
On this page
Start here
Quick answer
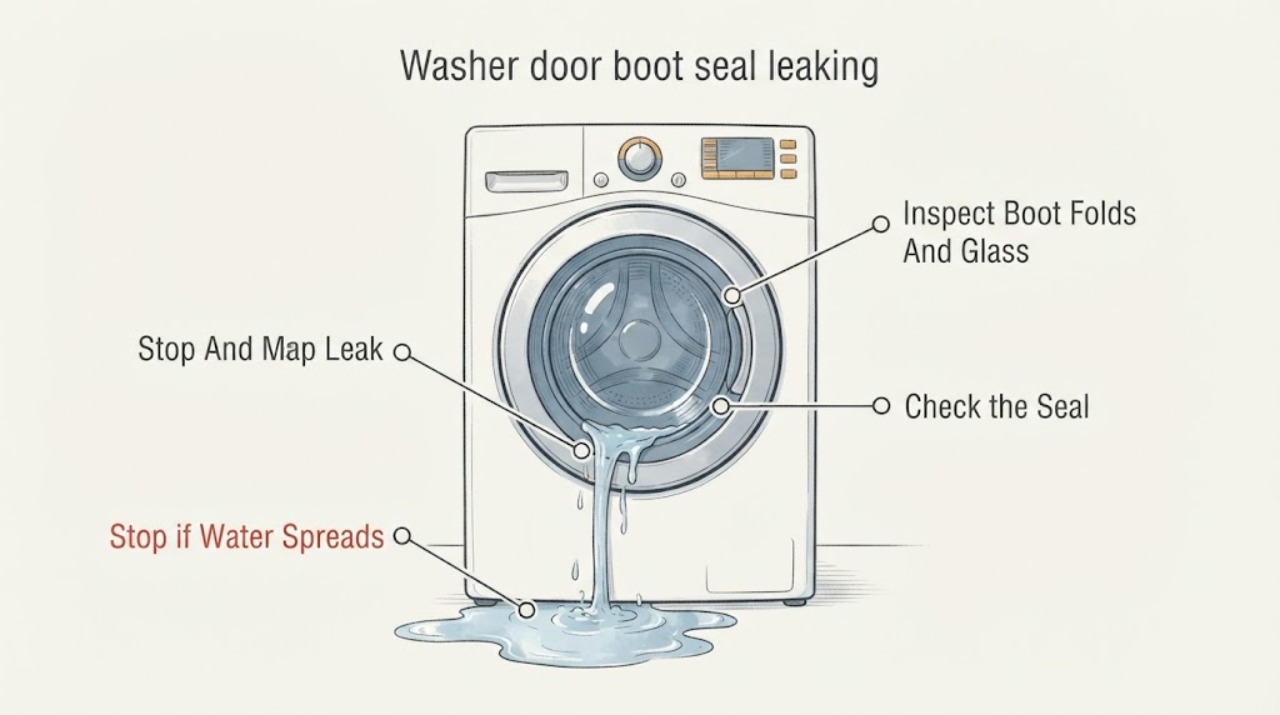
Stop the cycle and identify whether water is escaping from the door boot seal, the dispenser, the drain-filter area, the rear hoses, or the household drain. With the washer off and the drum safe to access, inspect the rubber boot's folds, inner glass contact area, drain holes, and seal-to-door edge for hair, lint, coins, trapped fabric, detergent residue, cracks, or a section pulled out of position. Clean loose debris with a soft damp cloth and keep every item inside the drum; do not stretch, cut, glue, or remove the boot. A torn, hardened, deformed, or displaced seal needs model-specific replacement by a qualified technician unless the exact manual gives a safe replacement procedure. Excess detergent, an overloaded drum, a door that is not latched, or a leak from another location can mimic a boot-seal failure. Keep the washer off for a substantial leak, water near electrical equipment, a damaged seal, or a leak that returns after cleaning.
Work through in order
Diagnostic checks
Use only checks that match the exact appliance or system and its official guide.
-
Check 1
Pause or turn off the washer, keep clear of water near electrical equipment, and note when the leak starts and where the first wet point appears.
Expected result: Record a lower-door leak, water inside a boot fold, a rear or dispenser leak, water at the drain-filter area, household-drain backup, flooding, or no safe way to inspect.
Next step: Keep the appliance off for an unsafe leak, and otherwise use the matching door-seal, loading, dispenser, hose, drain, or service branch.
Stop if: Do not unplug while standing in water, move a stacked unit, or restart a washer that is flooding or exposing electrical equipment to water.
Why this matters
Why: A lower-door or fold source makes the boot relevant; another wet location may be the real source; flooding or electrical exposure is an immediate stop boundary.
-
Check 2
With the washer off and the door open, gently inspect the boot folds, lower drain-hole area, and inner door-glass contact surface for hair, lint, coins, trapped fabric, residue, cracks, or a displaced edge.
Expected result: Record loose debris, fabric caught between glass and boot, detergent buildup, a clean intact boot, a crack or hole, or a section pulled from its groove.
Next step: Remove only loose accessible debris and wipe with a soft damp cloth. Leave the washer off and call service for damage, displacement, or a retaining part that is loose.
Stop if: Do not use sharp tools, cut the rubber, pull the boot from its groove, apply glue, or remove a retaining band.
Why this matters
Why: Loose debris or trapped laundry can interrupt the seal; a crack, hole, hardening, or displacement supports a damaged or incorrectly seated boot that needs model-specific service.
-
Check 3
Confirm all laundry is inside the drum, the load is within the manual's guidance, and the door closes and latches without fabric or an object at the seal.
Expected result: Record trapped fabric, an overloaded or uneven load, a door that does not latch, normal loading and closure, or a leak that occurs only with a particular load.
Next step: Remove the trapped item or correct the load only when the door opens safely. Arrange service for a latch, hinge, alignment, or recurring leak with normal loading.
Stop if: Do not force the door, defeat the lock, reach into a moving drum, or run a cycle with the seal visibly displaced.
Why this matters
Why: Fabric pressure, overloading, or incomplete closure can prevent the boot from sealing even when the rubber looks intact; a normal empty closure shifts attention to the boot or another path.
-
Check 4
Review detergent type and amount, then inspect accessible dispenser, rear hoses, drain hose, and lower drain-filter cover for overflow, moisture, kinks, or an incompletely closed cap.
Expected result: Record excessive suds, dispenser residue or overflow, a rear hose leak, drain backup, a wet drain-filter cover, or a dry nearby path.
Next step: Use only the model's detergent guidance and have plumbing service address household drain backup. Leave the washer off for a rear, internal, or unresolved leak.
Stop if: Do not open a drain filter with a full hot tub, use chemicals in the washer, move the appliance alone, or tighten inaccessible fittings.
Why this matters
Why: Suds, dispenser buildup, rear supply or drain hoses, household backup, or a drain-filter cap can put water on the floor without a boot failure; a dry nearby path makes the door source more likely.
-
Check 5
Only if the boot is intact, the area is dry, and the exact manual permits it, observe a short empty rinse or spin cycle from a safe position without placing hands near the door or opening it while running.
Expected result: Record no leak, water at the lower door edge, water from a rear or dispenser path, excess suds, or an immediate substantial leak.
Next step: Stop at the first leak or abnormal condition and keep the washer off. Do not repeat tests or use the machine until the source is corrected.
Stop if: Do not run this observation with a torn boot, standing water, electrical exposure, an unstable appliance, or any safety warning.
Why this matters
Why: No empty-load leak makes loading, debris, or oversudsing relevant; a repeat lower-door leak with no laundry supports boot, door, or alignment service; another source redirects the diagnosis.
-
Check 6
Record the washer model, leak location and cycle stage, boot condition, debris or fabric found, loading and detergent details, nearby hose or drain findings, and whether an empty observation changed the symptom.
Expected result: Confirm that the record contains external observations only, with no boot removal, adhesive, retaining-band work, cabinet access, or lock bypass.
Next step: Contact a qualified appliance technician for a damaged or recurring boot leak and a plumber for household drain or supply-pipe problems. Provide photos and the exact model.
Stop if: Stop homeowner troubleshooting when the boot is torn or displaced, a hinge or latch is misaligned, the source is behind the cabinet, or the leak persists after cleaning.
Why this matters
Why: The timing and first wet point help a technician distinguish boot damage or alignment from loading, suds, dispenser, hose, drain, latch, or internal leaks.
Use your observations
Decision map
Find the observation that best matches what you see, then follow the next safe action.
-
PATH 01Next step
What you see
The boot is intact and flexible, but hair, lint, a coin, residue, or fabric is trapped at the glass-to-boot contact area; the leak stops after safe cleaning or corrected loading.
Do this next
Keep the folds and glass clean, keep all laundry inside the drum, and follow the manual's load and detergent guidance. Arrange service if the leak returns.
Why this path and its safety boundary
Why it matters: The seal was being interrupted by debris or loading rather than a proven failed rubber part.
-
PATH 02Safety boundary
What you see
The boot has a crack, hole, hard or deformed section, pulled edge, loose retaining hardware, or a lower-door leak continues after debris and loading checks.
Do this next
Keep the washer off and request model-specific appliance service. Do not glue, patch, stretch, or remove the boot as a shortcut.
Why this path and its safety boundary
Why it matters: A damaged or incorrectly seated door boot, door, hinge, or retaining assembly is more likely than a detergent-only issue.
Safety stop: Do not run repeated cycles or attempt a seal replacement without the exact model procedure and proper service boundary.
-
PATH 03Next step
What you see
The boot is clean and intact, but excess suds, dispenser overflow, a rear hose, drain backup, or drain-filter cover is wet.
Do this next
Correct only the model-directed detergent or accessible routing issue; call a plumber for household backup and appliance service for a rear or internal source.
Why this path and its safety boundary
Why it matters: Water is likely arriving from detergent, supply, drain, or filter paths rather than escaping through the boot.
-
PATH 04Next step
What you see
The boot remains dry during a permitted empty observation but leaks with laundry, or the leak follows a particular load or detergent.
Do this next
Use a smaller correctly loaded load and the manual's detergent guidance. Stop and request service if a normal load still leaks.
Why this path and its safety boundary
Why it matters: Trapped fabric, overloading, load distribution, or oversudsing is more likely than a continuously failed boot, although a marginal seal remains possible.
-
PATH 05Safety boundary
What you see
The leak is substantial or uncontrolled, water reaches electrical equipment, the appliance is unstable, there is smoke or a burning odor, or a breaker trips.
Do this next
Keep clear, stop the cycle, close the water supply if safely accessible, and use appropriate emergency, electrical, plumbing, or appliance help from a safe position.
Why this path and its safety boundary
Why it matters: The immediate risk is flooding, electric shock, fire, or physical injury rather than identifying a seal.
Safety stop: Do not enter standing water near electrical equipment, move the washer, touch a wet cord or receptacle, or restore power to test it.
Helpful context
Understand the symptom
Stop safely and locate the first wet point
Pause or turn off the washer. If water is near the receptacle, cord, or controls, keep clear and disconnect power only from a safe, dry position; do not unplug while standing in water. Note whether the leak occurs during filling, tumbling, rinsing, or draining, and whether it begins at the lower door edge, inside a boot fold, or somewhere else. A leak that appears only while the drum moves can still come from trapped fabric or a damaged seal, but timing helps separate it from a hose or drain problem.
Inspect and clean the boot without damaging it
With the washer off and the door open, gently inspect the visible folds and the inner door-glass contact area. Remove hair, lint, coins, or fabric that is loose and accessible; wipe residue with a soft damp cloth. Check the drain holes and lower fold for buildup, but do not use a sharp tool, pull the seal out of its retaining groove, or apply adhesive. A clean, flexible boot with no tear shifts attention to loading, suds, or another leak path.
Check loading, detergent, and door closure
Keep every garment inside the drum so nothing is caught between the glass and boot. Confirm the door closes and latches normally, and follow the model's detergent and load guidance. Excess suds can overflow or escape at the door, while overloading can press laundry against the seal. If the boot is intact but the leak follows a particular load or detergent change, correct that condition before assuming the rubber part has failed.
Do not confuse a door leak with a nearby leak
Inspect the accessible rear supply and drain hoses, dispenser area, and lower drain-filter cover without moving an inaccessible or stacked appliance. Water from the rear, a clogged household drain, a dispenser overflow, or a loose residual-water cap can travel underneath and appear to come from the boot. If the door boot is dry while another area is wet, follow that source instead. If the water source is behind the cabinet or remains unclear, stop and arrange service.
Treat damage or a recurring leak as a repair boundary
Cracks, holes, hardening, deformation, a boot pulled out of its groove, a loose retaining band, or a leak that returns after cleaning means the seal or its installation needs model-specific service. The boot is a watertight part, but its fit and retaining hardware vary by model. Do not glue or patch it, and do not run repeated cycles to prove the leak. Keep the washer off and provide the model, leak timing, photos, and visible condition to a qualified appliance technician.
Safety boundary
Stop conditions
- Stop immediately for substantial or uncontrolled water, water near electrical equipment, smoke, burning odor, arcing, an unstable appliance, or a breaker that trips.
- Leave the washer off for a torn, cracked, hardened, deformed, or displaced boot, a leak that returns after cleaning, a latch or hinge problem, or a source behind the cabinet.
- Do not cut, glue, patch, or remove the door boot, defeat the door lock, open the cabinet, run repeated leak tests, or use chemicals to clear a suspected door-seal or drain problem.
Only after diagnosis
Potential parts
- door boot seal or bellows
Consider this only when the exact model's boot is confirmed torn, cracked, hardened, deformed, or unable to seal after debris and loading causes are ruled out.
Match the exact washer model, door geometry, drain-hole arrangement, and retaining hardware. Do not use adhesive or a generic seal as a substitute. - door hinge or latch component
Consider this only when the boot is intact but the door does not align or latch correctly and a qualified technician confirms the hinge or latch is causing the seal gap.
Confirm the exact model and door assembly before ordering; a latch or hinge part should not be inferred from a leak alone. - boot retaining clamp or ring
Consider this only when service diagnosis finds a damaged or missing retainer and the boot itself is suitable for reuse according to the model procedure.
Use the exact model's approved retainer and installation method. Retaining-band work can require cabinet access and is not a generic homeowner repair.
When checks do not resolve it
Need a professional?
Call a qualified appliance technician for a torn or displaced door boot, loose retaining hardware, latch or hinge alignment, an internal or rear leak, a leak that returns after cleaning and correct loading, or any repair requiring boot removal or cabinet access. Call a plumber for household drain backup or a leaking supply valve. Use emergency or electrical help for flooding, water near energized equipment, smoke, burning odor, arcing, or an unsafe appliance.
Have this ready
- Provide the washer brand and model, front-load or combo configuration, leak location and cycle stage, boot and glass condition, debris or trapped-fabric findings, detergent and load details, nearby hose or drain observations, photos, and any electrical or flooding warning.
Common questions
FAQ
Why is water leaking from the washer door boot seal?
Hair, lint, coins, residue, or trapped fabric can interrupt the glass-to-boot seal. A cracked, torn, hardened, deformed, or displaced boot, a misaligned door, excess suds, or an unrelated hose or drain leak can produce a similar puddle. Inspect the first wet point with the washer off.
Can I clean a washer door boot seal myself?
You can remove loose accessible debris and wipe the folds and inner glass with a soft damp cloth while the washer is off. Do not cut, stretch, glue, pull the boot from its groove, or use sharp tools. A damaged or displaced seal needs model-specific service.
Why does the washer leak only with a full load?
Laundry caught between the glass and boot, overloading, poor load distribution, or excess suds can make a clean-looking boot leak only during a particular load. Keep garments inside the drum and follow the model's detergent and load guidance; call service if a normal load still leaks.
When should a leaking washer boot seal be replaced?
Have the boot assessed for replacement when it has a crack, hole, hardening, deformation, pulled edge, or a leak that returns after safe cleaning and loading checks. Match the exact model and retaining hardware; do not patch the seal or order a generic part from the symptom alone.
Read the exact guide
Official sources
- LG Front Load Washer Water leaks to the floorLG Electronics · LG's official floor-leak guide supports distinguishing a boot leak from rear, drain, supply, dispenser, or filter sources; the article is model-general.
- Water Leak from AddWash or Main DoorSamsung Gulf · Samsung's official support page provides independent front-door leak context; it applies to supported Samsung models and does not replace the installed model manual.
- LG Washer - Troubleshooting Leaks on A Front Load WasherLG Electronics · LG's official support article provides manufacturer context for door-gasket cleaning and damage; the installed model's instructions govern repair.
- Front Load Washer - Leaking WaterGE Appliances · GE's official front-load leak page supplies independent gasket, loading, suds, hose, drain, and flood-safety context; the installed model manual controls all procedures.
- Front Load Washer Dripping Water from the DoorWhirlpool · Whirlpool's official product-help page supports general boot-seal inspection and loading logic; the exact installed washer manual controls any replacement procedure.
Community feedback
Share a repair observation
Share a plain-text repair observation. Accepted observations are published automatically; this page may take a moment to update.