
On this page
Start here
Quick answer
A washer drain hose can leak because the hose is cracked, pinched, or pulled loose; its holder or connection is not securing it; the hose is inserted incorrectly; or the household standpipe is restricted and overflowing. Stop the cycle, keep water away from electrical parts, and identify whether water appears from the hose body, its washer connection, the standpipe, the pump-filter area, or underneath the cabinet. With power off and the machine stable, correct only an obvious loose hose or model-approved routing issue. Do not tape a damaged hose as a permanent repair, remove the rear hose holder, force the appliance out, open the cabinet, or run repeated tests over a wet floor. A split hose, recurring leak, standpipe overflow, leak from inside the cabinet, or water near electricity needs qualified appliance or plumbing service.
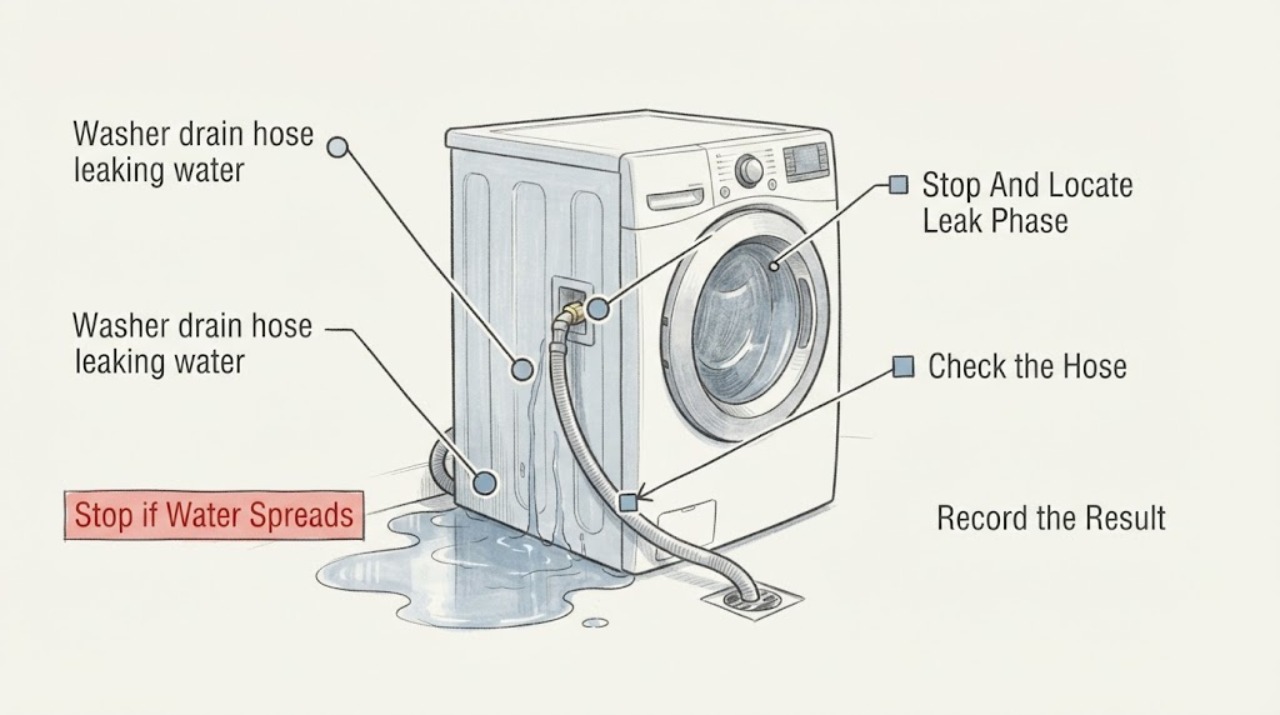
Work through in order
Diagnostic checks
Use only checks that match the exact appliance or system and its official guide.
-
Check 1
Stop the washer with its normal controls, keep people away from the wet area, and disconnect power only if the plug and floor are dry and safe to reach. Without moving the machine yet, note whether the leak began during filling, washing, draining, or after the cycle stopped, and identify the highest visibly wet point.
Expected result: Record water at the rear hose, the standpipe opening, a hose connection, the pump-filter area, the door or inlet area, underneath the cabinet, or near electrical equipment; note a small drip versus rapid flow.
Next step: Close the household water valves if a supply-side leak is also present and keep the washer off. Continue only with dry, ordinary-access checks when the source is safely visible; otherwise arrange service.
Stop if: Do not touch plugs, outlets, exposed wiring, or the washer while standing in water, and do not continue a cycle to locate a rapid leak.
Why this matters
Why: A leak that starts during draining supports the drain hose, drain connection, standpipe, or pump path. A leak during filling points more toward an inlet or dispenser path. Water already near the cord, outlet, or controls is an electrical safety concern, regardless of the original source.
-
Check 2
From safe access with the washer off, inspect the visible drain hose from the rear of the washer to the drain opening. Look along its full reachable length and at both ends for a crack, puncture, abrasion, crushed section, sharp bend, wet seam, or hose pulled out of position; do not drag a heavy washer by the hose.
Expected result: Record an intact dry hose, a kink or pinch, a split or puncture, moisture at the washer outlet, moisture at the drain end, or a section that cannot be seen without moving the appliance.
Next step: If the hose is merely kinked and the manual allows it, restore a smooth route without stretching it. Leave the washer off and request service for any damage, uncertain outlet connection, or inaccessible section.
Stop if: Do not patch a pressurized or draining hose as a lasting repair, cut off a damaged section, pull the washer alone, or open the cabinet to reach an internal hose.
Why this matters
Why: A split, puncture, crushed section, or persistent wet hose body can directly cause the leak and needs model-specific hose service or replacement. Moisture only at an end points toward the connection, holder, insertion, or drain rather than the hose wall.
-
Check 3
Compare the drain hose route with the exact installation manual. Confirm the hose is supported by the supplied guide or holder, is inserted only to the specified depth, is not sealed airtight in the standpipe, and is not routed so low, high, or tightly bent that water can siphon, back up, or spill.
Expected result: Record a secure guide and manual-compliant route, a loose hose, an absent or displaced holder, insertion that is too shallow or too deep for the manual, an airtight fit, a low or high route, or an extension or adapter not approved for the model.
Next step: Correct only an obvious routing error using the supplied holder and model instructions. If the holder is missing, the hose will not stay supported, or the manual route cannot be achieved, leave the washer off and request appliance or installation service.
Stop if: Do not remove a rear hose screw or holder, make an airtight seal around the standpipe, force the hose deeper, or add an unapproved extension to reach the drain.
Why this matters
Why: A hose that can fall out or a route that allows siphoning or backflow can cause floor water without a hole in the hose. A missing holder or unknown insertion depth makes the installation unverified; it does not justify removing the rear clamp or guessing a dimension.
-
Check 4
Inspect the standpipe or household drain opening without placing hands into it. If the washer is off, the floor is dry, and the installation permits a safe check, observe whether the drain accepts discharge without rising or spilling; do not pour water if it may overflow or if the drain is unsafe to access.
Expected result: Record water spilling around the standpipe only during discharge, a drain that rises slowly, a drain that accepts water normally, a loose drain opening, an odor trap or adapter, or a blockage that cannot be safely cleared.
Next step: Stop using the washer until a plumber clears or evaluates an overflowing standpipe. Do not pour harsh drain chemicals into the washer or force a snake through an appliance hose; keep the hose supported while the household drain is serviced.
Stop if: Do not test a drain that is already backing up, remove a trap or wall fitting, or work around sewage-contaminated water without appropriate protection and service help.
Why this matters
Why: Overflow at the standpipe can run onto the floor and mimic a failed drain hose. A normal household drain with water wetting the hose body or its connection keeps the focus on the appliance-side hose or fitting. A restricted or overflowing drain needs plumbing attention.
-
Check 5
If the washer manual identifies an owner-cleanable pump or debris filter, inspect that area only with power off, the drum drained as the manual directs, and a shallow container ready for residual water. Check that the residual-drain cap and filter are seated, without opening a panel that the manual does not designate for owners.
Expected result: Record a dry, secure filter area, a loose cap, lint or objects in the filter, retained water, a leak from the filter housing, hot water, or no owner-accessible filter on this model.
Next step: Clean and reseat the filter and cap only as the exact manual permits, then keep the washer off until the area is dry. If the leak remains or the source is inside the cabinet, arrange appliance service.
Stop if: Do not open a filter with hot water, force a stuck cap, reach into the pump, leave a filter loose, or work near electrical parts or standing water.
Why this matters
Why: A loose cap or blocked filter can cause water to appear near the front or lower cabinet and can be mistaken for a drain-hose leak. Hot, excessive, or recurring water, or a cracked housing, needs service rather than repeated filter removal.
-
Check 6
After an obvious routing correction or correctly reseated owner-serviceable cap, dry the floor and place an absorbent cloth where the source was seen. Run one short, model-approved rinse or drain test while staying nearby, and stop through normal controls if water returns.
Expected result: Record no leak, a drip at the hose body, a drip at a connection, standpipe overflow, water from underneath, a leak only during draining, or a new error or abnormal pump sound.
Next step: Keep the washer out of service for persistent leakage and provide the technician with the phase, source, hose route, filter status, and any photo or video captured from a dry safe position. Contact a plumber for a household drain overflow.
Stop if: Stop immediately for rapid flow, cabinet movement, smoke, electrical odor, water near the cord or outlet, or a leak that can reach flooring or neighboring equipment.
Why this matters
Why: A dry test after a clear routing or cap issue supports that correction. A repeated leak, water from underneath, a hose-body drip, or standpipe overflow requires diagnosis; a clean test does not authorize continued use if the hose is visibly damaged.
Use your observations
Decision map
Find the observation that best matches what you see, then follow the next safe action.
-
PATH 01Next step
What you see
Water appears on the length of the drain hose, or the hose is cracked, punctured, crushed, or abraded, especially during discharge.
Do this next
Keep the washer off and arrange model-specific appliance service or hose replacement. Do not tape, splice, shorten, or clamp over the damaged section as a lasting repair.
Why this path and its safety boundary
Why it matters: The drain hose itself is the leading source. A damaged hose can release water faster as the pump runs and should not be treated as a routing adjustment.
-
PATH 02Next step
What you see
The hose is intact but slips from the drain, lacks its holder, is inserted outside the manual's range, is kinked, or forms an airtight fit.
Do this next
Restore the route only with the supplied guide and exact installation instructions. If the holder is missing or the route cannot remain secure, request service and do not run the washer.
Why this path and its safety boundary
Why it matters: The route or support can cause spill, siphoning, backflow, or poor discharge without a hole in the hose. The correct dimensions and holder are model-specific.
-
PATH 03Next step
What you see
Water rises or spills from the household standpipe during the washer's drain phase, while the appliance hose remains intact and supported.
Do this next
Stop washer use and arrange plumbing evaluation. Keep the hose positioned as specified and do not add drain chemicals to the washer.
Why this path and its safety boundary
Why it matters: A restricted, undersized, poorly installed, or otherwise overwhelmed household drain is more likely than a leaking hose wall. The overflow may wet the hose and cabinet from outside.
-
PATH 04Next step
What you see
The hose and standpipe stay dry, but water comes from the pump-filter area, a residual-drain cap, underneath the cabinet, or another internal location.
Do this next
Leave the washer off, perform only the exact manual's cool-water filter check if owner access is provided, and arrange qualified appliance service for any persistent or internal leak.
Why this path and its safety boundary
Why it matters: The apparent drain-hose leak may be a filter, pump, internal hose, seal, or cabinet leak. Ordinary external routing changes will not correct it.
-
PATH 05Next step
What you see
The leak is rapid, returns after a correction, reaches electrical parts or nearby equipment, or is accompanied by smoke, burning odor, a damaged cord, or cabinet movement.
Do this next
Stop use, isolate water or power only when safe, keep people away, and obtain qualified appliance service; use local emergency guidance for smoke or fire.
Why this path and its safety boundary
Why it matters: The immediate risk is water or electrical damage and possible injury. Further cycles can spread the damage and obscure the source.
Helpful context
Understand the symptom
Find where the water starts
Water on the floor behind a washer is not proof that the drain hose itself has a hole. Water can run along the hose or cabinet from a loose connection, a pump-filter cap, an inlet hose, or a standpipe that backs up during discharge. The most useful first split is the cycle phase and the highest wet point: a leak only during draining focuses on the drain hose, drain connection, and household drain; a leak during filling points elsewhere.
Routing matters as much as the hose material
A drain hose must be supported at the drain opening and routed at the height and insertion depth specified by the washer manual. Samsung warns that a hose inserted too little can fall out, while one inserted too far or sealed airtight can create siphoning; a kink or missing rear holder can also cause trouble. Do not generalize another brand's measurements to this washer, and do not remove a built-in holder just to gain reach.
A damaged hose is a service decision, not a tape repair
Inspect the visible hose for a split, puncture, crushed section, abrasion, or wet seam, and inspect both ends without pulling the washer beyond what the installation instructions allow. Manufacturer guidance directs service for a damaged drain hose and for leaks that remain after routing or connection checks. If the standpipe overflows when the washer discharges, the household drain may need plumbing attention even if the hose is intact.
Only after diagnosis
Potential parts
- washer drain hose assembly
Consider only when inspection or service confirms a cracked, punctured, crushed, stretched, or otherwise failed hose or when the exact hose assembly is required for the model's outlet and routing.
Confirm the exact model, outlet connection, hose length, bend shape, holder arrangement, and manufacturer fit information; do not splice a generic hose by appearance. - drain hose holder, clamp, or sealing connection
Consider only after service confirms a missing, broken, or failed holder or connection is allowing the hose to slip, leak, or route incorrectly.
Match the exact model and rear mounting arrangement; do not substitute a clamp that creates an airtight standpipe connection or stresses the hose. - drain pump or filter housing
Consider only when qualified testing locates the leak or poor discharge at the pump, filter housing, residual-drain cap, or an internal drain path rather than at the external hose or household drain.
Confirm the exact model, pump and filter configuration, seals, electrical connection, and water path with a qualified technician before replacement.
When checks do not resolve it
Need a professional?
Arrange appliance service for a cracked, punctured, crushed, or inaccessible drain hose; a missing holder; a leak from a connection, pump-filter area, underneath the cabinet, or an internal hose; or any leak that returns after a model-approved routing correction. Arrange plumbing service when the household standpipe backs up or overflows. Stop immediately for rapid water flow, water near electricity, smoke, burning odor, a damaged cord, or cabinet movement.
Have this ready
- Give the technician the full model, washer type, cycle phase, leak rate and highest wet point, hose condition and route, holder and standpipe observations, filter or residual-cap status, recent relocation or installation work, and any error, odor, cord, or electrical warning.
Common questions
FAQ
Why does my washer drain hose leak only during draining?
The pump sends water through the hose at that phase, so a split, kink, loose holder, poor insertion, or standpipe restriction can show up only then. Check the hose body, both ends, holder, and household drain from a dry safe position.
Can I tape a leaking washer drain hose?
Tape is not a dependable repair for a drain hose that is cracked, punctured, crushed, or leaking under discharge flow. Keep the washer off and arrange model-specific hose service or replacement.
How far should a washer drain hose go into the standpipe?
Use the exact washer installation manual and supplied hose guide. Insertion depth and drain height vary by model; too little can let the hose fall out, while too much or an airtight fit can cause siphoning or other drainage problems.
How can I tell a clogged standpipe from a leaking hose?
If water rises or spills at the household standpipe during discharge while the hose remains intact and supported, the drain is more likely restricted. If the standpipe accepts water but the hose body or its connection gets wet, the appliance-side hose or fitting is more likely.
Should I clean the washer pump filter when the drain hose leaks?
Only if the exact manual provides an owner-accessible filter and the washer is off, cool, and safely drained. A loose cap or blocked filter can leak near the lower cabinet, but a cracked housing, hot water, internal leak, or persistent water needs service.
When is a washer drain-hose leak urgent?
Stop immediately for rapid water flow, water near an outlet or cord, smoke, burning odor, a damaged cord, cabinet movement, or a leak that can reach neighboring equipment. Isolate water or power only when safe and obtain qualified appliance or plumbing service.
Read the exact guide
Official sources
- Samsung washing machine is leakingSamsung Support · Official Samsung guidance used for cross-brand diagnostic reasoning; dimensions and filter access are model-specific.
- LG Washer – Why is My Front Load Washing Machine Leaking?LG USA Support · Official LG guidance used for external hose and drain-source branches; access and cleaning instructions vary by model.
- LG Top Load Washer - LeakingLG USA Support · Official LG top-load guidance used for general drain-hose and household-drain reasoning; washer designs differ by model.
- LG Front Load Washer: Leaks During Drain CycleLG USA Support · Official LG guidance used for drain-phase and standpipe-overflow branches; exact routing varies by model.
- LG front load washer leak: Water leaks from the drain outlet and drain hose during drainageLG USA Support · Official LG front-load guidance used for hose-to-standpipe connection and backflow branches; exact installation is model-specific.
Community feedback
Share a repair observation
Share a plain-text repair observation. Accepted observations are published automatically; this page may take a moment to update.