
On this page
Start here
Quick answer
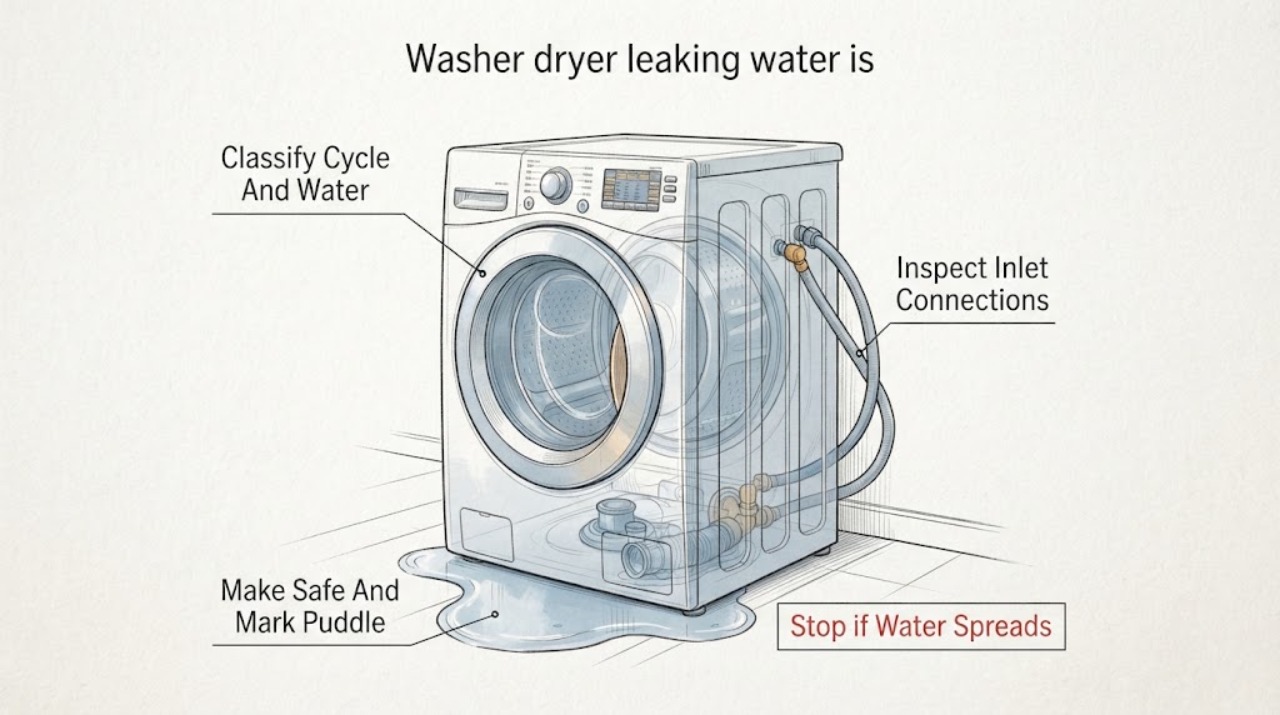
Water under a washer-dryer usually comes from an inlet connection, drain hose or household drain, door seal, dispenser or oversudsing, pump filter, or an internal tub or hose. Stop the cycle, disconnect power if the floor or plug is wet, and close both water valves before moving the unit or inspecting connections. Dry and mark the edge of the puddle, then identify whether water appears during filling, washing, draining, or while the appliance is idle. Check only accessible hose ends, the drain path, the door seal, and a model-approved pump-filter area. A torn hose or seal may explain the location, but water from the center, rear, cabinet, or an inaccessible part needs service. Do not run repeated test cycles, tip a stacked or built-in unit, remove panels, or work near wet electrical parts.
Before you begin
Safety first
- This article covers stopping the cycle, controlling accessible water and power when safe, locating the first wet area, inspecting external hoses and seals, checking a model-accessible filter, and correcting only plainly identified external issues. It does not authorize moving a stacked unit, opening panels, working near wet electrical parts, or repairing internal components.
Work through in order
Diagnostic checks
Use only checks that match the exact appliance or system and its official guide.
-
Check 1
Stop the cycle, keep hands and feet away from a wet plug or outlet, disconnect power only from a dry accessible control point when safe, close both household water valves, and mark the outer edge of the puddle with a dry towel; do not move a stacked or built-in unit.
Expected result: The floor or plug is wet, water is still entering while the appliance is off, the puddle is growing, or the leak stops after the valves are closed.
Next step: Leave the appliance unused until the area and electrical connection are safe. If water is near electrical parts, the puddle is growing, or the source cannot be controlled, arrange prompt appliance or plumbing service.
Stop if: Do not touch a wet plug, outlet, cord, or control; do not restore power while water is present near electrical parts.
Why this matters
Why: Water near electrical parts creates a shock risk. Continued filling while idle points toward a supply or inlet-valve path. A stopped puddle after the valves close suggests pressurized water rather than only residual drain water.
-
Check 2
Once the area is safe and the appliance remains off, use the puddle edge and a dry cloth to determine whether the water is clear, soapy, or dirty and whether it first appeared at the front, rear, side, or center; record whether the machine was filling, washing, draining, or idle.
Expected result: The water is clear during filling or idle, soapy near the door or dispenser, dirty during draining, or the first wet area is underneath the center or rear.
Next step: Use the phase and location to choose the next external check. If the first wet area is inside the cabinet or cannot be seen without moving the unit, stop and arrange service.
Stop if: Do not run a cycle merely to reproduce an unidentified leak, crawl under a wet appliance, or remove a cabinet panel.
Why this matters
Why: Clear water near the rear favors inlet hoses, valves, or a supply connection. Soapy water favors detergent, dispenser, door-seal, or oversudsing issues. Dirty water during pump-out favors the drain path or pump filter. Center or cabinet water makes an internal hose, pump, tub seal, or inaccessible connection more likely.
-
Check 3
With both water valves closed and power off, inspect the accessible hot and cold inlet hoses, washers, valve connections, and rear hose surfaces for a loose connection, crack, hole, kink, or wet fitting; do not reach behind a heavy or stacked unit.
Expected result: A hose end is wet, a washer is missing or damaged, a hose is cracked, or all accessible inlet connections are dry.
Next step: Keep the valves closed and replace only an externally accessible model-approved washer or hose when the connection is clearly identified and the area is dry; otherwise arrange service. Reopen water only for a controlled check after the repair and manual procedure are satisfied.
Stop if: Do not loosen a pressurized fitting, reach into wet electrical space, or continue if the leak is behind the cabinet or the valve will not close.
Why this matters
Why: A wet fitting or damaged hose can directly create water under the unit, especially during fill. Dry inlet connections move attention toward the drain, door, dispenser, pump, or internal parts.
-
Check 4
From ordinary access, inspect the drain hose for a split, kink, loose insertion, or overflow mark and check the household drain for backup. If the exact model provides a user-accessible pump-filter or residual-water procedure, follow it only with power and water controlled and a suitable shallow container ready.
Expected result: Water appears during draining, the standpipe or sink backs up, the drain hose is damaged or displaced, the filter area is wet, or the drain path is clear and dry.
Next step: Correct only a plainly displaced drain hose or a model-directed filter-cap seating issue. If the hose is cracked, the drain backs up, the filter will not seal, or water still appears from underneath, stop use and arrange service or plumbing help.
Stop if: Do not force a filter, pour unknown chemicals into the drain, open a pump housing, or drain water through a wet electrical area.
Why this matters
Why: Drain overflow or a displaced or damaged hose can put water under the appliance without an internal washer failure. A wet filter cap or residual-water hose can leak after service or cleaning. A clear external drain path with a center puddle favors an internal pump, tub, or hose fault.
-
Check 5
On a front-loading design, inspect the visible door glass and gasket lip for hair, lint, clothing, residue, tears, or a load caught at the seal; also check that the dispenser is closed and that the detergent is the model-approved type and amount. Do not pull the gasket from its channel.
Expected result: The leak starts at the door or dispenser, debris is trapped in the seal, the gasket is torn, or heavy suds are present; alternatively these areas are clean and dry.
Next step: Remove only loose debris from an accessible seal surface, use the documented detergent guidance, and leave a torn seal or persistent leak for service. Do not operate the appliance to test a visibly damaged seal.
Stop if: Do not stretch or remove the gasket, pry the door latch, or continue a cycle with a torn seal, uncontrolled suds, or water escaping from the cabinet.
Why this matters
Why: Debris, a torn gasket, an unlatched dispenser, or excess suds can direct water over the front and onto the floor. Clean, intact front areas make a rear, drain, pump, tub, or internal hose source more likely.
-
Check 6
After a clearly identified, low-risk external correction and only when the floor and electrical connection are dry, compare the next normal use against the original phase and location; do not repeat a cycle when the source remains uncertain or water is near electrical parts.
Expected result: The leak stops after a hose or drain correction, stops after seal or detergent correction, returns from the same cabinet area, or appears while the appliance is idle.
Next step: Keep the appliance out of service for a returning or internal leak and provide the technician with the cycle phase, water type, first-wet location, photos, and any correction attempted.
Stop if: Do not run repeated tests, tip the appliance, remove panels, or restore operation after an internal, electrical, or uncontrolled leak.
Why this matters
Why: Improvement after a matching external correction supports that source. A repeat cabinet leak, an idle leak, or a leak that changes location suggests an inlet valve, pump, tub seal, internal hose, or other component that needs diagnosis.
Use your observations
Decision map
Find the observation that best matches what you see, then follow the next safe action.
-
PATH 01Safety boundary
What you see
Clear water appears at the rear during filling or continues while the washer-dryer is idle, and an inlet fitting, hose, or valve area is wet.
Do this next
Keep both water valves closed, do not use the appliance, and arrange repair if a hose or fitting is damaged, inaccessible, or still leaks after an obvious external correction.
Why this path and its safety boundary
Why it matters: A pressurized inlet hose, connector washer, house valve, or inlet valve is more likely than a drain or door leak.
Safety stop: Do not loosen a pressurized connection or restore water while the floor or electrical connection is wet.
-
PATH 02Safety boundary
What you see
Dirty or soapy water appears only during pump-out, the drain backs up, the drain hose overflows, or the pump-filter area is wet.
Do this next
Correct only a clearly accessible hose position or model-directed filter-cap issue. Use plumbing service for a backed-up household drain and appliance service for a cracked hose, pump, or persistent filter leak.
Why this path and its safety boundary
Why it matters: A blocked household drain, displaced or damaged drain hose, filter-cap issue, or drain-pump path is more likely than an inlet leak.
Safety stop: Do not force the filter, use unapproved drain chemicals, or open the pump housing.
-
PATH 03Safety boundary
What you see
Water or suds first appear at the front door, gasket, or dispenser during filling or washing, with debris, a torn seal, an unlatched dispenser, or excess suds.
Do this next
Remove loose visible debris, confirm the model's detergent guidance, and request service for a torn gasket, latch problem, or leak that persists after the accessible correction.
Why this path and its safety boundary
Why it matters: A door gasket or closure issue, dispenser overflow, loading problem, or detergent oversudsing is more likely than a center tub leak.
Safety stop: Do not pull the gasket out, pry the latch, or run the machine with water escaping from the cabinet.
-
PATH 04Safety boundary
What you see
The puddle starts under the center or cabinet, the external hoses and drain path are dry, the source is hidden, the leak returns, or water reaches the plug, outlet, controls, or other electrical parts.
Do this next
Leave power and water off, do not move a stacked or integrated unit, and arrange appliance service; use plumbing help as well when the household supply or drain is involved.
Why this path and its safety boundary
Why it matters: An internal hose, pump, tub seal, valve, structural leak, or electrical hazard is more likely and cannot be safely isolated by external checks.
Safety stop: Do not tip the unit, remove panels, reach underneath, or restore power to locate the source.
Helpful context
Understand the symptom
First locate the phase and edge of the leak
A puddle that grows during filling points toward inlet hoses, valves, dispenser overflow, or the door area. A puddle that appears during draining points toward the drain hose, household standpipe, pump filter, or drain path. Water that appears while the appliance is idle makes a supply valve or inlet valve more likely. The visible front edge is not always the origin, so place a dry towel around the perimeter and track the first wet area without pushing the machine.
Washer-dryer combinations need extra caution
A stacked, integrated, or washer-dryer combination may hide hoses, filters, and electrical parts behind panels or below the drum. Do not tip the unit or pull a stacked appliance apart to reach a suspected leak. Use the model manual for any user-accessible filter or drain procedure, and leave cabinet, pump, tub, and internal hose work to a technician.
A clean floor after one cycle does not clear the machine
A loose connection may leak only under water pressure, a drain may overflow only at pump-out, and a door seal may leak only when suds or a load pushes water toward it. If the source is not obvious, stop using the appliance and document the cycle phase, water appearance, load, detergent, and exact first-wet location for service rather than creating a larger puddle.
Safety boundary
Stop conditions
- Stop and disconnect power only from a dry accessible control point when safe if water is near the plug, outlet, cord, controls, or other electrical parts; do not touch wet electrical equipment.
- Close both water valves and leave the appliance unused for a growing puddle, an uncontrolled leak, a leak while idle, or a valve that will not close.
- Do not tip, pull apart, or climb around a stacked, integrated, or built-in washer-dryer to reach hidden hoses or panels.
- Do not remove cabinet panels, open a pump or tub, pull a door gasket from its channel, test live components, or run repeated cycles to recreate an unidentified leak.
- Do not order a hose, seal, pump, inlet valve, or tub component until the exact model and qualified diagnosis establish the source and fit.
Only after diagnosis
Potential parts
- inlet or drain hose and connector washer
Consider this category only when the visible hose or connector has a confirmed crack, hole, missing washer, or leak at the identified connection.
Confirm the exact model, hose routing, connector type, and water-service requirements before ordering; do not substitute by length or appearance alone. - door gasket or dispenser seal
Consider this category only when a front leak is traced to a torn or deformed gasket, failed seal, or damaged dispenser path after debris and loading checks.
Confirm the exact model, door orientation, dispenser design, and manufacturer fit information before ordering; installation may require service access. - drain pump, filter, or inlet valve
Consider this category only when qualified diagnosis identifies a pump, filter housing, or inlet valve leak after external hose and drain checks.
Confirm the exact model, pump or valve configuration, electrical and plumbing connections, and manufacturer procedure before ordering; do not infer a failed component from a puddle location alone.
When checks do not resolve it
Need a professional?
Arrange appliance service when water comes from the cabinet or center, a leak returns after an external correction, the source is hidden, a hose or seal is torn, a pump-filter area will not seal, or the appliance is stacked or integrated. Arrange plumbing help for a household drain backup or house-valve leak. Seek prompt help for a growing puddle, water near electrical parts, an uncontrolled supply leak, or any need to move the appliance to reach the source.
Safety scope: This article covers stopping the cycle, controlling accessible water and power when safe, locating the first wet area, inspecting external hoses and seals, checking a model-accessible filter, and correcting only plainly identified external issues. It does not authorize moving a stacked unit, opening panels, working near wet electrical parts, or repairing internal components.
Common questions
FAQ
Why is there water under my washer-dryer?
Common paths include an inlet hose or valve, drain hose or household drain, front door seal, dispenser and suds, pump filter, or an internal hose, pump, or tub seal. Identify the water type and cycle phase without moving the unit; cabinet or electrical-area water needs service.
Should I run another cycle to find the leak?
Not when the source is unclear, the puddle is growing, or water is near electrical parts. Stop water and power safely, record the first wet location and cycle phase, and let a technician perform any controlled leak test.
What if the washer-dryer leaks only while draining?
Inspect the accessible drain hose for damage or displacement and look for household drain backup. A model-accessible pump-filter area may be checked through its documented procedure. A backed-up drain needs plumbing help; a persistent pump or cabinet leak needs appliance service.
Can detergent cause water under a washer-dryer?
Excess or unsuitable detergent can create suds that escape through a door, dispenser, or vent path. Follow the model detergent guidance and inspect the visible seal and dispenser. A torn seal or leak that continues after the correct detergent use needs service.
When is a washer-dryer leak urgent?
Treat a growing puddle, uncontrolled filling, water near the cord or outlet, a wet control area, smoke or odor, or a leak from a hidden cabinet as urgent. Keep people away, close the water valves, avoid wet electrical equipment, and obtain qualified appliance or plumbing help.
Read the exact guide
Official sources
- Leaking from Underneath or Bottom - Front Load WasherMaytag Corporation · Official Maytag product-help article used for under-unit leak location and external hose, drain, dispenser, and detergent branches; the exact appliance manual controls access steps.
- WASHER MAINTENANCEWhirlpool Corporation · Official Whirlpool washer maintenance document used for model-procedure priority, hose and drain observation, and disconnect-power boundaries; it is not a universal repair manual.
- LG Washer – Why is My Front Load Washing Machine Leaking?LG Electronics USA · Official LG support article used for front-load washer leak branches and model-directed filter, hose, and gasket checks; it is not a model-specific instruction for every washer-dryer.
- Reasons Why Your Washing Machine Is LeakingWhirlpool Corporation · Official Whirlpool troubleshooting article used for generic washer leak mechanisms and external checks; the exact washer-dryer manual controls model-specific procedures.
Community feedback
Share a repair observation
Share a plain-text repair observation. Accepted observations are published automatically; this page may take a moment to update.