
On this page
Start here
Quick answer
A washer that will not fill, or fills only slowly, may have a closed or weak household supply, a kinked inlet hose, a clogged inlet-hose or washer-valve screen, freezing, an anti-flood restriction, a drain hose that is siphoning water away, or an inlet valve, door-lock, pressure-sensing, or control fault. Turn off the water and disconnect power before separating a hose. Catch residual water, inspect the screen without forcing it out unless the exact manual permits removal, clean only with a soft brush or rinse, reinstall the screen and rubber washer correctly, then check for leaks. If the screen is clear but the washer still does not fill, the hose has no supply, the valve hums without water, an error returns, or a leak appears, stop and arrange qualified appliance service.
Before you begin
Safety first
- A technician should handle inlet-valve, door or lid-lock, pressure-sensor, control-board, wiring, internal hose, anti-flood, and energized testing. Keep homeowner work to closing water, disconnecting power, inspecting or gently cleaning a documented screen, checking visible hoses, and performing one supervised fill test.
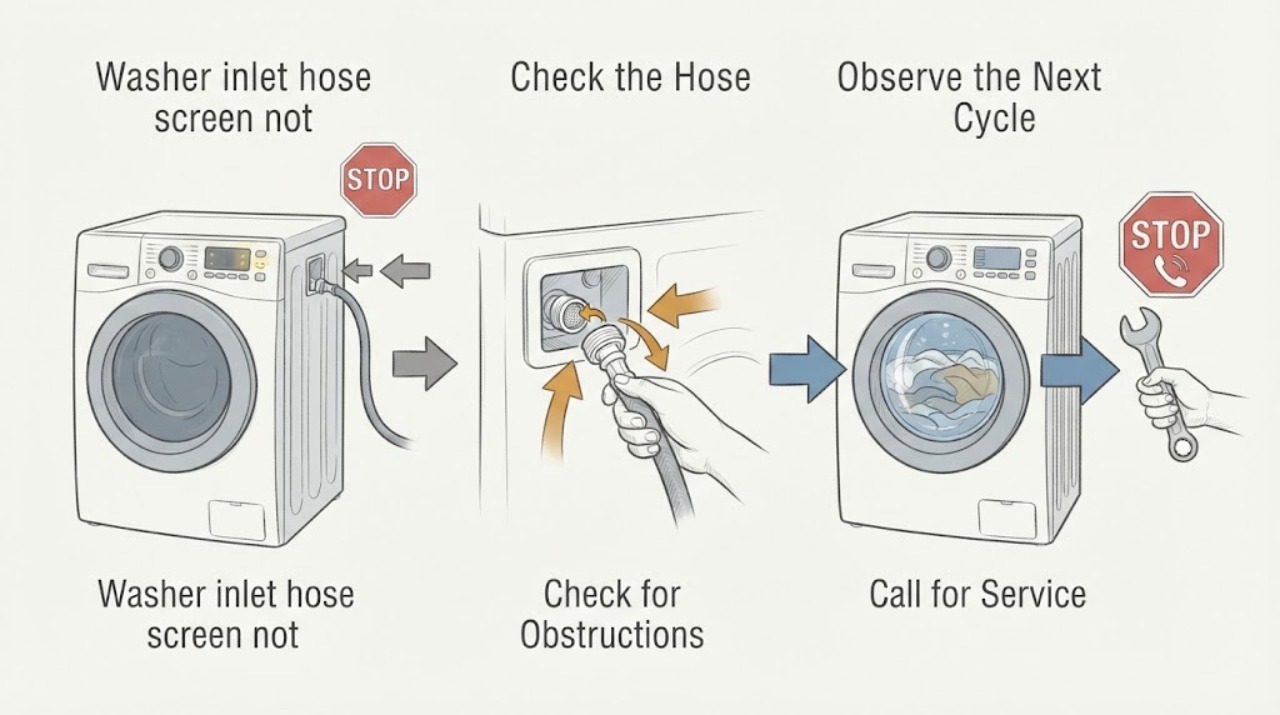
Work through in order
Diagnostic checks
Use only checks that match the exact appliance or system and its official guide.
-
Check 1
Stop the cycle, unplug the washer or disconnect its power as the manual directs, and close the relevant water faucet or faucets before moving a hose or touching an inlet screen; do not work with water near an energized outlet.
Expected result: The washer is still running, the hose or floor is wet, hot water is connected, the outlet is nearby, or the appliance is safely stopped with water controlled.
Next step: If water cannot be contained, the outlet is wet, or the hose connection is hot and unsafe to handle, leave the washer off and arrange service. Otherwise place a towel and container below the connection before loosening anything.
Why this matters
Why: Hose removal can release residual water and hot water can burn; water near an outlet adds shock risk. A stopped, dry, isolated washer permits an external supply and screen inspection.
-
Check 2
Check the exact washer manual and inspect the household supply faucet or faucets, hose connections, hot-or-cold routing, and inlet hoses for a closed valve, incorrect connection, kink, crush point, bulge, crack, or anti-flood device that restricts flow.
Expected result: A faucet is partly closed, an expected hose is missing or misrouted, a hose is kinked or damaged, an anti-flood device is installed, or the visible supply path is open and undamaged.
Next step: Correct only a clearly understood faucet position or visible hose route allowed by the manual. Replace a damaged hose rather than patching it, and do not change connection type or bypass a safety device as a test.
Why this matters
Why: A closed valve, wrong connection, crushed hose, or restrictive device can prevent water from reaching the screen and can imitate a clogged filter. A sound open path shifts attention to household pressure, the screen, drain siphoning, or the washer valve.
-
Check 3
With the water off and power disconnected, loosen the inlet hose at the washer end only as the model instructions permit, catch remaining water, and inspect the hose-end screen and washer inlet-valve screen with a light; do not force a screen from its seat.
Expected result: The screen has sand, rust, scale, or lint, the hose screen is clear but the valve screen is dirty, the screen is damaged or missing, or both screens appear clear.
Next step: Follow the exact manual on whether the screen may be removed. If cleaning is allowed, use a soft brush or rinse and keep the screen seated correctly; if it is damaged, missing, stuck, or inaccessible, stop and arrange service.
Why this matters
Why: Debris at the inlet is a direct flow restriction. A missing or damaged protective screen can allow contaminants into the valve. Clear screens move the likely fault upstream to supply and hose flow or downstream to the valve and controls.
-
Check 4
If the manual permits screen cleaning, clean the accessible mesh gently, inspect the hose gasket or rubber washer, reconnect the hose without cross-threading, open the faucet slowly, and check every connection for leakage before restoring power.
Expected result: Flow improves and the connection stays dry, flow remains weak, the hose gasket is missing or damaged, or water leaks at the hose or valve.
Next step: Close the faucet immediately for a leak, restore the correct model-approved gasket and connection, and do not operate until watertight. If flow is still weak or the screen cannot be restored, arrange appliance service.
Why this matters
Why: Improved flow with a dry connection supports a screen restriction. Weak flow after cleaning points toward supply pressure, hose blockage, valve, or control trouble. A missing gasket or leak is a reassembly or connection hazard, not a reason to run a cycle.
-
Check 5
With the hose disconnected from the washer and its end secured over a bucket or sink, briefly open the household faucet only if the connection and temperature can be controlled safely; compare the stream with another nearby fixture without spraying the washer.
Expected result: The hose produces a strong stream, a weak or intermittent stream, no water, cloudy or debris-filled water, or water is present at the washer inlet but the washer will not fill.
Next step: Close the faucet and stop if water is uncontrolled or contaminated. Have a plumber address household supply or pressure problems; arrange appliance service when supply reaches the washer but the fill operation still fails.
Why this matters
Why: A strong hose stream makes the supply and screen less likely and shifts attention to the washer inlet valve, wiring, drain siphon, lid or door condition, or control. Weak, absent, or debris-filled supply indicates a household faucet, hose, frozen line, or plumbing-pressure issue.
-
Check 6
During one supervised fill attempt after the inlet path is reassembled, observe the drain hose, lid or door status, control display, and sound from the inlet valve without opening the cabinet or touching wiring.
Expected result: Water enters and immediately drains away, the washer reports a fill error, the valve hums with no water, the lid or door does not lock, or the washer fills normally.
Next step: Stop if the tub overflows, the valve buzzes abnormally, a leak appears, or the error returns. Check only the documented drain routing and lid or door closure; leave valve, lock, sensor, wiring, and control diagnosis to qualified service.
Why this matters
Why: Immediate drain points toward siphoning or drain installation. A fill error with confirmed supply can indicate an inlet valve, lock, pressure-sensing, or control problem. A hum without flow may be a restricted valve or supply; a failed lock can prevent a cycle from opening the valve.
-
Check 7
After the accessible supply, hose, screen, gasket, and drain-routing checks, run one normal fill test and inspect the rear connections and floor when the washer stops filling.
Expected result: The washer fills and stays dry, fills slowly, stops with an error, never opens the inlet valve, or leaks after reassembly.
Next step: Close the water supply and disconnect power for a leak, repeated error, or uncontrolled filling. Arrange qualified appliance repair for persistent slow or absent fill rather than repeatedly starting cycles.
Why this matters
Why: A normal fill supports a corrected supply or screen restriction. Persistent slow or absent filling after a clear supply path makes the inlet valve, control, lock, pressure sensor, or internal restriction more likely. A leak indicates unsafe reassembly or a damaged hose or valve.
Use your observations
Decision map
Find the observation that best matches what you see, then follow the next safe action.
-
PATH 01Next step
What you see
A faucet was partly closed or the inlet hose was kinked, and filling returns after a clearly safe correction with no leak.
Do this next
Keep the hose free of crush points and periodically inspect it. Arrange service if the restriction returns or the hose is damaged rather than continuing to run the washer against it.
Why this path and its safety boundary
Why it matters: An external supply restriction is more likely than a failed washer valve or inlet screen.
-
PATH 02Next step
What you see
The inlet screen contains scale, rust, or other debris, and filling improves after manual-approved gentle cleaning and watertight reassembly.
Do this next
Keep the protective screen installed and follow the model maintenance guidance. If debris returns quickly, supply flow remains low, or the valve behaves abnormally, arrange plumbing or appliance service.
Why this path and its safety boundary
Why it matters: The screen was likely restricting flow, although recurring debris can indicate upstream plumbing contamination or water-quality conditions.
-
PATH 03Next step
What you see
No water comes from the disconnected hose, the stream is weak at several fixtures, or the supply line is frozen or contaminated.
Do this next
Close the supply and arrange plumbing help. Do not reconnect a frozen, cracked, bulging, or contaminated hose until the cause and safe condition are resolved.
Why this path and its safety boundary
Why it matters: A household water-supply, faucet, hose, frozen-line, or plumbing-pressure problem is more likely than the washer inlet screen.
-
PATH 04Next step
What you see
Water reaches the washer through a clear screen and hose, but the valve does not open, a fill error returns, the lid or door does not lock, or the valve hums without flow.
Do this next
Leave cabinet and electrical diagnosis to qualified appliance service. Provide the model, error text, supply result, screen condition, and valve sound rather than ordering a valve based only on the symptom.
Why this path and its safety boundary
Why it matters: An inlet valve, door or lid lock, pressure sensor, wiring, or control fault is more likely than a screen restriction.
-
PATH 05Next step
What you see
The tub receives water but the level never rises, water immediately exits through the drain, or a leak appears after hose reconnection.
Do this next
Stop the cycle, close the water supply for a leak or uncontrolled fill, correct only documented drain routing or gasket placement, and arrange service if the condition persists.
Why this path and its safety boundary
Why it matters: Drain siphoning, incorrect drain installation, a damaged gasket or hose, or an uncontrolled fill condition is more likely than a clogged inlet screen.
Helpful context
Understand the symptom
The screen is a flow clue, not the whole diagnosis
The small mesh at the hose or washer inlet protects the water valve from sand, rust, scale, and other debris. A screen that looks dirty can restrict filling, but the same symptom can come from a closed faucet, crushed hose, low household pressure, frozen plumbing, a drain hose installed for siphoning, or a valve that is not opening. Check the supply path before assuming the screen or valve needs replacement.
Do not assume every washer uses the same water connections
Some washers use separate hot and cold hoses, while others use a single cold connection. The exact model manual controls which hose must be connected, which cycle calls for which temperature, and whether the screen belongs in the hose, the washer inlet valve, or both. Never add a connector or leave an expected inlet disconnected just to make the symptom disappear.
Clean gently and keep the screen in its designed position
Manufacturers describe cleaning mineral or debris buildup with a soft brush or rinse after water is shut off. Do not scrape the mesh, enlarge its opening, discard it, or pry out a screen that the manual says to leave in place. The screen is a protective part; operating without it can allow particles into the inlet valve and increase leak or valve-sticking risk.
A washer can fill and still appear not to fill
If water enters and immediately leaves through a low, deeply inserted, sealed, or badly routed drain hose, the tub may never reach its level and the control can report a fill problem. A drain restriction, siphon, or pressure-sensor issue can therefore mimic a blocked inlet screen. Observe where water goes during a supervised test rather than adding more supply pressure.
Keep the valve and control diagnosis professional
If a clear inlet path produces no water, the washer's inlet valve, wiring, door or lid lock, pressure sensor, control board, or water-level logic may be involved. These checks can require energized testing or cabinet access. Keep the user task to the supply, hose, screen, visible leak, and documented test boundary.
Safety boundary
Stop conditions
- Stop and close the water supply if a hose, gasket, valve, or rear connection leaks, the washer is filling uncontrollably, water reaches an outlet, or the floor cannot contain residual water.
- Disconnect power before hose or screen access. Do not remove a screen that the exact manual says to leave in place, operate without the protective screen, probe the inlet valve, or test wiring under power.
- Do not bypass a lid or door lock, pressure sensor, anti-flood device, or control fault, and do not keep restarting a washer after a repeated fill error or abnormal valve noise.
- Arrange plumbing service for absent or contaminated household supply, frozen or damaged hoses, or weak flow at the faucet; arrange appliance service when water reaches a clear inlet but the washer still will not fill.
Only after diagnosis
Potential parts
- washer inlet hose screen or mesh filter
Consider this only when the screen is missing, damaged, permanently deformed, or cannot be restored after a documented cleaning; a clear screen does not explain every no-fill condition.
Match the exact washer and hose or inlet-valve design, screen location, gasket, and model instructions. - washer water inlet hose
Consider this when the hose is cracked, bulged, leaking, internally restricted, frozen-damaged, or remains kinked after safe routing.
Match the exact hose length, connection, temperature rating, gasket, and installation requirements; never patch a pressurized hose. - washer water inlet valve
Consider this only after a qualified diagnosis confirms that water reaches the washer and the valve does not open or regulate flow correctly.
Match the exact washer model, valve ports, coil voltage, connectors, temperature routing, and service procedure. - washer door or lid lock assembly
Consider this only when the washer does not recognize a safely closed lid or door and a qualified diagnosis confirms the lock prevents the fill command.
Match the exact model, lock type, connector, safety interlock, and installation instructions.
When checks do not resolve it
Need a professional?
Safety scope: A technician should handle inlet-valve, door or lid-lock, pressure-sensor, control-board, wiring, internal hose, anti-flood, and energized testing. Keep homeowner work to closing water, disconnecting power, inspecting or gently cleaning a documented screen, checking visible hoses, and performing one supervised fill test.
Common questions
FAQ
Why is my washer not filling even though the inlet hose screen looks clogged?
The screen may restrict flow, but a closed faucet, kinked hose, low household pressure, freezing, drain siphoning, inlet valve, door or lid lock, or control fault can produce the same symptom. Shut off water and power, inspect the screen and hose safely, and follow the exact model manual before cleaning or removing anything.
Can I remove and clean a washer inlet screen myself?
Only if the exact manual permits it. Some manufacturer guidance says to clean a screen in place, while other models allow gentle removal with pliers. Turn off water, disconnect power, catch residual water, never run without the protective screen, and stop if it is stuck, damaged, or unclear.
What if water reaches the washer but it still will not fill?
If the hose flow is good and the screen is clear, the inlet valve, wiring, door or lid lock, pressure sensor, control, or drain siphoning may be involved. Check only the documented drain routing and closure conditions; valve, control, and energized testing require appliance service.
Why does my washer fill and then lose the water?
A drain hose that is too low, inserted too far, sealed into the standpipe, or otherwise installed for siphoning can let water leave as it enters. Stop the cycle, check only the model-approved drain routing, and arrange service if the level still will not rise.
When should I call for washer inlet-screen service?
Arrange service for a missing or stuck screen, damaged hose or gasket, leak after reconnection, absent household supply, repeated fill errors, valve humming without water, a lock or control fault, or any need to open the cabinet or test wiring.
Read the exact guide
Official sources
- Checking the Fill Hoses if the Washer is not FillingWhirlpool Product Help · Whirlpool washers; use the installed model manual for the exact number and type of hoses and screen procedure
- LG Top Load Washer - Troubleshooting an IE Error CodeLG USA Support · LG top-load washers; the error label and exact procedure are model-specific
- Not Filling or Filling Slowly - Front Load WasherWhirlpool Product Help · Whirlpool front-load washers; connection layout and screen access vary by model
- What to do when my washing machine does not fill up or drain?Samsung Support · Samsung washers; instructions may not apply to every model and exact connections vary
- LG Washer - Troubleshooting Fills Too Slow / Does Not FillLG USA Support · LG washers and washer-dryer combos; filter access and controls vary by model
Community feedback
Share a repair observation
Share a plain-text repair observation. Accepted observations are published automatically; this page may take a moment to update.