
On this page
Start here
Quick answer
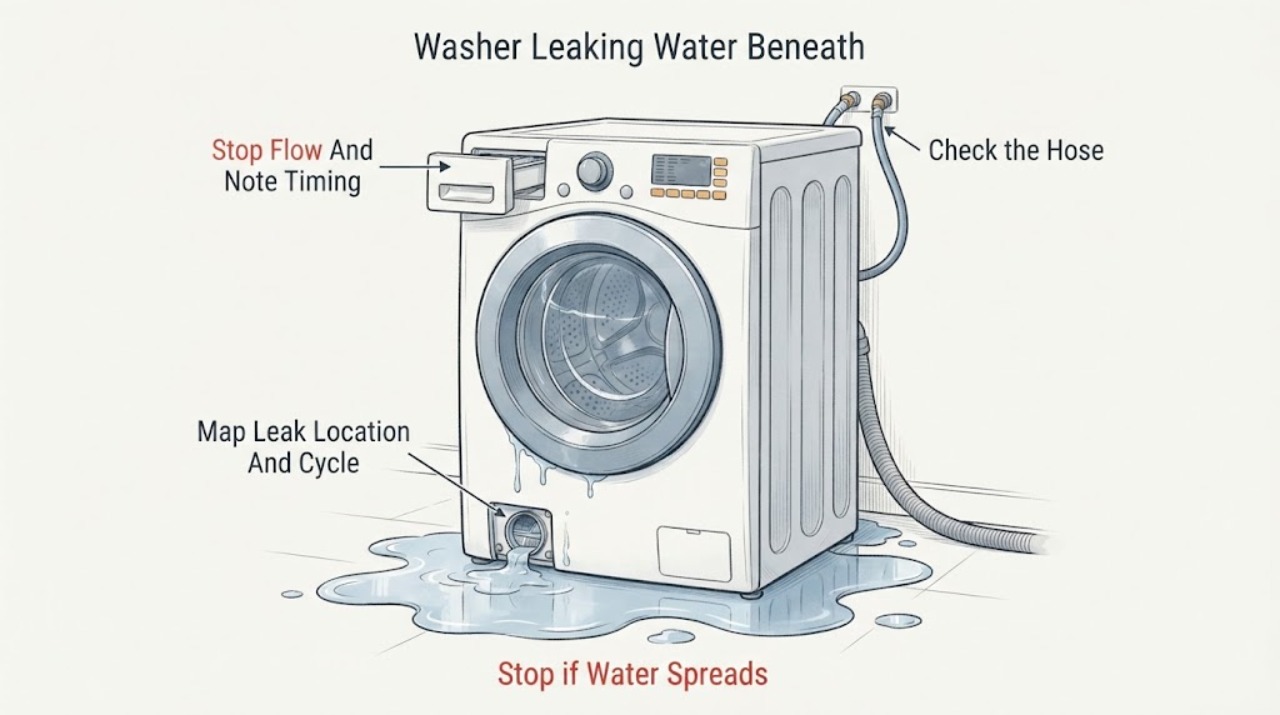
Treat water beneath or around a washer as a source-location problem first. From a safe standing position, stop the cycle, contain the water, and turn off the household washer water valves if water is still entering. Note whether the puddle appears during filling, washing, draining, or after the washer sits. Check the visible supply-hose and faucet connections, drain hose and standpipe, front door gasket or top-lid area, dispenser, and any pump-filter access cover without opening the cabinet or moving a leaking appliance. A loose hose, drain backflow, excess suds, an overloaded top-load tub, debris at a gasket, or a filter cap that was not closed after service can all put water on the floor. If the source is underneath, the leak is continuous, a hose or seal is cracked, or the leak returns with an empty manufacturer-approved test, leave the washer off and arrange qualified appliance or plumbing service.
Work through in order
Diagnostic checks
Use only checks that match the exact appliance or system and its official guide.
-
Check 1
Stop the washer from a safe, dry standing position and keep the door or lid closed. If water is still entering, turn off the household washer water valves without moving the appliance. Mop or contain the puddle only when it is safe, then note whether water continues to appear after the valves are off and whether the last machine activity was filling, washing, draining, or spinning.
Expected result: Water continues with the washer stopped, stops when the household valves are closed, appears only during draining, or cannot be traced without moving the washer.
Next step: Keep the washer off until the source is identified. Proceed with only visible external checks when the floor and controls are dry; arrange service or plumbing help for continuous flow, an inaccessible source, or any electrical warning.
Stop if: Do not reach into standing water, move the washer while hoses are connected, or continue a cycle to make a leak easier to see.
Why this matters
Why: Continued water after the cycle stops can indicate a supply-side leak or water already trapped in the appliance. A leak that occurs only during draining shifts attention to the drain hose or household drain. An untraceable leak beneath the cabinet should not be diagnosed by moving or opening the machine.
-
Check 2
From outside the washer, inspect the visible floor path and the areas where water could start: rear supply connections, rear or side drain hose, standpipe, dispenser, front door gasket, top lid edge, and pump-filter access cover. Do not remove panels or push the appliance forward. Record the highest or wettest point and the cycle stage when the puddle first appeared.
Expected result: The wettest point is at a faucet or inlet hose, drain or standpipe, door or lid, dispenser, access cover, or beneath the cabinet; the leak occurs during filling, washing, draining, or at rest.
Next step: Use the matching external check below and photograph the source area for service. If water is coming from beneath the cabinet or the source remains uncertain, do not disassemble the washer; arrange qualified appliance inspection.
Stop if: Do not remove the top, front, rear, or bottom panel to follow a water trail.
Why this matters
Why: The first wet point is more useful than the largest puddle. Rear leaks during filling can come from supply connections or oversudsing, drain-stage leaks can be backflow or a loose drain hose, and a front or access-cover leak can involve a gasket or a recently disturbed filter cap. Water emerging from beneath without an external source leaves an internal leak unresolved.
-
Check 3
With the household washer water valves closed, inspect the visible inlet hoses, faucet connections, and hose fittings for droplets, a crack, a displaced seal, or a connection that is visibly loose. Do not disconnect a hose from the washer; only check the external connection and whether the faucet itself leaks when the washer is not running.
Expected result: A hose or faucet connection is wet, a hose is cracked or damaged, a faucet leaks independently, or the supply path stays dry while the washer is off.
Next step: Leave the valves closed and have a plumber or appliance technician correct a damaged hose, faucet, seal, or connection. If the connections are dry, continue with the drain and cabinet-external checks rather than tightening blindly or restarting a leak.
Stop if: Do not force a seized fitting, disconnect a pressurized hose, or keep the water valves open when a hose is visibly damaged.
Why this matters
Why: A wet faucet or hose connection can put water behind and beneath the washer without an internal washer failure. A cracked or damaged hose needs replacement selected for the exact installation. A dry supply path makes the drain, door or lid, dispenser, filter cover, or an internal source more likely.
-
Check 4
Inspect the visible drain hose where it enters the household drain or standpipe. Check that the hose has not slipped out, is not kinked or crushed, and is not surrounded by water that is backing up from the drain. Do not remove the hose from a full or running washer. If the household drain is visibly overflowing or slow, stop using the washer and treat it as a drain problem.
Expected result: The drain hose is loose or displaced, the standpipe backs up during draining, the hose is kinked or damaged, or the drain path remains dry and secure.
Next step: Secure only an obviously displaced external hose when the model installation instructions permit it. Stop and arrange plumbing service for a backing-up household drain, and arrange appliance service for a damaged hose or a leak that persists with a sound drain path.
Stop if: Do not pour water into a questionable drain, open a drain connection under flow, or run another cycle when the standpipe is overflowing.
Why this matters
Why: A loose drain hose can discharge directly onto the floor, while a clogged or restricted standpipe can overflow and look like a washer leak. A kink or crack can prevent proper drainage or leak under pump flow. A secure, clear visible drain path does not rule out an internal pump or tub leak.
-
Check 5
For a front-load washer, inspect the visible door gasket for hair, debris, distortion, or a tear, and check whether water starts at the lower door edge. For a top-load washer, look for splash over the lid or an overloaded or floating load. For either style, look for excessive suds or overflow at the dispenser and review whether the detergent type and amount match the washer and detergent instructions.
Expected result: Debris is caught in the door gasket, the gasket is torn, water splashes over the lid, foam overflows, the dispenser is wet, or these areas are dry.
Next step: Remove only loose visible debris from a user-accessible gasket, reduce the load, and follow the detergent label and washer instructions on the next safe cycle. If the seal is torn, the dispenser overflows, or the leak returns with correct loading and detergent, arrange appliance service.
Stop if: Do not run a damaged-seal washer, force the lid or door closed, or pour cleaning chemicals into a dispenser to chase a leak without the model instructions.
Why this matters
Why: Debris can interrupt a front door seal, while a torn gasket requires service or a model-specific replacement. A tightly packed or floating top-load load can splash water out. Excess or unsuitable detergent can create suds that escape from the rear or dispenser and resemble an appliance leak.
-
Check 6
If the washer has a visible pump-filter or residual-water access cover, check whether the leak began after that area was serviced. From outside, look for a cap or hose end that is visibly not seated; do not open it unless the exact owner manual gives a user procedure and the washer is stopped with residual water safely managed. When the floor is dry and there is no active hazard, use an empty rinse or spin observation only if the model instructions allow it, and stop immediately if water appears.
Expected result: The access cover area is wet after recent cleaning, a cap is visibly loose, the empty approved test leaks, or the washer stays dry during the test.
Next step: Follow the exact model procedure only for a user-accessible cap or filter; otherwise keep the washer off. If the empty test leaks, the access area remains wet, or the source is beneath the cabinet, arrange qualified appliance service and provide the cycle stage and location.
Stop if: Do not open the cabinet, remove a pump or filter under uncertain water pressure, or repeat a test when water is reaching electrical components.
Why this matters
Why: A pump-filter or residual-drain cap that was not correctly closed can leak beneath the washer. A repeatable leak with an empty load makes a load-size or splash explanation less likely and points toward a connection, pump, tub, seal, or other machine fault. A dry empty test does not prove that the washer is repaired; the leak may depend on load or detergent conditions.
Use your observations
Decision map
Find the observation that best matches what you see, then follow the next safe action.
-
PATH 01Next step
What you see
The rear of the washer or the floor near a faucet is wet while the washer is not running, and a supply hose or faucet connection shows droplets.
Do this next
Keep the washer water valves closed and arrange plumbing or appliance service for the visibly damaged connection. Do not restart the washer to confirm it.
Why this path and its safety boundary
Why it matters: A household valve, faucet, hose, fitting, or seal is more likely than a leak from the wash tub.
-
PATH 02Next step
What you see
A large puddle appears only while the washer drains, the drain hose is loose or displaced, or water rises from the standpipe.
Do this next
Stop the cycle. Correct only an obvious external hose position if the installation instructions permit it; arrange plumbing service for a backing-up standpipe and appliance service for a damaged hose.
Why this path and its safety boundary
Why it matters: A loose hose or restricted household drain is more likely; backflow can be mistaken for a washer leak.
-
PATH 03Next step
What you see
Water begins at the front door or top lid during washing, or foam and detergent residue overflow from the dispenser or rear.
Do this next
Remove loose visible gasket debris, reduce or redistribute the load, and follow the correct detergent instructions on a later safe cycle. Have a technician replace a torn seal or inspect a recurring dispenser leak.
Why this path and its safety boundary
Why it matters: A dirty or damaged door gasket, top-load splash from the load, or excess or unsuitable detergent is more likely than a drain-stage leak.
-
PATH 04Next step
What you see
Water collects beneath the washer, the pump-filter access area is wet after recent cleaning, or no external hose, drain, lid, door, or dispenser source is visible.
Do this next
Keep the washer off and use only the exact model's user-accessible cap procedure if one exists. Otherwise arrange qualified appliance inspection; do not pull panels or replace an internal part based on the puddle location.
Why this path and its safety boundary
Why it matters: A filter or residual-drain cap may not be sealed, or an internal pump, tub, hose, or seal fault remains possible. The source cannot be identified safely from the puddle alone.
-
PATH 05Next step
What you see
The washer leaks during an empty, manufacturer-approved rinse or spin observation, or water continues after a safe stop.
Do this next
Leave the water valves closed and the washer off, document the leak stage and location, and arrange qualified appliance service. Use plumbing service instead when the household drain or faucet is the observed source.
Why this path and its safety boundary
Why it matters: A load-specific splash or detergent explanation is less likely, and a supply, drain, pump, tub, seal, or other machine fault needs diagnosis.
-
PATH 06Next step
What you see
Water is spreading toward electrical parts, the control is hot or erratic, wiring is damaged, or there is smoke, a burning odor, or another immediate hazard.
Do this next
Keep clear of standing water, leave the washer off, and obtain qualified appliance or electrical help; use local emergency guidance for smoke, fire, or active electrical danger.
Why this path and its safety boundary
Why it matters: This is a safety event rather than a routine leak adjustment. Continued operation can increase water or electrical risk.
Helpful context
Understand the symptom
A puddle is not proof that the washer itself is leaking
Water can travel along a hose, wall, floor, or cabinet before it reaches the area beneath the washer. A clogged standpipe can overflow during draining, and a leaking faucet or supply connection can run down the rear of the appliance. Start by matching the leak to the moment it appears. Filling points toward the supply path, washing can expose suds, splash, a door or lid seal, or a dispenser issue, and draining points toward the drain hose or household drain. Water that appears only after the machine has been moved or serviced deserves extra attention to connections and caps.
Protect the floor before troubleshooting
Stop the cycle and keep hands and feet out of standing water near electrical equipment. Do not pull the washer forward to see underneath while it is connected to water or drain lines. If the source is not visible from a safe position, the puddle keeps growing, or the washer has damaged wiring, smoke, a burning smell, or a hot control, leave it off and use qualified service.
Only after diagnosis
Potential parts
- model-specific washer inlet hose or hose seal
Consider this only when a visible hose, fitting, or seal is confirmed as the source and the household faucet is sound.
Hose ends, seals, routing, and washer connections vary. Confirm the exact model and installation requirements before selecting a replacement. - model-specific washer door gasket or lid seal
Consider this only when the leak starts at a confirmed torn or deformed door or lid seal after loose debris and loading causes are excluded.
Front-load gaskets and top-load lid seals are not interchangeable categories. Confirm the washer style and exact model before selection; installation may require service. - model-specific drain hose or pump-filter cap
Consider this only when the drain hose or filter-cap area is confirmed as the leak source and the external household drain is not backing up.
Drain routing, cap design, and pump-filter assemblies vary by model. Do not replace an internal pump or cap from appearance alone.
When checks do not resolve it
Need a professional?
Arrange qualified appliance or plumbing service when the source is beneath the cabinet, a hose or seal is cracked, the drain or faucet is backing up or leaking, the leak persists with a safe empty test, the washer needs to be moved or opened, or a pump, tub, seal, valve, or control diagnosis is required. Keep the washer off for continuous water flow, an active leak near electrical parts, smoke, burning odor, damaged wiring, a hot or erratic control, or any standing-water hazard; use local emergency guidance for fire or active electrical danger. Do not open panels, disconnect pressurized hoses, reach into standing water, or choose an internal replacement part from the puddle location alone.
Common questions
FAQ
Why is water collecting beneath or around my washer?
The puddle may come from a supply hose or faucet, a loose drain hose, a backed-up household drain, door or lid sealing, excess suds, a dispenser, a top-load splash, a pump-filter cap, or an internal washer fault. Identify the first wet point and the cycle stage rather than assuming the largest puddle shows the source.
What should I do first when a washer is leaking?
Stop the cycle from a safe, dry position, contain water only when safe, and close the household washer water valves if water is still entering. Keep the washer off and inspect only visible hose, drain, door or lid, dispenser, and access-cover areas. Do not move or open the appliance while it is connected to water and drain lines.
Why does the washer leak only when it drains?
A drain hose may have slipped out or be loose, or the household drain may be clogged and backing up under pump flow. Secure only an obvious external hose position when the installation instructions allow it. A backing-up standpipe is a plumbing issue, while a damaged hose or persistent appliance-side leak needs service.
Can too much detergent make a washer leak?
Yes. Manufacturer troubleshooting identifies excess suds as a cause of rear or dispenser overflow, and top-load guidance also links floating or overloaded loads with splash. Follow the washer and detergent instructions, reduce the load, and arrange service if the leak continues with correct dosing and loading.
When should I call a professional for a leaking washer?
Arrange appliance or plumbing service when water comes from beneath the cabinet, the source is inaccessible, a hose or seal is damaged, the drain or faucet backs up, the leak returns during an empty approved test, or panels, internal parts, or appliance movement are needed. Keep the washer off for an active leak near electrical parts, smoke, burning odor, damaged wiring, or standing-water hazards.
Read the exact guide
Official sources
- [LG Front Load Washing Machine] Troubleshooting LeaksLG USA Support · LG front-load washing-machine leak timing, drain backflow, hose, suds, gasket, and filter-cover troubleshooting
- [LG top load washing machine water leak] Water leaks to the floor during washingLG USA Support · LG top-load washer water-supply and drain-hose connection leaks during washing
- LG Top Load Washer - LeakingLG USA Support · LG top-load washer leak sources, hose and drain checks, overload, detergent, level, and service boundary
- [LG Front Load Washer] Water leaks to the floorLG USA Support · LG front-load washer leak location, drain, rear, door gasket, and pump-filter guidance
- [LG front load washer leak] Water leaks from the drain outlet and drain hose during drainageLG USA Support · LG washer drain-hose displacement and household drain backflow during draining
- [LG washing machine water leakage] Water leaks from the faucet and the hose connectionLG USA Support · LG washer inlet-hose and faucet connection leaks
Community feedback
Share a repair observation
Share a plain-text repair observation. Accepted observations are published automatically; this page may take a moment to update.