
On this page
Start here
Quick answer
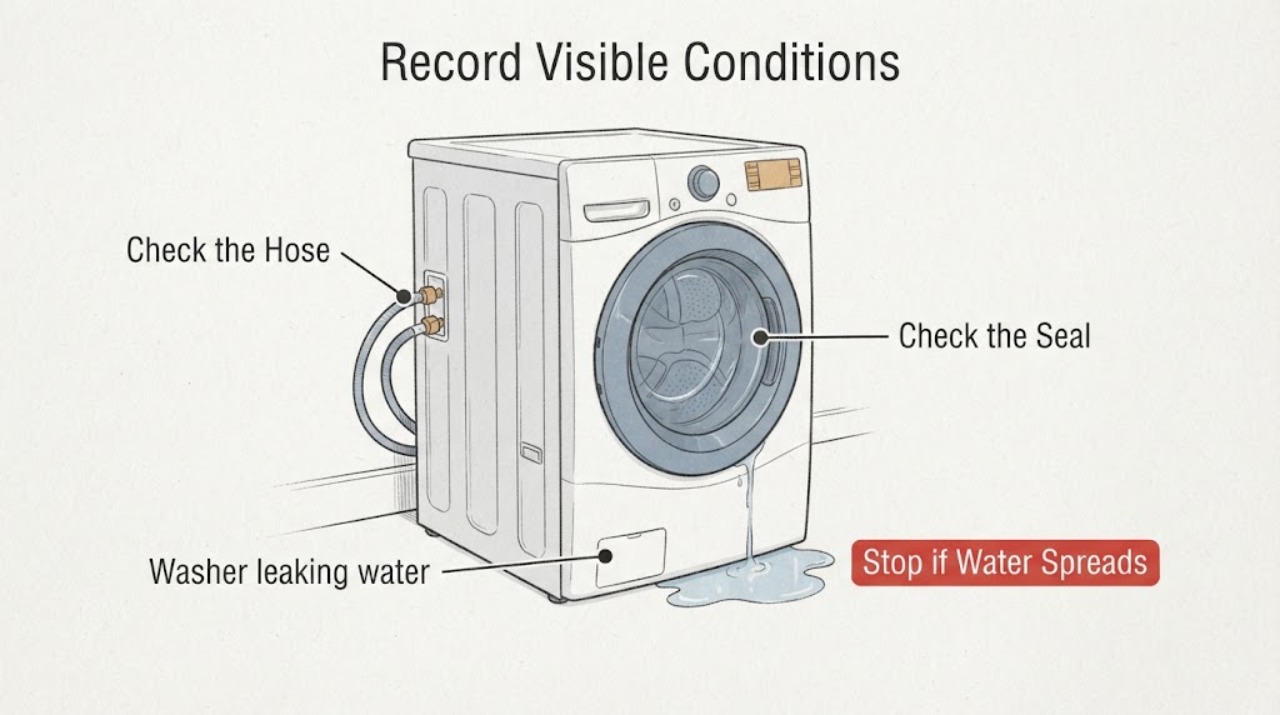
Stop the washer when you see active leaking, keep hands and feet dry, and do not unplug it while standing in water. From a dry position, note whether the leak starts during filling, washing, draining, or spinning, and whether water appears at the front, rear, underneath, dispenser, door seal, inlet hoses, drain hose, or household standpipe. Visually inspect external hoses, connections, the front door gasket if present, detergent drawer, and drain outlet without moving the machine or opening panels. If water is near the cord or outlet, the leak is substantial or recurring, the cabinet or hose is damaged, or the source is hidden, leave the washer out of use and call a qualified appliance technician or plumber.
Work through in order
Diagnostic checks
Use only checks that match the exact appliance or system and its official guide.
-
Check 1
From a dry standing position, observe the existing water pattern without starting another cycle; record whether the leak appears during filling, agitation, draining, or spinning, and whether the first visible water is at the front, rear, side, underneath, dispenser, door, or drain outlet.
Expected result: Water may be present while the washer is idle, appear only during filling, emerge during draining or spinning, or leave a puddle with no visible source.
Next step: Write down the first time and location of water, take a safe-distance photo, and leave the washer out of use until the external checks and service decision are clear.
Stop if: Stop immediately for a spreading puddle, water near the cord or outlet, a burning smell, smoke, sparking, an unstable appliance, or any need to reach behind or underneath the washer.
Why this matters
Why: An idle leak keeps the supply valve or inlet path in focus; a fill-time leak points toward supply hoses, dispenser, or tub fill routing; a drain or spin leak points toward the drain hose, standpipe, pump, or household plumbing. Water can travel, so timing is more reliable than puddle location alone.
-
Check 2
From the front or another dry, unobstructed position, visually inspect the accessible hot and cold inlet hoses, their ends, and the wall-side valves for cracks, bulges, corrosion, missing washers, or droplets; do not reach behind a wet machine or tighten a connection as a test.
Expected result: The hoses and connections may look dry and intact, show a drip at one end, show a split or bulge, or be hidden behind the washer.
Next step: Photograph the visible hose and valve condition and report which side is wet. If a supply hose is damaged or the valve will not safely isolate the water, stop using the washer and request appliance or plumbing service.
Stop if: Stop for water near an outlet, a burst or bulging hose, a valve that will not close, exposed wiring, wet flooring that blocks access, or any need to move the washer or handle a wet connection.
Why this matters
Why: A drip at an inlet connection or hose damage can explain water during filling, while a dry supply side shifts attention toward the door, dispenser, drain path, or internal components. A hidden connection cannot be cleared by a front view.
-
Check 3
If the washer is a front-loader, look at the visible door gasket and its folds with the door open and the machine idle; also inspect the accessible detergent drawer and surrounding area for residue, foreign material, damage, or water tracks without removing panels or forcing the drawer.
Expected result: The gasket may look clean and intact, contain visible lint or residue, show a tear or distortion, or be wet only after the door is opened; the dispenser may be clean or show buildup and overflow marks.
Next step: Record the finding and compare it with the exact owner's manual. Do not scrub aggressively, pull the gasket away from its retaining ring, remove the dispenser housing, or run a test cycle while the leak remains unexplained.
Stop if: Stop for a torn gasket, a loose retaining ring, broken glass, a large amount of water, mold-like contamination, or any need to remove a panel or force a component.
Why this matters
Why: A damaged or obstructed gasket can leak from the front, while dispenser buildup or a drawer that is not fully closed can redirect fill water. A few drops after opening a front-load door may be normal on some models; dripping while closed is more significant.
-
Check 4
From a dry position, inspect the visible drain hose, its connection and holder, the standpipe or laundry sink, and the nearby floor drain for kinks, cracks, a loose-looking outlet, overflow marks, or water backing up; do not pull the washer forward or insert anything into the drain.
Expected result: The drain hose may look smooth and secure, be kinked or damaged, sit loosely at the outlet, or discharge into a household drain that overflows during draining.
Next step: Photograph the visible installation and note which fixture backs up. Ask a plumber to assess the household drain when multiple fixtures are affected or the standpipe overflows; ask an appliance technician to assess the washer when the outlet stays clear.
Stop if: Stop for wastewater, a flooded floor, a detached hose, a cracked standpipe, water near electrical equipment, or any need to pull the washer, remove a trap, or open the drain line.
Why this matters
Why: A loose, damaged, or restricted drain hose can leak during drain or spin, while an overflowing standpipe or sink points toward a household plumbing restriction. A hose that appears correct does not rule out an internal pump or tub leak.
-
Check 5
Without running another cycle, record whether the last load was unusually large, bulky, water-resistant, or uneven, and whether there was excessive suds, detergent residue, or water at the dispenser; do not add detergent, redistribute a wet load, or run a test cycle to reproduce the leak.
Expected result: The leak may follow an unusual load or heavy suds, or it may occur with ordinary loads and no visible residue.
Next step: Record the detergent type and approximate use only if known, then follow the exact manual's loading guidance after the leak is repaired. Do not treat a smaller load or less detergent as proof that an active leak is safe.
Stop if: Stop for flooding, chemical irritation, a washer that shifts, a damaged cabinet, or any need to operate the machine while water remains or the source is unknown.
Why this matters
Why: Oversized or uneven loads can splash or overflow some top-load designs, and excess or unsuitable detergent can create suds that escape or worsen draining. A leak with ordinary loads keeps hose, seal, drain, pump, or tub faults in focus.
-
Check 6
Read the washer manufacturer and model from the exterior label or existing paperwork, and assemble the leak timing, first wet location, hose and gasket findings, drain behavior, load and detergent context, and safe-distance photos; do not remove a cover to find the label.
Expected result: The record may identify a supply-side leak, door or dispenser leak, drain or standpipe overflow, or an internal leak whose source remains hidden.
Next step: Request appliance service for a washer-side leak or plumbing service for a household-drain backup, and provide the exact model and observations. Keep the appliance out of use until the source is repaired.
Stop if: Stop all self-directed work when the washer must be moved, a panel or pump must be opened, wiring must be handled, or an internal hose, pump, tub, or seal must be replaced.
Why this matters
Why: The model determines the correct seal, hose, filter, pump, and diagnostic procedures. Clear evidence of an external issue can guide service, but a hidden leak cannot be confirmed without a technician's inspection.
Use your observations
Decision map
Find the observation that best matches what you see, then follow the next safe action.
-
PATH 01Safety boundary
What you see
Is water near the cord or outlet, is the floor flooded, or is there smoke, sparking, burning smell, or a damaged electrical connection?
Do this next
Keep clear, do not unplug while standing in water, stop using the washer, and request qualified appliance or electrical service as appropriate.
Why this path and its safety boundary
Safety stop: Do not handle the cord, outlet, controls, or appliance while wet or standing in water.
-
PATH 02Safety boundary
What you see
Is the first water at an inlet hose, wall valve, or washer-side supply connection, especially during filling?
Do this next
Leave the washer unused and arrange appliance or plumbing service for the supply hose, washer, or valve; report the exact wet connection.
Why this path and its safety boundary
Safety stop: Do not reach behind a wet washer, force a valve, or tighten a wet connection as a test.
-
PATH 03Safety boundary
What you see
Does water appear at the front door gasket or dispenser area during filling or washing?
Do this next
Record whether the door was closed and whether the gasket or drawer shows damage or residue; call appliance service for a recurring leak or damaged seal.
Why this path and its safety boundary
Safety stop: Do not pull out the gasket, remove the dispenser housing, or operate the washer to force a front leak.
-
PATH 04Safety boundary
What you see
Does water appear during draining or spinning, or does the standpipe, sink, or nearby fixture back up?
Do this next
Call a plumber for a household backup or an appliance technician for a washer-side hose, pump, or internal leak; provide the timing and affected fixture.
Why this path and its safety boundary
Safety stop: Do not pull the machine forward, remove a trap, open the pump, or snake the drain yourself.
-
PATH 05Safety boundary
What you see
Did the leak follow an unusually large or uneven load, water-resistant items, excessive suds, or detergent residue?
Do this next
Record that context but do not dismiss the leak; have the appliance checked if it recurs or any water remains.
Why this path and its safety boundary
Safety stop: Do not run repeated test cycles or add chemicals while the source is unknown.
Helpful context
Understand the symptom
The leak's timing and location narrow the path
Water can come from the supply side while a washer fills, from a door gasket or dispenser during washing, from the drain hose or household standpipe during draining, or from an internal pump, tub, or hose connection. Water can travel across a floor or cabinet, so the wettest visible spot is not always the source. Record when the first drops appear and where they are first seen before trying to clean or move anything.
What the manufacturer checks have in common
Manufacturer guidance commonly starts with visual checks of inlet and drain hoses, their washers and connections, the front-load door gasket, the dispenser, and the household drain. An incorrectly positioned or kinked drain hose can cause backflow or siphoning, while a damaged door seal or hose can leak during a particular part of the cycle. These are model-dependent clues, not permission to dismantle the washer or guess at an internal repair.
Protect the floor and electrical connection
A small drip can become floor, cabinet, or electrical damage. Keep the washer out of use for an active or unexplained leak, and keep the floor dry only from a safe position without reaching behind a wet appliance. Never handle a cord or outlet with wet hands or while standing in water. Hidden leaks, damaged hoses, and any leak near an electrical connection need professional service.
Safety boundary
Stop conditions
- Stop using the washer for active, recurring, substantial, or unexplained leaking, especially when water is near the cord, outlet, controls, or other electrical connections.
- Do not reach behind or underneath a wet washer, move the appliance, open panels, handle wiring, remove a pump or trap, or disassemble internal hoses or the tub.
- Do not run repeated test cycles, pour chemicals into the washer or household drain, or use a guessed seal or hose without confirming the exact model and safe procedure.
- Call a qualified appliance technician for a washer-side leak and a plumber for a household-drain backup; provide timing, first wet location, model, photos, and visible hose, seal, dispenser, and drain findings.
Only after diagnosis
Potential parts
- washer door boot seal
Consider this category only if a technician or exact model manual confirms a front-load door gasket is torn, distorted, or otherwise the leak source.
Confirm the washer manufacturer and exact model before ordering; do not infer fit from appearance or attempt retaining-ring work without the model procedure. - washer inlet hose
Consider this category only when visible hose damage or a confirmed supply-side leak identifies the inlet hose as the failed component.
Confirm connection type, length, washers, and model or installation requirements. Water isolation and replacement should be handled only when the area is dry and the safe procedure is clear. - washer drain hose
Consider this category only if a technician or exact manual confirms a cracked, loose, kinked, or otherwise failed washer drain hose rather than a household drain backup.
Confirm routing, holder, outlet arrangement, and exact model. Do not pull the washer or disconnect a wet hose to test the diagnosis.
When checks do not resolve it
Need a professional?
Call immediately for water near the electrical connection, flooding, a burst or bulging hose, wastewater backup, smoke or burning odor, or a leak that continues while the washer is idle. Call after the visual checks if the source is hidden, the leak recurs, a gasket or hose is damaged, or the household drain backs up.
Common questions
FAQ
What should I do first when my washer is leaking?
Stop the washer, keep the floor and hands dry, and do not unplug it while standing in water. Record when the leak starts and where water first appears, then inspect only visible external hoses, the door gasket, dispenser, and drain outlet. Keep using it stopped until the cause is clear or a technician assesses it.
Why is my washer leaking from underneath?
Water underneath can come from an inlet or drain hose, a household drain backup, excess water or suds, a pump, tub, or another internal connection. Timing and the first wet location are more useful than the puddle alone. Do not move or open the washer to look underneath; request service if the source is not obvious and dry to observe.
Can a door gasket cause a front-load washer to leak?
Yes. A torn, distorted, or obstructed gasket can leak from the front, although a few drops after opening the door may be normal on some models. Look only at the visible gasket with the washer idle, and have a technician confirm the model-specific seal or retaining hardware before replacement.
How do I tell whether the washer or household drain is the problem?
Observe the drain hose and standpipe from a dry position and note whether the standpipe, sink, or another fixture backs up during draining. A clear household outlet with water at the washer points more toward the appliance; several affected fixtures point toward plumbing. Do not remove a trap or open the drain line.
Read the exact guide
Official sources
- Front Load Washer - Leaking WaterGE Appliances · Manufacturer guidance for GE front-load washers; top-load and other models may use different components and procedures.
- Samsung washing machine is leakingSamsung · Manufacturer troubleshooting guidance for Samsung washers; controls, hose routing, and components vary by model.
- Leaking Water Underneath - WasherWhirlpool · Manufacturer product-help guidance for Whirlpool top-load washers; use the diagnostic distinctions as clues and confirm the exact model.
Community feedback
Share a repair observation
Share a plain-text repair observation. Accepted observations are published automatically; this page may take a moment to update.