
On this page
Start here
Quick answer
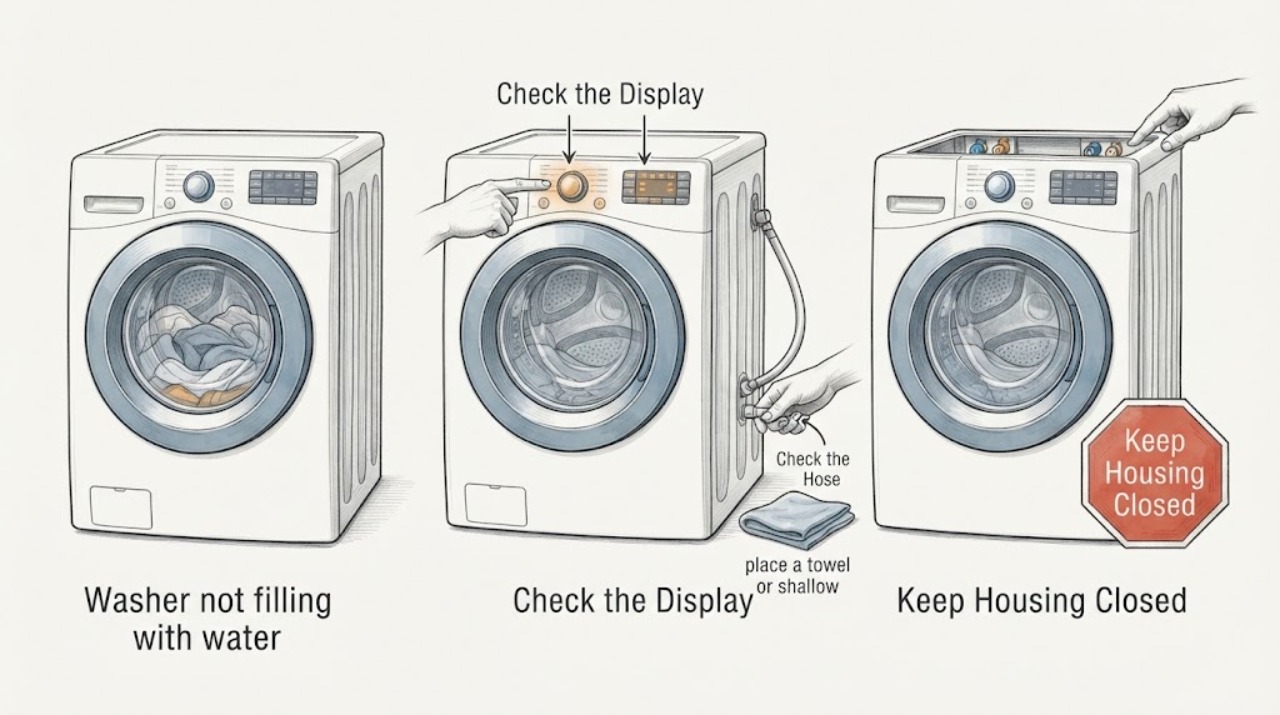
If no water enters a washer tub, first check whether the cycle is still sensing the load or whether a fill error is present. Then confirm that the household water valves are fully open, hot and cold hoses are connected to the correct inlets, and neither hose is kinked, crushed, frozen, or damaged. With the washer unplugged and the water valves closed, inspect the inlet screens for sediment only if the model manual permits it; reinstall every screen before use. A front-loader may also refuse to start filling if the door is not locking, while a top-loader may pause for a lid or control condition. Do not remove the inlet valve, bypass a door/lid lock, operate without screens, or keep resetting a breaker. If water is available at the hoses but the washer still does not fill, the inlet valve, control, lock, or wiring needs model-specific service.
Before you begin
Safety first
- Homeowner-safe checks are reading the display, confirming open valves and hose routing, inspecting for kinks or obvious damage, checking an accessible inlet screen only with power and water isolated, and verifying normal door/lid closure. Internal valves, wiring, controls, interlocks, live testing, leaks, and appliance movement belong to a qualified professional.
Work through in order
Diagnostic checks
Use only checks that match the exact appliance or system and its official guide.
-
Check 1
Start the normal cycle once and watch the control panel from a dry, safe position for a fill delay, sensing message, blinking lights, or an error; note whether the washer drains, locks the door/lid, hums, or remains completely silent.
Expected result: The washer is sensing or draining first, displays an inlet/fill code, does not lock the door or lid, or gives no response at all.
Next step: Record the exact code or light pattern and model number. Continue with external supply checks, but do not bypass an interlock or open the control panel.
Why this matters
Why: A brief sensing or drain phase may be normal for some models. A fill code makes the water path more likely, while a missing lock/lid response can prevent the control from allowing water. No response keeps power, control, and interlock issues in consideration.
-
Check 2
Check that the hot and cold wall valves are fully open, that each hose is connected to the matching washer inlet, and that the hoses are not kinked, crushed against the wall, sharply bent, leaking, or frozen; do not force a stuck valve.
Expected result: A valve was closed, the hoses were crossed or kinked, a hose is damaged/frozen, or both supplies and hose routing look normal.
Next step: Open an accidentally closed valve or correct a safe hose bend. Replace a damaged hose or thaw a frozen line using the model’s instructions; do not use a flame or heat the plastic aggressively. If supply is normal, continue with the screen and interlock checks.
Why this matters
Why: No supply or a restricted hose can leave the tub dry and trigger a fill error. Crossed connections can also fail on cycles that request a particular temperature. Normal external supply shifts attention to screens, lock/control, drain setup, or the inlet valve.
-
Check 3
With the washer unplugged and both water valves closed, place a towel or shallow container under the connections and inspect the washer-side inlet screens for rust, sand, scale, or other debris only if the exact manual permits screen removal; do not pry, pierce, or operate without the screens.
Expected result: A screen is visibly clogged, missing, damaged, clean, or cannot be reached without removing a panel or applying force.
Next step: Clean and reinstall the screen exactly as directed, reconnect hoses, open valves slowly, and check for leaks. Stop if the screen will not seat, a connection leaks, or the inlet valve body is damaged.
Why this matters
Why: Sediment or debris can restrict flow enough that no water reaches the tub. A missing or damaged screen can allow particles into the valve and cause leaks or valve malfunction. An inaccessible screen requires model-specific service rather than improvised access.
-
Check 4
Check the front-load door or top-load lid for an object preventing closure and confirm the lock/lid indicator behaves normally; do not slam the door, hold the lock switch, or bypass the interlock.
Expected result: The door/lid closes and locks, a garment or object blocks it, the lock indicator stays off, or the lock clicks but no water enters.
Next step: Remove only an obvious obstruction and close the door/lid normally. If the lock will not engage, remains intermittent, or requires bypassing, leave the washer off and arrange service.
Why this matters
Why: The control may withhold the fill command until the door or lid is safely closed and locked. A normal lock with no fill points back to water supply, screens, inlet valve, control, or wiring rather than the interlock alone.
-
Check 5
Inspect the visible drain hose routing without pulling the washer out: verify it is not kinked, crushed, loose, or installed as an airtight or incorrect standpipe connection according to the model’s installation instructions.
Expected result: The drain hose is low, deeply inserted, kinked, airtight at the standpipe, damaged, or correctly routed with no backup.
Next step: Correct only an obvious external routing issue using the exact installation guide. Stop for a damaged hose, household drain backup, or any need to move the appliance alone, and arrange plumbing or appliance help.
Why this matters
Why: Incorrect drainage can siphon incoming water or cause a fill error even when the supply valves are open. A correctly routed hose makes a supply restriction or washer-side component more likely.
-
Check 6
After correcting a hose or screen issue, restore water and power and try one normal cycle; if the manual allows, perform the specified power reset once, without repeatedly cycling power or resetting a tripped breaker.
Expected result: Water now enters, only one temperature line fills, the washer still stays dry, or the breaker trips/errors recur.
Next step: Stop after one controlled retry. Leave the washer off for a recurring error, no-fill condition, or breaker trip and arrange service with the model number and recorded checks.
Why this matters
Why: Restored filling confirms an external restriction or reset-sensitive control state. One-line filling can indicate a supply connection or valve path issue. A persistent dry tub with available water makes an inlet valve, lock, control, wiring, or model-specific fault more likely.
-
Check 7
If water is available at the wall and the washer-side screens and external setup are normal, document whether the inlet valve makes a click or hum, whether the door/lid locks, and whether any water enters; do not measure live voltage or open the console unless qualified.
Expected result: The valve clicks but no water enters, the valve is silent, the lock is normal, or the washer displays a persistent fill code.
Next step: Keep power isolated from internal work and arrange qualified appliance service. Provide the model, code, supply-line results, screen condition, lock behavior, and whether both valves have supply.
Why this matters
Why: A click with no flow can leave the inlet valve or a blocked internal path in consideration. Silence can involve the control, lock, wiring, or valve coil. The symptom cannot establish which internal part failed without model-specific testing.
Use your observations
Decision map
Find the observation that best matches what you see, then follow the next safe action.
-
PATH 01Next step
What you see
Both wall valves are open, hoses are correctly connected and undamaged, the door/lid locks normally, and no water reaches the tub.
Do this next
Perform only the model-approved screen check with power and water isolated. If screens are clear or the washer remains dry, leave it off and arrange appliance service rather than replacing a valve by guesswork.
Why this path and its safety boundary
Why it matters: The restriction is more likely at the inlet screens, inlet valve, control, or internal wiring than at the household supply.
-
PATH 02Next step
What you see
One wall valve is closed, a hose is kinked/crossed/frozen, or water is absent when a disconnected hose is checked safely.
Do this next
Restore the supply, correct the bend or connection, or use qualified plumbing help for a stuck valve or frozen/damaged line. Reconnect only after the hose is intact and the valve is closed.
Why this path and its safety boundary
Why it matters: A household supply or external hose restriction is more likely than an internal washer failure.
-
PATH 03Next step
What you see
The washer does not lock the front door or recognize the top lid as closed, even though the supply setup is normal.
Do this next
Remove only a visible obstruction and close the door/lid normally. Do not bypass the safety interlock; arrange service if the lock indicator or latch remains abnormal.
Why this path and its safety boundary
Why it matters: The control may be withholding the fill command because of a door/lid latch, lock, obstruction, or related wiring issue.
-
PATH 04Next step
What you see
Water briefly enters and immediately drains, or a fill error appears with an incorrectly routed drain hose.
Do this next
Correct the external drain routing from the exact installation instructions. If the drain backs up, is damaged, or cannot be safely accessed, arrange plumbing or appliance service.
Why this path and its safety boundary
Why it matters: Siphoning, an airtight or incorrect standpipe connection, or a drain-path installation problem may be preventing the washer from reaching its expected level.
-
PATH 05Next step
What you see
The washer leaks, a hose bursts, the breaker trips, wiring is exposed, the inlet valve is cracked, or water continuously enters without stopping.
Do this next
Close the washer water valves and disconnect power only if safe, keep water away from electrical equipment, and arrange qualified appliance or plumbing help. Leave for smoke, fire, or immediate danger.
Why this path and its safety boundary
Why it matters: The problem may be an active water or electrical hazard, including a valve/control fault that should not be tested by repeated operation.
Helpful context
Understand the symptom
No water in the tub is not always a failed valve
Some high-efficiency washers spend time sensing a load, draining residual water, or waiting for a door/lid lock before opening the inlet valve. If the tub stays completely dry and the cycle shows an inlet error, the useful split is whether water reaches the washer, whether it can pass the inlet screens, and whether the controls are allowing a fill. Do not choose a valve from the symptom alone.
Check both supply lines and the inlet screens
A washer may need both hot and cold connections even when a cycle is labeled cold, depending on the model and temperature logic. A partly closed valve, kinked hose, sediment screen, frozen line, or swapped connection can prevent filling. Close the valves before loosening a hose, keep a towel or container ready, and do not run the washer with an inlet screen missing.
Door, lid, and drain setup can stop a fill sequence
Front-load models commonly require the door to lock before filling; a top-loader may require the lid to be closed. An incorrectly routed drain hose can siphon water away or create a fill error on some models. These are model- and installation-specific checks, so record any displayed code and use the exact manual before opening panels or changing wiring.
Safety boundary
Stop conditions
- Do not remove an inlet screen, hose, valve, panel, or control while the washer is powered or the water valves are open. Never operate the washer without its inlet screens installed.
- Do not bypass a front-door or lid interlock, apply live voltage tests, open the control console, or replace an inlet valve based only on the no-fill symptom. Use the exact model manual and qualified service.
- Stop for a leaking or burst hose, cracked valve, drain backup, exposed wiring, repeated breaker trip, or water entering continuously. Close water valves and disconnect power only when safe.
- For smoke, fire, arcing, or immediate electrical danger, leave the area and use emergency assistance from a safe location.
Only after diagnosis
Potential parts
- washer water inlet valve
Only consider this part after water is available at the connected hoses, screens are clear and installed, the door/lid interlock is operating, and a model-specific diagnosis identifies the inlet valve path.
Valve coil ratings, ports, hose connections, and wiring vary by model; confirm the appliance model and manufacturer fit information before ordering or installing. - washer door or lid lock assembly
Only consider a lock assembly when the washer cannot confirm a closed/locked door or lid and service diagnosis separates that fault from a supply, control, or wiring problem.
Lock geometry, connectors, and safety behavior are model-specific; never bypass the lock and confirm fitment from the exact manufacturer information.
When checks do not resolve it
Need a professional?
Safety scope: Homeowner-safe checks are reading the display, confirming open valves and hose routing, inspecting for kinks or obvious damage, checking an accessible inlet screen only with power and water isolated, and verifying normal door/lid closure. Internal valves, wiring, controls, interlocks, live testing, leaks, and appliance movement belong to a qualified professional.
Common questions
FAQ
Why is my washer not filling with water at all?
A closed valve, crossed or kinked hose, frozen supply, clogged inlet screen, door/lid interlock, drain-hose setup, failed inlet valve, control, or wiring can all leave the tub dry. Start with the external supply and record any fill code before considering internal parts.
Do both hot and cold hoses need to be connected if I choose cold water?
Some washers use both lines depending on the cycle and temperature logic, even when a setting is labeled cold. Connect each hose to the matching inlet and follow the exact manual; do not assume one missing line is acceptable for every model.
Can a kinked drain hose stop a washer from filling?
It can contribute to a fill error or cause incoming water to drain away when the hose is incorrectly routed, kinked, or sealed at the standpipe. Check only the visible routing against the installation instructions and use plumbing help for a blocked or damaged drain.
Can I clean the washer inlet screens myself?
Only if the exact model manual provides an accessible procedure. Close both water valves, unplug the washer, contain hose water, and reinstall every screen before reconnecting. Do not pry or pierce a screen, remove a panel, or operate without filters.
When does a no-fill washer need service?
Arrange service when the household supply is available but the tub remains dry after safe hose, screen, drain, and door/lid checks, or when the inlet valve, control, wiring, or lock may be involved. Stop immediately for leaks, continuous filling, exposed wiring, repeated breaker trips, or smoke.
Read the exact guide
Official sources
- LG Washer - Why Is There No Water in My Front Load Washing Machine?LG USA Support · Front-load LG guidance; door-lock, supply, and valve behavior must be checked against the exact model.
- Water fill issues with Samsung washing machinesSamsung Support · Samsung washer guidance; exact temperature logic, error codes, hose dimensions, and cycle behavior vary by model.
- Samsung washing machine will not start or fill with waterSamsung Support · Samsung washer guidance; lock behavior and emergency-drain access vary by model.
- LG Washer - Troubleshooting Fills Too Slow / Does Not FillLG USA Support · General LG washer guidance; exact inlet-screen access, temperature behavior, and error codes vary by model.
Community feedback
Share a repair observation
Share a plain-text repair observation. Accepted observations are published automatically; this page may take a moment to update.