
On this page
Start here
Quick answer
If a washer is not filling, first confirm that a cycle has started with the lid or door closed, then check the household water supply and accessible inlet hoses. A kinked hose, closed valve, incorrect hose connection, or a drain hose that allows siphoning can stop or immediately remove incoming water. If the supply and setup look normal, or the washer fills continuously, stop using it and arrange qualified service rather than testing an inlet valve, sensor, control, or lid-lock circuit yourself.
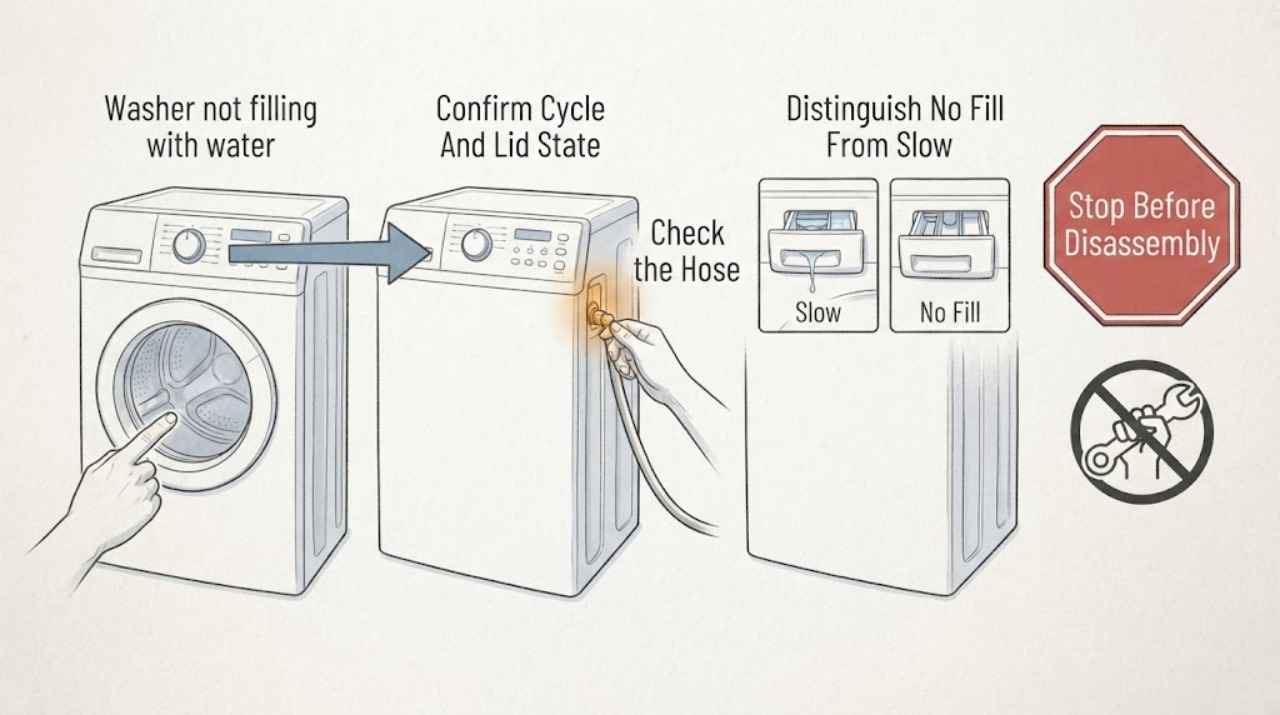
Work through in order
Diagnostic checks
Use only checks that match the exact appliance or system and its official guide.
-
Check 1
Select the affected cycle, press Start or Resume once, and confirm that the washer's lid or door is fully closed without clothing or residue blocking the latch area.
Expected result: The control starts the cycle and shows a lock or sensing response; it stays idle, pauses, or shows a lid or door indication; or it advances without any water sound.
Next step: If the lid or door does not latch or the washer remains idle, follow the exact model manual and arrange service if the condition remains. If the cycle starts, continue to the water-supply check.
Stop if: Do not defeat or bypass the lid or door lock and do not reach into a moving tub.
Why this matters
Why: A washer that never starts or does not recognize a closed lid or door may have a cycle-state or interlock issue, while a normal start shifts attention to water entry and drain routing.
-
Check 2
From behind the washer, inspect the household valves and the accessible inlet hoses. Confirm the required valves are fully open, hot is connected to hot and cold to cold where the model uses both, and neither hose is kinked, pinched, visibly damaged, or fitted with a restrictive device.
Expected result: A valve is closed, a hose is sharply bent or damaged, the hot and cold connections are swapped, or the supply appears normal.
Next step: Open a closed valve or straighten an accessible kink only when the connection is dry and stable, then perform one controlled test. Do not operate with a damaged or leaking hose; arrange service or a model-approved hose replacement.
Stop if: Do not loosen a pressurized or leaking connection. Shut off the valves and stop if water sprays, a fitting moves, or the setup is unsafe to reach.
Why this matters
Why: A closed valve, restricted hose, wrong connection, or flow-limiting device can prevent or reduce water entry; a normal external supply makes an internal inlet path more likely but does not prove a failed part.
-
Check 3
Start a short, model-approved cycle while staying clear and listen for the fill attempt; watch whether water enters at all, enters as a weak stream, or is preceded by a sensing delay or water-supply indication.
Expected result: There is a brief sensing delay followed by filling, a weak or intermittent stream, no incoming water with a code or blinking indicator, or no clear response from the control.
Next step: Use the model manual to interpret any displayed code. If the manual permits user cleaning, turn off the water valves before inspecting inlet screens and clean only without removing a screen; otherwise leave the washer off and arrange service.
Stop if: Do not measure live voltage, energize a loose hose, remove a panel, or substitute a part based only on the symptom.
Why this matters
Why: A sensing delay can be normal on some models. A weak stream points toward supply pressure, hose restriction, or inlet-screen debris, while no water after a normal start keeps the inlet valve, sensing circuit, lock, or control in the professional-diagnosis set.
-
Check 4
If water can be heard entering but the tub remains empty, inspect the drain hose routing from a safe position. Check that it is not kinked, sealed airtight into the standpipe, or positioned outside the model's specified height and insertion guidance.
Expected result: Water enters and immediately disappears, the drain hose is sealed or unusually low, or the routing follows the manual and the water remains in the tub.
Next step: Correct only an accessible routing issue using the exact installation instructions, then observe one short fill. If routing is normal or water still leaves immediately, stop and arrange service.
Stop if: Do not pull a fixed drain connection, move a heavy washer, or work around standing water or a leak.
Why this matters
Why: Water that leaves as it enters is more consistent with siphoning or incorrect drain installation than with a completely closed inlet. Correct routing can restore filling; normal routing shifts attention back to the fill path.
-
Check 5
After one accessible, manual-approved correction, run one controlled fill observation from a clear position and stop the cycle if the washer leaks, continuously fills, makes an unfamiliar electrical or mechanical noise, or shows a new fault indication.
Expected result: The washer fills and proceeds normally, fills slowly or incompletely, still does not fill, or continues filling without stopping.
Next step: If the symptom remains or returns, leave the washer out of use and provide the technician with the model, timing, displayed indications, hose observations, and the one correction attempted. If it continuously fills, close the water valves immediately and request service.
Stop if: Do not keep cycling the washer to see whether the symptom changes.
Why this matters
Why: A normal result supports an external setup or operating cause but does not prove an internal component is healthy. A repeat no-fill or slow-fill symptom needs diagnosis, while continuous filling can indicate a valve or control problem and can cause overflow.
Use your observations
Decision map
Find the observation that best matches what you see, then follow the next safe action.
-
PATH 01Safety boundary
What you see
The washer remains idle, pauses before filling, or does not recognize the closed lid or door.
Do this next
Check the exact model's start and lock indications once; if the latch or lock remains abnormal, arrange qualified service without bypassing it.
Why this path and its safety boundary
Why it matters: The cycle-state, control, or lid or door interlock is more likely than a household water-supply restriction.
Safety stop: Do not operate with a defeated safety lock.
-
PATH 02Safety boundary
What you see
A supply valve is closed, a hose is kinked or damaged, connections are incorrect, or the inlet stream is weak.
Do this next
Restore only a dry, accessible, manual-approved condition and retest once. Replace or service a leaking or damaged connection rather than forcing it.
Why this path and its safety boundary
Why it matters: The external water path can explain the no-fill or slow-fill symptom; a correction may be possible without opening the washer.
Safety stop: Stop for spray, leakage, unsafe access, or a connection that will not move normally.
-
PATH 03Safety boundary
What you see
Water is heard entering, but the tub stays empty and the drain hose is low, sealed, kinked, or otherwise outside the manual's installation guidance.
Do this next
Correct the accessible drain routing according to the model instructions and make one controlled observation. If water still leaves immediately, arrange service.
Why this path and its safety boundary
Why it matters: Siphoning or drain installation is more likely than a total inlet failure.
Safety stop: Do not move the appliance or disturb fixed plumbing to chase the symptom.
-
PATH 04Safety boundary
What you see
The cycle starts, valves and hoses look normal, drain routing is correct, and the washer still does not fill or fills only weakly after one controlled retest.
Do this next
Leave the washer off and arrange qualified diagnosis. Give the technician the exact model, cycle, timing, codes or light pattern, and whether any water entered.
Why this path and its safety boundary
Why it matters: An inlet screen, inlet valve, water-level sensor or pressure circuit, lock, control, or supply-pressure problem remains possible; the observations do not identify one replacement part.
Safety stop: Do not remove panels, test live circuits, bypass a lock, or order a part from the symptom alone.
-
PATH 05Safety boundary
What you see
Water continues entering after the washer should stop or the tub level rises unexpectedly.
Do this next
Close the washer's water valves immediately, keep people clear of any spill, and request qualified service.
Why this path and its safety boundary
Why it matters: An uncontrolled fill can create an overflow risk and requires a different response from a no-fill symptom.
Safety stop: Do not leave the appliance running while waiting for the level to stabilize.
Helpful context
Understand the symptom
What the symptom can mean
“Not filling” covers several different observations: the cycle never begins, no water enters, water enters slowly, or water enters and immediately drains away. Those patterns point to different next checks. A washer can also pause for load sensing or display a water-supply code, so give the control panel time to respond and record any code instead of guessing at a part.
Stay on the accessible side of the repair
Use a dry, stable position and inspect only controls, the closed lid or door, valves, hose routing, and visible connections. Turn off both water valves before any hose service, keep a towel ready for residual water, and do not remove a washer panel, bypass a lid or door lock, probe live wiring, or open a leaking connection. Model instructions take priority because hose layouts and fill behavior vary.
Use the result to choose the next step
A clear external correction should be tested only once. If the washer still will not fill, fills very slowly, or repeats the problem, the remaining possibilities include restricted inlet screens, low supply pressure, an inlet valve, a water-level sensing circuit, a lid or door lock, or a control fault. The symptom alone cannot identify which component needs replacement.
Safety boundary
Stop conditions
- Close the water valves and stop immediately for continuous filling, an active leak, spray, or water near electrical components.
- Do not bypass a lid or door lock, remove panels, probe live wiring, or disconnect a pressurized or leaking hose.
- Do not move a heavy washer or work around standing water to reach a connection.
- If the accessible supply, hose, cycle, and drain checks do not resolve the symptom after one controlled retest, leave the washer off and call a qualified technician.
Only after diagnosis
Potential parts
- washer water inlet valve
Consider only if the water supply, hose routing, and accessible inlet screens are normal and a qualified diagnosis identifies the valve as the failed part.
Confirm the exact washer model, valve configuration, connectors, and manufacturer fit information before selection. - washer water inlet hose
Consider only when an inlet hose is visibly damaged, leaking, blocked, or cannot provide the required flow, and replacement is allowed by the model instructions.
Confirm hose length, connection type, pressure rating, and exact model requirements before selection. - washer water-level pressure switch or sensor
Consider only after the cycle starts but the washer does not fill and qualified testing points to the water-level sensing circuit rather than the supply or inlet valve.
Confirm the exact model, sensor type, tubing or connector arrangement, and manufacturer instructions before selection. - washer lid-lock assembly
Consider only when the washer does not recognize a closed lid, the exact model's diagnostics support that conclusion, and a qualified diagnosis identifies the lock assembly.
Confirm the exact model and lock design; never bypass the safety lock as a substitute for a repair.
When checks do not resolve it
Need a professional?
Call when the no-fill or slow-fill symptom persists or returns, the cycle never starts, water enters and immediately drains, a hose or valve leaks, or the next check requires concealed access.
Have this ready
- Exact brand and model from the rating label
- Whether the cycle starts, locks, senses, or displays a code
- Whether water is absent, weak, delayed, or immediately drains
- Valve and hose observations and any visible leak
- The one accessible correction attempted and its result
Common questions
FAQ
Why does my washer make a sound but no water enters?
Confirm the valves are open, the inlet hoses are not kinked, and the cycle has recognized a closed lid or door. If those checks are normal, a restricted inlet screen, inlet valve, sensing circuit, or control problem remains possible and needs qualified diagnosis.
Can a drain hose stop a washer from filling?
Yes. Incorrect routing, a sealed standpipe connection, a kink, or a drain hose positioned outside the model's installation guidance can cause siphoning or prevent the cycle from progressing. Correct only an accessible routing issue using the exact manual.
Is a small amount of water normal in a high-efficiency washer?
Some models use load sensing and may pause before adding water, and the selected cycle affects the amount. If the washer gives a water-supply indication, leaves laundry dry, or never adds water after the model's normal sensing period, follow the manual and arrange service if the checks do not resolve it.
What should I do if the washer keeps filling?
Close the washer's water valves immediately, stop the cycle, and request qualified service. Do not leave it running or rely on a control reset while water continues to enter.
Read the exact guide
Official sources
- Water fill issues with Samsung washing machinesSamsung · Samsung washer guidance; display codes, hose requirements, and cycle behavior vary by model.
- Front Load Washer - No FillGE Appliances · GE front-load washer guidance; exact model and installation instructions govern.
- Checking the Fill Hoses if the Washer is not FillingWhirlpool · General Whirlpool washer installation and fill guidance; exact model instructions govern.
- Top Load Washer - Agitates But Does Not FillGE Appliances · GE top-load washer guidance; the water-level control and reset behavior are model-specific.
- Not Filling or Filling Slowly - Front Load WasherWhirlpool · Whirlpool front-load washer guidance; hose and drain dimensions vary by model and installation.
- Lid Locking on a Top Load High Efficiency WasherWhirlpool · Whirlpool top-load high-efficiency washer lid-lock guidance; operation varies by model.
Community feedback
Share a repair observation
Share a plain-text repair observation. Accepted observations are published automatically; this page may take a moment to update.