
On this page
Start here
Quick answer
An outdated bathroom floor finish does not by itself mean the floor must be demolished. First identify the existing covering, check for movement or moisture, and confirm the finished height around the door and toilet. A sound, firmly bonded, clean, dry tile floor may be a candidate for a properly specified tile-over-tile system; loose, cracked, damp, swollen, or unknown resilient flooring needs a qualified assessment before any overlay or removal. Do not sand, scrape, cut, or remove an older or unknown floor covering until asbestos risk has been addressed.
Before you begin
Safety first
- Limit homeowner work to photos, measurements, ordinary walking observations, and reading product instructions. Do not sand, grind, scrape, cut, pry, remove the toilet, disconnect plumbing, or disturb suspect flooring as a diagnostic step.
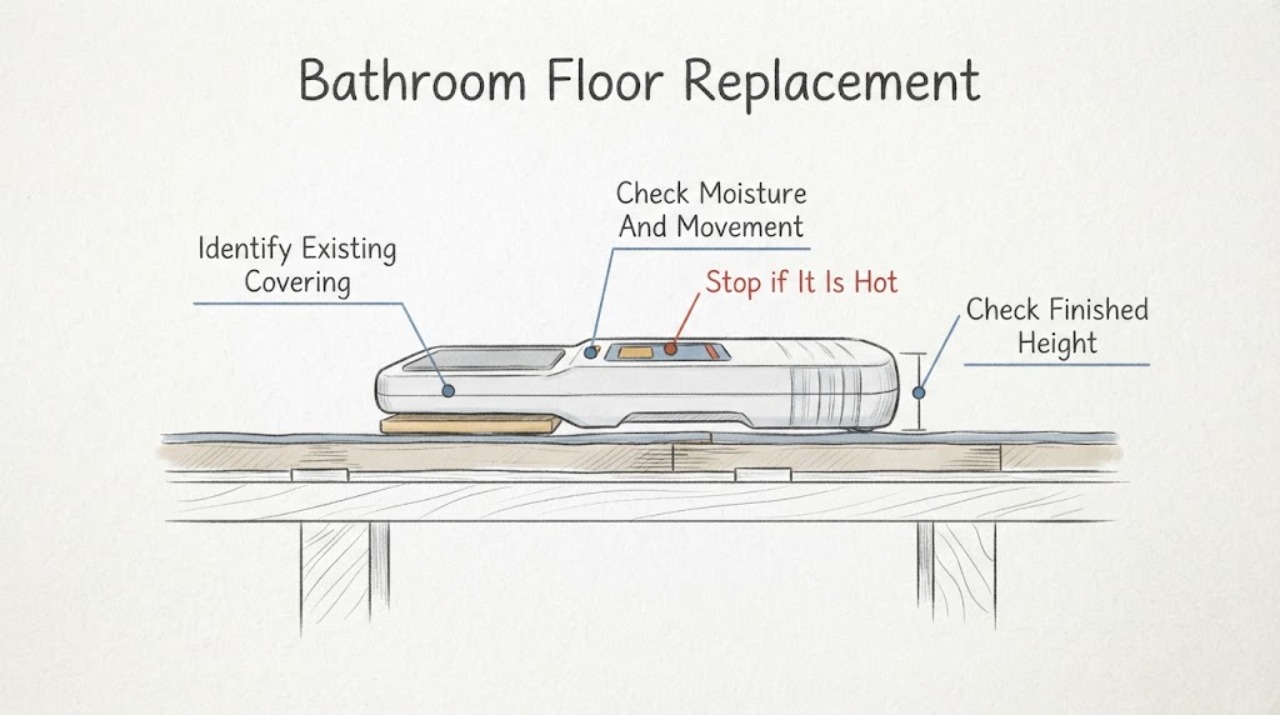
Work through in order
Diagnostic checks
Use only checks that match the exact appliance or system and its official guide.
-
Check 1
From a safe standing position, photograph the floor and identify the visible covering as ceramic or porcelain tile, natural stone, sheet or resilient flooring, laminate, or another material. Record loose edges, cracks, missing grout, peeling finish, buckling, and any area that sounds hollow when lightly tapped by hand without striking or prying.
Expected result: The surface is either intact and firmly bonded, or it has loose, cracked, hollow, peeling, or visibly deformed areas; the material may also remain uncertain.
Next step: Keep the surface intact and continue to the moisture and height checks. If the floor is loose, damaged, or of unknown resilient material, ask a qualified flooring or remodeling professional to assess it before demolition.
Why this matters
Why: A stable, known surface may support an overlay assessment. Loose or damaged areas need repair or removal planning, while an unknown resilient covering must not be disturbed until its material risk is evaluated.
-
Check 2
Inspect the floor perimeter, around the toilet, at the tub or shower entrance, and near the vanity for active dampness, recurring dark grout, swelling, staining, musty odor, soft spots, or movement under normal walking. Note whether the condition follows shower use or a plumbing event, but do not open the floor or plumbing to test it.
Expected result: The floor is dry and stable, or moisture, odor, swelling, softening, or movement is repeatable or worsening.
Next step: Stop finish work and arrange professional diagnosis if the area is wet, soft, moving, mold-affected, or linked to a leak. If it is dry and stable, document the result for the installer and continue with the clearance check.
Why this matters
Why: A repeatable moisture or movement pattern points to a leak, ventilation problem, substrate issue, or other condition that a new finish could conceal and worsen. A dry, stable result supports finish planning but does not prove waterproofing or structural adequacy.
-
Check 3
Measure and photograph the transitions at the bathroom doorway and nearby flooring, and inspect the clearances for the door, threshold, baseboard, and toilet without removing the toilet or trim. Ask the installer to account for the thickness of the proposed finish, adhesive, underlayment, and any leveling layer.
Expected result: The proposed build-up appears to preserve door swing, threshold continuity, trim fit, and fixture clearance, or the added height would create a conflict.
Next step: Have the installer provide a written build-up and transition plan before ordering material. Do not cut doors, move plumbing, or alter the toilet connection as an improvised workaround.
Why this matters
Why: An overlay can be technically bonded yet still fail as a renovation if the finished height blocks a door, creates a trip edge, traps trim, or changes the toilet connection. A height conflict favors planned removal or a different approved floor system.
-
Check 4
Compare the documented floor condition with the proposed installation method and product instructions: confirm that the existing surface is an allowed substrate, that it is clean and free of wax, polish, grease, dust, and loose material, and that any required primer, adhesive, leveling, movement, and edge details are specified.
Expected result: The proposed system explicitly accepts the existing substrate and its condition, or the installer cannot document how adhesion, flatness, moisture, and movement will be handled.
Next step: Proceed only with the manufacturer's written instructions and a qualified installer's scope. If the existing floor cannot meet those conditions, plan controlled removal and substrate repair instead of applying a new finish over it.
Why this matters
Why: Tile-over-tile is a system decision, not a shortcut based only on appearance. Missing preparation or compatibility details make debonding, cracking, lippage, or a concealed substrate defect more likely.
Use your observations
Decision map
Find the observation that best matches what you see, then follow the next safe action.
-
PATH 01Next step
What you see
The covering is known, firmly bonded, cleanable, dry, and free of cracks or movement, and the proposed build-up fits the room.
Do this next
Treat the floor as an overlay candidate only after the installer confirms substrate load, surface preparation, primer or adhesive, and edge and movement details.
Why this path and its safety boundary
Why it matters: The cosmetic problem may be solved without full demolition, but only the specified installation system—not the visual inspection alone—supports that choice.
-
PATH 02Next step
What you see
Tiles are loose, cracked, hollow, or the floor moves, buckles, or has soft areas.
Do this next
Do not cover the defect to improve its appearance; have the finish and substrate assessed as one assembly.
Why this path and its safety boundary
Why it matters: The observed movement or bond failure makes a new finish over the area unreliable and may indicate damage below the visible surface.
-
PATH 03Next step
What you see
There is active or recurring water, swelling, softening, mold, musty odor, or a condition that follows shower or plumbing use.
Do this next
Pause the finish replacement and address the water source and drying plan first.
Why this path and its safety boundary
Why it matters: A replacement surface would hide the moisture path and can leave the underlying material unable to dry; extensive or contaminated water damage needs professional help.
-
PATH 04Next step
What you see
The floor is older or of unknown resilient material, or the proposed work would sand, scrape, cut, grind, or otherwise disturb it.
Do this next
Stop demolition planning and treat the material as potentially hazardous until an accredited asbestos professional evaluates it.
Why this path and its safety boundary
Why it matters: Appearance alone cannot establish whether asbestos is present, and disturbing suspect flooring can release fibers.
Helpful context
Understand the symptom
The visible finish is only the top layer of a bathroom floor. A new finish will not correct a loose tile, a moving subfloor, a wet assembly, or damage below the surface. Start with photos and safe standing observations; do not pry up flooring or disconnect plumbing just to investigate.
There are two different renovation paths: preserve a sound existing surface and install a compatible new covering over it, or remove the finish so the substrate and moisture-control details can be repaired. The choice depends on the actual condition of the floor, the approved installation system, and whether the added thickness will interfere with doors, thresholds, trim, or bathroom fixtures.
An outdated appearance is a design problem only when the assembly is otherwise sound. If water damage, mold, movement, or an unknown resilient covering is present, resolve that condition before choosing a finish. Keep the bathroom out of service when the floor is unsafe or the water source is active.
Only after diagnosis
Potential parts
- tile-on-tile primer
Consider only when the existing surface is stable, clean, dry, and explicitly accepted by the selected installation system; primer cannot correct movement, moisture, or a weak substrate.
Confirm the existing floor material, the new covering, and the manufacturer's approved primer and adhesive system before purchase. - compatible tile adhesive
Consider only after the installer confirms that an overlay is appropriate and the surface preparation and tile size requirements are satisfied.
Match the adhesive to the substrate, covering, moisture exposure, and installation instructions; do not infer compatibility from a generic product name. - floor leveling material
Consider only if a qualified installer documents a flatness problem and selects a compatible repair or leveling system after moisture and substrate checks.
Verify the substrate, allowable thickness, drying requirements, and finished-height impact before use.
When checks do not resolve it
Need a professional?
Call a qualified flooring or bathroom remodeling professional when the floor is loose, cracked, moving, damp, mold-affected, structurally uncertain, or requires removal, leveling, waterproofing, fixture disconnection, or work on an unknown resilient covering.
Safety scope: Limit homeowner work to photos, measurements, ordinary walking observations, and reading product instructions. Do not sand, grind, scrape, cut, pry, remove the toilet, disconnect plumbing, or disturb suspect flooring as a diagnostic step.
Have this ready
- Give the professional photos, floor material and finish information, room dimensions, moisture history, location of movement or damage, transition and clearance measurements, recent work, and the proposed replacement material.
Common questions
FAQ
Can I put a new bathroom floor over the old one?
Sometimes. A tile-over-tile method requires a stable, clean, dry, firmly bonded existing surface, a compatible primer and adhesive system, enough load capacity, and acceptable finished height. Loose, cracked, damp, or unknown resilient flooring should be assessed before any overlay or removal.
Does an outdated finish mean I have to remove the entire floor?
Not necessarily. If the floor assembly is sound and the approved replacement system can be installed within the available height, an overlay may be possible. A professional should verify the substrate and transitions before work begins.
What should I do if the old bathroom floor might contain asbestos?
Do not sand, scrape, cut, grind, or remove it based on appearance. Leave the material undisturbed and contact a trained and accredited asbestos professional for evaluation before renovation.
When should a floor replacement wait because of moisture?
Wait when there is active or recurring water, swelling, softening, mold, or a musty odor. Fix and document the moisture source, dry the area, and have the substrate assessed before installing a new finish.
Read the exact guide
Official sources
- The Key to Mold Control is Moisture Control - InfographicU.S. Environmental Protection Agency · Indoor damp or wet surfaces, recurring leaks, mold, and extensive or contaminated water damage
- Protect Your Family from Exposures to AsbestosU.S. Environmental Protection Agency · Homeowners planning renovation or removal of damaged or unknown building materials, including flooring
- Tiling Over Existing Tiles: Fast, Durable & EfficientBostik · Bathroom tile renovation where existing tiles may be retained
- Cemfix Flex Method StatementDCP International · Ceramic tile installation and re-tiling where the existing substrate and tile assembly are being assessed
Community feedback
Share a repair observation
Share a plain-text repair observation. Accepted observations are published automatically; this page may take a moment to update.