
On this page
Start here
Quick answer
Do not pry up or cut out a bathroom floor threshold just because it looks worn. From a dry, standing position, document the transition height and edges, whether the door clears and latches normally, any visible moisture or soft-looking flooring, and whether the change catches a foot or mobility aid. A loose threshold, active leak, soft floor, visible mold, suspected asbestos-containing material, or a clear trip hazard is a reason to isolate the area and arrange professional bathroom-remodeling or plumbing assessment. A replacement must match the adjoining floor, door clearance, waterproofing, and any accessibility requirements; the appropriate design depends on the room and route, not on a generic part size.
Work through in order
Diagnostic checks
Use only checks that match the exact appliance or system and its official guide.
-
Check 1
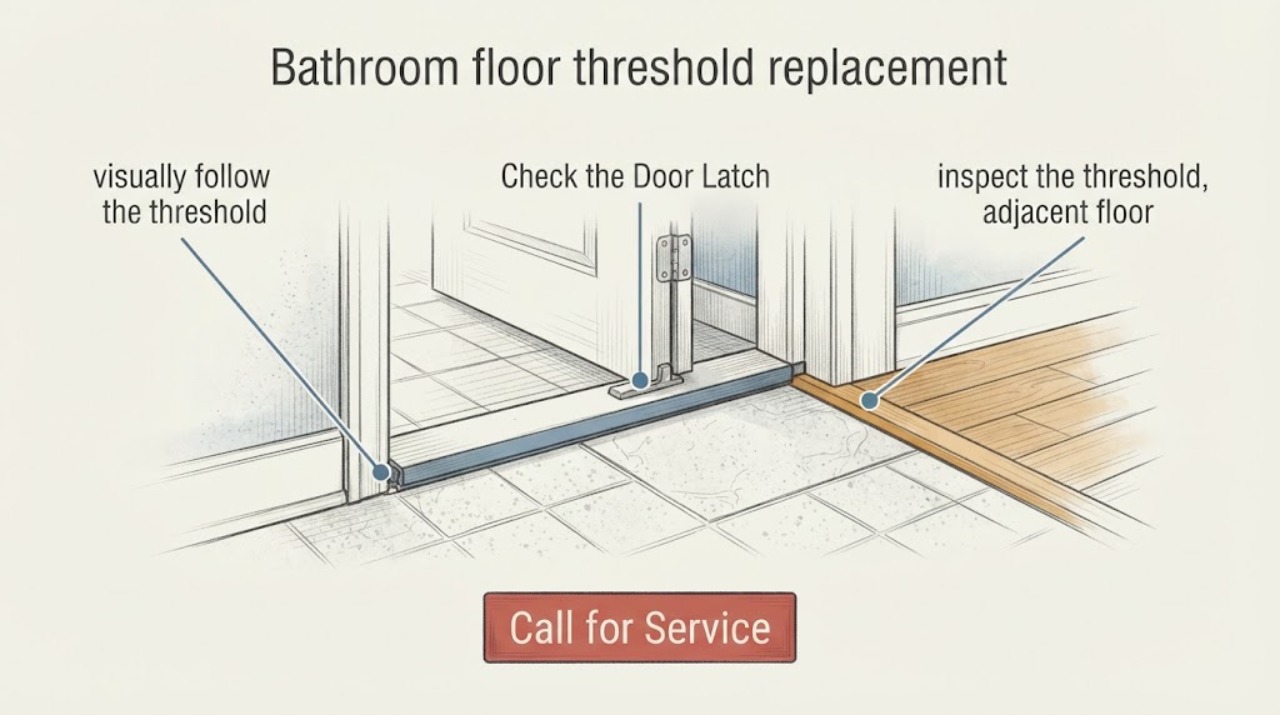
From a dry standing position at the doorway, visually follow the threshold from one adjoining floor to the other and note the raised edge, gap, chipped finish, uneven transition, or material that appears to have shifted. Do not press, lift, or probe it.
Expected result: Record whether the transition looks even and intact, has a localized chipped or open edge, or appears raised, separated, or tilted across a wider span.
Next step: Photograph the condition from both sides and tell a bathroom-remodeling professional exactly where the change starts and ends. Keep the area dry and avoid disturbing the material until it is assessed.
Stop if: Stop the inspection and keep people away from the area if the threshold is loose, the floor looks soft or collapsed, an edge catches a foot or mobility aid, or the area is wet. Arrange professional service.
Why this matters
Why: A small surface defect may be limited to the finish, while a broad separation, visible movement, or uneven height can indicate a substrate, moisture, or installation issue that a replacement part alone may not solve.
-
Check 2
With the floor dry and clear, operate the bathroom door through its normal range without force and observe the threshold and door relationship. Do not remove hinges, adjust the latch, or push against the threshold.
Expected result: Note whether the door opens and closes freely, rubs at the threshold, fails to latch, or leaves less clear passage than before; record whether the problem occurs in one direction or both.
Next step: Stop normal use if the door binds, cannot close safely, or traps someone; otherwise include the direction of swing and the observed clearance in a professional assessment request. Do not compensate by forcing the door or changing its hardware.
Stop if: Stop immediately if the door catches a person, the threshold shifts during normal door movement, or force would be needed. Isolate the doorway and call a qualified professional.
Why this matters
Why: Rubbing or lost clearance can follow a changed floor height, a shifted transition, or door/frame movement. A door that no longer latches may also leave the room less private or less usable, but the observation does not identify which component is at fault.
-
Check 3
From the doorway or another dry position, inspect the threshold, adjacent floor edges, baseboards, and the visible area near the bathroom entrance for darkening, staining, swollen finish, crumbling grout, dampness, or a musty odor. Do not touch, scrape, or open the floor.
Expected result: Classify the area as visibly dry with no odor, showing an old-looking stain, or currently damp with continuing droplets, spreading discoloration, soft-looking material, or visible mold-like growth.
Next step: If it is dry and stable, document the pattern and mention it in the quote request. If moisture is active, stop using the nearby fixture only if doing so is safe, contain access without touching the material, and arrange plumbing/remodeling assessment.
Stop if: Stop and keep occupants away if water is actively spreading, the floor is soft, there is visible mold-like growth, or any nearby electrical equipment could contact water. Escalate to an appropriate professional.
Why this matters
Why: A stain can be historical, but active dampness, soft-looking material, odor, or growth raises concern about an ongoing leak or moisture damage beneath the transition. Visual inspection cannot establish the source or extent.
-
Check 4
From a safe, dry position, look at the threshold as a person would approach the bathroom and note whether a normal step, shoe, walker, or wheelchair path would catch on the edge or lose usable maneuvering space. Do not repeatedly cross a visibly unsafe transition.
Expected result: Record whether the edge is easily crossed, requires a noticeable step, catches footwear or a mobility aid, or narrows the usable doorway when the door is open.
Next step: Mark or otherwise communicate the hazard without attaching anything to the threshold, use another safe route when available, and ask the professional to consider the user’s mobility needs, door swing, and applicable accessibility requirements.
Stop if: Stop use of the doorway if someone could trip, a mobility aid could tip, or the route cannot be used safely. Isolate the area and request prompt professional service.
Why this matters
Why: A transition that catches or restricts maneuvering is a safety and access concern even when it looks cosmetically minor. For an accessible route or facility, the applicable standards and existing conditions must be checked by the designer or qualified professional; requirements are not universal to every private bathroom.
-
Check 5
Review visible renovation history and compare the threshold with the adjoining floor surfaces without moving furniture or disturbing trim: note the floor materials on each side, any recent water event, prior repair, and whether the threshold problem appeared after a floor or door change.
Expected result: Record whether the transition joins tile to another material, follows a recent remodel or leak, or has an unknown older finish or adhesive beneath it.
Next step: Give the professional the photos, dates, floor materials, and any prior leak or remodel information. If the material may contain asbestos or is crumbling, leave it undisturbed and request qualified material assessment before renovation planning.
Stop if: Stop if investigating the history would require pulling trim, lifting flooring, scraping adhesive, or disturbing crumbling material. Isolate the area and use a trained professional for the assessment.
Why this matters
Why: Material changes and renovation history affect the transition detail and the risk of disturbing hidden materials. An older unknown floor or adhesive cannot be identified safely by appearance alone.
Use your observations
Decision map
Find the observation that best matches what you see, then follow the next safe action.
-
PATH 01Safety boundary
What you see
The threshold and adjoining floor look stable and dry, the door operates normally, and no one catches on the transition.
Do this next
Collect photos and the floor-material details and obtain a professional quote if replacement is still desired. Ask the installer to confirm the transition, door clearance, waterproofing approach, and applicable accessibility needs before selecting a material.
Why this path and its safety boundary
Safety stop: Do not begin removal merely because a replacement looks similar; stop if the assessment finds movement, moisture, or an unknown material.
-
PATH 02Safety boundary
What you see
The edge is loose, raised, visibly separated, or catches a foot or mobility aid.
Do this next
Keep the doorway clear, communicate the hazard to occupants, and arrange prompt bathroom-remodeling service to assess the substrate and transition as a system.
Why this path and its safety boundary
Safety stop: Do not step repeatedly over it, pry it up, or try to fasten it in place.
-
PATH 03Safety boundary
What you see
There is active water, a soft-looking floor, spreading stain, swollen finish, musty odor, or visible mold-like growth.
Do this next
Stop nearby fixture use if safe, isolate the area, and request qualified plumbing and remodeling assessment to locate and correct the moisture source before a threshold replacement.
Why this path and its safety boundary
Safety stop: Do not open the floor, disturb growth, or cover an active leak with a new transition.
-
PATH 04Safety boundary
What you see
The visible floor or adhesive is old, crumbling, or suspected to contain asbestos.
Do this next
Leave it alone and keep activity to a minimum in the area. Arrange assessment and any sampling or repair through a trained and accredited asbestos professional before renovation work.
Why this path and its safety boundary
Safety stop: Do not scrape, sand, drill, cut, sweep, or take a do-it-yourself sample.
-
PATH 05Safety boundary
What you see
The door binds, fails to latch, loses clearance, or the threshold affects an accessible route or mobility aid.
Do this next
Describe the door direction, clearance problem, and user needs to a qualified remodeling professional, who can coordinate the transition and door/frame assessment.
Why this path and its safety boundary
Safety stop: Do not force the door, alter its hardware, or declare a generic threshold dimension compliant without checking the applicable route and facility requirements.
Helpful context
Understand the symptom
What a threshold problem can mean
A bathroom threshold is the transition between floor surfaces and, in some layouts, the shower or wet-room edge. A raised or shifting-looking edge can be a finish problem, movement in the substrate, or evidence that water has reached material below the visible surface. Inspection from a dry location can narrow the next step, but it cannot confirm the condition of hidden waterproofing or structure. Keep the threshold intact while gathering that information.
Keep the inspection observational
Use ordinary lighting and a phone photo only if the area is dry and stable. Do not lift, pry, drill, cut, scrape, sand, or probe the threshold or floor. Do not treat grout touch-up as a cure for movement or a leak. The purpose of these checks is to give a qualified professional a clear description of the condition and its urgency.
Only after diagnosis
Potential parts
- tile spacer
Consider this category only if the professional confirms an intact tile transition that needs a compatible spacing detail; it is not a remedy for a loose threshold, wet substrate, or movement.
Confirm the exact adjoining tile system, joint detail, and installer-specified material before ordering; no generic fit is implied. - grout repair
This may be relevant only for an isolated grout defect after the substrate is confirmed dry and stable. It should not be used to conceal movement, an active leak, or a damaged transition.
Have the professional match the existing grout and joint conditions and confirm that repair is appropriate for the floor assembly. - flooring transition
A transition category is relevant only after the adjoining floor materials, substrate, moisture condition, door clearance, and desired accessibility outcome are known.
Verify dimensions, wet-area suitability, installation method, and applicable accessibility requirements with the installer; appearance alone does not establish compatibility.
When checks do not resolve it
Need a professional?
Call a qualified bathroom-remodeling professional when replacement is needed, the transition is loose or unsafe, the door no longer clears or latches, or the floor condition is uncertain. Involve a plumber when active water may be the source, and use a trained and accredited asbestos professional when older or crumbling material may be disturbed.
Have this ready
- Provide the threshold photos, the approximate location and extent of any gap or height change, door-swing and clearance observations, floor materials on both sides, moisture or odor history, recent renovation or leak dates, and any mobility or accessibility needs.
Common questions
FAQ
Can I replace a bathroom floor threshold without removing the floor?
Sometimes a professional can use an overlay or a localized transition detail, but that decision depends on the adjoining floor, substrate, moisture condition, door clearance, and any accessible-route requirements. Do not pry or cut the existing threshold to find out.
Is a small height difference automatically a code violation?
No single number applies to every private bathroom and every doorway. The U.S. Access Board guidance describes requirements for covered accessible routes and facilities, while shower type, alteration status, and local rules also matter. Have the professional assess the actual route and use.
Should I regrout a threshold that is cracking?
Not before the cause is understood. Cracking can be a finish defect, but it can also accompany movement or moisture. If the floor is soft, wet, stained, or visibly growing mold-like material, stop and arrange professional assessment instead of covering the joint.
What if the bathroom floor is old and I do not know what is under the threshold?
Leave the unknown material intact and do not scrape, sand, drill, cut, or sample it yourself. EPA guidance says suspect materials cannot be identified reliably by appearance and should be assessed by a trained and accredited asbestos professional when renovation could disturb them.
Read the exact guide
Official sources
- Chapter 6: Bathing RoomsU.S. Access Board · Relevant when the bathroom or shower is within a facility and scope covered by the ADA Standards; shower type and alteration context matter.
- Protect Your Family from Exposures to AsbestosU.S. Environmental Protection Agency · Relevant when an older or unknown floor, backing, or adhesive could be disturbed during threshold or floor work.
- Chapter 4: Entrances, Doors, and GatesU.S. Access Board · Use only when the bathroom doorway is part of a route or facility covered by the cited accessibility standards; the article does not treat these values as a universal residential rule.
Community feedback
Share a repair observation
Share a plain-text repair observation. Accepted observations are published automatically; this page may take a moment to update.