
On this page
Start here
Quick answer
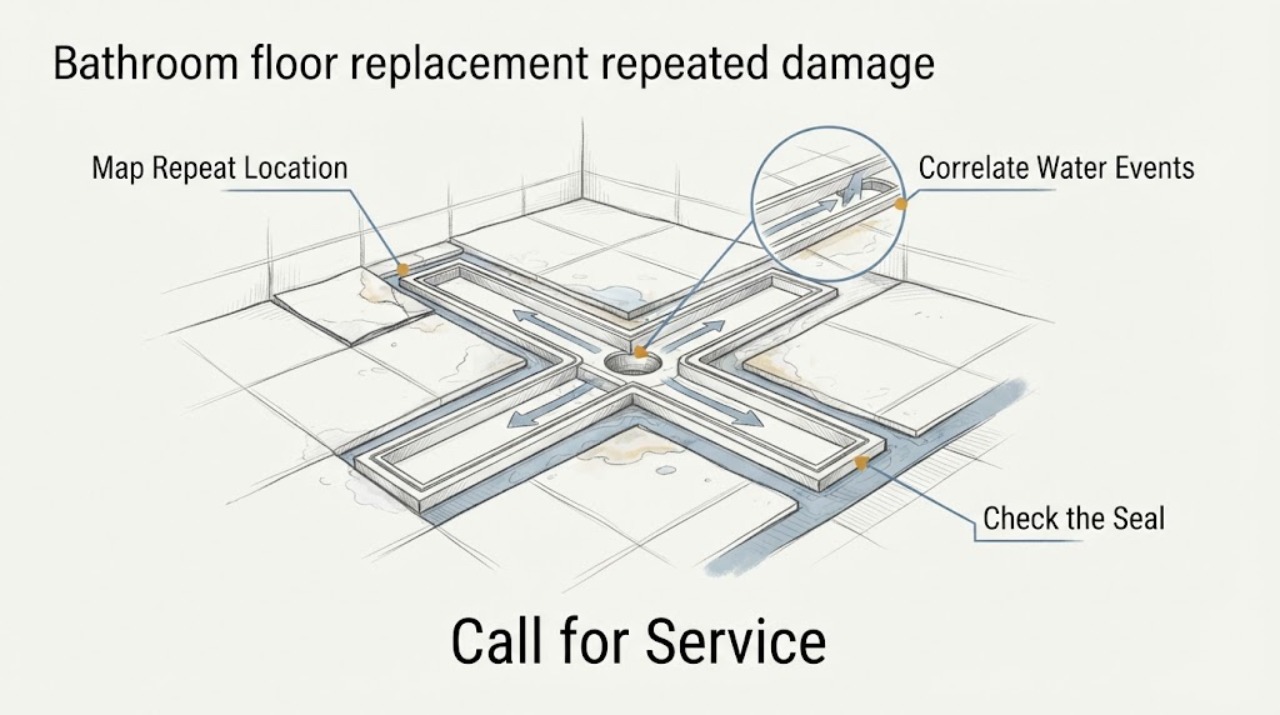
Repeated damage after a bathroom floor replacement is usually a moisture-management, movement, substrate, installation, or transition problem rather than a reason to replace the visible finish again. From safe dry positions, document where damage returns, whether it follows a shower, toilet, sink, or plumbing event, grout or joint opening, hollow or lifted areas, staining below, and the timing after cleaning or use. Do not remove tile, cut the floor, probe the substrate, or attempt structural repair. Keep water off the affected area when practical and arrange a bathroom-remodeling or qualified plumbing inspection to identify the source and rebuild the water-management system before selecting tile, grout, or transition materials.
Before you begin
Safety first
- This article provides observation-only guidance. Professionals determine source control, substrate, waterproofing, demolition, structural scope, and replacement materials.
Work through in order
Diagnostic checks
Use only checks that match the exact appliance or system and its official guide.
-
Check 1
From a dry position, photograph the full bathroom floor and mark where damage returned relative to the shower, tub, toilet, sink, walls, doorway, and floor below; do not lift tile or scrape joints.
Expected result: Damage may cluster at a wet fixture, perimeter, doorway, isolated tile, or broad area and may include cracked grout, lifted tile, staining, or soft-looking finishes.
Next step: Give the marked photos to a remodeling professional and plumber as appropriate, and avoid wetting the affected area.
Stop if: Stop for standing water, soft floor, active leakage, exposed substrate, or any need to remove flooring or probe beneath it.
Why this matters
Why: The pattern helps distinguish a localized wetting path from movement or a broader assembly issue, but cannot prove the cause.
-
Check 2
Record whether the damage appears after showering, bathing, toilet use, sink use, cleaning, heavy rain, or no identifiable event; inspect adjacent walls and the room below only from safe accessible areas.
Expected result: The pattern may follow one fixture, cleaning water, rain, recurring humidity, or remain unrelated to visible use.
Next step: Share the timeline and photos before scheduling replacement work; keep water away from the damaged area where practical.
Stop if: Stop for ceiling staining below, active water, electrical contact, or any attempt to open a wall or ceiling to trace it.
Why this matters
Why: Timing narrows which plumbing, enclosure, ventilation, or building-envelope professional should investigate, but water can travel away from its entry point.
-
Check 3
Visually compare grout lines, movement joints, baseboard edges, thresholds, and transitions with surrounding areas; do not press tiles, remove caulk, or test adhesion by tapping.
Expected result: Joints may be open, discolored, cracked in a line, missing at an edge, or intact while tiles are chipped, lifted, or separated.
Next step: Photograph interfaces and ask the remodeler to evaluate waterproofing, movement accommodation, substrate, and transition design before specifying materials.
Stop if: Stop for loose flooring, sharp edges, a trip hazard, or any need to remove finish material.
Why this matters
Why: Joint or transition recurrence can indicate water entry or movement at an interface; intact joints do not rule out hidden moisture or substrate movement.
-
Check 4
From accessible safe locations, look for staining, odor, peeling paint, ceiling damage, or humidity in the room below and record prior repairs, dates, materials, and warranty paperwork; do not enter a damaged cavity.
Expected result: The room below may be dry, show old staining, show fresh moisture, or be inaccessible.
Next step: Provide the record to the remodeler and any plumber or water-damage professional, and keep occupants away from unsafe areas.
Stop if: Stop for sagging ceiling, mold-like material, sewage, active flow, or structural uncertainty.
Why this matters
Why: Damage below increases urgency and suggests the professional should investigate the entire moisture path rather than replace a surface alone.
Use your observations
Decision map
Find the observation that best matches what you see, then follow the next safe action.
-
PATH 01Safety boundary
What you see
Is there active water, fresh staining, soft flooring, or damage below the bathroom?
Do this next
Stop replacement work, limit water use, and arrange prompt plumbing and water-damage assessment before remodeling.
Why this path and its safety boundary
Safety stop: Do not remove tile, cut the floor, or open the ceiling yourself.
-
PATH 02Safety boundary
What you see
Does damage recur after one fixture, shower, cleaning, rain, or a doorway transition?
Do this next
Tell the appropriate professional the timing and location and request source-control and interface inspection before replacement.
Why this path and its safety boundary
Safety stop: Do not seal over recurring damage or assume grout alone is the cause.
-
PATH 03Safety boundary
What you see
Are tiles loose, lifted, sharp, missing, or creating a trip hazard?
Do this next
Keep people away from the area and arrange prompt remodeling assessment; use a safe alternate route if available.
Why this path and its safety boundary
Safety stop: Do not load-test, pry, tap, or reset flooring.
-
PATH 04Safety boundary
What you see
Is the prior installation method, waterproofing, substrate, or material unknown?
Do this next
Request an inspection and written scope before buying tile, grout, or transitions.
Why this path and its safety boundary
Safety stop: Do not guess compatibility or begin demolition based on appearance alone.
Helpful context
Understand the symptom
Repeated surface failure is a clue, not a diagnosis
A replacement floor can be damaged again by a continuing leak, moisture entering the subfloor, movement, inadequate substrate preparation, failed joints, or a transition that concentrates stress. The visible tile or grout may be the last part of the assembly to show the problem. EPA bathroom-remodeling guidance says leaks and condensation should be addressed, wet walls should prevent water from penetrating cavities, and flooring should protect the subfloor and space below.
Find the pattern before choosing finish materials
Map the returning damage against wet fixtures, floor edges, walls, thresholds, and the room below. Repeated damage at a shower perimeter is different from damage below a toilet or at a doorway. A visual pattern can guide the professional, but it cannot establish waterproofing or structural condition without opening the assembly under a controlled plan.
Plan source control and rebuild together
EPA notes that moisture entering cavities can lead to mold, rot, structural damage, and finish failure, and that water problems should be corrected before other remodeling. A remodeler and, when indicated, a plumber should agree on source control, substrate condition, waterproofing, finish, and transitions before work begins.
Only after diagnosis
Potential parts
- tile-spacer
Consider this category only after the remodeler confirms the tile layout and substrate are ready for installation.
Match the selected tile, joint design, layout, and installation system; spacers cannot correct movement or moisture problems. - grout-repair
Consider this category only when the moisture source and movement cause are resolved and the professional confirms a localized joint repair is appropriate.
Verify tile, joint, exposure, and manufacturer instructions; do not use grout to conceal active movement or water entry. - flooring-transition
Consider this category only after finished-floor heights, doorway movement, and moisture boundaries are established in the remodel scope.
Confirm adjacent materials, height, wet-area exposure, and secure fastening with the remodeler.
When checks do not resolve it
Need a professional?
Arrange a bathroom-remodeling assessment for repeated floor damage before another replacement. Add prompt plumbing or water-damage service for active water, fresh staining, soft flooring, damage below, odor, mold-like material, or suspected fixture leaks.
Safety scope: This article provides observation-only guidance. Professionals determine source control, substrate, waterproofing, demolition, structural scope, and replacement materials.
Have this ready
- Marked photos showing recurrence location and interfaces
- Timing after shower, fixture use, cleaning, rain, or no event
- Grout, tile, transition, wall, room-below, and odor observations
- Prior materials, installation method, repairs, dates, and warranty records
- Any active water, trip hazard, access or occupancy limitation
Common questions
FAQ
Why does a bathroom floor fail again after replacement?
Possible causes include an unresolved leak, moisture in the substrate, movement, installation or joint problems, and a transition issue. Document the pattern and water timing, then have the assembly assessed before replacing the finish again.
Should I regrout recurring cracks?
Not before the source and movement are assessed. Grout may be a symptom of moisture or movement, and covering it can delay the needed repair.
What should I save before a remodel quote?
Save marked photos, recurrence dates, fixture and rain timing, room-below observations, prior material and waterproofing records, repair invoices, and warranty information.
When is repeated floor damage urgent?
Active water, soft or loose flooring, fresh staining below, a trip hazard, sewage, mold-like material, or electrical contact warrants prompt professional plumbing, water-damage, or remodeling assessment.
Read the exact guide
Official sources
- Remodeling Your Home and Indoor Air QualityU.S. Environmental Protection Agency · Supports fixing leaks and condensation, preventing water penetration into cavities, and protecting the subfloor before finish decisions.
- Mold Course Chapter 9: PreventionU.S. Environmental Protection Agency · Supports prompt investigation of bathroom water damage, hidden moisture, and professional escalation when a recurring moisture source is unresolved.
Community feedback
Share a repair observation
Share a plain-text repair observation. Accepted observations are published automatically; this page may take a moment to update.