
On this page
Start here
Quick answer
A cracked bathroom floor tile may be a surface defect, movement in the tile assembly, or a sign of moisture or subfloor movement. Start with safe observation: map the crack, look for tile or grout movement, note soft or uneven areas without pressing hard, and check for moisture or plumbing-related timing. Keep the area dry and isolate a trip hazard. Do not lift tile, drill, pry, cut, grind, open the floor, remove fixtures, or attempt plumbing or structural repair. If the floor moves, feels soft, stays wet, spreads quickly, leaks, or affects a toilet or other fixture, arrange professional bathroom-floor and plumbing assessment before any cosmetic repair.
Work through in order
Diagnostic checks
Use only checks that match the exact appliance or system and its official guide.
-
Check 1
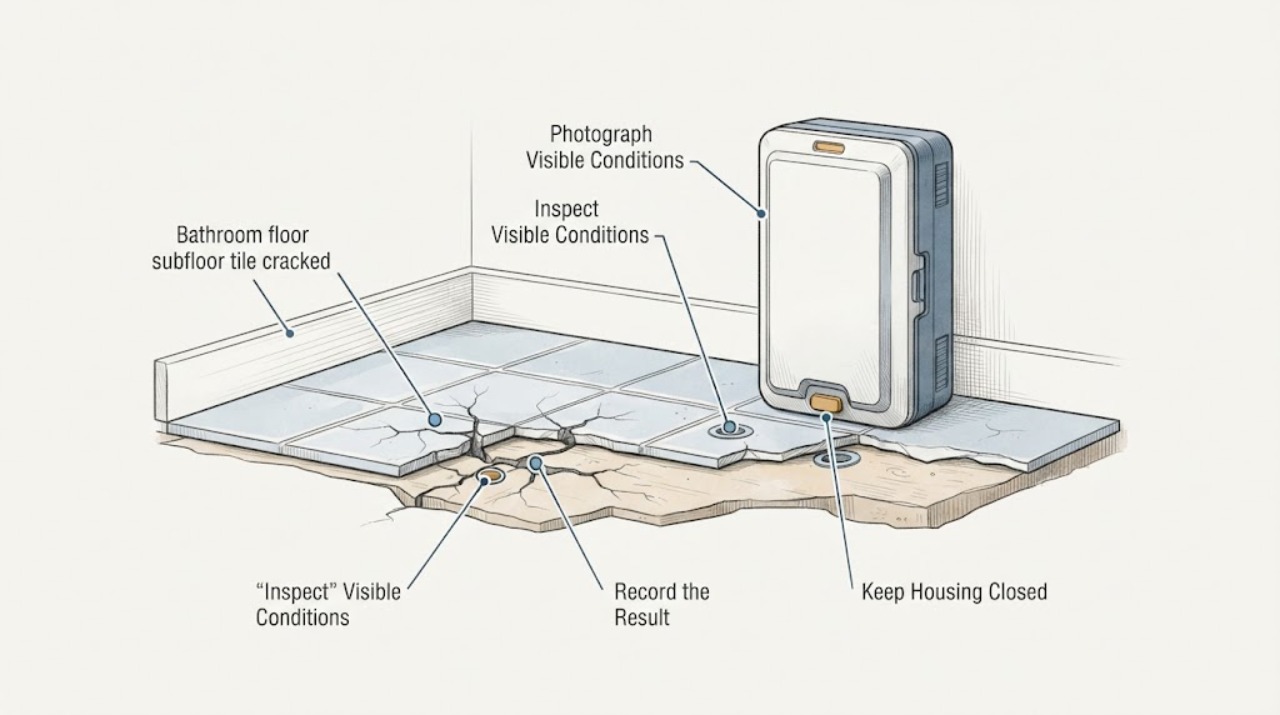
Photograph and map the visible crack from a dry standing position, without scraping, widening, lifting, or pressing the tile or grout.
Expected result: Record whether the crack is within one tile, crosses several tiles or grout joints, follows a doorway or fixture line, branches, or has changed since it was first noticed.
Next step: Save dated photos, mark the visible perimeter with removable tape only if it will not contact wet or damaged material, and request flooring assessment if the pattern is spreading or crosses multiple tiles.
Stop if: Stop if the tile is sharp, loose, rocking, wet, or likely to break, or if documenting it requires kneeling on an unstable area.
Why this matters
Why: A single isolated line can have a different cause from a crack pattern that crosses the assembly or is expanding. The pattern is a lead for a professional assessment, not proof of a failed subfloor.
-
Check 2
Observe the floor while walking normally around—not directly over—the crack; do not deliberately load, bounce, pry, or tap the tile.
Expected result: Note any visible tile movement, a soft or yielding area, a change in level, hollow-looking separation, new grout gaps, or a creaking sound during ordinary safe use.
Next step: Keep traffic off the affected area, photograph the boundary, and arrange a qualified flooring or remodeling inspection; ask a plumber to assess it if the area relates to a fixture or water event.
Stop if: Stop walking the area if it yields, shifts, becomes a trip edge, or appears unsafe. Do not lift the tile or probe the subfloor.
Why this matters
Why: Movement, softness, or a changing level raises concern about the tile assembly or support below it and makes a cosmetic grout or repair-kit approach unsuitable until assessed.
-
Check 3
Look for moisture clues from accessible, dry surfaces around the crack, nearby toilet, tub, shower, vanity, supply connections, and room edges without removing fixtures, sealant, flooring, or baseboards.
Expected result: Record visible dampness, staining, swollen trim, recurring puddles, musty odor, deteriorating grout, or whether the crack appears after bathing, cleaning, or a plumbing event.
Next step: Stop using the affected fixture if doing so is necessary to avoid more water, document the timing, and request qualified plumbing and water-damage assessment before cosmetic work.
Stop if: Do not touch contaminated water, mold, wet electrical equipment, or concealed plumbing. Stop if moisture is near an outlet or other electrical component.
Why this matters
Why: A timing relationship or moisture trace suggests an active water source or drying problem may be contributing to the floor condition. A dry surface does not rule out concealed moisture.
-
Check 4
Check the crack's location relative to the room perimeter, door threshold, plumbing fixtures, walls, and any visible transition without moving furniture or removing trim.
Expected result: Note whether the line terminates at a wall or doorway, surrounds a fixture, aligns with a grout joint, or is accompanied by a gap or raised edge at the room boundary.
Next step: Provide a simple room sketch and photos to the flooring professional and mention any related leak, remodel, or fixture history.
Stop if: Do not remove a toilet, vanity, baseboard, threshold, or floor covering to trace the line.
Why this matters
Why: Location helps the professional compare a localized finish problem with movement or moisture near a fixture, transition, or floor edge. It cannot establish the condition of hidden framing or a subfloor.
-
Check 5
Assess the immediate walking risk from a safe position and keep children, pets, and bare feet away from the damaged area.
Expected result: Note sharp edges, loose fragments, raised tile, slippery moisture, an enlarging gap, or a route that forces people to step over the crack.
Next step: Use a temporary visual barrier or keep the room out of service without fastening, gluing, caulking, or covering the damaged floor; arrange professional repair.
Stop if: Stop using the room if the floor feels unstable, the hazard cannot be isolated, or water is actively entering the area.
Why this matters
Why: A sharp, loose, wet, or raised surface is an immediate trip or cut hazard independent of the underlying cause. CPSC treats flooring slips and trips as a recognized consumer-safety concern.
Use your observations
Decision map
Find the observation that best matches what you see, then follow the next safe action.
-
PATH 01Safety boundary
What you see
The crack is isolated, dry, stable during ordinary nearby walking, and has no visible moisture, movement, or trip edge.
Do this next
Document it and arrange a flooring professional's assessment before choosing a conditional surface-repair material; monitor for pattern or moisture changes.
Why this path and its safety boundary
Safety stop: Do not assume a cosmetic kit addresses the subfloor or use a filler over a moving, wet, or loose assembly.
-
PATH 02Safety boundary
What you see
The crack crosses several tiles or grout joints, is expanding, or is accompanied by rocking, softness, a level change, or creaking.
Do this next
Keep traffic away and request a qualified flooring or remodeling inspection for the tile assembly and support below it.
Why this path and its safety boundary
Safety stop: Do not lift, pry, drill, cut, grind, or demolish the floor to investigate.
-
PATH 03Safety boundary
What you see
Moisture, staining, odor, swollen material, recurring puddles, or a fixture-related timing pattern is present.
Do this next
Request prompt plumbing and water-damage assessment and provide the observed location and timing before any tile repair.
Why this path and its safety boundary
Safety stop: Do not open the floor, remove a fixture, disturb mold, or perform a plumbing repipe or concealed-line repair.
-
PATH 04Safety boundary
What you see
The area is sharp, loose, raised, slippery, unstable, or creates an unavoidable walking hazard.
Do this next
Keep people and pets out, isolate the room or route without attaching anything to the floor, and arrange professional service.
Why this path and its safety boundary
Safety stop: Do not tape, glue, caulk, or press the tile back into place as a substitute for assessment.
-
PATH 05Safety boundary
What you see
Water is near an outlet, fixture wiring, or other electrical equipment, or there is active leaking or rapid damage.
Do this next
Leave the area and contact qualified emergency plumbing, electrical, or water-damage help as appropriate.
Why this path and its safety boundary
Safety stop: Do not touch wet electrical components, enter standing water, or continue inspecting.
Helpful context
Understand the symptom
A tile crack does not identify the layer that failed
The visible finish can crack because of impact, grout or mortar deterioration, movement in the tile assembly, moisture, or movement below it. A bathroom floor can conceal plumbing and moisture-sensitive materials, so a surface-only patch can hide an active cause. The Building America Solution Center notes that unmanaged interior water can contribute to mold, air-quality problems, and structural damage; it also treats moisture management behind wet-area assemblies as a design concern rather than a casual surface repair.
Keep the inspection non-destructive
Use a flashlight and photographs from a normal standing position. Do not turn a visual check into a demolition or plumbing exercise. EPA guidance recommends fixing water problems and drying affected materials, while contaminated water or uncertain cleanup conditions may require a professional.
Only after diagnosis
Potential parts
- tile-repair-kit
Consider this category only if a qualified flooring professional confirms the crack is a stable, localized surface defect with no movement, moisture, or support concern.
Match the tile material, color, finish, and use area; a surface kit is not a substitute for subfloor, waterproofing, or structural assessment. - grout-repair
Consider this only after the professional confirms that the visible problem is limited to grout and that the surrounding tile and support are stable and dry.
Confirm joint width, grout type, exposure, and manufacturer directions; do not use it to bridge a moving crack or hide active moisture. - silicone-caulk
Consider this only for a professional-approved perimeter or fixture-joint condition after the water source and floor movement have been addressed; it is not a structural or tile-crack repair.
Confirm the exact joint, substrate, wet-area use, and existing sealant compatibility; do not seal over mold, wet material, or an unknown leak.
When checks do not resolve it
Need a professional?
Arrange flooring or bathroom-remodeling service when the crack crosses tiles, the floor moves or feels soft, the pattern is expanding, the area is unstable, or a subfloor or waterproofing issue is possible. Add qualified plumbing or water-damage service for active leaks, fixture-related moisture, staining, odor, or wet building material.
Have this ready
- Provide dated photos, a room sketch, crack pattern and location, movement or soft-point observations, moisture timing, nearby fixture history, trip-risk notes, and any recent leak or remodeling event. Do not remove finishes to prepare for the visit.
Common questions
FAQ
Does one cracked bathroom tile prove that the subfloor failed?
No. The crack may be limited to the finish, but movement, moisture, a spreading pattern, or softness increases concern about the tile assembly or support below it. A professional must distinguish those possibilities.
Can I replace or lift the cracked tile to inspect below it?
Not within this observation-only guidance. Do not lift, pry, drill, cut, or demolish the floor. Photograph what is visible and request flooring or bathroom-remodeling assessment.
When is a plumbing inspection needed?
Arrange one when the crack is associated with recurring wetness, staining, odor, a nearby fixture, a recent leak, or water that appears to be entering the floor. Stop using the affected fixture if needed to prevent more water and obtain qualified help.
Can I cover the crack with grout or caulk for now?
Do not use a cosmetic product to hide movement, active moisture, mold, or an unstable edge. A professional can recommend a conditional surface material only after the floor is confirmed stable and dry.
Read the exact guide
Official sources
- A Brief Guide to Mold, Moisture and Your HomeU.S. Environmental Protection Agency · Setting a stop point when a cracked bathroom floor is accompanied by moisture, odor, or mold
- Cement Board Installed behind Tile and Panel Tub and Shower EnclosuresU.S. Department of Energy Building America Solution Center · Explaining why moisture or support concerns beneath a bathroom tile surface need professional assessment
- Flooring (Slips, Trips, and Falls)U.S. Consumer Product Safety Commission · Explaining why sharp, raised, loose, or slippery cracked flooring should be isolated
Community feedback
Share a repair observation
Share a plain-text repair observation. Accepted observations are published automatically; this page may take a moment to update.