
On this page
Start here
Quick answer
A crack that stays in a concrete driveway control joint can be the joint doing its intended job of guiding movement, so it is not automatically a structural failure. From safe ground, check whether the crack follows the joint, whether it is widening or branching, whether either slab is higher or lower, and whether water or traffic makes the area unsafe. A stable joint-only line is a different problem from random cracking that leaves the joint or a joint with settlement, washout, spalling, or a trip edge. Do not cut, excavate, grind, inject, pry, drill, or attempt a structural repair. Keep people and vehicles away from a raised, sinking, rocking, rapidly changing, eroded, or trip-prone area and arrange a qualified concrete assessment.
Work through in order
Diagnostic checks
Use only checks that match the exact appliance or system and its official guide.
-
Check 1
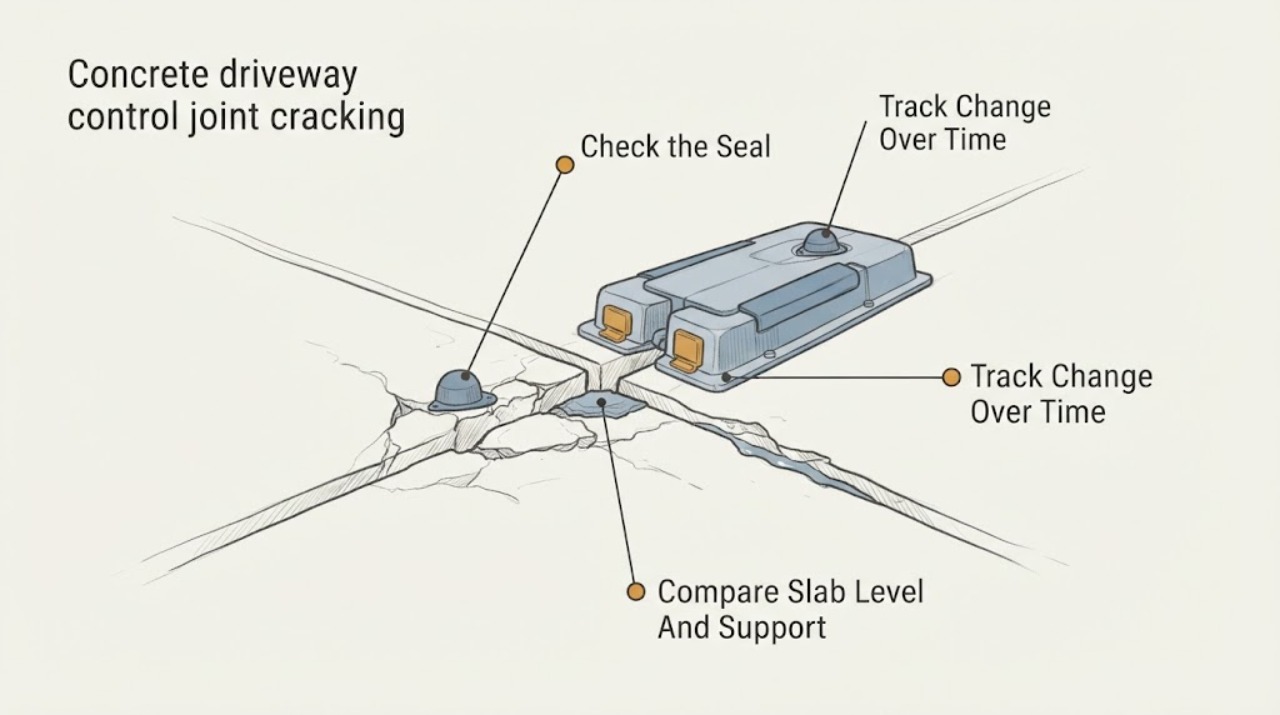
From level, stable ground, photograph the full control joint and nearby slab area without stepping onto an unstable edge. Note whether the visible crack stays centered in the control joint or leaves it, branches, or crosses the slab.
Expected result: A line that remains along the joint is a joint-related pattern; a crack that leaves the joint or forms a wider network is a different distress pattern that needs closer professional review.
Next step: Save the image with the date and location and give it to a qualified concrete professional. Do not cut or widen the crack to inspect it.
Stop if: Stop and keep people away if the edge is sharp or loose, the slab is rocking, or the crack presents an immediate trip or wheel hazard.
Why this matters
Why: The control joint is intended to guide concrete movement, but a crack outside that plane can indicate broader slab movement or support concerns rather than a joint-only opening.
-
Check 2
Compare dated photographs from the same safe viewpoint, or begin a dated photo record, to observe the joint opening, new branches, edge spalling, and discoloration through ordinary weather. Do not probe the joint or deliberately load it.
Expected result: A stable appearance differs from a visibly widening, branching, spalling, or rapidly changing joint line.
Next step: Share the timeline and weather context with the concrete professional; avoid filling, grinding, or injecting the opening before the cause and surface condition are assessed.
Stop if: Stop observation and isolate the area if the change is rapid, fragments are loosening, or a slab edge can catch a foot or tire.
Why this matters
Why: A stable joint pattern may be suitable for scheduled assessment, while visible progression indicates active movement or deterioration and should be prioritized for professional diagnosis.
-
Check 3
From the side and from a safe distance, visually compare the two slab surfaces at the control joint and at the driveway or garage transition. Note any raised edge, sunken side, rocking appearance, or visible gap beneath an edge without stepping on it to test movement.
Expected result: Surfaces that appear level and stable are different from a visible vertical offset, settlement, rocking slab, or void beneath an edge.
Next step: Keep vehicles off the affected section and provide photos plus the transition location to a qualified concrete professional for an on-site assessment.
Stop if: Stop and isolate immediately if the slab rocks, the height difference can trip or catch a wheel, the driveway is sinking, or the route is needed for emergency access.
Why this matters
Why: Vertical offset or loss of support can make this a safety and support problem, not just a surface crack.
-
Check 4
After ordinary rainfall, observe from a safe dry position whether water ponds at the control joint, follows the opening, flows toward an edge, or leaves visible soil washout or a void. Do not dig, redirect water by altering the slab, or inject material.
Expected result: No visible concentration is different from recurring ponding, water tracking, exposed soil, erosion, or a growing gap at the joint.
Next step: Photograph the water path and weather conditions and ask a professional to assess drainage and support together with the concrete.
Stop if: Stop if the surface is slick, water is undermining an edge, a void is expanding, or runoff reaches a foundation, utility area, or public path.
Why this matters
Why: Water concentration or washout can contribute to support loss and can explain why a joint-related opening is changing; the surface observation alone cannot establish the hidden cause.
-
Check 5
From outside the traffic path, observe whether the control joint lies in a tire track, walking route, garage threshold, or access route and whether the edge catches a shoe or could catch a wheel. Do not drive over the area as a test.
Expected result: A joint outside normal traffic with no sharp or offset edge has a different urgency from a raised, sunken, loose, or spalled edge in a vehicle, pedestrian, or emergency route.
Next step: Use visible barriers or another safe means to keep people and vehicles clear, then tell the professional exactly where the hazard intersects the route.
Stop if: Stop and isolate the route immediately if someone could trip, a tire could catch, the slab is unstable, or emergency access is obstructed.
Why this matters
Why: Location and edge condition can make a modest-looking crack an immediate access hazard even when its structural cause is uncertain.
Use your observations
Decision map
Find the observation that best matches what you see, then follow the next safe action.
-
PATH 01Safety boundary
What you see
The slab is raised, sunken, rocking, rapidly changing, or unsafe for people or vehicles.
Do this next
Isolate the area from a safe position and request a qualified concrete professional; do not attempt a structural repair or further testing.
Why this path and its safety boundary
Why it matters: The condition is an access or support concern, regardless of whether the visible line follows a control joint.
Safety stop: Keep people and vehicles away until the area has been assessed.
-
PATH 02Safety boundary
What you see
Water tracks through the joint, ponding recurs, or soil washout or a void is visible.
Do this next
Document the water path and arrange professional assessment of drainage and slab support together.
Why this path and its safety boundary
Why it matters: Drainage or support loss may be contributing to the joint distress, so surface sealing alone may not address the cause.
Safety stop: Do not dig, inject, redirect runoff by changing the slab, or conceal the opening before assessment.
-
PATH 03Safety boundary
What you see
The crack remains a stable, joint-only line with no visible offset, washout, or access hazard.
Do this next
Keep a dated photo record and seek routine professional advice before choosing any conditional joint or surface treatment.
Why this path and its safety boundary
Why it matters: The joint may be functioning as a planned movement line, although its condition and exposure still determine whether a sealant is appropriate.
Safety stop: Do not treat stability in one photograph as proof that hidden support or drainage problems are absent.
-
PATH 04Safety boundary
What you see
The crack leaves the control joint, branches across the slab, or shows widespread spalling or progression.
Do this next
Prioritize a qualified concrete assessment and provide dated photographs, water observations, and traffic impact.
Why this path and its safety boundary
Why it matters: The pattern is broader than a joint-only opening and needs an on-site diagnosis before a surface product is selected.
Safety stop: Do not use filler, grinding, cutting, or injection to conceal the pattern.
Helpful context
Understand the symptom
A control joint is not the same as a random crack
Concrete joints create a planned weak plane so shrinkage and temperature movement are more likely to form a controlled line. A visible line at the control joint therefore needs context: a tight, stable joint-only opening is different from a widening crack that leaves the joint, branches across the slab, offsets the slabs, or is accompanied by water loss and settlement. The location and pattern are more informative than the word crack by itself.
Document the condition without loading the slab
Use dated photographs and observations from a safe, stable location rather than trying to prove the cause by loading, probing, cutting, or opening the concrete. Record the joint location, whether the opening changes, any vertical offset or spalling, and the surrounding driveway or garage transition. These observations help a qualified concrete professional decide whether the concern is routine joint maintenance, movement or support loss, drainage-related distress, or an access hazard.
When a joint crack needs prompt service
If the slab is moving under ordinary foot access, a vehicle could catch an edge, a void or washout is visible, water is undermining the driveway, or the condition is changing quickly, isolate the area and request professional help. Do not make a temporary structural repair or use filler, grinding, cutting, or injection to conceal an active movement pattern.
Safety boundary
Stop conditions
- Stop and isolate the area for a raised, sunken, rocking, rapidly changing, eroded, loose, or trip-prone slab edge.
- Do not cut, excavate, grind, inject, pry, drill, or load-test the concrete as a diagnostic step.
- Keep vehicles and pedestrians away when a tire, foot, or emergency route could catch the damaged edge.
- Do not use filler or sealer to conceal active movement, settlement, washout, or an unresolved support problem.
Only after diagnosis
Potential parts
- concrete crack filler
Only consider a filler after a qualified professional confirms that the joint or surface is stable and the product is appropriate for the observed opening and exposure.
Joint movement, width, moisture, edge condition, and local repair requirements vary; do not use filler to hide active movement, settlement, or a safety hazard. - concrete sealer
Only consider sealing after the cause, moisture condition, and joint function have been assessed and a professional confirms a compatible use.
A sealer is not a structural repair and may be unsuitable where the joint is moving, wet, offset, spalled, or unsupported. - concrete moisture meter
A moisture reading can be supplemental information for a professional assessment when drainage or recurring wetness is suspected.
Readings depend on instrument and surface conditions and do not by themselves diagnose settlement, hidden voids, or joint failure.
When checks do not resolve it
Need a professional?
Call a qualified concrete professional when the joint is widening or spalling, the crack leaves the control joint, either slab has a vertical offset, settlement or washout is visible, or the driveway becomes a pedestrian, vehicle, or emergency-access hazard.
Have this ready
- The driveway location and the control-joint layout
- Dated photos showing whether the crack follows the joint or branches away
- Any visible progression, spalling, offset, rocking, settlement, or void
- Rainfall, ponding, drainage, soil washout, or water-tracking observations
- Whether the affected area is in a vehicle, walking, garage, or emergency-access route
Common questions
FAQ
Is cracking along a concrete driveway control joint automatically a structural failure?
No. A control joint is intended to guide movement, so a stable joint-only line can be different from cracking that leaves the joint, widens, offsets the slabs, or shows support or drainage distress. A professional should assess uncertain or changing conditions.
Should I fill or cut open a cracked control joint?
Do not cut, grind, widen, inject, or probe it as a DIY diagnostic or repair. Record safe, dated observations and let a qualified concrete professional determine whether any treatment is suitable.
What makes a control joint crack urgent?
A raised or sunken edge, rocking slab, rapid change, loose or spalled concrete, washout or a growing void, recurring water concentration, or a trip, wheel, or emergency-access hazard warrants isolating the area and arranging professional help.
What information should I provide to a concrete professional?
Share the control-joint location, dated photos, whether the crack follows the joint or branches away, any progression or spalling, vertical offset or settlement, rainfall and drainage observations, and affected traffic or walking routes.
Read the exact guide
Official sources
- Full-Depth RepairsFederal Highway Administration · Supports escalating medium or high-severity cracking, working cracks, support loss, faulting, blowups, and safety hazards for professional assessment.
- Concrete Pavement JointsFederal Highway Administration · Supports explaining why control joints guide shrinkage and thermal movement and why joint openings, faulting, spalling, and water-related distress need context.
- Concrete Pavement Distress SurveyFederal Highway Administration · Supports recording crack location, orientation, extent, visible size trend, joint condition, staining, pumping or drainage signs, and surrounding pavement context.
Community feedback
Share a repair observation
Share a plain-text repair observation. Accepted observations are published automatically; this page may take a moment to update.