
On this page
Start here
Quick answer
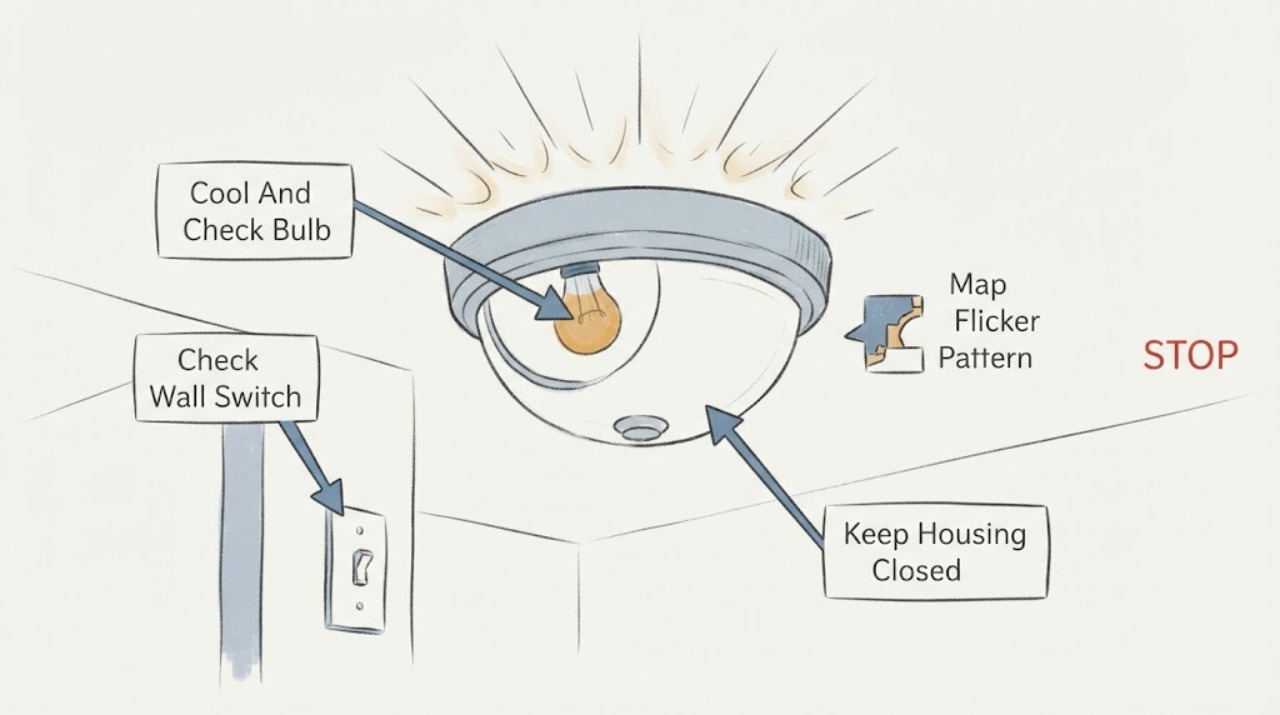
A Hampton Bay light fixture that flickers may have a loose or failing bulb, a switch or dimmer compatibility problem, a loose fixture connection, or a broader wiring issue. Turn the light off, let the bulb and fixture cool, and only reseat or replace a bulb if the socket and bulb can be reached without opening the fixture. Observe whether one bulb, the whole fixture, or other lights flicker, and whether there is buzzing, heat, discoloration, a burning odor, or breaker activity. Do not remove the fixture, open a switch box, or test live wiring as a homeowner. Stop using the light and arrange qualified electrical inspection for persistent flicker, flicker in multiple rooms, a warm or discolored switch, buzzing, sparks, burning odor, shock, or a fixture that trips the breaker.
Before you begin
Safety first
- This article supports safe visual observation, stopping use, recording the symptom, and reseating or replacing one reachable cool bulb with power off. A qualified electrician should open fixtures or switch boxes, inspect junction and circuit connections, assess controls and compatibility, test wiring, and repair or replace electrical parts.
Work through in order
Diagnostic checks
Use only checks that match the exact appliance or system and its official guide.
-
Check 1
From a safe position, note whether the flicker affects one bulb, every bulb in the Hampton Bay fixture, only the fixture on one switch, or other lights at the same time; do not keep toggling the switch to provoke it.
Expected result: The flicker may follow one bulb, affect the entire fixture together, occur only when a dimmer or smart control is used, or appear in several fixtures or rooms.
Next step: Use the bulb-only check for one accessible, cool bulb; keep a whole-fixture or multi-fixture symptom off and arrange electrical diagnosis rather than changing wiring assumptions.
Stop if: Stop observing and isolate use if the light makes a crackle or buzz, smells hot, flashes, sparks, or causes a breaker to trip.
Why this matters
Why: A single-bulb pattern makes the bulb or socket contact more likely. A whole-fixture pattern makes the control, fixture electronics, or fixture connection more likely. Several fixtures changing together raises concern about a circuit or supply issue.
-
Check 2
Turn the fixture off, allow the bulb and shade to cool, and only if the bulb is reachable without opening the fixture, check that it is seated; if needed, replace it with a bulb type and rating allowed by the Hampton Bay instructions.
Expected result: The bulb may be loose, visibly damaged, darkened, wrong for the fixture, firmly seated but still flickering, or inaccessible without removing electrical parts.
Next step: If the light becomes steady after the safe bulb check, monitor it without repeated switching; if it still flickers or the socket is damaged, leave the fixture off and arrange service.
Stop if: Do not touch a hot bulb, force a bulb from a damaged socket, use an unapproved bulb, remove the fixture cover, or continue when there is heat, charring, odor, or a loose socket.
Why this matters
Why: A loose or failed bulb can create a local flicker. A correctly seated or replaced bulb with the same symptom shifts concern toward the socket, switch, fixture electronics, or wiring. An inaccessible bulb is not a reason to dismantle the fixture.
-
Check 3
Without opening the switch or touching a warm plate, record whether flicker changes with a dimmer position, remote or wall control, gentle switch operation, or a control that makes noise; do not repeatedly cycle a suspect control.
Expected result: The light may flicker only below full brightness, flicker whenever the switch is moved, remain steady at the control's full-on position, or be accompanied by buzzing, heat, looseness, or discoloration.
Next step: Keep the light off if the control is noisy, hot, loose, or discolored; arrange a qualified electrician to check the control and fixture compatibility instead of bypassing or replacing the switch yourself.
Stop if: Do not open the switch box, tighten terminals, bypass a dimmer, or touch the control if there is a shock, spark, burning odor, or painful heat.
Why this matters
Why: A dimming-only pattern can indicate control and light-source compatibility or a failing control, while flicker tied to switch movement makes a switch or connection concern more likely. Buzzing, heat, or discoloration is an electrical warning sign, not a normal control behavior.
-
Check 4
With the fixture off, visually inspect only accessible surfaces for a scorched socket or shade, melted insulation, a loose or sagging fixture, moisture, or damage at the cord or visible housing; also note whether other lights dim when a large load starts.
Expected result: There may be no visible damage, a discolored or warm area, an odor, a loose mounting or cover, moisture, damaged insulation, or synchronized dimming elsewhere in the home.
Next step: Leave the affected light off and arrange qualified electrical inspection for any warning sign or multi-fixture pattern; do not remove covers to see farther inside.
Stop if: Stop immediately for smoke, active arcing, sparks, a burning smell, a shock or tingle, a hot or discolored switch or outlet, damaged insulation, or water near electrical parts.
Why this matters
Why: Visible damage, moisture, heat, or odor can indicate fixture or wiring damage. Synchronized changes in other lights make a broader circuit or service connection issue more likely than a single Hampton Bay bulb.
-
Check 5
Record the Hampton Bay model or SKU, fixture type, bulb type and count, control type, when the flicker began, whether a bulb change altered it, and which other lights or loads were affected; take a photo without opening the fixture.
Expected result: The product label or manual may identify the model and permitted lamp or control, while the symptom history may show a bulb-only, control, fixture, or circuit pattern.
Next step: Give the model information and symptom pattern to Hampton Bay support or a qualified electrician, and request diagnosis before ordering a socket, driver, control, or replacement fixture.
Stop if: Do not remove the fixture to find a label, order an unverified electrical part, or restore use merely because the flicker temporarily stops.
Why this matters
Why: Hampton Bay says the product number and manual identify product-specific instructions and parts; a model-free replacement or generic control can be incompatible. The timing and spread of the flicker help the technician choose between fixture, switch, and wiring checks.
Use your observations
Decision map
Find the observation that best matches what you see, then follow the next safe action.
-
PATH 01Safety boundary
What you see
Only one accessible bulb flickered, the fixture and switch show no warning signs, and the approved cool bulb is seated or replaced and remains steady.
Do this next
Use the light normally only while it remains steady and cool, and monitor for recurring flicker, socket discoloration, or control symptoms.
Why this path and its safety boundary
Why it matters: A loose or failed bulb is more likely than a whole-fixture or circuit fault, but a recurrence still warrants inspection.
Safety stop: Stop using it and arrange service if flicker returns, the socket becomes loose or hot, or any odor, buzzing, or discoloration appears.
-
PATH 02Safety boundary
What you see
All bulbs in the Hampton Bay fixture flicker together or flicker continues after a safe, approved bulb check.
Do this next
Leave the fixture off and have a qualified electrician inspect the control and fixture connections; provide the model and symptom history.
Why this path and its safety boundary
Why it matters: A switch or dimmer, fixture connection, driver, socket assembly, or other fixture-level fault is more likely than a single failed bulb.
Safety stop: Do not remove the fixture, open the switch, or tighten wiring as a homeowner response.
-
PATH 03Safety boundary
What you see
The light is steady at full output but flickers at some dimmer settings, or the problem began after a control or lamp change.
Do this next
Leave the control at a safe off state and arrange qualified evaluation of the Hampton Bay fixture and its control compatibility; do not bypass the dimmer.
Why this path and its safety boundary
Why it matters: Control and light-source compatibility or a failing dimmer is more likely, but the exact cause depends on the fixture and control instructions.
Safety stop: Stop immediately for buzzing, heat, discoloration, odor, sparks, or a shock at the switch.
-
PATH 04Safety boundary
What you see
Other lights or rooms flicker or dim at the same time, or lights change when another substantial load starts.
Do this next
Stop relying on the affected lighting and arrange qualified electrician inspection of the circuit and supply; record which fixtures and loads were involved.
Why this path and its safety boundary
Why it matters: A shared circuit, overload, loose connection, or broader wiring or service issue is more likely than a Hampton Bay fixture-only fault.
Safety stop: Do not open the electrical panel, alter breaker ratings, or keep cycling loads to reproduce the flicker.
-
PATH 05Safety boundary
What you see
Flicker is accompanied by buzzing, sizzling, warmth, discoloration, burning odor, sparks, smoke, a loose switch, or a shock or tingle.
Do this next
Turn the light off without touching a hot or damaged control, keep clear, and obtain prompt qualified electrical inspection; use emergency response for smoke, fire, or active arcing.
Why this path and its safety boundary
Why it matters: These are electrical danger signs and can indicate overheating, arcing, damaged insulation, or a failing connection rather than an ordinary bulb issue.
Safety stop: Do not touch the fixture or switch, spray water, remove covers, reset a repeatedly tripping breaker, or investigate live wiring.
-
PATH 06Safety boundary
What you see
The bulb is approved and seated, no warning signs are visible, but the same Hampton Bay fixture continues to flicker or the symptom returns.
Do this next
Leave the fixture off when the flicker occurs and arrange diagnosis rather than accepting repeated bulb changes as a repair.
Why this path and its safety boundary
Why it matters: An intermittent socket, control, fixture connection, driver, or supply fault remains possible even when the fixture looks normal.
Safety stop: Escalate promptly if any heat, odor, buzzing, discoloration, breaker activity, or multi-fixture flicker develops.
Helpful context
Understand the symptom
Start by separating a bulb symptom from a circuit symptom
Watch from a safe position with the light off between observations. One bulb that flickers while the other bulbs remain steady points toward that bulb, its socket contact, or a local control. The whole Hampton Bay fixture flickering together points more toward the switch, fixture connection, driver, or supply. If lights in other fixtures or rooms change at the same time, treat it as a possible wiring or supply problem rather than a lamp replacement problem.
A bulb is the only homeowner-level replacement check
Switch the fixture off, allow the bulb to cool, and use only a bulb type and rating permitted by the Hampton Bay instructions. If the bulb can be reached without removing a shade, cover, or electrical part, gently check that it is seated; do not force a tight or damaged socket. A new bulb that flickers in the same position does not prove the fixture is safe and is a reason to stop troubleshooting at the socket.
Do not turn a flicker into a wiring experiment
Hampton Bay's support guidance mentions fixture-to-junction-box and switch connections, but those checks require power isolation and access to wiring. For a permanently installed light, a homeowner should record the symptom and leave those connections to a qualified electrician. Never probe live conductors, pull down the fixture, open the switch, or bypass a dimmer or safety device to make the flicker disappear.
The surrounding electrical signs decide urgency
A flicker accompanied by a warm or discolored switch plate, sizzling or buzzing, sparks, burning odor, repeated breaker trips, or a shock is not a normal lighting adjustment. Turn the light off, keep clear, and arrange prompt electrical inspection. Smoke, active arcing, or fire requires emergency response and should not be investigated at the fixture.
Safety boundary
Stop conditions
- Turn the light off and stop using it for buzzing, sizzling, sparks, smoke, burning odor, a warm or discolored switch, shock or tingling, damaged insulation, moisture, or repeated breaker trips.
- Do not open the fixture, junction box, switch box, or electrical panel; do not probe live wiring, tighten terminals, bypass a dimmer, or change breaker protection as a homeowner troubleshooting step.
- Only reseat or replace a reachable bulb after power is off and the bulb is cool, using a bulb type and rating permitted by the Hampton Bay instructions; stop if the socket is damaged or hot.
- Arrange qualified electrical inspection when the whole fixture flickers, the symptom recurs after an approved bulb check, other fixtures flicker, or the cause cannot be identified from safe observations.
- Use emergency assistance for smoke, fire, active arcing, or an immediate shock hazard; keep clear and do not use water on energized electrical equipment.
Only after diagnosis
Potential parts
- approved replacement bulb
Consider this only when the fixture manual permits the bulb type and a safe cool-bulb check supports a bulb-level fault.
Match the manual's lamp base, technology, shape, rating, enclosure, and dimming requirements; a generic bulb may flicker or overheat if incompatible. - socket or lamp holder assembly
Consider this only after service confirms that a socket contact or holder is damaged and that the model supports replacement.
The electrician must match the exact fixture model, socket construction, lamp rating, wiring, and mounting; do not adjust a socket tab or wiring while energized. - switch or dimmer control
Consider this only when the symptom follows the control and an electrician confirms the fixture and control compatibility.
Match the fixture's control requirements and the installed wiring; do not bypass a control or substitute a device by appearance. - fixture driver or complete light fixture
Consider this only when service identifies an internal driver or fixture fault and confirms that a compatible replacement is available.
Use the exact model and revision with matching electrical and mounting characteristics; the visible flicker alone does not identify a driver or justify replacement.
When checks do not resolve it
Need a professional?
Arrange qualified electrical inspection when the Hampton Bay fixture continues to flicker after a cool, approved bulb check, when all bulbs flicker together, when a dimmer or switch is implicated, or when other fixtures change at the same time. Treat buzzing, sizzling, heat, discoloration, burning odor, sparks, smoke, shock, damaged insulation, moisture, or repeated breaker trips as an electrical safety issue; stop using the light and escalate promptly, with emergency assistance for smoke, fire, or active arcing.
Safety scope: This article supports safe visual observation, stopping use, recording the symptom, and reseating or replacing one reachable cool bulb with power off. A qualified electrician should open fixtures or switch boxes, inspect junction and circuit connections, assess controls and compatibility, test wiring, and repair or replace electrical parts.
Common questions
FAQ
Can a loose Hampton Bay bulb cause flickering?
Yes, a loose or failed bulb is one possible local cause. Turn the light off, let it cool, and only reseat or replace a reachable bulb with an approved type. If the fixture still flickers, stop changing bulbs and arrange service.
Should I tighten the wires in a flickering light fixture?
Not as a homeowner troubleshooting step. Hampton Bay identifies fixture and switch connections as possible checks, but a permanently installed fixture or switch should be de-energized, opened, and inspected by a qualified electrician.
When is flickering a wiring emergency?
Treat flicker with buzzing, sizzling, warmth, discoloration, burning odor, sparks, smoke, shock, damaged insulation, or repeated breaker trips as an electrical warning. Stop using the light and obtain prompt qualified inspection; use emergency assistance for fire or active arcing.
Read the exact guide
Official sources
- Safety InformationHampton Bay · Opened Hampton Bay lighting instruction PDF for a product-family safety instruction; the user's exact fixture manual controls the permitted lamp type and rating.
- Guide to Home Wiring HazardsU.S. Consumer Product Safety Commission · CPSC household wiring hazard guide used for the broader circuit warning boundary; the document does not identify the fixture's model or local repair method.
- Electrical Safety DosElectrical Safety Foundation International · Electrical-safety organization guidance for recognizing warning signs; it does not diagnose the Hampton Bay fixture or replace an electrician's inspection.
- Hampton Bay Customer ServiceThe Home Depot for Hampton Bay · Hampton Bay brand support page hosted by the brand's retail support channel; model-specific instructions and local electrical requirements still control the repair.
Community feedback
Share a repair observation
Share a plain-text repair observation. Accepted observations are published automatically; this page may take a moment to update.