
On this page
Start here
Quick answer
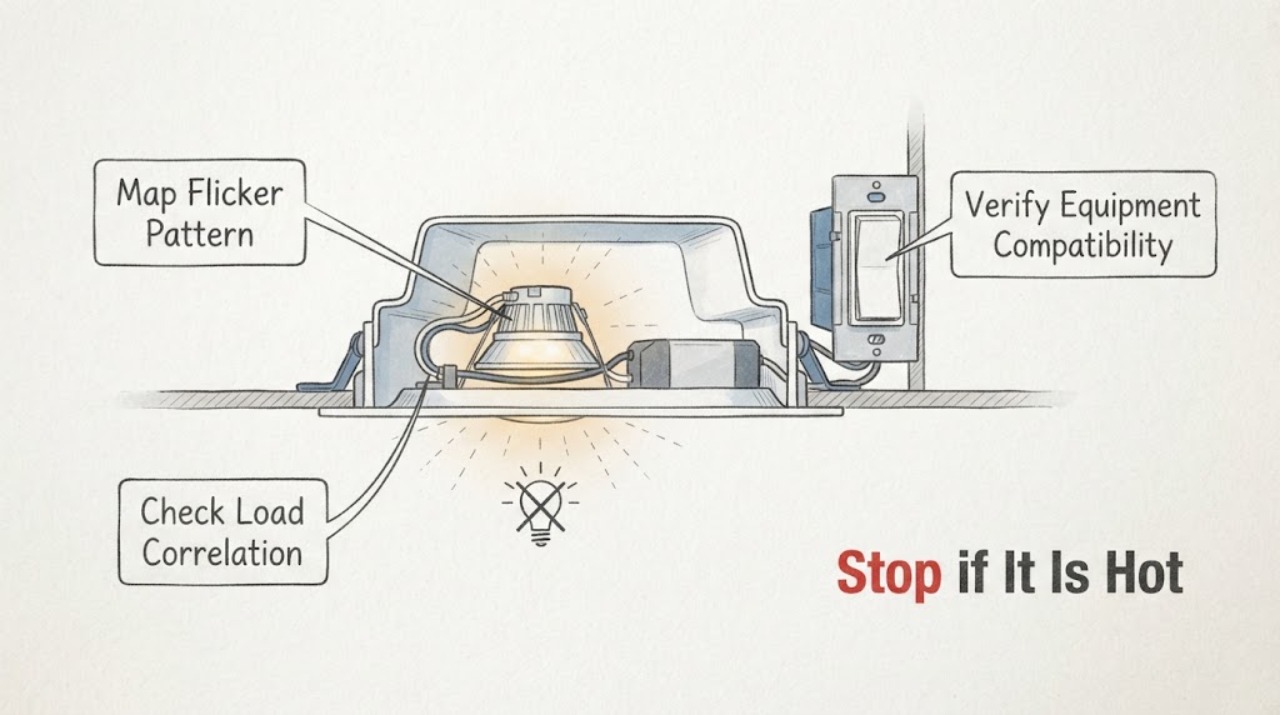
First determine whether the Kichler light flickers only at certain dimmer positions, only when another load starts, or at every setting. From a safe position, record the pattern, confirm that the lamp and dimmer are intended to work together, and check the exact fixture instructions; Kichler and ENERGY STAR both caution that LED fixtures and dimmers are not universally compatible. With power off and the fixture cool, you may inspect only accessible, visible lamp or trim seating without opening the fixture or touching wiring. A replaceable lamp, dimmer, low-voltage power supply, integrated LED driver, socket, or connection can produce similar symptoms, so do not guess at a part. Stop for heat, scorching, odor, smoke, arcing, a loose fixture, water, or a tripped breaker, and use a qualified electrician for persistent flicker, an integrated LED fixture, circuit-wide flicker, or any wiring diagnosis.
Work through in order
Diagnostic checks
Use only checks that match the exact appliance or system and its official guide.
-
Check 1
From a safe position, observe the light at full brightness, several dimmer positions, and during a normal start of another large appliance; note whether one lamp, the whole fixture, or other lights flicker.
Expected result: Record flicker only at low or mid dimming, flicker at every setting, a single lamp that differs from the others, or simultaneous flicker elsewhere on the circuit.
Next step: Use the observed pattern to select the matching branch, and stop the test if the light becomes hot, smells burnt, arcs, smokes, or trips the breaker.
Stop if: Do not operate the fixture repeatedly to provoke flicker when there is heat, odor, smoke, arcing, water, a loose fixture, or a recurring breaker trip.
Why this matters
Why: A dimmer-position pattern makes compatibility or minimum-level behavior relevant; one-lamp behavior makes the lamp or socket relevant; circuit-wide behavior needs electrical diagnosis.
-
Check 2
Read the Kichler fixture or lamp label, the dimmer model, and the product instructions; verify whether the lamp is dimmable and whether the dimmer and any low-voltage power supply are listed as compatible.
Expected result: Record a replaceable dimmable LED lamp with a compatible dimmer, an unknown or non-dimmable lamp, a dimmer without an LED rating, a low-voltage supply with no compatibility record, or an integrated LED module.
Next step: Use only the exact product documentation to identify a compatible lamp or control; if compatibility cannot be confirmed, leave the equipment unchanged and arrange qualified electrical help.
Stop if: Do not install an unlisted lamp or dimmer, exceed a fixture rating, bypass a driver, or modify wiring as a compatibility test.
Why this matters
Why: An unknown or incompatible pairing can explain dimming flicker, while an integrated module shifts the repair boundary to model-specific service rather than a bulb swap.
-
Check 3
Note whether the flicker starts when a vacuum, HVAC unit, motor, or other substantial load starts, and whether other lights on the same circuit change at the same moment.
Expected result: Record no timing relationship, a repeatable change when another load starts, flicker in multiple fixtures, or a breaker or protective device that trips.
Next step: Stop using the affected circuit if flicker is widespread or a breaker trips, and give an electrician the timing and affected fixtures; keep isolated fixture troubleshooting separate from circuit diagnosis.
Stop if: Do not open a panel, tighten terminals, measure live voltage, or reset a breaker repeatedly to continue the test.
Why this matters
Why: A repeatable circuit-wide response may indicate a supply, shared neutral, connection, or load problem that cannot be solved by selecting another lamp.
-
Check 4
After the light is off and fully cool, inspect only visible, accessible parts for a loose replaceable lamp, shifted trim, loose shade, scorching, moisture, or a fixture that is not firmly supported.
Expected result: Record a visibly loose lamp or trim, discoloration or moisture, a loose fixture, no visible defect, or an integrated LED fixture with no replaceable lamp.
Next step: If the fixture is safe and the instructions allow it, isolate power and correct only the visible lamp seating; otherwise leave the fixture off and arrange an electrician.
Stop if: Do not remove covers, reach into a socket, touch wiring, disturb a driver, climb near an unstable fixture, or continue with heat, smoke, odor, arcing, or water.
Why this matters
Why: A visible lamp or trim issue may be corrected only within the product instructions; discoloration, moisture, looseness, or an integrated module requires a service boundary.
-
Check 5
Only when the fixture has a replaceable lamp and its instructions permit it, compare the symptom with one known-compatible, correctly rated dimmable lamp after isolating power and allowing the old lamp to cool.
Expected result: Record flicker that follows the original lamp, flicker that remains with the known-compatible lamp, or no safe way to access or identify an approved replacement.
Next step: Use the exact fixture and dimmer documentation for any replacement; if flicker remains or compatibility is uncertain, stop substitutions and arrange qualified diagnosis.
Stop if: Do not force a lamp, use a non-dimmable or over-rated lamp, defeat a safety feature, or perform this comparison on an integrated LED fixture.
Why this matters
Why: A symptom that follows one lamp supports a lamp-level fault; a symptom that remains points back to the dimmer, driver, socket, supply, or wiring and does not identify a part by itself.
-
Check 6
Record the Kichler model, lamp type, dimmer model, fixture location, flicker timing, recent installation or control changes, other affected lights, heat or odor, breaker behavior, and the compatibility information you found.
Expected result: Confirm that the handoff contains observations and labels only, with no opened fixture, panel, socket, driver, or live wiring test.
Next step: Contact a qualified electrician or the installer and provide the model information, photos of visible labels, symptom pattern, and any safety warning.
Stop if: Stop homeowner troubleshooting when diagnosis requires panel access, wiring inspection, electrical measurement, driver access, or a fixture repair beyond the product's stated user instructions.
Why this matters
Why: The equipment pairing and symptom pattern help an electrician distinguish a lamp or dimmer issue from an integrated driver, supply, socket, or circuit fault.
Use your observations
Decision map
Find the observation that best matches what you see, then follow the next safe action.
-
PATH 01Safety boundary
What you see
The fixture is steady at full brightness but flickers at one or more dimmer positions, with no heat, odor, smoke, arcing, water, looseness, or breaker trip.
Do this next
Verify the exact lamp, dimmer, driver, and Kichler compatibility information. If the combination is not confirmed or the issue persists at an approved setting, arrange qualified electrical service.
Why this path and its safety boundary
Why it matters: LED-dimmer compatibility, the dimmer's minimum level, or the LED driver's dimming range is more likely than a circuit-wide fault.
Safety stop: Do not open the dimmer or fixture, bypass the control, or continue if a safety symptom appears.
-
PATH 02Next step
What you see
One replaceable lamp flickers while the other lamps in the same fixture remain steady, or the symptom follows that lamp when an approved comparison is made.
Do this next
With power isolated and the fixture cool, use only the exact approved lamp instructions. If the symptom remains, the lamp is unavailable, or the socket looks discolored or loose, leave the light off and call an electrician.
Why this path and its safety boundary
Why it matters: The lamp, its seating, or its socket becomes the leading observation, but a socket or fixture connection still cannot be confirmed without electrical service.
-
PATH 03Next step
What you see
Every lamp flickers at every control position, a compatible replaceable lamp does not change the symptom, or the Kichler fixture has an integrated LED module.
Do this next
Leave the fixture off if flicker persists and arrange qualified electrical service with the model and dimmer information. Do not open an integrated LED fixture or guess at a driver.
Why this path and its safety boundary
Why it matters: The driver, light engine, socket connection, dimmer, or fixture wiring needs model-specific diagnosis; a bulb-only fix is not established.
-
PATH 04Next step
What you see
The flicker begins with another load or affects multiple lights, even when the Kichler fixture's local lamp and dimmer pairing appears correct.
Do this next
Stop using the affected circuit if the symptom is widespread or the breaker trips, and call an electrician. Provide the load timing and list of affected fixtures rather than changing parts.
Why this path and its safety boundary
Why it matters: A supply, shared circuit connection, neutral, or load interaction is possible and requires electrical testing by a qualified person.
-
PATH 05Safety boundary
What you see
The fixture is hot, smells burnt, smokes, arcs, shows scorching or water, is loose, or the breaker trips again.
Do this next
Stop using the light, keep clear, and use appropriate emergency or qualified electrical help from a safe position. Do not touch the fixture or restore power to test it.
Why this path and its safety boundary
Why it matters: The immediate concern is fire, shock, equipment damage, or a falling fixture, not identifying a compatible lamp.
Safety stop: Do not handle wet equipment, exposed conductors, a hot lamp, an arcing control, or a repeatedly tripping breaker.
Helpful context
Understand the symptom
Use the flicker pattern to narrow the fault
Watch the fixture at full brightness, at several dimmer positions, and while another large appliance starts. Note whether every lamp in the fixture flickers, whether only one lamp does, and whether the light returns to steady operation after a control change. Flicker that follows dimmer position points toward compatibility or the dimmer's operating range; flicker that affects a room or circuit points toward a supply or connection problem. Observation can narrow the next step, but it cannot prove which electrical component has failed.
Confirm the lamp, fixture, and dimmer pairing
Read the lamp label, fixture label, dimmer model, and the Kichler product instructions. Verify that a replaceable LED lamp is marked dimmable and that the dimmer is rated for that LED load; for a low-voltage or integrated LED fixture, use the compatibility information for the installed power supply or driver. Kichler notes that LED products can respond differently and that compatibility depends on the driver and dimmer combination. Do not substitute a random lamp or dimmer, exceed the fixture rating, or alter wiring as a test.
Check only cool, accessible fixture parts
After the light is off and fully cool, inspect from the outside for a visibly loose replaceable lamp, shifted trim, a loose shade, or discoloration. If you need to reach a lamp, isolate power at the correct breaker when you can do so safely and follow the product instructions; do not rely on a wall switch alone for wiring work. An integrated LED Kichler fixture may have no user-replaceable bulb, and a driver or light engine inside the fixture should be evaluated by a qualified electrician. Never remove a cover or handle a socket, connector, or wire to reproduce flicker.
Know when the symptom is a service call
Arrange electrical service if the light flickers at every setting with a confirmed compatible lamp, the whole fixture or circuit is affected, the flicker began after installation or a control change, or the fixture has an integrated LED light engine. Kichler's warranty information treats incompatible aftermarket dimmers or accessories and improper installation as relevant exclusions, which is another reason to document the equipment combination and have the installation assessed rather than guessing at a replacement. Stop immediately for heat, smoke, burning odor, arcing, water, a loose fixture, or a breaker that trips again.
Safety boundary
Stop conditions
- Stop immediately for heat, burning odor, smoke, scorching, arcing, water or moisture, a loose or falling fixture, exposed wiring, or a breaker that trips again.
- Leave the fixture off when flicker persists at every setting, affects multiple lights, begins with another load, or remains after a documented compatible lamp and dimmer check.
- Do not open the fixture or dimmer, access an integrated LED driver, open an electrical panel, measure live wiring, bypass a control, or alter wiring as a homeowner test.
Only after diagnosis
Potential parts
- dimmable LED lamp
Consider this only when the fixture has a replaceable lamp, the original lamp is implicated by observation, and the fixture and dimmer documentation confirms the lamp type and rating.
Match the exact Kichler fixture, socket, wattage, base, dimming behavior, temperature rating, and dimmer compatibility; a generic LED lamp is not automatically suitable. - LED driver or integrated light engine
An integrated driver or light engine is a candidate only after a qualified technician confirms that the fixture-level fault is not the lamp, dimmer, supply, socket, or wiring.
Use the exact Kichler model and manufacturer-approved component or assembly; do not open or retrofit an integrated LED fixture as a homeowner repair. - LED-compatible dimmer
A dimmer is a candidate only when the flicker is control-position dependent and the exact Kichler lamp, driver, power supply, and dimmer compatibility information supports that diagnosis.
Have the installed load and wiring assessed by a qualified electrician and use the exact compatibility list; do not select a control from brand name alone.
When checks do not resolve it
Need a professional?
Call a qualified electrician or the installer for persistent flicker, circuit-wide flicker, an integrated LED fixture, an unknown or incompatible lamp and dimmer combination, visible discoloration or looseness, or any diagnosis that requires fixture, panel, driver, socket, or wiring access. Use appropriate emergency help for smoke, fire, arcing, water near electrical equipment, or an unsafe falling fixture.
Have this ready
- Provide the Kichler model and serial information if safely visible, lamp and dimmer models, fixture location, flicker pattern, timing with other loads, recent installation or control changes, photos of visible labels, and any heat, odor, smoke, arcing, water, looseness, or breaker behavior.
Common questions
FAQ
Why does a Kichler LED light flicker only when dimmed?
The lamp or LED driver and the dimmer may not be compatible across the full dimming range. Confirm the exact lamp, dimmer, power supply, and Kichler compatibility information; do not assume that a dimmer that works with one LED product will work with another.
What if the Kichler fixture flickers at every brightness setting?
If a documented compatible, correctly rated replaceable lamp does not change the symptom, or the fixture has an integrated LED module, the dimmer, driver, socket, supply, or wiring needs qualified diagnosis. Leave the light off if the flicker persists and do not open the fixture.
Can another appliance cause a Kichler light to flicker?
A repeatable flicker that starts with another load or affects multiple lights can indicate a circuit or supply issue rather than a bad lamp. Stop repeated testing, do not open the panel, and provide the timing and affected fixtures to a qualified electrician.
When should I stop using a flickering Kichler light?
Stop immediately for heat, burning odor, smoke, scorching, arcing, water, a loose fixture, exposed wiring, or a breaker that trips again. Keep clear and use appropriate emergency or qualified electrical help; do not restore power just to reproduce the symptom.
Read the exact guide
Official sources
- Light Fixtures (Downlights)ENERGY STAR · ENERGY STAR's official light-fixture guidance provides an independent compatibility caution that not every LED works well with every dimmer; it does not replace Kichler's model-specific instructions.
- Power Supply Planning 101Kichler Lighting · Kichler's official power-supply guide supports compatibility and dimming-range explanations, especially for low-voltage fixtures; the exact installed power supply and fixture documentation remain controlling.
- Warranty Coverage for Kichler ProductsKichler Lighting · Kichler's official warranty page supports the conditional service boundary for integrated LED components and cautions that aftermarket or incompatible dimmers and improper installation can affect coverage; it is not a diagnosis of this fixture.
- Why Does My LED Bulb Flicker or Turn Off When Dimming?Leviton · Leviton's official support page provides general LED-dimmer troubleshooting context; Kichler and the installed dimmer documentation govern compatibility for this fixture.
- Using Dimmers With LED LightingKichler Lighting · Kichler's official dimmer guidance supports the distinction between LED drivers, dimmers, and product-specific compatibility; exact fixture instructions govern the installed product.
Community feedback
Share a repair observation
Share a plain-text repair observation. Accepted observations are published automatically; this page may take a moment to update.