
On this page
Start here
Quick answer
If an LED light flickers when you move a dimmer, first check the lamp or fixture label for a clear dimmable marking. A non-dimmable LED is not intended to be controlled by a dimmer and can flicker or buzz; even a dimmable LED can flicker when its driver and dimmer are not a tested match, when the load is outside the control's range, or when the flicker appears only at the bottom of the dimming range. Stop dimming a lamp marked non-dimmable, let it cool, and replace it only with a lamp confirmed for the fixture and dimmer, or have a qualified electrician change the control arrangement. Do not open the wall box, adjust wiring, or keep testing if there is heat, discoloration, a burning smell, crackling, sparks, shock, moisture, or a tripped breaker.
Before you begin
Safety first
- Homeowner checks are limited to labels, normal control operation, visible exterior conditions, and symptom notes from a safe position. Electrical access, rewiring, energized testing, and internal driver or dimmer diagnosis require qualified personnel.
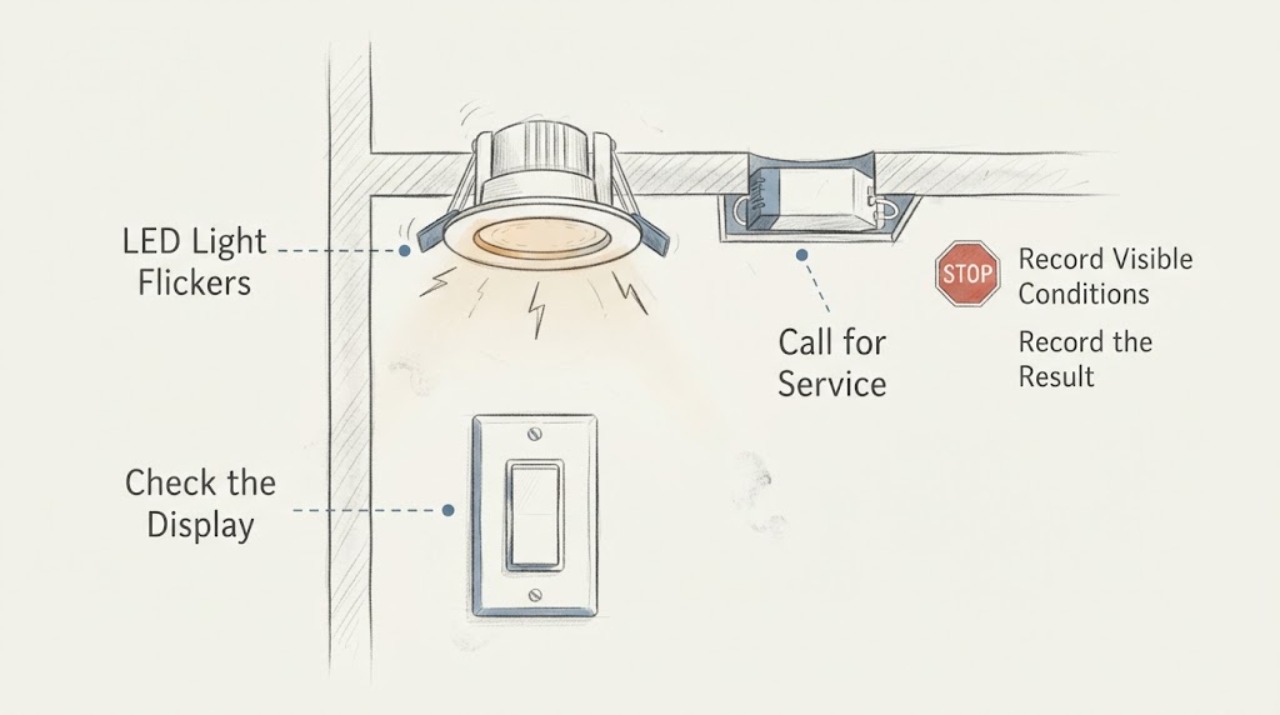
Work through in order
Diagnostic checks
Use only checks that match the exact appliance or system and its official guide.
-
Check 1
Turn the light off, let the lamp or fixture cool, and read the lamp packaging, lamp body, or fixture instructions without opening the fixture. Look specifically for a dimmable marking or wording that says it is not for use with a dimmer; if the light is an integrated fixture, record its model marking instead of assuming the LED board is replaceable.
Expected result: Record one of three outcomes: an explicit non-dimmable warning, an explicit dimmable marking, or no clear marking/model information.
Next step: For a non-dimmable lamp, stop using the dimming function and choose a compatible lamp or an electrician-approved on/off control arrangement. For a dimmable or unidentified lamp, record the model and continue with the non-contact compatibility checks.
Why this matters
Why: An explicit non-dimmable warning makes the present dimmer arrangement unsuitable for that lamp. A dimmable marking only establishes that the lamp is intended to dim; it does not prove compatibility with this dimmer. Missing information leaves compatibility unconfirmed.
-
Check 2
Operate the dimmer only from its normal control surface and note whether the light is steady at full output, flickers throughout the range, flickers only near the lowest setting, drops out before the control reaches its bottom, or flickers when the dimmer is not being moved.
Expected result: Write down the brightness range and timing of the flicker, including whether every lamp in the fixture changes together or only one lamp does.
Next step: Use the pattern to select the relevant compatibility or service branch. Do not repeatedly sweep the control or hold it at a flickering setting to reproduce the symptom.
Why this matters
Why: Flicker limited to the low end points toward a minimum-level or driver-range mismatch; flicker throughout the range points more broadly to lamp-and-dimmer incompatibility, load type, or wiring. A single affected lamp is more local than a whole-fixture or multi-light pattern, but no pattern proves the exact failed part.
-
Check 3
From a dry, safe position, read the dimmer's visible brand/model and any LED or load marking. Count the lamps on the circuit and record each lamp's stated wattage or the integrated fixture model; do not remove the wall plate to read hidden terminals or wiring.
Expected result: Compare the visible information with the dimmer and lamp manufacturer's compatibility instructions. Note whether the dimmer is marked for LED loads, whether the lamp is on a tested compatibility list, and whether the total load is inside the stated minimum and maximum range.
Next step: If the combination is unlisted or outside the documented range, stop trying to tune it and obtain a compatible lamp/control recommendation. If it is listed but still flickers, continue to the service-boundary branch rather than opening the box.
Why this matters
Why: A dimmer intended only for older lamp types, an unlisted lamp, or a load outside the control's range can cause flicker, buzzing, early shutoff, or poor dimming even when the lamp says dimmable. A listed combination makes an incompatibility less likely but does not clear wiring or a failing component.
-
Check 4
Check the fixture's visible exterior and the dimmer face without touching either one. Look for a hot surface, discoloration, melting, loose wall control, moisture, crackling, buzzing, burning odor, sparks, or a breaker that has tripped; also note whether nearby lights flicker or change when another appliance starts.
Expected result: Record either a normal-looking, cool, quiet installation with no odor or a warning sign affecting the fixture, dimmer, circuit, or surrounding area.
Next step: If any warning sign is present, stop using the fixture and arrange prompt qualified electrical inspection. If the observation is normal, keep the lamp/control details for the final decision and do not access energized parts.
Why this matters
Why: A clean, isolated dimming symptom can remain a compatibility question. Heat, damage, odor, sound, moisture, shocks, circuit trips, or load-linked changes raise concern for an electrical or overload problem beyond a non-dimmable lamp.
-
Check 5
If the lamp is clearly labeled non-dimmable and there are no heat, damage, moisture, odor, sound, or circuit warning signs, leave the dimmer at off and arrange one controlled correction: use a lamp confirmed for the fixture and dimmer, or ask a qualified electrician whether an on/off control is appropriate. Do not install a replacement while the fixture is energized.
Expected result: After the lamp or control has been changed by the appropriate person, a steady light across the intended operating range supports a compatibility correction; continuing flicker, drop-out, or noise means the issue is unresolved.
Next step: If flicker remains after a confirmed compatible combination, stop dimming and request diagnosis of the dimmer, driver, fixture connections, and circuit. Do not keep substituting random lamps or controls.
Why this matters
Why: A change that removes flicker supports the original lamp/control mismatch, but it does not prove the wiring or dimmer is healthy if other symptoms remain. An integrated fixture may require a fixture-specific replacement rather than a bulb swap.
-
Check 6
Prepare a service handoff containing the fixture and lamp model, the dimmer model, dimmable marking, number of lamps, flicker range and timing, whether the symptom follows the control, recent lamp or switch changes, and every warning sign observed.
Expected result: A complete record separates an explicit non-dimmable lamp, an untested combination, a low-end-only behavior, and a circuit-wide or hazardous pattern.
Next step: Give the record and photographs of labels, taken without opening equipment, to a qualified electrician or the relevant product support channel. Keep the fixture off when the cause remains uncertain.
Why this matters
Why: The sequence is useful to the electrician without requiring the homeowner to identify a failed driver, switch, connection, or circuit conductor.
Use your observations
Decision map
Find the observation that best matches what you see, then follow the next safe action.
-
PATH 01Next step
What you see
The lamp or fixture is explicitly marked non-dimmable, flicker occurs when the dimmer is used, and there are no electrical warning signs.
Do this next
Arrange qualified service and follow the exact model guidance.
Why this path and its safety boundary
Why it matters: Treat the mismatch as the leading explanation. Stop dimming it, then use a lamp confirmed for that fixture and dimmer or have a qualified electrician provide an appropriate on/off control. Do not treat continued use as a compatibility test.
-
PATH 02Next step
What you see
The lamp is marked dimmable, but the dimmer is not marked or documented for LED loads, the model combination is not listed, or the total load falls outside the documented range.
Do this next
Arrange qualified service and follow the exact model guidance.
Why this path and its safety boundary
Why it matters: The driver-control compatibility remains unresolved and is a likely cause of flicker or drop-out. Obtain a tested combination or professional recommendation; do not open or rewire the dimmer.
-
PATH 03Next step
What you see
The lamp is dimmable and the combination is documented, but flicker occurs only at the lowest setting and stops above that range.
Do this next
Arrange qualified service and follow the exact model guidance.
Why this path and its safety boundary
Why it matters: The lamp may not operate smoothly at the dimmer's minimum level. Use only a model-specific adjustment described by the dimmer instructions, without removing covers; if the adjustment is unavailable or the symptom persists, request product support or electrical diagnosis.
-
PATH 04Next step
What you see
Flicker affects multiple lamps or lights, changes when another appliance starts, or occurs while the dimmer is not being moved.
Do this next
Arrange qualified service and follow the exact model guidance.
Why this path and its safety boundary
Why it matters: A broader circuit, connection, load, or supply issue becomes more concerning than one non-dimmable lamp. Stop experimenting and arrange qualified electrical inspection.
-
PATH 05Next step
What you see
The fixture or dimmer is hot, discolored, melting, wet, buzzing or crackling, smells burned, sparks, shocks the user, or the breaker trips.
Do this next
Arrange qualified service and follow the exact model guidance.
Why this path and its safety boundary
Why it matters: Stop using the light immediately and keep clear. If power can be isolated without touching damaged equipment or entering water, use the safe labeled disconnect; otherwise leave the area and obtain urgent qualified electrical help. Do not reset and retest.
Helpful context
Understand the symptom
Why this combination flickers
An LED lamp is a light-emitting device paired with an electronic driver. The dimmer changes the electrical waveform and the driver has to interpret that change smoothly. A lamp that is not designed for dimming can react with visible flicker or buzzing; a lamp that is labeled dimmable can still behave poorly when the dimmer model, load type, or dimming range is not compatible. The symptom alone cannot identify whether the lamp, driver, dimmer, or wiring is at fault.
Separate a lamp mismatch from an electrical warning
A flicker that follows the dimmer position and affects only this fixture is consistent with a lamp-and-control mismatch, but that is not a safety clearance. Flicker in several lights, flicker when another appliance starts, or a hot, loose, discolored, buzzing, or odorous control point needs electrical assessment. Keep all observations non-contact and do not remove a faceplate or fixture cover to find the cause.
Use the label and model information for the next decision
Record the exact lamp or integrated fixture marking, dimmer brand and model visible on the front, number of lamps controlled, and whether the symptom is constant or limited to a brightness range. Compatibility lists and the manufacturer's instructions are more reliable than a generic LED label. If those details do not establish a compatible combination, leave the control arrangement unchanged and give the record to an electrician.
Safety boundary
Stop conditions
- Stop immediately for heat, melting, discoloration, smoke, burning odor, sparks, crackling, moisture near electrical parts, a shock, or a breaker that trips again.
- Do not remove a wall plate or fixture cover, access a socket or driver, move wiring, measure energized conductors, bypass a protective device, or repeatedly reset a breaker to reproduce flicker.
- Leave the dimmer off and arrange qualified electrical help when the lamp is integrated, the model or compatibility information is missing, a confirmed compatible combination still flickers, or the symptom affects more than one light.
Only after diagnosis
Potential parts
- dimmable LED lamp
Consider this only when the present lamp is explicitly non-dimmable or the documented compatibility check identifies the lamp as the mismatch, with no electrical warning signs.
Match the fixture socket or integrated-fixture requirements, lamp form, enclosure and environment ratings, and the exact dimmer compatibility information before installation. - LED-compatible dimmer
Consider this only after the lamp is confirmed dimmable and a qualified diagnosis or manufacturer compatibility information identifies the existing control as unsuitable.
Confirm the exact wiring arrangement, load type and range, fixture requirements, and local installation rules with the product instructions or a qualified electrician.
When checks do not resolve it
Need a professional?
Safety scope: Homeowner checks are limited to labels, normal control operation, visible exterior conditions, and symptom notes from a safe position. Electrical access, rewiring, energized testing, and internal driver or dimmer diagnosis require qualified personnel.
Common questions
FAQ
Can a non-dimmable LED lamp cause flicker on a dimmer?
Yes. A lamp marked non-dimmable is not intended for a dimmer and may flicker or buzz. Stop dimming it and use a lamp and control combination confirmed by the relevant instructions, or have an electrician change the control arrangement.
Why does a dimmable LED flicker only at the lowest setting?
The lamp may not operate smoothly at the dimmer's minimum level, or the pair may not be compatible across the full range. Check the exact model instructions for a permitted minimum-level adjustment; do not open the wall box or keep testing a visibly unsafe control.
Does a dimmable label prove the lamp will work with my dimmer?
No. The label says the lamp is designed for dimming, but the driver and dimmer still need a compatible combination and load range. Compare the exact model information with the manufacturer's compatibility guidance.
Should I replace the dimmer immediately?
Not based on flicker alone. First record the lamp and dimmer models and check for a non-dimmable marking or a documented mismatch. If there is heat, discoloration, odor, buzzing, moisture, sparks, shock, a repeated trip, or flicker in several lights, stop using the circuit and call a qualified electrician.
Read the exact guide
Official sources
- Why Does My LED Bulb Flicker or Turn Off When Dimming?Leviton · LED and dimmer compatibility, wiring and load-type clues, low-end flicker, and model-specific dimming adjustments
- Dimmer CompatibilityFeit Electric · Reading dimmer and lamp model information, LED load range, tested compatibility, and causes of flicker or early shutoff
- Switch to SafetyElectrical Safety Foundation International · Electrical warning signs at switches and lighting controls and recommendation for qualified inspection
- Can LED bulbs be dimmed?Philips Hue · LED dimmability labels, non-dimmable LED behavior with dimmers, dimmer compatibility, and low-brightness limitations
- CPSC Guide to Home Wiring HazardsU.S. Consumer Product Safety Commission · Lighting overheat, arcing, buzzing, odor, discoloration, and stop-use/professional electrical safety boundaries
- Flicker BasicsU.S. Department of Energy · LED driver response, dimmer-delivered waveforms, and the mechanism of temporal light variation
Community feedback
Share a repair observation
Share a plain-text repair observation. Accepted observations are published automatically; this page may take a moment to update.