
On this page
Start here
Quick answer
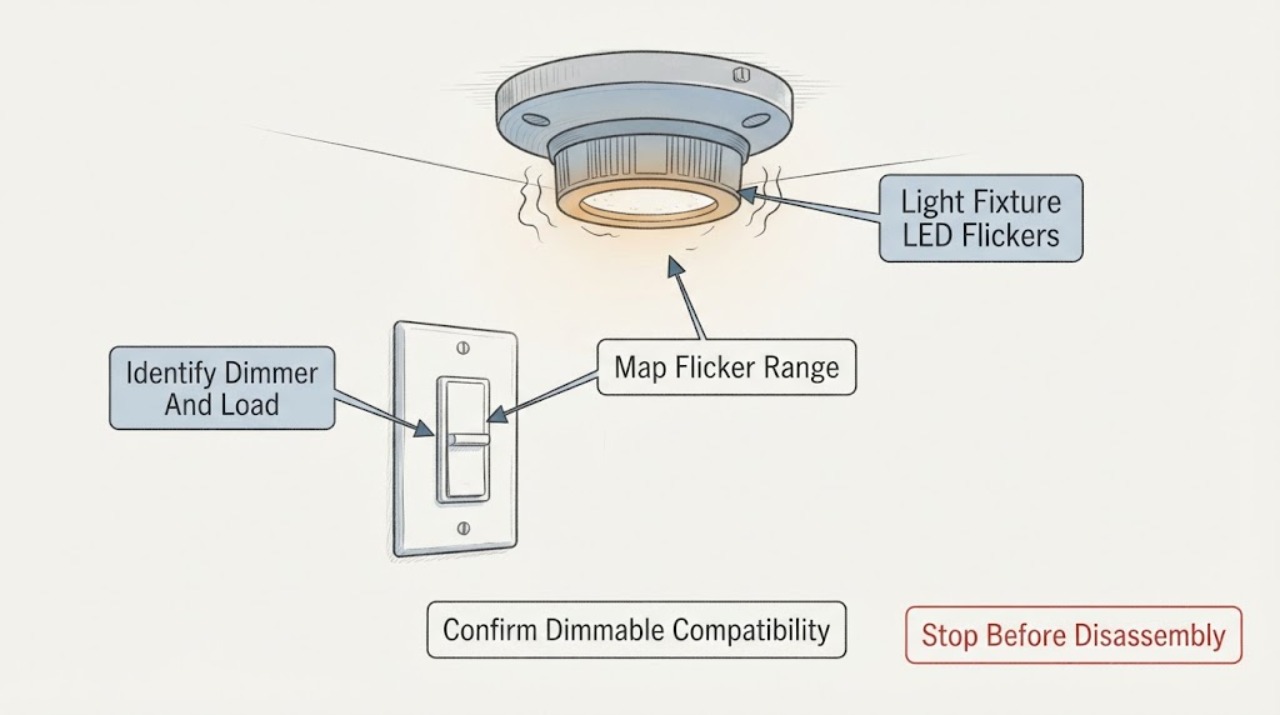
A Lutron dimmer and LED fixture can flicker when the LED is not dimmable, the LED and dimmer are not on Lutron's compatibility list, or the light is being driven outside a stable part of its dimming range. First identify the exact Lutron dimmer and LED or fixture model, confirm the LED is dimmable, and note whether flicker occurs only near low or full brightness, only when off, or throughout the range. If the model supports trim adjustment, use only its documented low- or high-end procedure; a compatible LED can often distinguish a lamp mismatch from a dimmer or fixture fault. Do not open the wall box, change wiring, install a shunt or bypass component on a dimmer, or continue using a light that flickers with heat, odor, arcing, or a breaker trip.
Before you begin
Safety first
- This article supports model identification, ordinary visual observation, compatibility lookup, and a documented user-level trim or lamp change only when the exact instructions permit it. It does not authorize wall-box or fixture wiring work, live testing, driver or ballast access, shunt installation on a dimmer, or control replacement.
Work through in order
Diagnostic checks
Use only checks that match the exact appliance or system and its official guide.
-
Check 1
From a safe standing position, operate the Lutron control through its ordinary range once and observe the fixture without opening the wall box or touching the lamp or driver.
Expected result: Record whether flicker occurs only near the lowest level, near full brightness, throughout the range, during turn-on, only when the control is off, or only in one lamp or fixture in the group.
Next step: Keep the pattern with the exact dimmer and fixture identity, then use the matching compatibility and model-specific control check.
Stop if: Stop using the light for smoke, burning odor, arcing, heat from the wall box or fixture, a breaker trip, or a control that will not turn the load off.
Why this matters
Why: Lutron documents low-end trim for flicker or drop-out near minimum output and high-end trim for some symptoms near maximum output. A symptom throughout the range or only in one fixture is less likely to be solved by a generic slider adjustment and may involve load compatibility, a fixture driver, or a connection issue.
-
Check 2
Read the Lutron dimmer model from the accessible device label or existing documentation and read the LED bulb or fixture model from the lamp, package, or fixture paperwork without removing the wallplate or fixture housing.
Expected result: Record the complete Lutron model, LED or fixture model, whether the lamp is explicitly dimmable, the number of lamps, and whether the installation is single-location or multi-location according to its documentation.
Next step: Use the exact model information in Lutron's compatibility resources and the control's owner or installation documentation before changing settings or parts.
Stop if: Do not remove a wallplate, expose conductors, assume a similar-looking Lutron model has the same ratings, or change a multi-location control arrangement from memory.
Why this matters
Why: The control family, LED electronics, fixture driver, and installation arrangement determine which compatibility list and trim instructions apply. A generic claim that an LED is dimmable does not establish compatibility with this Lutron control or fixture.
-
Check 3
Compare the recorded Lutron dimmer and LED or fixture model with the applicable Lutron LED compatibility information and the fixture manufacturer's dimming instructions; do not rely on a package's dimmable label alone.
Expected result: Classify the load as listed or documented compatible, explicitly non-dimmable, absent from the applicable list, or a fixture with an unknown or separate LED driver.
Next step: If the exact instructions identify a compatible LED option, test only that approved replacement after power is off and the fixture's normal lamp-changing procedure is followed; otherwise arrange lighting or electrical advice.
Stop if: Do not combine incompatible dimmer technologies, install a non-dimmable LED on the dimmer, use a shunt intended for another control type, or alter the fixture driver.
Why this matters
Why: Lutron states that LED bulbs differ in dimming behavior and that tested compatibility can improve flicker performance. A non-dimmable or undocumented load can explain flicker, but an absent listing is not proof of failure; it means the pairing needs cautious substitution or professional assessment.
-
Check 4
If the exact Lutron model supports user-accessible trim, follow only that model's documented low- or high-end trim procedure while watching the actual light output; do not enter an unknown programming mode or change wiring.
Expected result: Record whether the flicker stops at the affected end of the range, the light drops out or remains unstable, the symptom is unchanged, or the control exits without saving a stable setting.
Next step: Keep the original setting and result, restore the documented default if the exact manual directs it, and arrange qualified service when the trim cannot produce stable light.
Stop if: Do not guess button sequences, alter line or load wiring, bypass a neutral or safety feature, or continue if the dimmer becomes hot, emits odor, sparks, or trips a protective device.
Why this matters
Why: Lutron's Application Note describes low-end trim as changing the minimum achievable level and high-end trim as changing the maximum level; the appropriate adjustment depends on where the symptom occurs. No improvement, instability across the range, or a model without the documented feature points toward load, driver, control, or installation diagnosis.
-
Check 5
If the fixture design permits ordinary lamp replacement, turn the light off, let it cool, and compare one documented compatible LED load or a known-good lamp only by the fixture manufacturer's normal replacement procedure; do not open the fixture or wall box.
Expected result: Record whether the flicker follows the original LED, disappears with the documented compatible load, remains with both loads, or cannot be tested because the fixture has an integrated driver or the lamp cannot be changed safely.
Next step: Leave the stable documented load in place only if the fixture operates normally; otherwise turn the circuit off when safe and provide the model numbers and comparison result to a qualified electrician or lighting technician.
Stop if: Do not touch exposed contacts, remove an integrated LED driver, bypass the dimmer, use a lamp with a different undocumented load type, or continue with heat, arcing, odor, or a breaker event.
Why this matters
Why: A symptom that follows one bulb supports a load-compatibility or lamp-electronics issue. Flicker that remains with a documented compatible load, occurs in an integrated fixture, or appears with heat, odor, or a control fault points toward the dimmer, driver, wiring, or installation and needs professional inspection.
Use your observations
Decision map
Find the observation that best matches what you see, then follow the next safe action.
-
PATH 01Safety boundary
What you see
The exact LED is dimmable and the flicker appears only near the lowest light level, while full and mid-range output are stable.
Do this next
Use only the documented low-end trim procedure for that Lutron model or choose a listed compatible load; stop if the light drops out or remains unstable.
Why this path and its safety boundary
Why it matters: The LED's usable dimming range and the Lutron control's low-end setting are the leading user-check possibilities; compatibility still must be confirmed for the exact models.
Safety stop: Do not guess trim controls, replace the dimmer without model confirmation, or open the wall box.
-
PATH 02Safety boundary
What you see
The light is stable at lower settings but flickers or pops near full brightness, and the exact control documents high-end trim.
Do this next
Follow the exact model's high-end trim guidance once, or request professional assessment if the control has no such documented setting or the symptom persists.
Why this path and its safety boundary
Why it matters: A high-end range or LED-control interaction is plausible, but a documented feature and compatible load are required before adjustment.
Safety stop: Do not keep operating a control that heats, sparks, smells, or trips a breaker.
-
PATH 03Safety boundary
What you see
A documented compatible LED or a known-good comparison is stable, but the original LED flickers on the same Lutron control.
Do this next
Use the compatible load only if its exact fixture instructions permit it and the light remains stable; replace the original load with a model-confirmed option or ask a lighting professional for a fixture-specific recommendation.
Why this path and its safety boundary
Why it matters: The original lamp or fixture electronics are more likely to be incompatible, damaged, or outside their stable dimming range than the dimmer itself.
Safety stop: Do not use a non-dimmable LED, mix undocumented load types, or alter an integrated driver.
-
PATH 04Safety boundary
What you see
The exact load is documented compatible, trim does not help, and flicker continues through the range or remains with a comparison load.
Do this next
Stop changing parts and arrange qualified electrical or lighting service with the model numbers, range pattern, trim result, and any control or fixture symptoms.
Why this path and its safety boundary
Why it matters: A dimmer fault, fixture driver, control wiring, multi-location arrangement, supply issue, or installation incompatibility is more plausible than a simple low-end adjustment.
Safety stop: Do not open the wall box, rewire the dimmer, perform live measurements, or bypass the control.
-
PATH 05Safety boundary
What you see
The LED glows or flickers when off, the dimmer or fixture becomes hot, there is odor or arcing, or a breaker trips.
Do this next
Turn the control off, isolate the circuit only when safely accessible, keep the light out of use, and arrange qualified electrical service.
Why this path and its safety boundary
Why it matters: Off-state leakage or load incompatibility may explain a faint glow, but heat, odor, arcing, or protective-device operation is an electrical safety boundary rather than a trim problem.
Safety stop: Do not install a shunt or capacitor on a dimmer, remove the wallplate, touch wiring, or restore a tripping circuit repeatedly.
Helpful context
Understand the symptom
LED flicker usually starts with the load and control pairing
The word dimmable on an LED package does not by itself prove that a particular Lutron control and fixture will behave well together. LED electronics, fixture drivers, and dimmers can interact differently at the low end, near full brightness, or while the control is off. Lutron publishes tested control and lamp combinations for some product families and provides trim features on supported controls. Use the exact model numbers before changing a bulb or control.
The position of the slider changes the diagnosis
Flicker only near the dimmest setting points toward a low-end range or LED drop-out issue; flicker near full brightness can point toward high-end range or load compatibility. Flicker through the full range, flicker with the control off, or a symptom that follows a fixture rather than a bulb raises a broader control, driver, wiring, or installation question. A brief visual observation is useful, but it is not a reason to open the wall box or measure live conductors.
Keep electrical work outside the homeowner check
Lutron's technical documentation distinguishes ordinary control operation from wiring, ballast, driver, and fixture testing. Record the dimmer model, LED or fixture model, number of lights, wiring arrangement as documented by the installer, and exactly where in the dimming range the flicker appears. If a listed compatible load and the model's documented trim procedure do not resolve the symptom, have a qualified electrician or lighting technician inspect the installation.
Safety boundary
Stop conditions
- Stop using the light and isolate the circuit only when safely accessible for smoke, burning odor, arcing, abnormal heat, exposed conductors, a damaged fixture, or a breaker that trips again.
- Do not open the wall box or fixture housing, perform live electrical testing, change wiring, or bypass a dimmer, driver, ballast, neutral, or safety feature.
- Do not use a non-dimmable LED, combine an undocumented load with the Lutron control, or install a shunt or capacitor intended for another control type.
- Do not guess Lutron programming sequences or apply low- or high-end trim instructions from a different model.
- Do not select a dimmer, LED driver, bulb, or fixture part from flicker alone; confirm exact models and compatibility or use qualified electrical service.
Only after diagnosis
Potential parts
- Lutron-compatible dimmable LED bulb or fixture
Consider this category only when the original LED is non-dimmable, absent from the applicable compatibility information, or a controlled comparison shows the flicker follows that load.
Confirm the exact Lutron dimmer, LED or fixture model, load arrangement, and manufacturer guidance before ordering; a dimmable label alone is not enough. - model-specific Lutron dimmer
Consider a dimmer replacement only after qualified diagnosis confirms the existing control is faulty or unsuitable for the documented load and trim cannot resolve the issue.
Verify exact load type, fixture or driver requirements, control locations, wiring, and manufacturer fit; installation is electrical work. - model-specific LED fixture driver
Consider this category only when a qualified technician isolates flicker to an integrated or replaceable LED driver after control and load compatibility checks.
Confirm the fixture model, driver specifications, dimming method, electrical ratings, and manufacturer-approved replacement procedure; do not access the driver while energized.
When checks do not resolve it
Need a professional?
Arrange qualified electrical or lighting service when a documented compatible LED still flickers throughout the dimming range, the exact Lutron model has no applicable trim procedure, the fixture has an integrated driver, the symptom persists with a comparison load, or the installation's wiring or multi-location arrangement is uncertain. Use model-specific instructions only for ordinary compatibility and trim checks. Treat heat, burning odor, arcing, exposed conductors, a damaged fixture, or repeat breaker operation as urgent stop conditions.
Safety scope: This article supports model identification, ordinary visual observation, compatibility lookup, and a documented user-level trim or lamp change only when the exact instructions permit it. It does not authorize wall-box or fixture wiring work, live testing, driver or ballast access, shunt installation on a dimmer, or control replacement.
Common questions
FAQ
Why does my LED flicker with a Lutron dimmer?
The LED may not be dimmable or may not be compatible with that Lutron control, or the flicker may occur outside a stable low- or high-end range. Identify both models before changing the trim or parts.
What if the flicker happens only at the lowest setting?
That pattern can indicate that the LED cannot dim as low as the control. If the exact Lutron model supports it, follow its documented low-end trim procedure or use a model-confirmed compatible load.
Can I fix Lutron LED flicker by adjusting high-end trim?
Only if the exact Lutron control documents high-end trim and the flicker occurs near full brightness. Do not guess a programming sequence or apply instructions from another model.
Why does the LED flicker when the Lutron dimmer is off?
Some LED loads can respond to the small current associated with certain controls or configurations. Confirm compatibility first; do not install a shunt or capacitor on a dimmer or alter wiring without qualified guidance.
When should I call an electrician?
Call qualified electrical or lighting service when flicker persists with a documented compatible load, affects the full range, involves an integrated fixture driver, or comes with heat, odor, arcing, exposed wiring, or a breaker trip.
Read the exact guide
Official sources
- Application Note #459Lutron · Official Lutron application note explaining low-end trim for LED flicker or strobing and high-end trim for maximum-level behavior on supported Maestro controls.
- Dimmable Fluorescent Troubleshooting Application Note #436Lutron · Official Lutron troubleshooting note for fluorescent dimming systems; used only for its explicit qualified-personnel and load/control compatibility boundaries, not as a claim that this LED fixture is fluorescent.
- Ariadni / Toggler LED+ Dimmer SwitchLutron · Official Lutron product information showing LED+ compatibility testing, dimming performance, and model-specific specifications; not a universal wiring guide.
- 030-657e SPSELV-600M Electronic Low-Voltage Dimmer with IR ReceiverLutron · Official Lutron installation and troubleshooting document for a specific low-voltage dimmer; used for the general boundary that fixture and control types must match and internal wiring is not a casual user check.
Community feedback
Share a repair observation
Share a plain-text repair observation. Accepted observations are published automatically; this page may take a moment to update.