
On this page
Start here
Quick answer
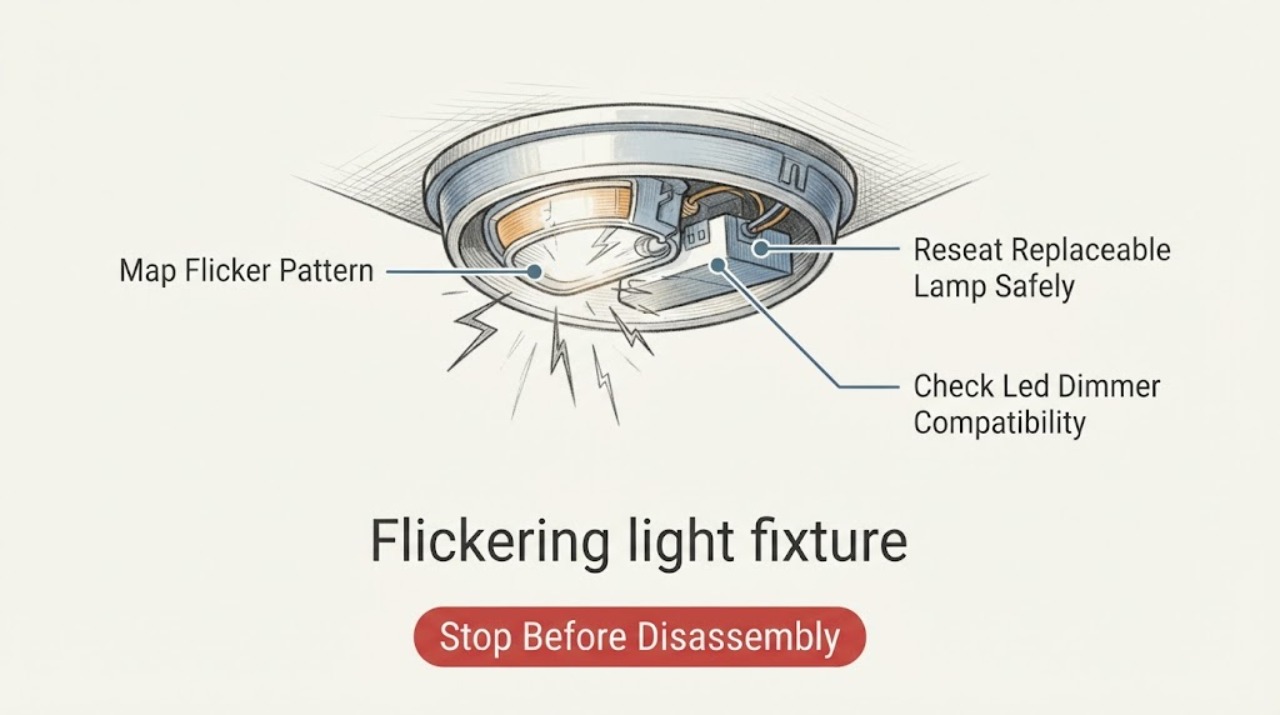
A flickering light fixture can be a loose or failing lamp, an LED-and-dimmer compatibility issue, or an electrical connection or circuit problem. First note whether only one fixture flickers, whether it happens only while dimming or when another load starts, and whether the fixture still flickers with a correctly rated, compatible lamp. With power off and the fixture cool, you may reseat a replaceable lamp and inspect visible external damage; do not open the fixture, switch box, junction box, or electrical panel. Stop immediately for a hot or discolored switch or plate, buzzing or crackling, burning smell, sparking, smoke, shock, repeated breaker trips, or flicker affecting multiple fixtures, and have a qualified electrician determine the cause.
Work through in order
Diagnostic checks
Use only checks that match the exact appliance or system and its official guide.
-
Check 1
From a safe standing position, observe the light without touching it and note whether the flicker is constant or intermittent, occurs only at low dimmer settings, begins when another load starts, and affects one fixture, a room, or several areas.
Expected result: Only one fixture flickers, all fixtures on one switch or circuit flicker, the flicker is limited to dimming, or the symptom is house-wide or load-related.
Next step: Use the pattern to select the lamp/compatibility or electrical-warning branch. Do not open the fixture or panel to identify the cause.
Stop if: Stop immediately for buzzing, crackling, heat, discoloration, burning smell, smoke, sparking, shock, or repeated breaker trips.
Why this matters
Why: A single-fixture pattern can fit a lamp, driver, dimmer, or local connection; dimming-only flicker can fit LED-control compatibility; multiple or load-related flicker raises the concern for a circuit or supply problem.
-
Check 2
If the light uses a replaceable lamp, turn the switch off, wait for the lamp and fixture to cool, and from a stable position gently check that the lamp is seated. Use only a lamp type and wattage permitted by the fixture; do not remove a sealed LED module or fixture cover.
Expected result: The lamp was visibly loose or damaged, the flicker stops with a correctly seated permitted lamp, or the flicker remains.
Next step: If the fixture is stable and the permitted lamp resolves the problem, monitor it. If flicker remains, stop changing lamps and arrange an electrician inspection.
Stop if: Stop for a hot, cracked, swollen, discolored, sparking, or damaged lamp/fixture, a lamp that is stuck, or any need to remove the fixture from its mounting.
Why this matters
Why: A loose or failing lamp can explain a single-fixture flicker, but continued flicker after a safe lamp check moves attention toward the dimmer, fixture driver, connection, or circuit.
-
Check 3
If the fixture is LED and flickers only while dimming or at a low setting, read the lamp or integrated-light documentation and identify whether the dimmer is intended for that LED load. Do not change wiring or adjust a wall control's internal settings.
Expected result: The lamp is non-dimmable, the dimmer and LED have no confirmed compatibility, the flicker is low-end only, or the same flicker occurs at full brightness and with the dimmer bypassed only by a qualified professional.
Next step: Use only a manufacturer-approved compatible lamp/control combination identified from the product documentation, or have an electrician evaluate it. If flicker occurs at full brightness or without a dimming condition, do not assume compatibility is the only cause.
Stop if: Stop for a warm or discolored dimmer, buzzing, crackling, burning odor, shock, sparks, or any need to open the switch box.
Why this matters
Why: DOE explains that LED flicker depends on the driver and that dimmers or other electronics can induce or increase it. ENERGY STAR notes that LED lights and dimmers are not universally interchangeable.
-
Check 4
With the light switched off and cool, look only at accessible external surfaces of the fixture, switch plate, and plug/cord if present. Check for heat, discoloration, melted material, a loose plate, buzzing or sizzling, odor, smoke, or a visible damaged cord; do not touch suspicious surfaces or expose wiring.
Expected result: The fixture or switch is warm/discolored, a sound or odor is present, the cord or plug is damaged, or no external warning sign is visible.
Next step: For any warning sign, leave the light off, keep clear, and arrange a qualified electrician. If no warning sign is present, proceed only to documenting the pattern and affected fixtures.
Stop if: Stop immediately for smoke, active sparking, burning smell, a hot plate or fixture, exposed conductor, water intrusion, shock, or a breaker that trips.
Why this matters
Why: Heat, discoloration, buzzing/sizzling, burning odor, or damage is an electrical warning branch even if the light still works. A clean exterior does not clear a hidden connection or driver.
-
Check 5
After the single permitted lamp/compatibility check, decide whether flicker persists, affects multiple fixtures, changes with another electrical load, or is accompanied by any warning sign. Do not repeatedly toggle the light, reset a breaker, or open the panel to reproduce an intermittent fault.
Expected result: The flicker has stopped with no warning symptom, versus persistent or multi-fixture flicker, load-related dimming, or a heat/sound/odor/electrical warning.
Next step: Leave the affected light off when the cause is not clearly resolved and arrange qualified electrical inspection. Give the electrician the fixture map, lamp/control details, timing, and warning observations.
Stop if: Stop now for flicker with burning smell, smoke, sparks, hot/discolored hardware, buzzing/crackling, shock, water intrusion, or repeated breaker trips.
Why this matters
Why: A resolved lamp or compatibility issue can be monitored, but persistent, circuit-wide, or warning-associated flicker may involve a connection, dimmer, driver, branch circuit, or supply condition requiring professional testing.
Use your observations
Decision map
Find the observation that best matches what you see, then follow the next safe action.
-
PATH 01Next step
What you see
Only one replaceable-lamp fixture flickers, the lamp was loose or visibly damaged, and no heat, odor, sound, or circuit symptom is present.
Do this next
Turn the switch off, allow it to cool, and reseat or replace the lamp only with a fixture-permitted type and wattage.
-
PATH 02Next step
What you see
An LED flickers only while dimmed or at the low end and the lamp/control combination is not confirmed compatible.
Do this next
Treat LED-driver and dimmer compatibility as a possible cause, not as permission to open the switch or fixture.
-
PATH 03Safety boundary
What you see
Only one fixture flickers after a permitted lamp check, including an integrated LED fixture with no user-replaceable lamp.
Do this next
Leave it off if practical and treat the driver, fixture connection, or control as an inspection task.
Why this path and its safety boundary
Safety stop: True
-
PATH 04Safety boundary
What you see
Several fixtures flicker together, lights dim when another load starts, or the symptom is not confined to one fixture.
Do this next
Treat it as a circuit or supply warning rather than a bulb replacement problem.
Why this path and its safety boundary
Safety stop: True
-
PATH 05Safety boundary
What you see
A switch or fixture is hot or discolored, buzzing/crackling, smells of burning, sparks, smokes, shocks, has water intrusion, or trips a breaker.
Do this next
Stop using the light immediately and keep clear; do not touch, dismantle, or reproduce the fault.
Why this path and its safety boundary
Safety stop: True
Helpful context
Understand the symptom
Start with the pattern, not the ceiling hardware
Observe the fixture from a safe position and record whether the flicker is continuous, occasional, limited to low brightness, present only when another appliance starts, or visible across several lights. A single replaceable lamp has a different first check from a whole room or whole-home symptom. The pattern is evidence for where to look, not proof that a particular bulb, dimmer, driver, or wire has failed.
Make only an external lamp and compatibility check
If the fixture uses a replaceable lamp, turn it off, allow it to cool, and reseat it only from a stable position. Use the lamp type and wattage permitted by the fixture and check whether an LED is marked dimmable when a dimmer is present. LED light output depends on its driver, and dimmers or other electronics can induce or increase flicker; ENERGY STAR also cautions that not every LED light works well with every dimmer. Do not remove a canopy, trim, switch plate, or driver to continue this check.
Treat heat, smell, and sound as a different branch
With the switch off and the fixture cool, look only at visible external surfaces for darkening, melted plastic, a loose cover, or a damaged cord or plug. Do not touch a hot plate, exposed conductor, or suspected live part. ESFI and CPSC identify flickering lights together with warm or discolored switches, buzzing or sizzling, and burning odors as electrical warning signs that need qualified inspection rather than repeated lamp changes.
Use the number of affected fixtures to set urgency
If another fixture on the same area or circuit flickers at the same time, or lights dim when a load starts, stop treating the ceiling fixture as an isolated lamp problem. A circuit connection, switch, dimmer, panel, or supply condition may be involved. If only one fixture flickers and a permitted, compatible lamp does not change it, the fixture's driver or connection may need diagnosis; do not open it to prove which one.
Keep electrical work on the electrician side of the boundary
Record the fixture type, lamp or integrated-LED details, dimmer or smart-control presence, flicker timing, affected fixtures, and any sound, heat, odor, or breaker symptom. A qualified electrician can inspect de-energized connections and the circuit safely. Do not remove the fixture from the ceiling, replace a dimmer, identify house wiring, or probe a panel because flicker is intermittent; an intermittent fault can still overheat or arc.
Safety boundary
Stop conditions
- Do not open the fixture, canopy, switch box, junction box, dimmer, or electrical panel to investigate flicker.
- Do not touch hot, discolored, buzzing, sparking, wet, or exposed electrical parts and do not repeatedly reset a tripping breaker.
- Stop immediately for burning odor, smoke, sparks, shock, water intrusion, or flicker affecting multiple fixtures.
When checks do not resolve it
Need a professional?
Flicker persists after one permitted lamp and documented compatibility check, or the fixture has an integrated LED driver., Several fixtures flicker together, lights dim when another load starts, or breakers trip repeatedly., A switch plate or fixture is hot or discolored, or there is buzzing, crackling, burning odor, smoke, sparking, shock, or water intrusion., Diagnosis would require opening a fixture, switch box, junction box, dimmer, or electrical panel.
Common questions
FAQ
Is a flickering light fixture always a wiring problem?
No. A loose or failing replaceable lamp and an LED/dimmer compatibility issue are possible, especially when only one fixture flickers or the symptom occurs only while dimming. Flicker affecting several fixtures, changing with another load, or accompanied by heat, odor, sound, sparks, or breaker trips needs qualified electrical inspection.
Why does my LED light flicker when dimmed?
The LED driver and dimmer may not be compatible, or the LED may not be intended for dimming. DOE explains that drivers and dimming electronics affect flicker, and ENERGY STAR notes that not every LED works well with every dimmer. Check documentation only; do not open or rewire the control.
Can I just tighten a flickering ceiling light?
Do not remove the fixture or tighten electrical connections unless you are a qualified electrician following the applicable procedure. You may gently reseat a cool, replaceable lamp from a stable position, but a persistent flicker needs inspection rather than access to the ceiling wiring.
What does it mean if several lights flicker together?
A shared circuit, connection, dimmer, panel, or supply condition may be involved, so it is not a single-bulb diagnosis. Leave the affected lighting off as needed, do not open the panel or repeatedly reset a breaker, and arrange qualified electrical inspection.
When should I stop using a flickering light?
Stop immediately for a hot or discolored fixture or switch, buzzing or crackling, burning smell, smoke, sparks, shock, water intrusion, exposed wiring, repeated breaker trips, or flicker across multiple fixtures. Keep clear and have a qualified electrician determine the cause.
Read the exact guide
Official sources
- Flicker: Understanding the New IEEE Recommended PracticeU.S. Department of Energy · General solid-state-lighting information; it does not diagnose a particular fixture or installation.
- Electrical Safety DosElectrical Safety Foundation International · General home electrical safety guidance; local code and a qualified electrician govern the installation.
- Light Fixtures (Downlights)ENERGY STAR · General certified-lighting guidance; product and dimmer documentation govern a particular installation.
- Repairing Aluminum WiringU.S. Consumer Product Safety Commission · The publication addresses aluminum-wiring systems specifically; its warning signs do not identify the wiring type in an individual home.
Community feedback
Share a repair observation
Share a plain-text repair observation. Accepted observations are published automatically; this page may take a moment to update.