
On this page
Start here
Quick answer
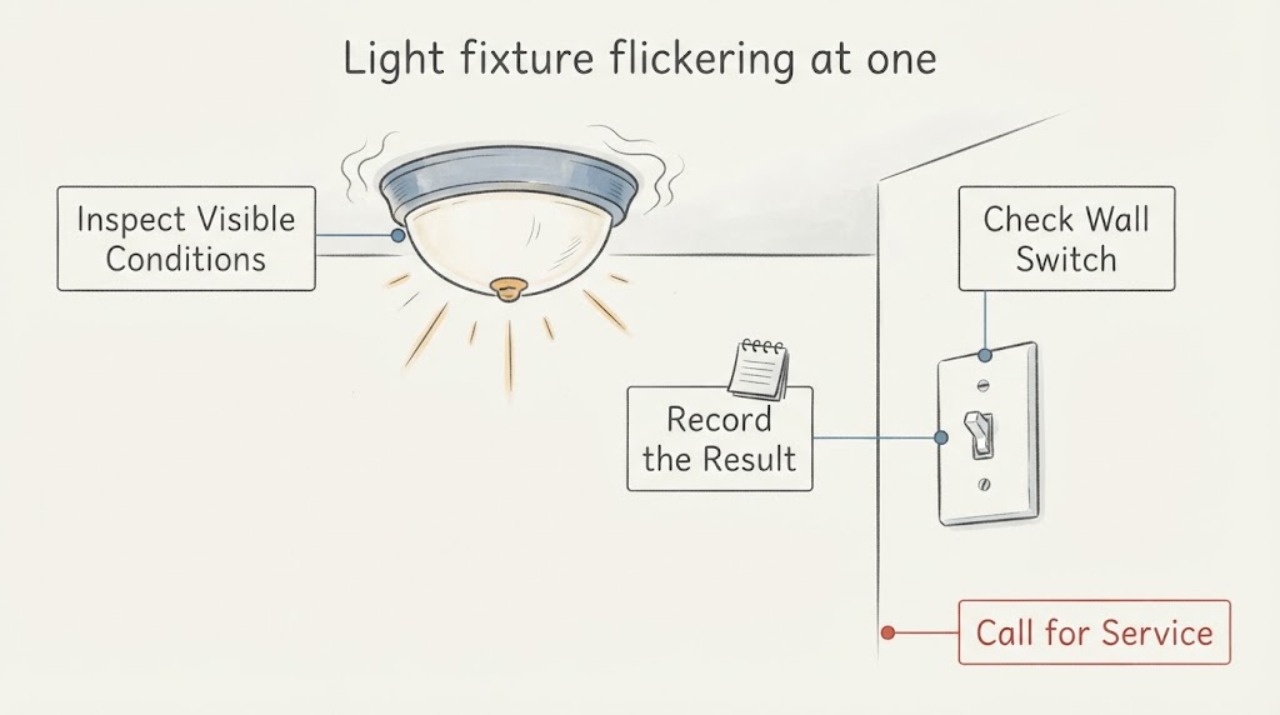
A light fixture that flickers when controlled by one switch may have a lamp or LED driver issue, a switch or dimmer compatibility problem, a loose local connection, or a branch-circuit or service-supply fault. First observe whether only one fixture flickers, whether the pattern changes with the switch or dimmer, and whether the lamp is an LED, fluorescent, incandescent, or integrated fixture. From a safe standing position, look for a warm or discolored switch plate, buzzing, burning odor, smoke, sparks, or a breaker that repeatedly trips; do not open the fixture, switch box, or electrical panel. LED drivers can flicker when they are not matched to the control, but that does not rule out wiring. Stop using the light and obtain qualified electrical help for persistent flicker or any heat, odor, arcing, shock, or fire warning.
Work through in order
Diagnostic checks
Use only checks that match the exact appliance or system and its official guide.
-
Check 1
From a safe standing position, observe the fixture for one normal use cycle and record whether the flicker is continuous, occasional, tied to one switch or dimmer position, or triggered when another appliance starts. Do not repeatedly cycle the control just to reproduce the symptom.
Expected result: Only one fixture flickers; several fixtures on the same area flicker together; or lights throughout the home change brightness.
Next step: Keep the affected light off when practical, record the locations and timing, and use the corresponding branch below. Do not open the fixture, switch, or panel.
Stop if: Stop immediately for a visible flash, smoke, sparks, fire, shock, hot parts, or a burning odor.
Why this matters
Why: One fixture keeps the lamp, LED driver, socket, or local control in focus. A shared or whole-home pattern makes a branch, connection, or service-supply issue more likely than a single switch, especially if it follows a load or weather event.
-
Check 2
Identify the visible light source and control without removing anything: replaceable LED lamp, incandescent lamp, fluorescent lamp, integrated LED fixture, ordinary switch, dimmer, smart control, or sensor. Note whether the flicker began after a lamp, dimmer, switch, or fixture change.
Expected result: The flicker began after a control or lamp change, occurs only at a dim setting, or occurs with an integrated fixture that has no replaceable lamp.
Next step: Read the exact lamp or fixture and control instructions for compatibility. If the model or approved replacement is unclear, leave the fixture off and arrange electrical service.
Stop if: Stop if the housing or switch is warm, discolored, loose, cracked, buzzing, or smells burnt.
Why this matters
Why: The timing raises a compatibility or driver possibility, particularly for an LED controlled by a dimmer, but it is not proof that the new part is compatible or that the wiring is sound. Integrated fixtures may require model-specific service rather than a bulb swap.
-
Check 3
Without opening the device, note how the light behaves at its normal switch or dimmer positions and whether another approved control, such as a separate wall control already installed for the same fixture, produces a different result. Do not remove the plate or touch the lamp socket.
Expected result: Flicker appears only at one dimmer range or switch position, remains at every setting, or the light goes completely out with a pop or abrupt drop.
Next step: Stop using the suspect control if the symptom persists. Give the electrician the exact control setting and fixture response rather than attempting a switch replacement.
Stop if: Do not keep cycling the switch, change dimmer wiring, probe the socket, or operate a control that becomes hot or crackles.
Why this matters
Why: A setting-specific pattern keeps the control/source interaction in focus. Flicker at every setting or an abrupt outage makes a failing lamp, driver, socket, connection, or branch condition more plausible and cannot be settled by the switch symptom alone.
-
Check 4
From outside the fixture and switch, look and listen for a warm plate, discoloration, a loose-looking cover, buzzing or sizzling, burning odor, movement at the fixture, or visible damage. Check only from a safe position; do not remove covers, climb, or reach over furniture.
Expected result: The exterior is cool and intact, or there is heat, discoloration, odor, buzzing, a gap, movement, or exposed material.
Next step: Leave the affected light off and request qualified electrical inspection of the switch, fixture, wiring, and mounting as indicated by the pattern.
Stop if: Stop all troubleshooting for heat, odor, smoke, sparks, a shock or tingling sensation, loose mounting, or exposed conductors.
Why this matters
Why: A cool exterior supports observation only; it does not clear concealed wiring. Heat, discoloration, noise, odor, movement, or exposed material can accompany overheating or a deteriorating connection and raises fire or shock risk.
-
Check 5
From a safe location, note whether the visible breaker or fuse status changes and whether the flicker coincides with a high-load appliance, rain, wind, an outage, or recent electrical work. Do not open the panel, change a fuse, install a different protective rating, or repeatedly reset a breaker.
Expected result: A protective device opens, the light flickers when a particular load starts, several circuits are involved, or the pattern follows weather or a utility event.
Next step: Leave the affected load or circuit unused and tell a qualified electrician or utility the exact trigger, locations, and timing. Keep away from service equipment or exterior damage.
Stop if: Stop for panel heat, smoke, arcing, repeated protection operation, or any need to touch the panel or service equipment.
Why this matters
Why: A load-linked or repeatedly opening protective device can indicate an overload, faulty load, or branch connection problem. Weather-linked or whole-home flicker can involve service equipment. Neither pattern is a switch-replacement diagnosis.
-
Check 6
Record the fixture location, source type, control type, number of affected lights, flicker timing, recent changes, load or weather trigger, and any heat, odor, buzzing, smoke, sparks, shock, or breaker behavior. Take photographs only from a safe distance.
Expected result: The symptom sequence and affected scope are documented, or the area cannot be approached safely.
Next step: Request qualified electrical service and provide the record. Ask for the switch, fixture, lamp/driver, branch, and service-supply path to be assessed according to the observed pattern.
Stop if: Do not reopen the fixture, switch, panel, or wiring, and do not restore use after a failed or hazardous observation.
Why this matters
Why: A complete sequence helps the electrician separate a local lamp/driver issue from a switch, branch, wiring, breaker, or service-supply condition without unsafe testing. An unsafe approach requires immediate professional assessment.
Use your observations
Decision map
Find the observation that best matches what you see, then follow the next safe action.
-
PATH 01Safety boundary
What you see
Only one cool, intact LED fixture flickers and the pattern changes with a dimmer range or follows a recent lamp/control change.
Do this next
Use only the manufacturer's compatibility instructions for a clearly accessible, approved lamp or control choice; if the flicker persists or compatibility is uncertain, call an electrician.
Why this path and its safety boundary
Why it matters: An LED-driver and control compatibility issue is plausible, but the flicker does not prove the dimmer or lamp is safe to replace without checking the exact requirements.
Safety stop: Do not substitute a similar-looking dimmer or lamp, open the control box, or continue using the fixture if it heats or buzzes.
-
PATH 02Safety boundary
What you see
The flicker appears only when one switch or dimmer position is used, while other lights and the fixture exterior remain normal.
Do this next
Stop using that control and arrange qualified electrical diagnosis rather than replacing or tightening the switch yourself.
Why this path and its safety boundary
Why it matters: The switch/dimmer and light-source interaction is more likely than a whole-home issue, but a worn switch or concealed connection can have the same pattern.
Safety stop: Do not remove the faceplate, touch wiring, or repeatedly operate the control to test it.
-
PATH 03Safety boundary
What you see
Several fixtures flicker together, or flicker begins when a particular appliance or load starts.
Do this next
Leave the suspect load or circuit unused and arrange electrician or utility assessment with the affected locations and trigger.
Why this path and its safety boundary
Why it matters: A branch circuit, connection, overload, or service-supply condition is more likely than one lamp or switch.
Safety stop: Do not open the panel, change protective-device ratings, or attempt a branch-wiring correction.
-
PATH 04Safety boundary
What you see
Lights throughout the home dim or flicker together, especially with wind, rain, an outage, or service activity.
Do this next
Contact the utility or a qualified electrician from a safe location and do not touch service equipment or exterior conductors.
Why this path and its safety boundary
Why it matters: This may involve service equipment or a utility-side connection rather than the assigned switch.
Safety stop: Stop immediately for exterior arcing, a bright flash, smoke, damaged equipment, or downed lines; keep people away and use emergency help as appropriate.
-
PATH 05Safety boundary
What you see
The switch, fixture, outlet, or cover is hot, discolored, buzzing, smoking, sparking, or smells burnt, or anyone feels a shock.
Do this next
Stop using the affected device, keep clear, and obtain urgent qualified electrical or emergency help from a safe location.
Why this path and its safety boundary
Why it matters: This is a possible overheating, arcing, or shock hazard, not a bulb or switch-adjustment problem.
Safety stop: Stop all troubleshooting and do not operate the circuit again until it is assessed.
Helpful context
Understand the symptom
A switch-linked flicker is a pattern, not a diagnosis
A flicker that follows one switch position, a dimmer setting, or a recent lamp change keeps the lamp, LED driver, and control in focus, but does not prove that the switch is the failed part. If several fixtures flicker together, or the whole home dims when a load starts, the branch circuit, connections, or service supply deserve professional attention instead. Note the exact timing and scope before trying to reproduce it.
LED and dimmer compatibility can create local flicker
Unlike a filament that continues to glow briefly, an LED depends on its electronic driver to maintain light output. The DOE notes that some drivers do not respond well to the output of a dimmer, so an LED can flicker at one control position or after a control change. Use only the fixture or lamp maker's compatibility guidance; do not infer compatibility from a similar-looking bulb or dimmer.
Treat heat, noise, odor, and arcing as a stop signal
A warm or discolored switch plate, sizzling or buzzing, burning odor, sparks, smoke, a shock, or a breaker that repeatedly opens is not a normal lamp adjustment. CPSC guidance says to discontinue use of hot switches and obtain qualified electrical help, and it warns consumers not to correct service-equipment problems themselves. Keep the light off and keep clear while arranging service.
Safety boundary
Stop conditions
- Do not remove a switch, fixture, outlet, or panel cover; touch conductors; probe an energized circuit; or perform live electrical testing.
- Do not replace a switch, dimmer, lamp, LED driver, fuse, or breaker based on flicker alone, and never install a different protective rating.
- Stop using the affected light for heat, discoloration, buzzing, burning odor, smoke, sparks, arcing, shock, water, exposed material, or a loose fixture.
- Keep away from service equipment and exterior wiring when flicker is whole-home, weather-linked, or accompanied by visible damage.
Only after diagnosis
Potential parts
- lamp or LED light source
Consider only when the exact fixture documentation identifies a compatible accessible source and the electrician or manufacturer guidance supports that path.
Confirm source type, socket or fixture requirements, dimming/control compatibility, and the maker's limits; do not select by appearance alone. - LED driver or integrated LED fixture module
Consider only after the exact fixture documentation and qualified diagnosis identify a serviceable driver or module.
Confirm exact fixture model, driver/module electrical and mechanical compatibility, connectors, and service instructions. - light switch or dimmer
Consider only after an electrician identifies the control as the cause and confirms the correct device for the fixture and circuit.
A dimmer must be compatible with the lamp/driver and circuit; switch replacement is electrical work and is not justified by flicker alone.
When checks do not resolve it
Need a professional?
Use qualified service for persistent or recurring flicker, any switch or fixture wiring diagnosis, a replacement dimmer or driver, shared or whole-home flicker, or any warning sign.
Have this ready
- Fixture location, source type, and visible control type
- Whether one fixture, a shared branch, or the whole home flickers
- Flicker timing and any switch, dimmer, load, weather, or recent-work trigger
- Visible condition of the switch plate and fixture
- Any heat, odor, buzzing, smoke, spark, shock, or repeated protection operation
Common questions
FAQ
Is a flickering light fixture always a bad bulb?
No. A lamp or LED driver can be involved, but a dimmer, switch, loose connection, branch circuit, breaker, or service-supply issue can produce the same symptom. The scope and timing are more informative than flicker alone.
What does it mean if the flicker changes when I move the switch?
It keeps the control and lamp/driver interaction in focus, but it does not prove that the switch is safe to replace. Stop using the control if the flicker persists and have a qualified electrician inspect it.
Can I tighten the switch or fixture connection?
Do not remove covers or touch wiring as a troubleshooting step. If the switch or fixture is warm, discolored, loose, buzzing, or smells burnt, discontinue use and obtain qualified electrical help.
Why does an LED flicker on a dimmer?
The DOE explains that LEDs rely on electronic drivers and that some drivers do not respond well to a dimmer's output. Use only the exact lamp and control compatibility guidance; do not assume any LED and dimmer pair will work.
When is flickering an electrical emergency?
Treat smoke, sparks, arcing, a bright flash, hot or discolored parts, buzzing, burning odor, shock, water damage, or repeated protective-device operation as a stop condition. Leave the area or keep clear and obtain qualified electrical or emergency help.
Read the exact guide
Official sources
- CPSC Guide to Home Wiring HazardsU.S. Consumer Product Safety Commission · General residential safety guidance; local code, installation, and professional assessment govern.
- Flicker BasicsU.S. Department of Energy · General lighting science; exact lamp, driver, dimmer, and fixture compatibility must come from the maker.
- Qualified employee requirements for the servicing and maintenance of electrical equipment.Occupational Safety and Health Administration · OSHA workplace electrical-safety interpretation; household service should still be performed by appropriately qualified personnel.
Community feedback
Share a repair observation
Share a plain-text repair observation. Accepted observations are published automatically; this page may take a moment to update.