
On this page
Start here
Quick answer
A mini-split that is not cooling may be in the wrong mode, set too high, restricted by a dirty filter or blocked airflow, affected by a condensate problem, or experiencing an electrical, refrigerant, coil, fan, or control fault. Confirm Cool mode and the remote setting, then check the accessible indoor filter and the clear space around the indoor and outdoor units without opening panels. Note whether the fan runs, the air changes temperature, the outdoor unit operates, ice appears, water pools, or an error indicator is shown. Stop for burning smell, smoke, exposed wiring, active water damage, severe icing, or unsafe access, and have a qualified HVAC technician diagnose refrigerant, electrical, coil, fan, or concealed-control work.
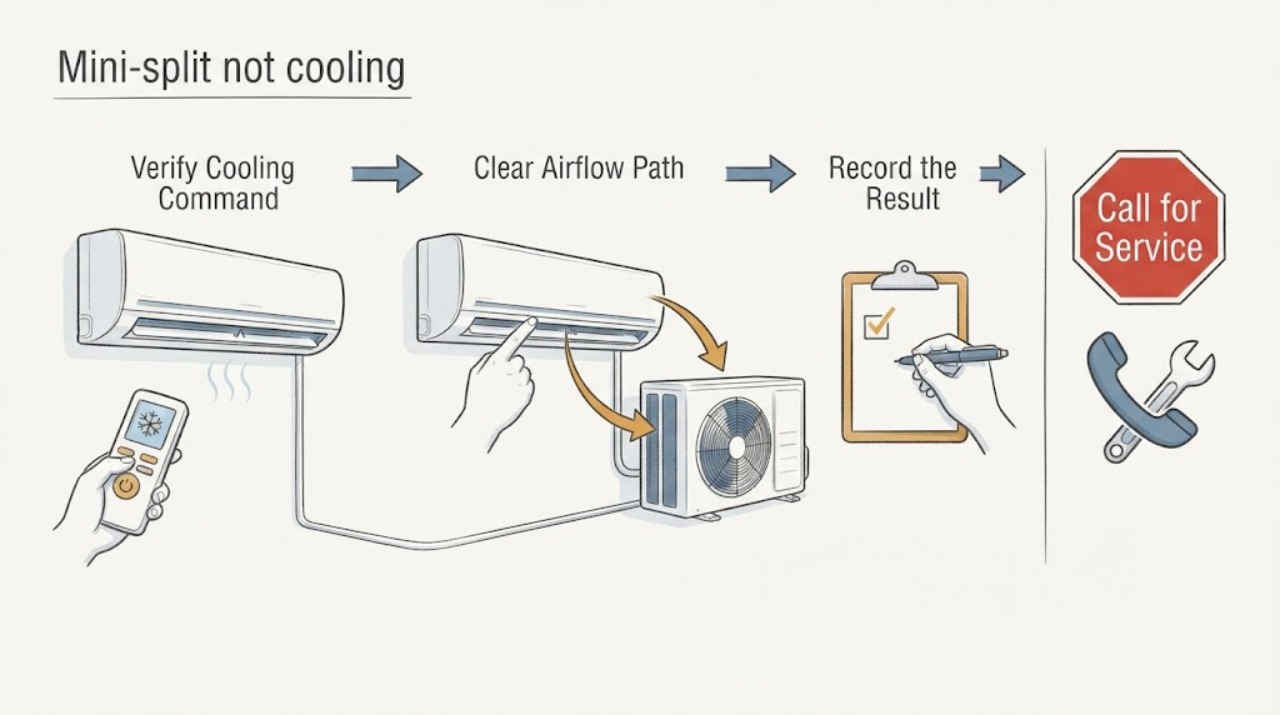
Work through in order
Diagnostic checks
Use only checks that match the exact appliance or system and its official guide.
-
Check 1
Use the normal remote or wall control to verify that the mini-split is in Cool mode, the setpoint is below the room temperature, and the fan is not intentionally set to a non-cooling mode. Do not keep changing settings rapidly.
Expected result: The unit was in another mode, the setpoint was not calling for cooling, the remote does not respond, or the unit is correctly commanded to cool.
Next step: Correct an obvious setting and allow one normal operating response. If the unit remains warm or the control does not respond, record the display and arrange qualified HVAC service.
Stop if: Stop for a burning smell, smoke, abnormal electrical sound, water near controls, or a damaged remote, cord, or disconnect.
Why this matters
Why: A mode or setpoint mismatch can look like equipment failure. A responsive control with a correct cooling command shifts attention to airflow, outdoor operation, condensate, or an internal fault.
-
Check 2
Observe the indoor head from floor level: check whether air exits the discharge, whether the intake and discharge are blocked by furnishings or dust, and whether the accessible filter appears loaded with dust. Follow the exact manual before removing or washing a filter.
Expected result: Airflow is strong, weak, absent, blocked, or the filter is visibly dirty.
Next step: Clear only an obvious external obstruction and clean the accessible filter as the model manual directs. If airflow stays weak, the coil is iced, or access requires opening the cabinet, stop and call a technician.
Stop if: Stop for water dripping from the electrical section, exposed wiring, an inaccessible high unit, fan noise suggesting contact, or ice that would require scraping.
Why this matters
Why: A dirty filter or blocked intake and discharge can reduce airflow and cooling performance. Weak or absent airflow with a clean and clear exterior keeps the indoor fan, coil, control, or power supply in scope.
-
Check 3
From a safe distance, inspect the outdoor unit's intake and discharge for leaves, packaging, snow, fencing, or other obstructions and note whether the outdoor fan or unit operates when cooling is commanded. Do not open the cabinet or touch the fan, disconnect, or refrigerant lines.
Expected result: Outdoor airflow is clear and the unit runs, an obstruction is visible, the unit is silent, or access is unsafe.
Next step: Remove only a loose external obstruction while the fan is stopped and without entering an unsafe area. If the unit remains silent or access is unsafe, leave it off and arrange qualified HVAC service.
Stop if: Stop for exposed wiring, a damaged disconnect, a moving fan, burning odor, active water, roof or ladder access, or any need to remove panels.
Why this matters
Why: The outdoor unit needs clear airflow to reject indoor heat. A visible obstruction can reduce cooling, while a silent unit with a correct command may indicate power, control, fan, compressor, or protection behavior that requires professional testing.
-
Check 4
Look at the accessible indoor coil area and condensate outlet from the floor for frost, ice, water pooling, or a blocked-looking drain path. Do not remove covers, chip ice, pour chemicals into the drain, or touch wet electrical parts.
Expected result: No ice or water is visible, the coil or line is iced, condensate is not reaching a safe drain, or water is entering the wall or electrical area.
Next step: Stop cooling operation if severe icing or water damage is present and arrange a technician. Protect nearby surfaces from further water only if this can be done without touching the unit or electrics.
Stop if: Stop immediately for water near electricity, active leaking into a wall, ceiling damage, severe ice, or any need to climb or open the indoor head.
Why this matters
Why: Frozen coils and condensate problems are signs that the system is not operating normally and can damage the unit or building. A clear visible drain does not rule out a concealed blockage, airflow fault, or refrigeration issue.
-
Check 5
If the system has multiple indoor heads, compare whether one zone or every zone is warm, and note whether the indoor fan runs, the outdoor unit cycles, strange smells or noise occur, or the setpoint is never reached. Do not force a restart or operate a suspect unit repeatedly.
Expected result: Only one head is affected, all heads are affected, the unit cycles off and on, unusual noise or smell occurs, or the temperature never reaches the setpoint.
Next step: Record the pattern and leave the system off for strange smells, severe cycling, or abnormal noise. Arrange qualified service rather than selecting a sensor, fan, or refrigerant part from the symptom.
Stop if: Stop for burning smell, smoke, active water, exposed wiring, severe vibration, or an outdoor unit that is unsafe to approach.
Why this matters
Why: A single affected head points toward a local filter, airflow, control, or indoor-unit issue. Several affected heads or shared outdoor symptoms expand the scope to the outdoor unit, power, common control, or refrigeration circuit.
-
Check 6
Photograph the indoor and outdoor unit model labels only if they are safely visible, and record any indicator code, power interruption, recent installation, filter cleaning, line work, or service history. Do not remove a panel to find a label.
Expected result: The model and symptoms are documented, only partial identification is available, or the label and fault indication cannot be safely accessed.
Next step: Give the identifiers, symptom pattern, airflow observations, ice or water evidence, and recent changes to a qualified HVAC provider. Do not order or install a part from a generic mini-split symptom.
Stop if: Stop for any label that requires moving the unit, climbing, opening an electrical cover, or entering a restricted service area.
Why this matters
Why: Mini-split components, controls, refrigerant requirements, and service procedures vary by model. Good identifiers and a symptom timeline help a technician choose the correct manual and distinguish a setting or maintenance issue from a system fault.
Use your observations
Decision map
Find the observation that best matches what you see, then follow the next safe action.
-
PATH 01Next step
What you see
There is smoke, burning smell, exposed wiring, active water near electricity, severe vibration, or an unsafe access route.
Do this next
Stop the system if it can be done without approaching the hazard, keep people away, and arrange urgent qualified HVAC or electrical help. Use emergency services for fire or immediate danger.
-
PATH 02Next step
What you see
The system was not in Cool mode, the setpoint was not calling for cooling, or the remote was not commanding the intended zone.
Do this next
Correct the obvious setting and allow one normal response. If cooling does not return or the control remains unresponsive, arrange service.
-
PATH 03Next step
What you see
The indoor filter, intake, discharge, or outdoor unit has a visible obstruction or dirt that can be addressed without opening the cabinet.
Do this next
Clear the safe external obstruction and clean the accessible filter according to the model manual. Call a technician if airflow remains weak.
-
PATH 04Next step
What you see
The indoor coil or line is iced, water is pooling, or condensate is not draining safely.
Do this next
Stop operation when severe icing or water damage is present and arrange qualified HVAC service. Do not scrape ice or open the unit.
-
PATH 05Next step
What you see
One indoor head is warm while other zones cool, with no active hazard.
Do this next
Record the affected head, filter, airflow, control, and indicator behavior. Request a technician to assess the local indoor unit and its connection.
-
PATH 06Next step
What you see
All zones are warm, the outdoor unit is silent, the system cycles abnormally, or cooling remains absent after safe setting and airflow checks.
Do this next
Leave the system off if symptoms are abnormal and arrange qualified service for power, controls, fan, coils, refrigerant circuit, and outdoor-unit operation.
Helpful context
Understand the symptom
What “not cooling” means on a mini-split
A ductless mini-split uses an indoor air handler and an outdoor unit connected by refrigerant lines. No cooling can therefore be a setting or airflow issue, a blocked filter or coil, an outdoor obstruction, a condensate problem, or an internal electrical or refrigeration fault. A fan that runs without a meaningful temperature change is not enough to identify low refrigerant, a compressor fault, or a sensor failure.
Keep the first checks at user level
Use only the remote, normal controls, and accessible filter instructions for the exact unit. Do not remove electrical covers, touch refrigerant lines or terminals, open the outdoor cabinet, climb to a high unit, or scrape ice from a coil. Keep hands and objects out of fans. Stop for smoke, burning smell, exposed wiring, water near electricity, severe icing, or unsafe access.
What to record for the technician
Record the selected mode, setpoint, room conditions, whether the indoor fan and outdoor unit run, filter and airflow condition, ice or condensate, indicator lights or codes, and recent power or installation changes. Note whether one indoor head or several zones are affected. This helps the technician separate a local airflow problem from a shared outdoor, control, or refrigeration fault.
Safety boundary
Stop conditions
- Stop for smoke, burning smell, exposed wiring, active water near electricity, severe icing, unusual vibration, or unsafe indoor or outdoor access.
- Do not open electrical covers, touch terminals or refrigerant lines, scrape ice, bypass controls, enter the refrigerant circuit, or add refrigerant during these checks.
- Refrigerant, electrical, compressor, fan-motor, coil, condensate, concealed-control, and line-set work belongs to a qualified HVAC technician.
Only after diagnosis
Potential parts
- indoor air filter
Consider only if the exact model requires a damaged or non-serviceable filter replacement after airflow diagnosis.
Match the exact indoor-unit model, filter dimensions, material, and installation direction; a generic filter may restrict airflow or fit poorly. - remote control or control sensor
Consider only if model-specific testing confirms that the control or sensor is not issuing or receiving a cooling command.
Confirm the exact indoor-unit series, control protocol, and required pairing or setup before replacement. - condensate drain component
Consider only if diagnosis confirms a failed drain pump, hose, pan, or related component rather than an airflow or installation issue.
Match the exact unit, drain routing, pump or hose arrangement, and safe installation requirements.
When checks do not resolve it
Need a professional?
Use a qualified HVAC technician for persistent no cooling, severe icing, condensate problems, a silent outdoor unit, repeated cycling, strange smells or noise, error indications, or any fault requiring electrical, refrigerant, compressor, fan, coil, or concealed-control work.
Common questions
FAQ
Why is my mini-split running but not cooling?
Check that it is in Cool mode with a setpoint below the room temperature, then inspect the accessible filter and clear airflow around both units. If the fan runs but the room remains warm, the cause may be a coil, control, outdoor-unit, electrical, or refrigerant fault that needs a technician.
Can a dirty filter stop a mini-split from cooling?
A dirty filter can restrict airflow and reduce performance. Clean only an accessible filter according to the exact manual. If airflow remains weak, the coil is iced, or the cabinet must be opened, stop and arrange service.
What does ice on a mini-split mean?
Ice is not a normal basis for scraping or continuing to run the system. It can accompany airflow, coil, condensate, or refrigeration problems. Stop for severe icing and have a qualified HVAC technician diagnose it.
Why is only one mini-split zone not cooling?
One warm zone keeps its local filter, airflow, indoor control, coil, and connection in scope, while other zones cooling makes a shared outdoor failure less obvious. Record the comparison and request model-specific service if safe checks do not restore it.
When should I stop troubleshooting a mini-split?
Stop for smoke, burning smell, exposed wiring, water near electricity, severe ice, unusual vibration, error indications that persist, or unsafe access. Refrigerant, electrical, compressor, fan, coil, and concealed-control work belongs to a qualified technician.
Read the exact guide
Official sources
- What is a mini-split?Mitsubishi Electric Trane HVAC US · Manufacturer explanation of indoor and outdoor mini-split components, refrigerant-line heat transfer, indoor zones, and cooling operation.
- HVAC - Preventative MaintenanceU.S. Department of Energy Building Science Education · HVAC maintenance responsibilities, ductless heat-pump maintenance education, and the effect of dirty filters on airflow and equipment operation.
- You Installed an Air Source Heat Pump. Now What?U.S. Department of Energy Building Science Education · Air-source and ductless heat-pump mode, filter, airflow, condensate, abnormal-operation, and qualified-service guidance.
- Ductless (Mini-Split) Heat Pump Systems Check ListU.S. Department of Energy · Ductless mini-split checklist for safe electrical service, clean filters, unobstructed indoor and outdoor airflow, condensate, refrigerant, and cooling-mode confirmation.
Community feedback
Share a repair observation
Share a plain-text repair observation. Accepted observations are published automatically; this page may take a moment to update.