
On this page
Start here
Quick answer
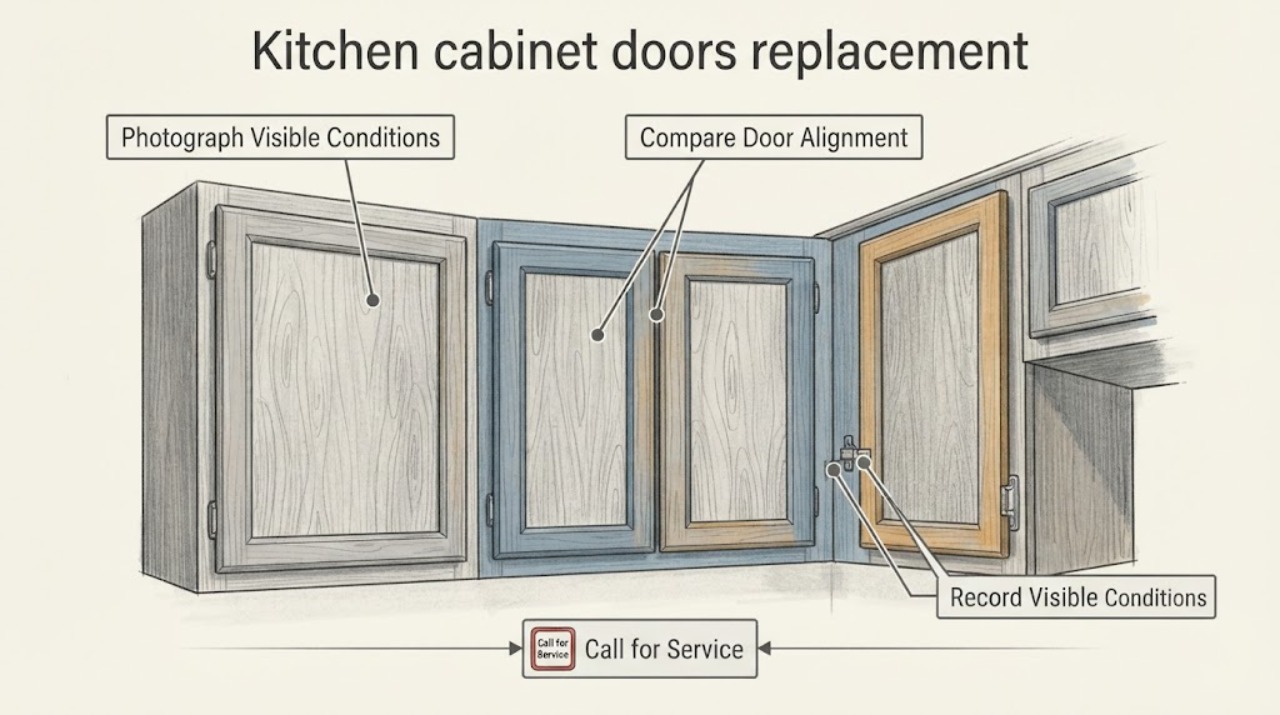
Replacing kitchen cabinet doors is usually a planning and fitment project rather than a one-size-fits-all swap. First document the cabinet layout, door dimensions, overlay, hinge style, finish, and visible damage from safe positions. If the cabinet box is sound and the door is the only problem, a professional can quote replacement doors; if the box, wall, plumbing, gas, or electrical work is involved, the scope is broader. Do not demolish cabinets, disturb utilities, or begin a door-removal or installation procedure before the replacement is confirmed to fit.
Before you begin
Safety first
- Keep the initial assessment observation-only. Do not demolish cabinets, remove heavy or unstable doors, drill or re-bore hinge holes, disconnect wiring or utilities, or begin installation without professional fitment confirmation.
Work through in order
Diagnostic checks
Use only checks that match the exact appliance or system and its official guide.
-
Check 1
Make a simple cabinet map from the floor and count each door, pair of butt doors, drawer front, and open shelf; photograph the whole run and each unusual corner or appliance-adjacent section.
Expected result: Record which fronts are being replaced, whether neighboring doors share a line, and whether a refrigerator, range, sink, corner, soffit, or wall opening limits the available clearance.
Next step: Give the map and photographs to the cabinet professional so the quote covers the actual count, opening type, and surrounding constraints rather than only a door count.
Stop if: Stop if a front is loose, falling, cracked through its mounting area, blocking an appliance, or requires climbing, force, or moving a heavy appliance to inspect.
Why this matters
Why: A single damaged door may be a localized replacement, while mismatched lines, several damaged fronts, or clearance conflicts point to a coordinated design and installation scope.
-
Check 2
With doors closed and then opened normally, visually classify each opening as inset, partial overlay, or full overlay and note whether the cabinet has a visible face frame or a frameless front edge; do not adjust or remove hinges.
Expected result: Record the visible gap around the door, how much the front covers the opening, whether a pair meets at the center, and whether hinge cups or mounting plates are visible.
Next step: Include these observations and close-up photos of the hinge style with the request for a replacement-door assessment; do not order from appearance alone.
Stop if: Stop if opening the door causes rubbing, scraping, sagging, a loose hinge plate, glass movement, or a risk that the front could detach.
Why this matters
Why: Overlay and cabinet construction affect replacement-door sizing and hinge compatibility; similar-looking doors can still require different hardware or a professional fit check.
-
Check 3
Measure the accessible outside width and height of a stable door or the cabinet opening, keeping the tape square and recording which object was measured; take a second reading without forcing a warped or swollen front.
Expected result: Record width, height, approximate thickness if safely visible at an edge, and whether dimensions vary across a pair or along the opening; note units and the location of every measurement.
Next step: Send the measurement sheet and photos for confirmation, and expect a professional to verify critical dimensions before fabrication or ordering.
Stop if: Do not measure by removing the front, leaning over a counter, standing on a stool, forcing a stuck door, or reaching behind utilities.
Why this matters
Why: A measurement set is useful only when the professional knows whether it describes the existing door, the opening, or the overlay; variation can indicate a non-square box, swelling, or a need for site verification.
-
Check 4
Inspect visible faces and edges for cracks, delamination, swelling, water staining, heat damage, loose veneer, or a failed center panel without scraping, sanding, prying, or opening the cabinet box.
Expected result: Note whether damage is cosmetic and isolated to the door, repeats on doors near the sink or dishwasher, reaches the face frame, or is accompanied by dampness, odor, soft material, or cabinet-box movement.
Next step: Photograph the defect and arrange cabinet and, when applicable, plumbing or appliance assessment; keep the affected storage unloaded if the front or box is unstable.
Stop if: Stop if there is active water, exposed wiring, gas or combustion concern, mold-like growth, sharp broken material, or a cabinet that is pulling away from the wall.
Why this matters
Why: A localized front defect can support door-only replacement, but recurring moisture, heat, or box damage must be addressed before a new door is specified or the same failure may return.
-
Check 5
Compare the proposed replacement style with an existing door from a safe viewing position, including rail-and-stile profile, center panel, edge detail, sheen, color, and hardware hole layout; use a sample or photograph rather than cutting or drilling.
Expected result: Record whether the finish and profile match under the kitchen lighting, whether the existing pulls and knobs appear reusable, and whether hinges or hardware differ between openings.
Next step: Request a sample, finish comparison, and written fitment confirmation before approving the replacement scope; do not rely on a generic color name or a single photo.
Stop if: Stop if the sample or proposed door conflicts with an appliance swing, an egress path, a glass panel, a sharp edge, or an unstable existing front.
Why this matters
Why: A style or finish mismatch can be more visible than a small dimension error, while different hardware patterns may require a coordinated hardware decision by the professional.
Use your observations
Decision map
Find the observation that best matches what you see, then follow the next safe action.
-
PATH 01Safety boundary
What you see
The cabinet boxes and face frames look stable, utilities are unaffected, and damage is limited to one or more doors.
Do this next
Proceed with a professional replacement-door assessment using the cabinet map, dimensions, overlay notes, hinge photos, and finish samples.
Why this path and its safety boundary
Safety stop: Do not remove or install fronts until fitment, hardware, clearance, and finish have been confirmed.
-
PATH 02Safety boundary
What you see
The cabinet box, face frame, wall attachment, or surrounding countertop is swollen, loose, shifting, or repeatedly exposed to moisture or heat.
Do this next
Expand the scope to a cabinet/building professional and address the underlying source before selecting replacement doors.
Why this path and its safety boundary
Safety stop: Keep the area unloaded and stop use if a cabinet or front could detach, collapse, or expose a sharp edge.
-
PATH 03Safety boundary
What you see
The existing doors have different overlays, hinge patterns, profiles, or finishes, or the cabinet maker is unknown.
Do this next
Provide close-up photos, measurements, and any original records for a custom fit and finish review; a generic door is not assumed compatible.
Why this path and its safety boundary
Safety stop: Do not drill, re-bore, alter hinges, or order a full set from one unverified measurement.
-
PATH 04Safety boundary
What you see
The proposed door work intersects an appliance, plumbing, gas line, outlet, built-in lighting, or cabinet demolition.
Do this next
Pause the door project and obtain the appropriate qualified remodeling, plumbing, gas, or electrical scope before any work begins.
Why this path and its safety boundary
Safety stop: Do not disconnect utilities, demolish cabinetry, or continue when the area is unsafe or inaccessible.
Helpful context
Understand the symptom
A door replacement is not automatically a cabinet replacement
A replacement can be practical when the cabinet boxes and face frames are stable and the problem is limited to the fronts. Fit depends on more than width and height: inset, partial-overlay, and full-overlay doors use different relationships to the opening, and hinge placement and mounting plates vary. A matching finish can also depend on the original maker, wood or panel construction, door profile, and aging. Treat the first visit as documentation for a designer or qualified cabinet professional, not as a demolition task.
Keep the planning inspection low-risk
Photograph closed and open doors, the cabinet face, hinge area, edge profile, and any damage from a stable position. Record measurements only where the tape can be used without climbing, forcing a warped door, or handling a loose front. Do not remove a door, drill new holes, alter hinges, disconnect lighting, or disturb plumbing and gas connections as part of this initial assessment.
Only after diagnosis
Potential parts
- cabinet hardware
Consider this category only after the door overlay, hinge pattern, finish, and existing hole layout are confirmed; hardware is not interchangeable by appearance alone.
Confirm the cabinet construction, hinge cup or mounting pattern, overlay, door thickness, finish, and manufacturer requirements with the cabinet professional. - drawer organizer
This category is relevant only if the remodel scope includes interior storage changes and the drawer box dimensions and clearances have been assessed; it does not solve a door fit problem.
Confirm usable interior width, depth, height, drawer-slide clearance, and any plumbing or sink-base restrictions before selection. - cabinet lighting
Consider this category only when lighting is part of the approved cabinet-door or remodel scope and the existing electrical layout has been reviewed by a qualified professional.
Confirm voltage, wiring, heat clearance, switch location, and cabinet construction; do not alter wiring or disconnect fixtures as part of a door replacement.
When checks do not resolve it
Need a professional?
Request a qualified cabinet designer or remodeling professional when doors need replacement, the manufacturer or style is uncertain, measurements conflict, the cabinet box is damaged, or the project touches appliances, plumbing, gas, electrical, or wall finishes.
Safety scope: Keep the initial assessment observation-only. Do not demolish cabinets, remove heavy or unstable doors, drill or re-bore hinge holes, disconnect wiring or utilities, or begin installation without professional fitment confirmation.
Have this ready
- Provide the cabinet map, door and opening measurements with units, overlay and frame observations, hinge and edge-profile photos, damage locations, finish or style samples, and any utility or appliance constraints.
Common questions
FAQ
Can I replace only the kitchen cabinet doors?
Often, if the cabinet boxes and face frames are sound and the new doors can be matched to the opening, overlay, hinges, and finish. A professional should confirm the scope before ordering.
What should I measure before requesting replacement doors?
Record whether you measured the existing door or the opening, then note width, height, visible thickness, overlay, frame or frameless construction, hinge style, and any variation between paired doors. Photos and a cabinet map help verify the notes.
Do replacement doors use the existing hinges?
Sometimes, but not automatically. Overlay, hinge cup or mounting pattern, door thickness, frame type, and the condition of the existing hardware all affect compatibility. Have the professional confirm before reusing or ordering hardware.
When is door replacement not the right scope?
If the cabinet box or wall attachment is loose, swollen, damaged by an unresolved leak or heat source, or connected to work involving plumbing, gas, electrical, or demolition, the project needs broader qualified assessment first.
Read the exact guide
Official sources
- Blum catalogue and technical manual: Information about hinge systemsBlum · General hinge-system terminology; not a compatibility claim for an unidentified cabinet or a DIY installation procedure
- How to Measure a Kitchen with CabinetsKraftMaid · General planning workflow for documenting a kitchen; it does not replace a site measurement or provide installation instructions for this project
- KraftMaid FAQs: Cabinet Help, Remodel & Replacement InfoKraftMaid · Manufacturer-specific examples used to frame why records, photos, dimensions, and professional confirmation matter; no KraftMaid identity is assumed for this topic
Community feedback
Share a repair observation
Share a plain-text repair observation. Accepted observations are published automatically; this page may take a moment to update.