
On this page
Start here
Quick answer
Start a cabinet replacement project by documenting the existing boxes, moisture and damage, kitchen layout, appliance openings, and visible plumbing, electrical, and ventilation constraints. A sound box may only need doors or hardware, while warped, delaminated, chronically wet, or poorly supported cabinets can justify a broader professional scope. Do not demolish cabinets, move utilities, open walls, or disconnect appliances to investigate. A remodeling professional can turn the ground-truth photos and measurements into a layout and quote while coordinating any required plumbing, electrical, ventilation, or structural work.
Work through in order
Diagnostic checks
Use only checks that match the exact appliance or system and its official guide.
-
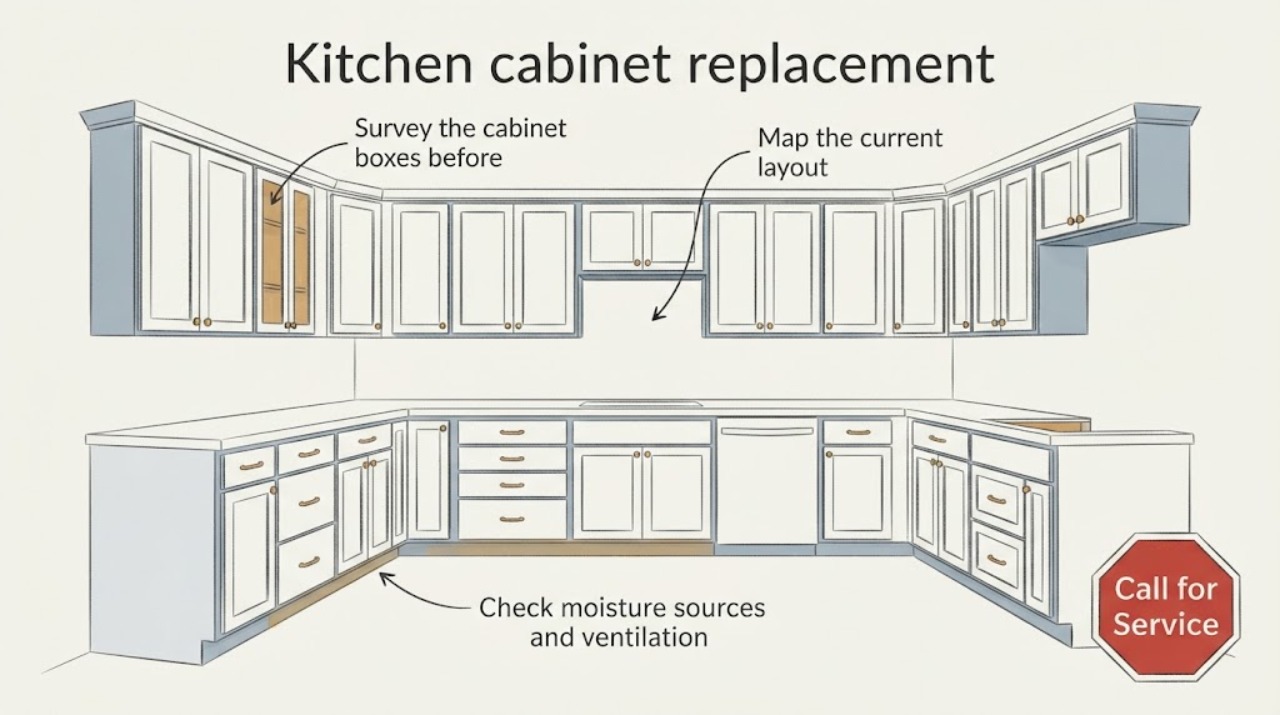
Survey the cabinet boxes before deciding what to replace
Photograph each cabinet run, then inspect only accessible faces, interiors, hinges, drawer openings, shelf supports, toe-kicks, and the wall or floor connection. Note swelling, delamination, water staining, mold odor, loose joints, sagging shelves, pest evidence, cracked finishes, and doors or drawers that no longer align.
Expected result: Dry, square boxes with localized door or hardware problems may support a limited scope; repeated swelling, soft material, movement, odor, or failed support suggests replacement or professional repair of the affected run and the underlying cause.
Next step: Create a room-by-room photo set and label each run by location. Keep damaged or suspect materials undisturbed until moisture, mold, lead, or structural concerns are assessed.
Stop if: Stop if inspection would require removing cabinets, opening a wall, disturbing suspected mold or asbestos, lifting a heavy unit, or working around an unstable cabinet or countertop.
Why this matters
Why: The box condition determines whether a designer or contractor should price fronts and hardware, replacement boxes, or a larger remediation and remodel scope. Appearance alone does not prove structural soundness.
-
Map the current layout and the intended use
From the finished floor, record wall lengths, cabinet run locations, appliance openings, door and drawer swings, traffic paths, window and door positions, and the locations of the sink, cooktop, refrigerator, and dishwasher. Note which shelves or work areas are difficult to reach and which clear routes must remain open.
Expected result: A replacement that keeps the current appliance and plumbing positions has a different coordination scope from a plan that changes work zones, traffic flow, storage reach, appliance openings, or an accessibility route. A cabinet that appears to fit on one wall can still conflict with a door swing or service clearance.
Next step: Add preferred storage, work-height, reach, and traffic goals to the sketch. Ask the remodeling professional to confirm the final layout against appliances, local requirements, and the people who will use the kitchen.
Stop if: Do not remove a cabinet, countertop, appliance, or wall finish to obtain a dimension. Stop if a proposed change would require structural work, utility relocation, or an inaccessible route without qualified design and trade review.
Why this matters
Why: The layout record lets a professional test cabinet widths, fillers, work surfaces, appliance clearances, and circulation before demolition or ordering. ADA guidance provides design criteria for covered accessible kitchens, but it is not a universal residential layout rule.
-
Check moisture sources and ventilation clues
Look under and beside the sink, dishwasher, refrigerator water connection, exterior wall, and range area without disconnecting anything. Note dampness, swelling, staining, condensation, recurring odors, peeling finishes, water at the floor or wall, and whether the range hood visibly exhausts to an appropriate location. Do not open walls or move fixed appliances.
Expected result: A dry cabinet run with no odor differs from a run with active plumbing moisture, repeated sink or dishwasher leaks, condensation, or a hood that does not remove cooking moisture. Moisture inside a wall or under a floor may not be visible from the cabinet opening.
Next step: Photograph stains and note when they appear, then include the plumbing and ventilation observations in the remodel brief. Request qualified water-damage or indoor-environment assessment when dampness, odor, microbial growth, or hidden moisture is suspected.
Stop if: Stop for active leaks, visible mold over a broad or hidden area, sewage, unsafe combustion conditions, or any need to remove finishes or disturb contaminated materials. Do not begin DIY mold remediation.
Why this matters
Why: EPA guidance links kitchen moisture and ventilation with wall and ceiling cavity conditions and notes that remodels can expose hard-to-reach spaces. The moisture source should be corrected and the affected materials assessed before new cabinets cover them.
-
Record visible utility constraints without touching them
From an accessible position, photograph and sketch visible outlets, switches, plumbing supplies and drains, gas or appliance connections, lighting, ventilation ducts, and any access panels behind or beside the cabinet runs. Mark unknown or concealed utilities as unknown rather than guessing their route.
Expected result: Utilities that align with the existing plan may allow a replacement to preserve locations; a conflict with a new sink, appliance, hood, lighting plan, or cabinet box requires trade coordination. A visible outlet or pipe does not reveal everything behind a wall.
Next step: Give the professional photos, model information for appliances if available, and the intended changes to sink, cooking, refrigeration, lighting, and ventilation. Let qualified trades verify and alter utilities.
Stop if: Do not disconnect appliances, remove junction-box covers, cut cabinet backs, move gas or plumbing lines, or perform electrical rewiring. Stop for leaks, exposed wiring, gas odor, or an unprotected utility.
Why this matters
Why: The utility map helps the remodeler sequence design and licensed plumbing, electrical, and ventilation work. It prevents a cabinet order from assuming that a hidden route can be moved without review.
-
Choose between a limited cabinet scope and a broader remodel assessment
Answer yes or no: are the boxes dry and stable, the desired layout unchanged, the appliance openings and utility locations compatible, and there is no hidden-moisture, accessibility, structural, or hazardous-material concern?
Expected result: Yes supports asking for a limited cabinet, door, hardware, or storage scope; no supports a broader design and trade assessment before any order or removal.
Next step: Send the photo set, layout sketch, priorities, appliance information, and moisture or utility notes to a qualified kitchen remodeler. Request that assumptions, exclusions, and trade responsibilities be explained in writing.
Stop if: Do not demolish, order around unverified dimensions, relocate utilities, alter structure, or cover water damage. Pause and escalate if the scope cannot be verified safely.
Why this matters
Why: The answer identifies the amount of coordination needed, not a final construction method or price. A professional still needs field verification, product fitment, local requirements, and a written scope.
Use your observations
Decision map
Find the observation that best matches what you see, then follow the next safe action.
-
PATH 01Safety boundary
What you see
Cabinet boxes are stable, there is no active moisture or hazardous material concern, and appliance and utility locations remain compatible.
Do this next
Ask for a limited scope that may focus on fronts, hardware, drawer function, organizers, or selected boxes. Have the professional verify measurements and clearances before ordering.
Why this path and its safety boundary
Safety stop: Do not assume an attractive face repair solves hidden movement, moisture, support, or appliance-clearance problems.
-
PATH 02Safety boundary
What you see
Boxes or adjacent walls and floors are swollen, soft, stained, odorous, visibly moldy, or repeatedly exposed to plumbing or cooking moisture.
Do this next
Pause cabinet covering or replacement decisions until the moisture source and affected materials are assessed. Coordinate water-damage or environmental service with the remodeler.
Why this path and its safety boundary
Safety stop: Do not scrape, spray, remove, or seal suspected mold or contaminated material as a DIY step.
-
PATH 03Safety boundary
What you see
The plan moves appliances, sink, hood, outlets, plumbing, lighting, or walls, or it must support specific reach, turning, or work-surface needs.
Do this next
Use a qualified remodel designer and the required licensed trades to coordinate the plan before cabinet ordering. Provide the layout sketch and list of users' needs.
Why this path and its safety boundary
Safety stop: Do not perform electrical rewiring, plumbing relocation, structural changes, or cabinet demolition to test a proposed layout.
Helpful context
Understand the symptom
Replacement starts with scope, not a catalog choice
Cabinet replacement can mean new doors and hardware, replacement boxes on the existing layout, or a complete redesign. The useful first distinction is whether the existing boxes are dry, square, supported, and usable, and whether the planned layout must change around appliances, plumbing, ventilation, or accessibility needs.
Treat the kitchen as a connected system
EPA remodeling guidance notes that cabinets can expose otherwise hard-to-reach wall and ceiling spaces, and that kitchen cooking produces moisture and combustion products that require appropriate ventilation. A cabinet plan should therefore record the hood, plumbing, electrical, and wall conditions rather than treating each cabinet as an isolated object.
Use accessibility goals deliberately
If the kitchen must serve someone with mobility or reach needs, identify those requirements before the layout is finalized. The ADA Standards describe clear floor space, approach, storage reach, appliance access, and kitchen work-surface provisions for covered facilities; local rules and the project's occupancy still determine what applies.
Only after diagnosis
Potential parts
- cabinet hardware
Hardware is relevant only when the cabinet boxes and mounting points are sound and the problem is limited to alignment, wear, or operation.
Confirm hinge overlay, mounting pattern, drawer construction, finish, and load requirements before selecting a replacement. - drawer organizer
An organizer is relevant after drawer dimensions, clearances, plumbing obstructions, and desired storage use are verified; it does not correct a weak or swollen drawer box.
Confirm the measured interior opening, drawer travel, cabinet depth, and moisture exposure before ordering. - cabinet lighting
Lighting is relevant only after the cabinet plan, switch location, heat and ventilation conditions, and electrical scope are reviewed by a qualified installer.
Confirm the lighting system's electrical requirements, mounting space, controls, and local installation requirements; do not perform rewiring as a cabinet project.
When checks do not resolve it
Need a professional?
Call a kitchen remodeling professional for field verification when boxes are damaged, the layout changes, appliances or utilities move, accessibility goals matter, moisture or mold is suspected, or the project includes multiple trades. Use licensed plumbing, electrical, ventilation, structural, or environmental specialists for their respective scopes.
Have this ready
- Provide cabinet-run photos, a layout sketch, appliance information, door and traffic paths, moisture and ventilation observations, visible utility locations, storage and reach priorities, and any age or hazardous-material concern you know about.
Common questions
FAQ
Do all kitchen cabinet projects require replacing the boxes?
No. Dry, stable boxes may support a limited door, hardware, or storage scope, while swollen, soft, unstable, or repeatedly wet boxes need a broader assessment. Have a professional verify them before ordering.
Should I remove the old cabinets before getting a quote?
No. Document the existing condition and let the remodel professional plan removal and trade coordination. Early demolition can expose utilities, mold, lead, asbestos, or structural problems.
What should I map before replacing cabinets?
Record cabinet runs, appliance openings, doors and traffic paths, sink and cooking locations, visible plumbing and electrical constraints, ventilation, moisture signs, and the storage or accessibility goals of the people using the kitchen.
Can I move outlets or plumbing as part of the cabinet installation?
Treat that as a separate licensed-trade scope. Do not perform rewiring or plumbing relocation yourself; have the remodeler coordinate qualified professionals before the cabinet layout is finalized.
Read the exact guide
Official sources
- 2010 ADA Standards for Accessible DesignU.S. Department of Justice · The 2010 Standards apply to covered facilities and situations described by the ADA; they are not a universal residential remodeling requirement.
- Best Practices for Indoor Air Quality when Remodeling Your HomeU.S. Environmental Protection Agency · General home-remodeling environmental and exposure precautions; project-specific hazards require qualified assessment.
- Remodeling Your Home and Indoor Air QualityU.S. Environmental Protection Agency · General residential kitchen-remodeling moisture and indoor-air-quality planning; not a substitute for local code or trade design.
Community feedback
Share a repair observation
Share a plain-text repair observation. Accepted observations are published automatically; this page may take a moment to update.