
On this page
Start here
Quick answer
Before replacing cabinets because the finish looks worn, determine whether the problem is surface soil, a small scuff, widespread finish failure, moisture or heat damage, or damage to the door, box, or hardware. Photograph the finish and identify the door style and material from a safe visual inspection; use only gentle care while deciding. Do not sand, strip, paint, dismantle, demolish, or rewire cabinets in this guide. A small, dry cosmetic blemish may suit a manufacturer-approved touch-up, while widespread, swollen, peeling, delaminated, or structurally damaged cabinetry needs a cabinet professional to compare refinishing, door replacement, and full cabinet replacement.
Work through in order
Diagnostic checks
Use only checks that match the exact appliance or system and its official guide.
-
Map where the finish is worn
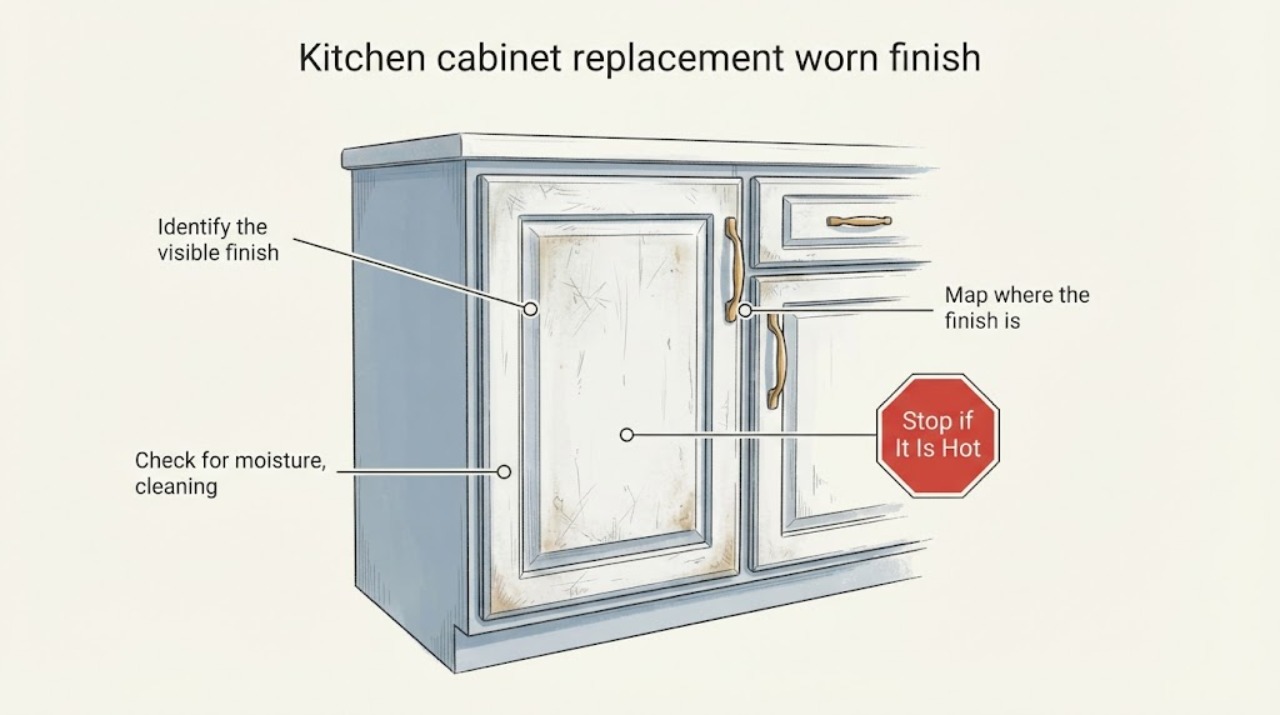
Photograph the entire kitchen, each affected elevation, and close views of doors, drawer fronts, face frames, exposed ends, toe kicks, and edges. Mark whether the wear is isolated or repeated across a run; do not scrub or abrade the surface to make the defect clearer.
Expected result: One small scuff is affected, several fronts show similar wear, the finish is dull but intact, or peeling, bubbling, swelling, or missing material is visible.
Next step: Preserve the photographs and compare the affected areas with an undamaged cabinet from the same run without applying a new product.
Stop if: Stop handling the cabinet for a soft, swollen, sharp, delaminated, unstable, or water-exposed panel.
Why this matters
Why: An isolated superficial blemish may be a touch-up or single-element decision, while repeated or failing finish suggests an environmental, coating, material, or use pattern that should be evaluated before replacement.
-
Identify the visible finish and substrate clues
From the cabinet exterior, note whether the surface appears painted, stained, clear-coated, veneered, thermofoil, or laminate-like, and whether the damage exposes wood, a panel core, a film edge, or only a change in sheen. Use the invoice, design record, or manufacturer documentation if available; do not peel an edge or remove a panel.
Expected result: The finish and substrate are known, partially known, visibly damaged at an edge, or unknown.
Next step: Record the manufacturer, door style, finish name, wood species or panel type if known, and preserve a small undamaged reference area for the professional to match.
Stop if: Do not scrape, sand, heat, peel, strip, or apply solvent to identify a finish.
Why this matters
Why: Different finish and panel constructions need different care and matching methods. A product intended for one finish can discolor, dissolve, or fail on another, so a generic paint or filler is not a safe replacement decision.
-
Check for moisture, cleaning, and heat patterns
Look for water marks, swollen edges, darkening, lifted film, steam exposure, grease, cleaner residue, wet towel contact, or heat concentrated beside a dishwasher, sink, or oven. Note when the wear appeared and any cleaning or appliance change; do not run a heat cycle or wet-test the cabinet.
Expected result: The wear is unrelated to moisture or heat, clusters near a sink or dishwasher, follows repeated cleaning, is beside an appliance, or the cause is unclear.
Next step: Wipe only ordinary surface spills with a soft cloth and dry immediately as the manufacturer directs; report persistent moisture, heat, or appliance-seal concerns to the appropriate professional.
Stop if: Stop for active leaks, wet or swollen panels, smoke, excessive heat, electrical damage, or any need to move an appliance or open a cabinet chase.
Why this matters
Why: KraftMaid warns that moisture can permanently damage doors and that excessive heat can damage adjacent finishes. A cause pattern may need correction before refinishing or replacement, or the new finish may fail again.
-
Check whether wear has become a cabinet-function problem
With the cabinet unloaded as far as can be done safely, observe whether doors close, drawers run, shelves sit level, hinges remain attached, and the box and face frame look square. Do not force a stuck door, tighten unknown fasteners, remove hardware, or climb on a cabinet.
Expected result: Only the appearance is affected, hardware is loose, a door or drawer binds, the box is swollen or out of square, or a shelf or panel is no longer supported.
Next step: Photograph gaps and alignment from the front and side, keep heavy contents out of the affected cabinet, and request cabinet assessment if operation or support is impaired.
Stop if: Stop for a falling door, unstable shelf, detached hinge, sagging box, sharp hardware, or any cabinet that could fall or pinch.
Why this matters
Why: Cosmetic wear can be considered separately from a functional or structural cabinet issue. Swelling, movement, or failed support can make refinishing a poor substitute for replacing an element or repairing the cabinet structure.
-
Prepare the cabinet replacement handoff
Compile the affected elevations, close photographs, manufacturer and finish information, door and drawer dimensions if safely available, moisture and heat history, functional observations, and the scope you want compared: touch-up, refinishing, replacement fronts, or full cabinet replacement. State that no sanding, stripping, demolition, electrical, or plumbing work was performed.
Expected result: The record shows minor cosmetic wear, finish failure across multiple elements, moisture or heat damage, functional damage, or an unknown construction and matching problem.
Next step: Request a cabinet-remodel assessment and ask for a written scope that identifies affected components, finish preparation, moisture-source correction, matching limits, and protection of nearby plumbing and electrical systems.
Stop if: Do not sand, strip, paint, remove cabinets, demolish, disconnect appliances, alter wiring, or cut plumbing as part of this guide.
Why this matters
Why: A cabinet designer, finish professional, or remodel contractor can compare the existing finish and box condition with the desired scope and assess whether matching, partial replacement, or a larger remodel is realistic.
Use your observations
Decision map
Find the observation that best matches what you see, then follow the next safe action.
-
PATH 01Safety boundary
What you see
The finish is intact and dry, operation is normal, and wear is limited to a small scuff, edge mark, or scratch.
Do this next
Compare the manufacturer's approved touch-up guidance and request a finish match if uncertain; keep the experiment off the visible cabinet until compatibility is confirmed.
Why this path and its safety boundary
Safety stop: Do not use abrasives, generic paint, solvent, wax, or silicone polish on an unknown finish.
-
PATH 02Safety boundary
What you see
Several doors, drawer fronts, or cabinet surfaces are dull, peeling, bubbling, discolored, or worn in a repeated pattern.
Do this next
Request a cabinet-finishing or remodeling assessment to compare refinishing, replacement fronts, and full replacement after the cause and finish construction are identified.
Why this path and its safety boundary
Safety stop: Do not sand or strip a large run before compatibility, dust control, and matching are planned professionally.
-
PATH 03Safety boundary
What you see
Swelling, lifted film, water marks, persistent dampness, or concentrated appliance heat is visible.
Do this next
Stop the source or appliance use as appropriate, protect the area, and request cabinet plus plumbing or appliance assessment before choosing replacement.
Why this path and its safety boundary
Safety stop: Do not seal, paint, or cover wet or swollen material.
-
PATH 04Safety boundary
What you see
Doors, drawers, shelves, or cabinet boxes bind, sag, detach, shift, or no longer support normal contents.
Do this next
Unload and restrict the cabinet, then request prompt cabinet or remodeling service to assess replacement elements and surrounding connections.
Why this path and its safety boundary
Safety stop: Do not force, climb, remove, or brace an unstable cabinet yourself.
Helpful context
Understand the symptom
Worn finish does not automatically mean the cabinet boxes must be replaced. Grease or residue can dull a surface, while abrasion, water, heat, delamination, swelling, or failed coating can require a different remedy. KraftMaid's care guidance says to avoid excessive moisture and abrasive cleaners, and its touch-up guidance separates minor scratches and scuffs from repairs that need professional help.
Start with a condition record that preserves the existing finish. Note which doors, drawer fronts, face frames, and cabinet sides are affected, whether the wear is near the sink, dishwasher, or cooking area, and whether operation or structure has changed. A replacement decision should follow identification of the cabinet construction and matching requirements, not just the most visible worn patch.
Protect the finish while you assess it
Keep wet towels, steam, strong cleaners, and heat away from the cabinet. If a cabinet is swollen, soft, delaminated, or no longer supports a door or shelf, unload it and keep people clear. Do not remove doors or drawers to identify the finish unless a qualified installer directs that step and the hardware and cabinet are safe to handle.
Only after diagnosis
Potential parts
- cabinet-hardware
Hardware is relevant only when the finish complaint also involves a failed or mismatched hinge, pull, slide, or mounting item; it will not repair a damaged cabinet finish or swollen box.
Identify the exact hardware type, overlay, mounting pattern, load, and cabinet construction before ordering; do not remove hardware from an unstable door. - drawer-organizer
An organizer is an optional remodel component when the drawer interior is being reconfigured, not a treatment for worn exterior finish or structural damage.
Confirm clear opening, drawer box dimensions, slide clearance, and load limits after the cabinet professional approves the scope. - cabinet-lighting
Lighting may be considered during a cabinet remodel when heat, wiring, or layout changes are part of the project; it is not a finish-repair product.
Confirm electrical rating, heat clearance, wiring route, and local installation requirements with a qualified professional; do not alter wiring in this guide.
When checks do not resolve it
Need a professional?
Request cabinet remodeling or finish service when wear is widespread, peeling, difficult to match, moisture- or heat-related, or paired with swollen boxes, binding doors, sagging shelves, or failed hardware. Add plumbing or appliance service for an active leak or heat source and escalate promptly for an unstable cabinet.
Common questions
FAQ
Does a worn cabinet finish mean I need a whole new kitchen?
No. A professional may find that cleaning, a compatible touch-up, refinishing, replacement fronts, or a limited component replacement is appropriate. The finish and box condition must be identified first.
Can I sand and repaint worn cabinets?
Do not start that work from this guide. Finish type, substrate, contamination, moisture, matching, dust control, and hardware protection affect the result; widespread work should be scoped by a finish or remodeling professional.
Can moisture cause cabinet finish damage?
Yes, persistent moisture can discolor or permanently damage cabinet doors and panels. Photograph the pattern, stop the source when safe, and correct the moisture issue before refinishing or replacement.
Can I use wax or silicone polish to hide worn finish?
Avoid doing so on an unknown finish. KraftMaid warns that wax buildup and silicone products can harm or interfere with future touch-up and refinishing work.
When should I call a cabinet remodeling professional?
Call when finish wear is widespread, peeling, swollen, heat- or moisture-related, difficult to match, or paired with binding doors, sagging shelves, or damaged boxes. A limited dry blemish can still be assessed before choosing a touch-up.
Read the exact guide
Official sources
- Architectural Woodwork Standards: Care and StorageWoodwork Institute · Supports directing larger finish or woodwork damage to a professional and treating moisture, heat, and abrasive products as finish risks.
- How to Clean Cabinets, Hardware & InsertsKraftMaid · Supports gentle care, avoiding excessive moisture and harsh products, and separating ordinary care from finish repair.
- Dos and Don’ts of Kitchen Cabinet Cleaning and CareKraftMaid · Supports avoiding excessive moisture, harsh or abrasive cleaners, and wax or silicone products that can affect finish and future repair.
Community feedback
Share a repair observation
Share a plain-text repair observation. Accepted observations are published automatically; this page may take a moment to update.