
On this page
Start here
Quick answer
A faucet that drips from the spout after the handle is fully off usually has a shutoff problem in the cartridge or its seals, but first confirm the water is not coming from the handle, spout base, hose connection, or supply fitting. Close the accessible hot and cold stop valves gently, identify the faucet model, and clean only an accessible aerator if flow is distorted. If the drip returns with the stops open, the cartridge may be worn, dirty, mis-seated, or model-incompatible; use the exact American Standard parts diagram or have a plumber replace and inspect it. Do not force a seized stop, work on a pressurized connection, pry the cartridge, mix hot and cold connections, or leave a leak running into the cabinet.
Before you begin
Safety first
- This article covers leak localization, model identification, gentle operation of accessible stops, accessible outlet observation, and cold visual checks. A plumber must handle seized valves, pressurized connections, cartridge removal, retaining hardware, faucet mounting, supply work, and any repair where isolation is uncertain.
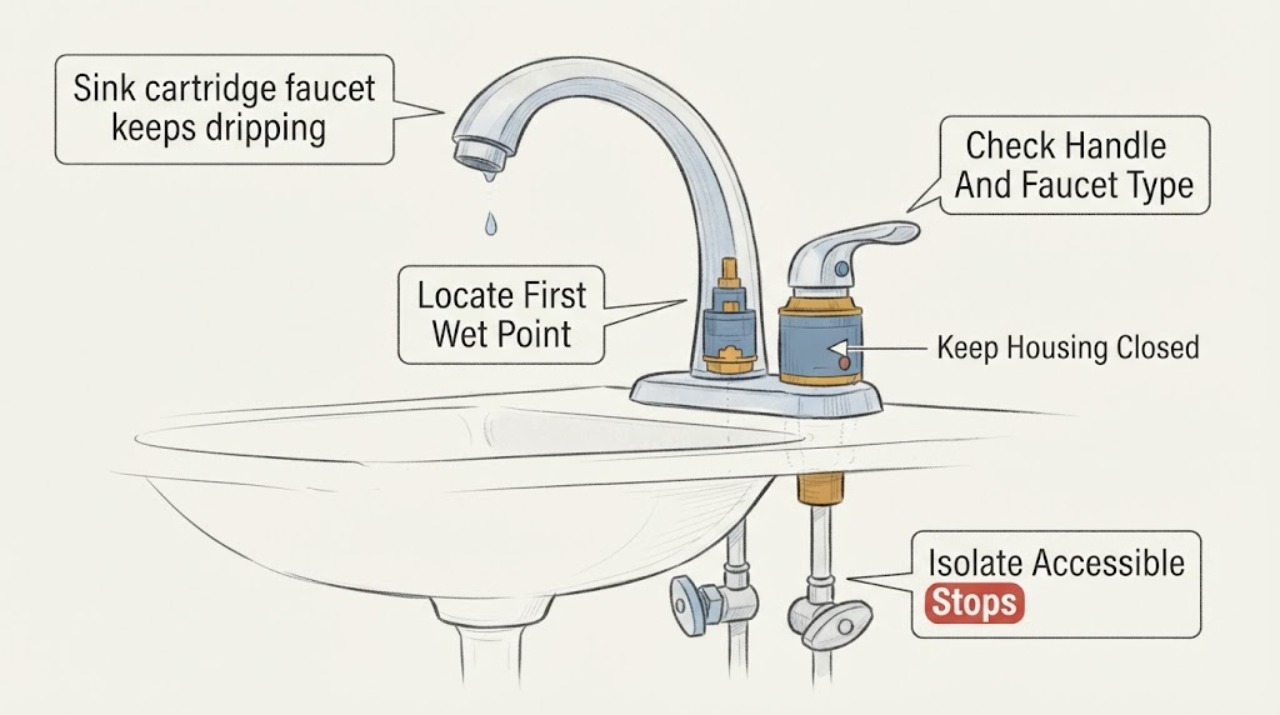
Work through in order
Diagnostic checks
Use only checks that match the exact appliance or system and its official guide.
-
Check 1
Dry the spout, handle, faucet base, supply fittings, and cabinet area. Leave the handle fully off and watch briefly for the first place that becomes wet; do not use a cloth to push water into a joint.
Expected result: Water begins at the spout outlet, handle or cartridge cap, spout base, pull-down hose or spray head, or an under-sink supply connection.
Next step: Record the wet point and continue only with the branch that matches it. For a cabinet or supply leak, place a container underneath and isolate the affected stop if it closes normally.
Stop if: Stop and isolate water if the leak is spraying, reaching electrical equipment, or running into the cabinet; do not disassemble a pressurized faucet.
Why this matters
Why: A spout outlet with the handle off supports a valve or cartridge shutoff path. A handle, base, hose, or supply leak points to a seal or connection outside the cartridge and should not be diagnosed by replacing the cartridge first.
-
Check 2
With the water still on, identify whether the sink faucet has one handle or two, note whether the drip is hot-side or cold-side related, and photograph the handle, trim, and faucet markings. Do not remove trim to guess the model.
Expected result: The faucet has one handle, two handles, a pull-down or side-spray configuration, or no readable model information is available.
Next step: Find the exact model in the original installation information or the manufacturer's support/parts resources. If the model cannot be confirmed, have a plumber identify the cartridge before ordering.
Stop if: Do not assume a two-handle cartridge fits a single-handle faucet or force a handle screw that is corroded or stripped.
Why this matters
Why: Handle design and faucet family change the cartridge and seal arrangement. American Standard's official cartridge pages describe different valve categories and model-specific use, so appearance alone does not establish fit.
-
Check 3
Place a towel or small container under the connections, then gently turn the accessible hot and cold stop valves to the closed position only if they move normally. Open the faucet briefly to see whether the water stops, then close the handle again.
Expected result: Both stops close and the drip stops, one stop will not close, the drip continues with both stops closed, or the faucet has no accessible local stops.
Next step: If isolation works, keep the stops closed for the next model-specific service decision. If it does not, use the building's safe water-shutoff plan or call a plumber; do not force the valve.
Stop if: Do not use pliers on a stuck stop, disconnect a supply line under pressure, or leave the cabinet unattended while water is escaping.
Why this matters
Why: A stopped drip confirms the faucet can be isolated for model-specific service. A seized stop, absent stop, or continued flow indicates a supply or isolation problem and makes cartridge work unsafe until a plumber controls the water.
-
Check 4
If the symptom is a distorted, reduced, or splashing stream rather than a steady drip, inspect the aerator or spray outlet for visible mineral debris. Clean only an easily removable outlet part according to the faucet instructions, without opening the valve body.
Expected result: The stream improves after outlet cleaning, or a steady drip remains from the outlet while the handle is off.
Next step: Use the faucet normally if only the stream distortion is resolved. If a steady drip remains, keep the model and isolation findings and proceed to exact cartridge service or plumbing repair.
Stop if: Do not poke debris deeper into the outlet, apply abrasive tools to the finish, or treat a supply leak as an aerator problem.
Why this matters
Why: Outlet debris can distort flow but does not prove that the cartridge is sealing. A steady post-shutoff drip keeps the cartridge, valve seat, or internal seal in the diagnostic path.
-
Check 5
With both local stops confirmed closed and the faucet depressurized, compare the handle movement and visible cartridge-cap area without forcing or removing retained parts. Note stiffness, a loose handle, mineral residue, a damaged seal, or a body that moves in the counter.
Expected result: The handle is loose or stiff, the cap or retaining area shows residue or damage, the faucet body shifts, or the outside is normal while the spout still drips after isolation is restored.
Next step: Use the exact American Standard service guide or have a plumber remove and inspect the cartridge, seals, and valve bore. Replace a cartridge only after model and cause are confirmed.
Stop if: Do not pry the cartridge, twist the faucet body, open the retaining nut against resistance, or resume water before all parts are correctly secured.
Why this matters
Why: A handle or retaining issue can prevent a cartridge from reaching its closed position; residue or seal damage can prevent shutoff. A moving body indicates mounting or connection work, not a simple cartridge-only fix.
Use your observations
Decision map
Find the observation that best matches what you see, then follow the next safe action.
-
PATH 01Safety boundary
What you see
The first wet point is the spout outlet, the handle is fully off, and the local stops close the flow.
Do this next
Confirm the exact American Standard faucet model and follow its service procedure or arrange plumbing service for cartridge and seal inspection.
Why this path and its safety boundary
Why it matters: A cartridge, valve seat, internal seal, or handle-closing issue is more likely than an aerator or supply leak.
Safety stop: Do not order a generic cartridge, pry the valve, or disassemble before the water is isolated and the model is confirmed.
-
PATH 02Safety boundary
What you see
The first wet point is the handle, spout base, spray hose, or an under-sink supply connection rather than the spout outlet.
Do this next
Close the affected accessible stop if it moves normally, keep water out of the cabinet, and arrange a plumber to inspect the fitting or seal.
Why this path and its safety boundary
Why it matters: A body seal, hose connection, mounting, or supply fitting is more likely; replacing the cartridge may not affect the leak.
Safety stop: Do not tighten or disconnect a pressurized fitting, twist the faucet body, or continue if water reaches electrical components.
-
PATH 03Safety boundary
What you see
A stop valve is seized or absent, or water continues when the local stops are supposedly closed.
Do this next
Use the building's documented shutoff plan or have a plumber control the supply before any faucet service.
Why this path and its safety boundary
Why it matters: The faucet is not safely isolated; the immediate problem is water control, not cartridge selection.
Safety stop: Do not force stops with tools, remove supply lines, or open the cartridge while the line may be pressurized.
-
PATH 04Safety boundary
What you see
The faucet does not maintain a steady drip when off, but its stream is distorted or reduced and improves after an accessible outlet is cleaned.
Do this next
Monitor the faucet with the handle off. If a true drip returns, re-enter the spout-drip branch and arrange cartridge or valve diagnosis.
Why this path and its safety boundary
Why it matters: Outlet debris is more likely than a cartridge shutoff failure.
Safety stop: Do not push debris into the valve or use abrasive tools on the outlet.
-
PATH 05Safety boundary
What you see
The faucet family or model cannot be confirmed, the handle or retaining hardware is seized, or the faucet body moves during attempted access.
Do this next
Stop disassembly and have a plumber identify the model, isolate the supply, and inspect the cartridge, seals, mounting, and valve body.
Why this path and its safety boundary
Why it matters: Part fit and safe access are uncertain; forcing the cartridge can damage the valve body, counter, or supply connections.
Safety stop: Do not use a visually similar cartridge, apply heat or penetrating chemicals around drinking-water parts, or wrench against a moving faucet body.
Helpful context
Understand the symptom
Find where the water starts before blaming the cartridge
A drip at the spout outlet with the handle off is different from water at the handle, the spout-to-body joint, the pull-down hose, or a supply connection under the sink. A cartridge can stop water through the valve, while an aerator can distort the stream without causing a true shutoff leak. Dry the faucet and cabinet, observe the first wet point, and do not tighten parts while the line is pressurized.
Model identity controls the part decision
American Standard uses different cartridge categories across single-handle and two-handle faucets. Its official parts pages describe a ceramic cartridge for many two-handle kitchen and bath faucets, while another cartridge kit is identified for a particular monoblock lavatory model. That is why a generic cartridge or a visually similar stem is not enough evidence for a fit; record the faucet model and use its parts diagram before ordering.
A cartridge replacement is a service boundary when access is unclear
Once the supply is isolated, a qualified person can follow the exact model's service instructions to access the handle and cartridge. The American Standard Colony guide explicitly turns off the water supply before removing the handle and cartridge, but its steps apply to that faucet design. If a stop valve will not close, a retaining nut is seized, the faucet body twists, or water continues with the supply isolated, stop and use a plumber rather than escalating force.
Safety boundary
Stop conditions
- Close an accessible stop and arrange prompt plumbing service for a leak into the cabinet, a spray, water near electrical equipment, or a stop that will not control flow.
- Do not disassemble a pressurized faucet, force a seized shutoff or retaining nut, twist the faucet body, or disconnect a supply line without confirmed isolation.
- Do not assume cartridge compatibility from brand or appearance; confirm the exact model, handle design, and manufacturer's parts information first.
- Do not use abrasive tools, heat, or unapproved chemicals on faucet finishes, seals, or drinking-water passages, and do not leave a persistent drip unattended.
Only after diagnosis
Potential parts
- American Standard faucet cartridge
Consider this category only when the drip is from the spout with the handle off, the water can be isolated, and the exact faucet model and cartridge design are confirmed.
Confirm the exact American Standard model, handle configuration, cartridge dimensions and seals, and manufacturer's fit information before ordering. - American Standard faucet cartridge seal kit
Consider this category only when the exact model's service information identifies replaceable seals and inspection confirms a seal issue rather than a damaged valve body or cartridge.
Confirm the exact model, seal material and location, and manufacturer's fit information before ordering; do not substitute generic seals in a pressurized repair. - American Standard faucet handle or retaining hardware
Consider this category only when the handle cannot fully close the model-specific cartridge or its retaining hardware is confirmed damaged after isolation.
Confirm the exact model, handle interface, fastener, and manufacturer's fit information before ordering. - American Standard faucet hose or supply connection seal
Consider this category only when the first wet point is a hose, mounting, or supply connection rather than the spout outlet and the connection-specific seal is confirmed faulty.
Confirm the exact model, connection type, thread or seal specification, and manufacturer's fit information before ordering; pressurized supply work is professional service.
When checks do not resolve it
Need a professional?
Safety scope: This article covers leak localization, model identification, gentle operation of accessible stops, accessible outlet observation, and cold visual checks. A plumber must handle seized valves, pressurized connections, cartridge removal, retaining hardware, faucet mounting, supply work, and any repair where isolation is uncertain.
Common questions
FAQ
Why does my American Standard sink faucet keep dripping when the handle is off?
If the first wet point is the spout outlet, the cartridge or an internal seal may not be shutting off. Confirm the faucet model and isolate the water before any cartridge service. A leak at the handle, base, hose, or supply fitting follows a different repair path.
Can cleaning the aerator fix a faucet drip?
Cleaning an accessible outlet may correct a distorted or reduced stream, but it does not prove that a steady spout drip is fixed. If water continues to emerge with the handle off, the cartridge or valve seal remains in the diagnostic path.
How do I know which American Standard faucet cartridge I need?
Identify the exact faucet model and whether it has one or two handles before ordering. American Standard lists model-specific cartridge categories and parts resources; brand name and appearance alone are not enough to establish fit.
What if the shutoff valve under the sink will not close?
Do not force the valve or disconnect a supply line. Use the building's safe water-shutoff plan or have a plumber control the supply before opening the faucet or cartridge area.
When should I call a plumber for an American Standard faucet drip?
Call when isolation fails, the leak is at a supply or mounting connection, the model or cartridge is uncertain, retaining hardware is seized, the faucet body moves, or water is entering the cabinet. A persistent spout drip after the handle is off also needs model-specific cartridge or valve diagnosis.
Read the exact guide
Official sources
- How To Replace The Hand Spray Diverter For Your Colony Soft FaucetAmerican Standard · Official instructions for a specific Colony faucet design; steps must not be generalized to every American Standard sink faucet.
- Cartridge KitAmerican Standard · Official American Standard product page for an Aspirations monoblock lavatory faucet; not a universal sink-faucet fit claim.
- Delancey® 2-Handle Widespread Kitchen Faucet 1.5 gpm/5.7 L/min With Side SprayAmerican Standard · Official product page for one Delancey kitchen faucet; it is used only to show that a particular model has a specific valve and repair-parts diagram.
- Faucet Replacement Valve Cartridge for 2-Handle FaucetsAmerican Standard · Official American Standard parts page for many two-handle kitchen and bath faucets; it does not establish fit for an unidentified faucet.
- American Standard Parts StoreAmerican Standard · Official American Standard parts resource; the exact faucet model and manufacturer's part information still control fit.
Community feedback
Share a repair observation
Share a plain-text repair observation. Accepted observations are published automatically; this page may take a moment to update.