
On this page
Start here
Quick answer
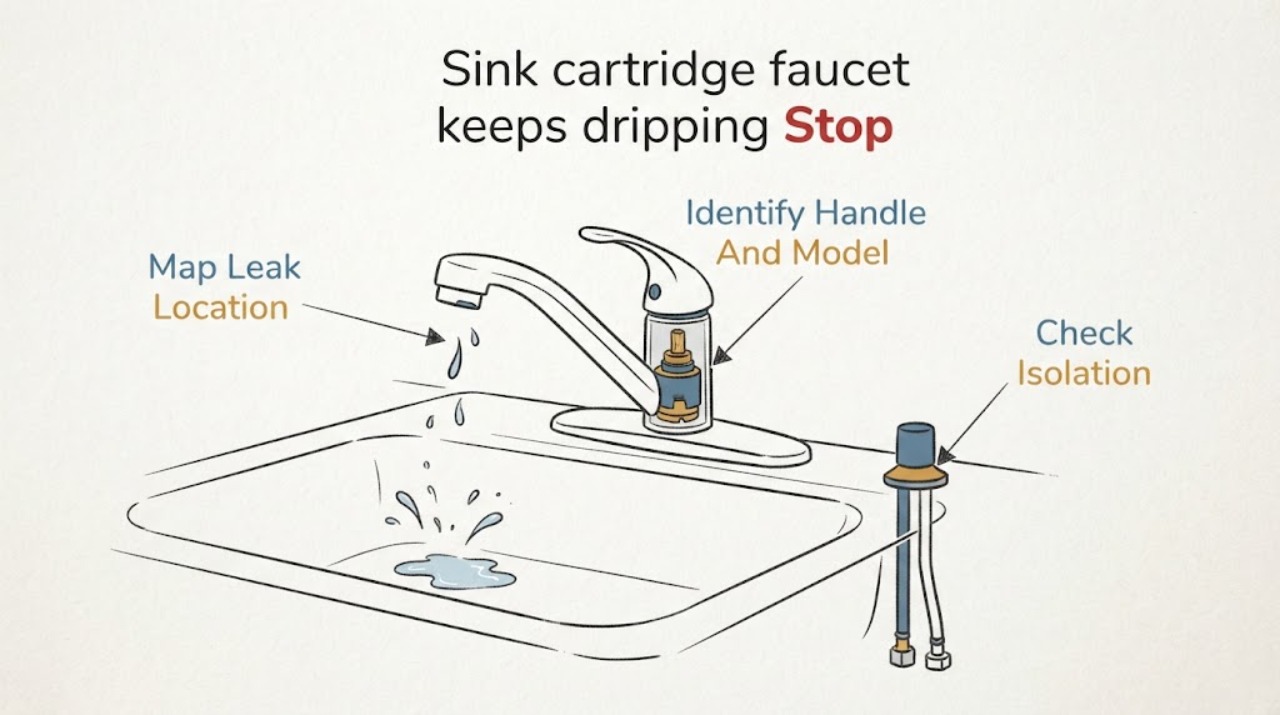
A faucet that drips from the spout while its handle is fully off often has an internal cartridge, seat, or seal that is not closing, but a leak around the handle, faucet base, supply connection, or under the sink points to a different repair. First locate the water, identify whether the faucet has one or two handles, and record the faucet model if it is visible. Moen notes that cartridges control flow, that single-handle and two-handle faucets use different arrangements, and that cartridges are not interchangeable; Delta likewise directs owners to use the model number and distinguishes leak locations and cartridge types. Isolate the water only if an accessible shutoff valve turns normally and stops the flow. Do not force a stuck stop, loosen a cartridge under pressure, or buy a generic cartridge before the exact faucet and leak location are confirmed.
Before you begin
Safety first
- This article supports ordinary-access observation, model identification, and a cautious check of an accessible shutoff only. Cartridge or valve disassembly belongs to the manufacturer's exact procedure or a qualified plumber after safe isolation.
Work through in order
Diagnostic checks
Use only checks that match the exact appliance or system and its official guide.
-
Check 1
From a dry, stable position, wipe the exposed faucet and cabinet surfaces, turn the faucet on once, turn the handle or handles fully off, and watch where the first new water appears without removing trim.
Expected result: Classify the leak as a continuing drip or stream from the spout, water around the handle or faucet base while running, water under the sink at a supply or stop-valve connection, or no repeatable leak.
Next step: Take a close photo of the leak location and continue only with the matching branch below; if water is reaching the cabinet, wall, floor, or electrical equipment, stop use and arrange service.
Stop if: Stop for active flooding, water near electrical equipment, a split hose, unstable cabinetry, or any need to reach through standing water.
Why this matters
Why: A spout drip with the handle off makes an internal cartridge, seat, or seal more likely. A handle or base leak makes an external seal, bonnet, body, or spout connection more likely; an under-sink leak is a supply-side problem rather than proof that the cartridge is bad.
-
Check 2
Record whether the faucet has one handle or separate hot and cold handles, and photograph any visible manufacturer mark, model label, faucet shape, and underside label from ordinary safe access; do not remove the handle just to identify the cartridge.
Expected result: Note a readable model number, only a brand or logo, two separate handles, or no usable identity information; also record which handle or side is associated with the drip on a two-handle faucet.
Next step: Use the exact model in the manufacturer's parts lookup or provide the photos to the manufacturer or plumber; if identity is unknown, do not order a generic cartridge or start disassembly.
Stop if: Stop if identifying the model would require removing a stuck handle, cutting trim, disconnecting a hose, or entering a wet or cramped unsafe space.
Why this matters
Why: Handle count changes the diagnostic path, and the exact model is needed to select the correct cartridge or valve. A familiar-looking replacement is not evidence of fit because manufacturers use multiple cartridge designs.
-
Check 3
From outside the cabinet, inspect the accessible hot and cold shutoff valves and supply hoses; close a valve gently only if it turns normally, is dry and intact, and you know it is the faucet supply shutoff.
Expected result: After a normal gentle closure, note whether the faucet flow stops, slows but continues, or the valve cannot be operated safely; do not repeatedly cycle a corroded stop.
Next step: If isolation fails or the valve condition is uncertain, leave the faucet assembled, avoid forcing it, and contact a plumber; if isolation succeeds, open the faucet briefly to relieve residual pressure only while keeping the area dry and controlled.
Stop if: Do not force a seized valve, loosen a supply connection, remove a cartridge, or continue if water cannot be isolated or begins escaping from the stop or hose.
Why this matters
Why: A stop that isolates the faucet creates a safer boundary for a model-specific repair. A stop that does not isolate the faucet, leaks at the stem, or cannot be turned safely leaves the line pressurized and makes cartridge disassembly a service task.
-
Check 4
With the faucet still assembled, observe one controlled off-to-on-to-off cycle after recording the initial condition, and note whether handle movement changes the drip, without tightening hidden hardware or repeatedly operating a damaged control.
Expected result: Record whether the spout begins dripping only after shutoff, the drip changes when the handle is moved, water appears around the handle or base only while flowing, or the symptom is unchanged.
Next step: Match the observed pattern to a symptom-led branch and give the model, photos, handle count, and timing to the manufacturer or plumber before selecting parts.
Stop if: Stop if the handle binds, breaks, sprays water, the leak rate increases, or the faucet cannot be returned to a controlled position.
Why this matters
Why: A drip that persists after shutoff supports a closure problem in the cartridge or valve assembly. A handle-dependent or base leak points more toward a seal, bonnet, spout connection, or body issue; unchanged behavior despite handle movement does not identify a replacement part by itself.
-
Check 5
Inspect only visible surfaces and record mineral scale, corrosion, a hard or loose handle, a recent cartridge replacement, missing trim, or evidence of prior sealant; do not pry the cartridge or scrape inside the valve body.
Expected result: Note whether the faucet is clean but still dripping, has scale or debris at the visible outlet, shows corrosion or damage, or started dripping immediately after a repair.
Next step: Save the old part and repair documentation if already removed, photograph the valve and handle, and request model-specific instructions or professional diagnosis when the drip persists or the body is damaged.
Stop if: Do not force a retaining nut, scrape a sealing surface, add unapproved sealant, or continue disassembly when the valve body or fastener is corroded.
Why this matters
Why: Scale or debris can affect a seal, but corrosion, a damaged valve body, incorrect orientation, an incompatible cartridge, or debris left after service can also cause a post-repair drip. A visible clue alone does not prove which internal part fits.
Use your observations
Decision map
Find the observation that best matches what you see, then follow the next safe action.
-
PATH 01Safety boundary
What you see
The faucet is dry around the base and under the sink, but water continues to drip or stream from the spout after the handle is fully off.
Do this next
Use the visible model number or the manufacturer's parts lookup to identify the correct cartridge or valve assembly. Isolate water safely before any manufacturer-directed repair; otherwise arrange a plumber.
Why this path and its safety boundary
Why it matters: An internal cartridge, valve seat, or seal is more likely than a supply-hose leak. On a single-handle faucet there is typically one cartridge; on a two-handle faucet the dripping side must be identified, and the exact design still controls the part.
Safety stop: Do not install a generic cartridge, force the handle or retaining hardware, or disassemble while the faucet remains pressurized.
-
PATH 02Safety boundary
What you see
Water appears around the handle, bonnet area, or faucet base while water is running or when the handle moves, while the spout itself shuts off.
Do this next
Keep the location documented and use the exact faucet service guide or a plumber to distinguish a seal repair from a cartridge repair. Isolate water before any disassembly.
Why this path and its safety boundary
Why it matters: An O-ring, bonnet or body seal, spout connection, or mounting area becomes more likely; replacing the cartridge may not correct a leak outside the cartridge's closure path.
Safety stop: Stop if water enters the cabinet, the mounting hardware is corroded, or the leak cannot be isolated without forcing a stop valve.
-
PATH 03Safety boundary
What you see
Water is first seen at a supply hose, angle stop, connection, or faucet shank under the sink, independently of a spout drip.
Do this next
If the stop closes normally, isolate the affected supply and place a container only as a temporary containment measure; contact a plumber for the hose, stop, connection, or faucet-mount repair.
Why this path and its safety boundary
Why it matters: This pattern points to the supply or shutoff side and does not establish a failed cartridge. Continued use can damage the cabinet even if the spout appears to shut off.
Safety stop: Do not loosen the connection, overtighten fittings, or force a corroded stop. Escalate promptly for a spray, burst hose, or uncontrolled flow.
-
PATH 04Safety boundary
What you see
A two-handle faucet drips from the spout when off, and closing or using one side changes the symptom.
Do this next
Record which side changes the symptom, identify the faucet model, and have the manufacturer or plumber specify the side-specific service part before ordering.
Why this path and its safety boundary
Why it matters: One hot or cold valve component may not be closing, but the two sides are not automatically interchangeable and the drip can still involve a seat, stem, cartridge, or seal.
Safety stop: Do not swap hot and cold components, force a handle, or disassemble one side without isolating water and confirming the model-specific procedure.
-
PATH 05Safety boundary
What you see
The drip began or remained after a cartridge was replaced, or the handle is now stiff, loose, or difficult to align.
Do this next
Stop further trial-and-error, preserve the removed part and packaging, and provide the model, installation history, photos, and exact symptom to the manufacturer or plumber for a controlled recheck.
Why this path and its safety boundary
Why it matters: Wrong model, incorrect orientation, debris, a damaged seal or valve seat, a retaining problem, or damage in the faucet body is possible; persistence does not justify forcing the mechanism or adding another random part.
Safety stop: Do not continue operating a worsening leak, force the handle, or open the faucet if water was not fully isolated.
-
PATH 06Safety boundary
What you see
The under-sink stop is seized, corroded, leaking, missing, or unable to stop water, or the cabinet cannot be accessed safely.
Do this next
Use the known main shutoff only if it can be operated safely, keep the area clear, and arrange qualified plumbing service for isolation and repair.
Why this path and its safety boundary
Why it matters: The faucet remains a pressurized plumbing assembly, so cartridge removal is outside a safe ordinary-user check.
Safety stop: Stop immediately for active flooding, a burst hose, water near electrical equipment, or an unknown main-shutoff condition.
Helpful context
Understand the symptom
Start by locating the water, not by ordering a cartridge
Dry the visible faucet body and the cabinet area from a stable, ordinary-access position, then operate the faucet once normally and turn the handle fully off. A continuing drop or stream from the spout is a different symptom from water that appears around the handle, at the base, or on a supply connection. A cartridge is a plausible cause only when the observed leak pattern matches the faucet's internal closing mechanism. Record photos, timing, number of handles, and the visible brand or model before removing trim or parts.
Why the exact cartridge matters
Cartridges are not a universal faucet insert. The body, stem, stops, seals, and handle mechanism vary across models, and a two-handle faucet can have separate hot and cold valve components. An exact model or parts diagram is more useful than a visual guess based on a similar-looking cartridge. If the model cannot be identified, keep the old parts in place and have the manufacturer or a plumber identify the repair path.
Use the shutoff as a safety boundary
A cartridge replacement requires the water to be isolated before the handle and retaining hardware are disturbed. Look at the accessible angle stops under the sink without reaching through standing water or forcing a corroded valve. If a stop is seized, spins without stopping water, begins leaking, or cannot be reached safely, use the building's known main shutoff only if it can be operated safely and arrange plumbing service. A drip that is annoying but contained is still a reason to avoid pressurized disassembly; active flooding or water near electrical equipment requires immediate escalation.
Safety boundary
Stop conditions
- Do not loosen a cartridge, supply hose, retaining nut, or other pressurized fitting unless water is safely isolated and the exact manufacturer procedure is known.
- Do not force a seized or corroded angle stop, handle, retaining screw, or cartridge; a damaged stop can turn a contained drip into an uncontrolled leak.
- Do not buy or install a generic cartridge, swap hot and cold components, or add sealant based only on appearance; verify the exact faucet model and leak location first.
- Stop for active flooding, a split hose, water near electrical equipment, cabinet or wall damage, a broken control, or inability to reach the plumbing safely.
- Arrange qualified plumbing service when the leak is under the sink, the water cannot be isolated, the valve body is corroded or damaged, or the drip persists after a model-specific repair.
Only after diagnosis
Potential parts
- faucet cartridge or valve assembly
Consider this category only when a spout drip persists with the handle off and the exact faucet model and side-specific design support an internal closure repair.
Confirm the exact faucet model, handle design, cartridge or valve type, orientation, and manufacturer's fit information before ordering; similar-looking cartridges are not proof of compatibility. - faucet O-ring, bonnet, or body seal kit
Consider this category only when water is localized around the handle, base, spout connection, or another seal area and the model-specific guide identifies that seal as the repair.
Match the exact faucet model and seal location; do not use a generic seal or overtightening to compensate for a damaged body or wrong fit. - faucet supply hose or angle stop
Consider this category only when the first leak is under the sink at the hose, stop, or connection rather than from the spout and the fitting can be safely identified.
Confirm connection type and faucet or stop configuration with the manufacturer or plumber; a supply-side leak is not evidence that a cartridge is needed.
When checks do not resolve it
Need a professional?
Arrange plumbing service when the leak is under the sink, an angle stop is seized or leaking, the water cannot be isolated, a retaining part or cartridge is stuck, the valve body is corroded, the faucet has been repaired but still drips, or the faucet model and correct part cannot be established safely. Escalate immediately for active flooding, a burst supply hose, water near electrical equipment, or cabinet and wall damage. Give the technician the leak-location photos, one- or two-handle design, visible model information, timing, shutoff behavior, and any prior repair history.
Safety scope: This article supports ordinary-access observation, model identification, and a cautious check of an accessible shutoff only. Cartridge or valve disassembly belongs to the manufacturer's exact procedure or a qualified plumber after safe isolation.
Common questions
FAQ
Does a dripping faucet always need a new cartridge?
No. A spout drip with the handle fully off makes an internal cartridge, seat, or seal more likely, but water around the handle, base, supply hose, or under the sink follows a different path. Locate the first water and identify the faucet before choosing a part.
Can I use any cartridge that looks like the old one?
No. Cartridge designs are not universally interchangeable. Use the exact manufacturer model or parts diagram and confirm handle count and side before ordering; if the model is unknown, have the manufacturer or a plumber identify it.
Should I close the shutoff valves before checking the cartridge?
Yes, water must be safely isolated before a cartridge or valve is disturbed, but do not force a seized, corroded, leaking, or unknown stop. If the valve cannot safely stop the water, leave the faucet assembled and call a plumber.
Why does the faucet still drip after a cartridge replacement?
The model or orientation may be wrong, debris may remain, a seal or valve seat may be damaged, or the leak may be outside the cartridge. Stop trial-and-error, preserve the removed part and packaging, and request a model-specific recheck.
When should a plumber handle a dripping sink faucet?
Call a plumber when the leak is under the sink, the shutoff cannot isolate water, a cartridge or retaining part is stuck, the valve body is corroded, the drip persists after a verified repair, or water is reaching the cabinet, wall, floor, or electrical equipment.
Read the exact guide
Official sources
- Kitchen Faucet: Leaking From The SpoutMoen Solutions · Official Moen troubleshooting page; its cartridge details are Moen-specific, while the observed leak location and exact installed faucet model control another brand's repair.
- Find Parts and Identify Your ProductDelta Faucet · Official Delta parts and issue-identification page; the listed cartridge and part examples are Delta-specific and should not be generalized to another faucet without its model information.
Community feedback
Share a repair observation
Share a plain-text repair observation. Accepted observations are published automatically; this page may take a moment to update.