
On this page
Start here
Quick answer
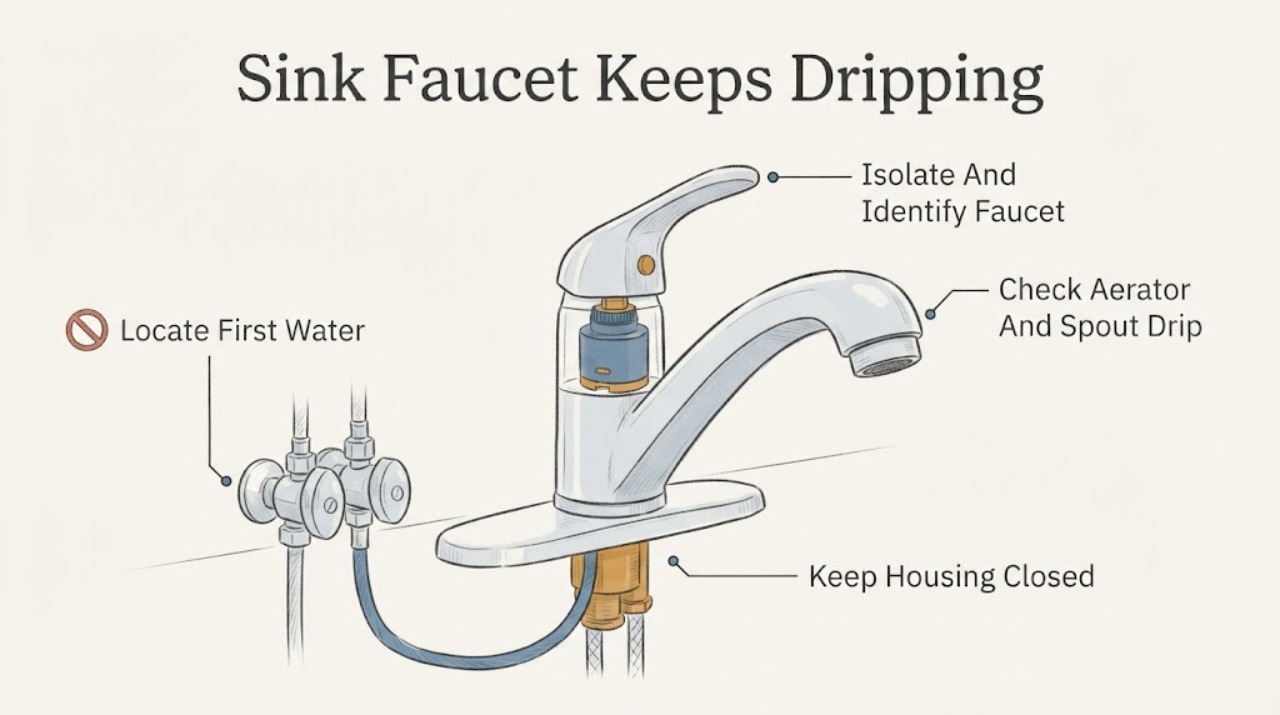
For a Delta sink faucet that keeps dripping, first identify whether water is coming from the spout or aerator when the faucet is off, around a handle or base, or from a connection underneath the sink. A spout drip can come from sediment or worn seats and springs on some two-handle designs, or a model-specific cartridge or valve on a single-handle or DST design. Delta recommends identifying the faucet and using the matching parts diagram rather than choosing a cartridge by appearance. You can safely close the local hot and cold stops if the leak is substantial and the valves operate normally, then clean the aerator or perform one model-directed flush with the drain covered. Do not force a handle, remove a cartridge without the exact instructions, overtighten supply connections, or keep using a faucet that sprays into the cabinet or cannot be isolated. If the drip continues after one safe external or model-directed check, arrange qualified plumbing service.
Before you begin
Safety first
- This article covers leak localization, safe supply isolation, accessible aerator cleaning, one model-directed flush, visible under-sink observations, model identification, and one brief retest only. Do not open concealed plumbing, disconnect pressurized lines, force stops, disturb electronic controls, or disassemble an unidentified valve.
Work through in order
Diagnostic checks
Use only checks that match the exact appliance or system and its official guide.
-
Check 1
Dry the Delta faucet, spout, aerator, handle, base, and under-sink connections. With the handles fully Off and no active spray, observe where the first new drop appears and whether it continues, pauses, or changes when a handle is moved.
Expected result: Water comes from the spout or aerator, around a handle or base, from the mounting or supply connection under the sink, or from more than one location.
Next step: Photograph the first wet point and continue only with the matching check. Close the local stops if water is substantial and they operate safely; arrange prompt service for cabinet wetting, uncontrolled flow, or a failed stop.
Stop if: Stop for flooding, a spraying connection, water near electrical equipment, an unsafe cabinet or floor, or any need to open the wall or alter concealed plumbing.
Why this matters
Why: A spout drip points toward the valve's seats, springs, cartridge, or debris. Handle or base water points toward a stem, cartridge seal, body, or mounting path. Under-sink water points toward a hose, supply, connection, or faucet-body leak. Multiple locations can mean more than one failed seal or a spray path that is traveling.
-
Check 2
Record whether the Delta sink faucet has one handle, two handles, a pull-down or pull-out hose, touch or electronic controls, and any model marking on the faucet or supply line. If the drip is substantial, turn both accessible hot and cold stops clockwise only as far as they move normally, then open the faucet briefly to relieve residual pressure and close it.
Expected result: The faucet is single-handle or two-handle, a model number is visible or missing, the drip stops after both supplies are isolated, or water continues despite the local stops being closed.
Next step: Use Delta's product identifier and matching parts diagram before removing any faucet component. Leave the stops closed for a substantial or recurring leak and arrange plumbing service.
Stop if: Do not force a shutoff, remove electronic parts, loosen pressurized connections, or continue if a stop leaks, will not close, or the cabinet is wet.
Why this matters
Why: Handle count and model identity determine whether seats and springs, a stem unit, a cartridge, an electronic valve, or a hose path is relevant. A drip that stops after isolation is in the faucet or residual line; continued flow indicates a stop, supply, or connection problem that needs service.
-
Check 3
If the first wet point is the Delta spout or aerator, remove the aerator only if it is accessible and the faucet is isolated as needed. Rinse loose debris, cover the drain so parts cannot fall in, and reinstall the aerator and its gasket. Do not use aerator cleaning to excuse a valve that continues to pass water when Off.
Expected result: Debris is visible in the aerator, the aerator gasket is damaged or missing, the aerator is clear, or the spout continues dripping after cleaning.
Next step: Reinstall the original parts and perform one brief retest. If the drip remains, follow the single-handle or two-handle valve branch and use the exact Delta model instructions; do not keep flushing or overtightening the aerator.
Stop if: Do not pry aggressively, cross-thread the aerator, use metal tools on the finish, or continue if the spout, body, or aerator is cracked.
Why this matters
Why: Debris can disturb the stream and may accompany sediment in the valve, but a continuing drip with the control Off is more consistent with a worn seat, spring, stem, cartridge, or internal seal than an aerator-only issue. A missing gasket can cause a stream leak but does not identify the valve part.
-
Check 4
Using the handle count and model information, determine whether the faucet uses a two-handle stem and seats or springs, a single-handle cartridge, a DST or ceramic valve, or an electronic or touch-control assembly. Do not remove the handle, bonnet, cartridge, stem, or wiring unless the exact Delta procedure is available and the water is safely isolated.
Expected result: The faucet is a two-handle design with a spout drip, a single-handle design with a spout or base drip, a DST or electronic model, or the valve design remains uncertain.
Next step: Use the exact parts diagram and model instructions or give the information to a plumber. A two-handle valve may require identifying hot versus cold; a single-handle or electronic assembly usually needs model-specific cartridge or control diagnosis.
Stop if: Do not mix hot and cold stem parts, force a cartridge, disturb electronic wiring, or open the faucet body without the exact procedure.
Why this matters
Why: Delta identifies worn seats and springs as a two-handle spout-drip cause and lists different single-handle cartridges and stem units for other faucet families. Electronic or DST faucets add model-specific components. Uncertainty means a part cannot be selected safely from the symptom alone.
-
Check 5
If water appears under the sink, dry the cabinet and inspect the faucet mounting area, supply hoses, shutoff connections, and any Quick-Snap or pull-down hose connection without disconnecting a pressurized line. Watch for a drop forming at a fitting, a hose that is cracked or kinked, or water that travels from the faucet body.
Expected result: A hose or connection leaks only while the faucet runs, a connection is loose or not seated, water is present with the faucet Off, or the visible connections are dry.
Next step: Isolate the affected supply if safe and follow Delta's exact connection procedure for an accessible, model-identified fitting. Arrange service for a body leak, failed stop, damaged hose, recurring leak, or any connection that cannot be secured without force.
Stop if: Do not overtighten, disconnect a pressurized hose, use unapproved sealant, move the faucet with wet cabinet materials, or leave water accumulating under the sink.
Why this matters
Why: A use-dependent fitting leak supports a hose, seal, or connection issue; water with the faucet Off suggests a supply or shutoff leak. A dry cabinet shifts suspicion back to the spout, handle, cartridge, or internal valve.
-
Check 6
After one safe aerator, flush, or model-directed external correction, reopen the stops slowly and observe the faucet for one brief Off and On cycle. Record whether the drip is gone, reduced, unchanged, or has moved to the handle, base, or cabinet.
Expected result: The drip stops, returns from the same point, appears at a new point, or continues when the faucet is fully Off.
Next step: Close the stops and arrange qualified plumbing service for any recurring or unresolved drip. Provide the model, handle type, first wet point, photos, hot or cold result, isolation result, and exact procedure attempted.
Stop if: Do not repeat disassembly, keep tightening parts, run the faucet with cabinet damage, or continue if water is uncontrolled or near electrical equipment.
Why this matters
Why: A lasting result supports a localized debris or accessible connection correction, but a returning or migrating leak suggests a valve, seal, cartridge, body, or supply issue. Continued dripping with the faucet Off indicates that the internal shutoff is not sealing or the faucet remains pressurized through a fault.
Use your observations
Decision map
Find the observation that best matches what you see, then follow the next safe action.
-
PATH 01Next step
What you see
A two-handle Delta faucet drips from the spout when both handles are Off, with no water under the sink.
Do this next
Identify the model and whether hot or cold is responsible, then follow the exact Delta procedure or arrange service. Isolate both supplies if the drip is substantial; do not mix stem or seat parts between designs.
Why this path and its safety boundary
Why it matters: Worn or debris-affected seats and springs or a stem assembly are more likely than a supply-hose leak.
-
PATH 02Next step
What you see
A single-handle, DST, ceramic, or electronic Delta faucet drips from the spout, base, or handle after the aerator is clear and supplies are normal.
Do this next
Use the model number and Delta parts diagram, and arrange qualified service if internal access is required. Do not order a cartridge from appearance or force the handle or bonnet.
Why this path and its safety boundary
Why it matters: A model-specific cartridge, stem, valve seal, or electronic control path is more likely than an aerator-only obstruction.
-
PATH 03Safety boundary
What you see
Water forms under the sink at a supply hose, Quick-Snap or other connection, mounting area, or faucet body rather than at the spout.
Do this next
Close the affected stop if safe, dry and protect the cabinet, and follow only the exact Delta connection procedure for an identified model. Arrange prompt service for a body leak, failed stop, damaged hose, or recurring water.
Why this path and its safety boundary
Why it matters: A connection, hose, seal, shutoff, or faucet-body leak is more likely than a cartridge-only spout drip.
Safety stop: Do not overtighten or disconnect a pressurized fitting, leave the cabinet wet, or use the faucet while water reaches electrical equipment.
-
PATH 04Next step
What you see
The aerator contains debris and the drip or stream improves after a single safe cleaning or model-directed flush, with no handle or cabinet leak.
Do this next
Reinstall the aerator and gasket correctly, monitor one normal use, and arrange service if dripping returns, flow remains abnormal, or debris repeatedly reappears.
Why this path and its safety boundary
Why it matters: Sediment or an accessible outlet restriction may have contributed, but improvement does not prove the internal valve is sound.
-
PATH 05Safety boundary
What you see
The faucet cannot be isolated, water continues with local stops closed, the body or supply connection sprays, or cabinet and floor damage is developing.
Do this next
Leave the faucet out of use, isolate the home's water only if safe and accessible, protect the cabinet, and contact qualified plumbing help promptly. Keep people away from wet electrical equipment.
Why this path and its safety boundary
Why it matters: This is an active plumbing and property-safety issue, not a routine cartridge or aerator adjustment.
Safety stop: Do not continue testing, open the wall, remove pressurized connections, or handle electrical equipment in a wet cabinet.
Helpful context
Understand the symptom
Locate the first new water before choosing a part
A drip from the spout or aerator is a water-shutoff problem inside the faucet; water around the handle or base points toward a stem, cartridge, seal, or body path; water under the sink points toward a hose, supply, or connection issue. Dry the visible surfaces and watch one brief normal shutoff only if there is no spray or cabinet damage. The location and whether the drip is continuous or intermittent are more useful than the Delta finish or handle shape alone.
Single-handle and two-handle Delta faucets use different repair paths
Delta's support resources list single-handle cartridges, two-handle cartridges or stem units, seats and springs, and different DST or non-DST designs. A spout drip on a two-handle faucet may involve one hot or cold valve, while a single-handle faucet may use a cartridge or ceramic valve. Do not assume that a cartridge shown in a similar photo fits your faucet; use the model number and parts diagram.
Protect the cabinet and sink while the leak is unresolved
A small spout drip wastes water, but a leak under the handle or counter can wet the cabinet and damage stored items or the faucet mounting area. If a supply connection is actively spraying or a local stop will not close, isolate the water when safe and keep the faucet out of use. Delta advises not overtightening connections and directs uncertain repair work to a qualified plumber.
Safety boundary
Stop conditions
- Do not keep using the Delta faucet when water is spraying, the cabinet is wet, the faucet body leaks, the local stop fails, or water is near electrical equipment.
- Do not choose a cartridge, stem, seat, spring, hose, or seal from appearance alone; identify the exact faucet model and design first.
- Do not force handles or stops, overtighten supply connections, disconnect pressurized hoses, or use unapproved sealant to hide a leak.
- Do not open the faucet body, disturb electronic controls, or remove internal valve parts without the exact Delta procedure and safe water isolation.
- Close the local hot and cold stops when safe and arrange prompt service for uncontrolled flow, a concealed leak, cabinet damage, or a drip that returns after one safe check.
Only after diagnosis
Potential parts
- Delta faucet cartridge or stem unit
Consider this category only when the exact model and qualified diagnosis identify a cartridge or stem valve as the source of a spout, handle, or base drip.
Confirm the exact Delta faucet family, DST or non-DST design, stem or cartridge geometry, seals, and parts diagram before ordering. - Delta seats and springs
Consider this category only for a model-identified two-handle Delta faucet whose spout drip is diagnosed as worn or debris-affected seats and springs.
Confirm the exact stem design, seat and spring dimensions, handle arrangement, and Delta model instructions before ordering or installing. - Delta aerator and gasket
Consider this category only when the drip or stream issue is localized to a damaged or missing aerator or gasket after the valve itself is confirmed to shut off.
Confirm the exact spout, thread, aerator style, flow design, and gasket before ordering; an aerator does not repair a valve drip. - Delta faucet hose or supply connection seal
Consider this category only when inspection confirms a leaking or damaged pull-down hose, Quick-Snap connection, supply hose, or accessible seal under the sink.
Confirm the exact Delta model, connection type, hose routing, seal design, and shutoff requirements before ordering or disconnecting.
When checks do not resolve it
Need a professional?
Arrange qualified plumbing service when a Delta sink faucet keeps dripping after one safe aerator or model-directed flush, when the handle, base, cartridge, stem, or faucet body is involved, when a supply hose or connection leaks, or when the model or valve design is uncertain. Seek prompt help for uncontrolled flow, a failed shutoff, cabinet or floor damage, water near electrical equipment, or any need to disconnect pressurized plumbing.
Safety scope: This article covers leak localization, safe supply isolation, accessible aerator cleaning, one model-directed flush, visible under-sink observations, model identification, and one brief retest only. Do not open concealed plumbing, disconnect pressurized lines, force stops, disturb electronic controls, or disassemble an unidentified valve.
Common questions
FAQ
Why does my Delta sink faucet keep dripping from the spout?
Sediment or a worn valve can prevent the faucet from sealing. Delta identifies seats and springs on some two-handle lavatory faucets and model-specific cartridges or stem units on other designs. Clean the aerator only as an accessible first check, then identify the exact faucet before internal repair.
Can a dirty aerator cause a Delta faucet to drip?
Debris can disturb the outlet stream and may accompany sediment in the faucet, but an ongoing drip with the handle fully Off usually requires a valve or seal diagnosis. Remove and rinse the aerator only when safe, cover the drain, reinstall its gasket, and retest once.
How do I know whether my Delta faucet needs a cartridge or seats and springs?
Handle count and model identity matter. Delta's support material associates seats and springs with some two-handle designs and lists different cartridges or stem units for single-handle, DST, and other families. Use the model number and parts diagram rather than choosing from a photo.
What if my Delta faucet is leaking underneath the sink?
Dry the cabinet and locate the first wet connection. A supply hose, Quick-Snap connection, mounting path, shutoff, or faucet body can leak below the counter and is a different problem from a spout drip. Close the affected stop if safe and arrange service for an active or recurring under-sink leak.
Should I tighten the Delta faucet handle or supply connection?
Do not force or overtighten it. Tightening a handle or connection without identifying the leak can damage threads, seals, or the faucet body. Isolate the water if necessary, photograph the wet point, and follow only the exact Delta model procedure or use a qualified plumber.
When should I call a plumber for a Delta faucet drip?
Call when the drip returns after one safe aerator or model-directed flush, when water comes from the handle, base, body, hose, or supply connection, when the faucet cannot be isolated, or when the model or valve design is uncertain. Seek prompt help for cabinet damage, uncontrolled flow, a failed shutoff, or water near electrical equipment.
Read the exact guide
Official sources
- Leaks - Service & Parts FAQDelta Faucet · Delta official leak FAQ index covering multiple faucet families; exact model instructions control the repair.
- Find Parts and Identify Your ProductDelta Faucet · Delta official parts-identification resource for kitchen and bathroom sink faucets; exact model selection is required before compatibility decisions.
- How do I get Delta replacement parts for a Delta faucet?Delta Faucet · Delta official replacement-parts guidance for faucets, including discontinued models; product identification remains necessary.
Community feedback
Share a repair observation
Share a plain-text repair observation. Accepted observations are published automatically; this page may take a moment to update.