
On this page
Start here
Quick answer
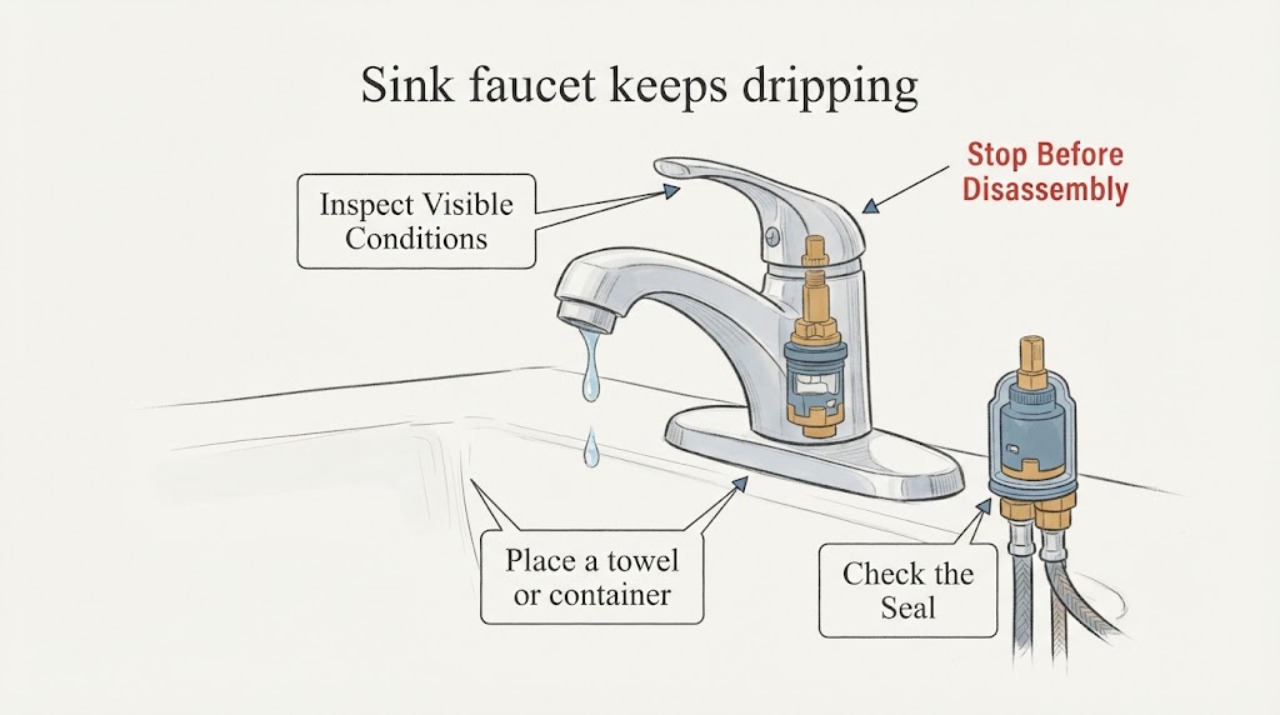
If an American Standard sink faucet keeps dripping after it is turned off, first identify whether water is coming from the spout, around the handle or faucet base, or from a supply connection below the sink. A spout drip with dry external connections points toward the faucet's shutoff valve or cartridge; a drip under the sink points toward a fitting, hose, O-ring, or body connection instead. American Standard sink faucets use different configurations and many models use ceramic-disc valves, but the exact replacement part depends on the model. Put a container or towel under the leak, close the accessible hot and cold supply stops before any disassembly, and use the exact installation or repair guide. Do not force a handle, remove a cartridge with water on, overtighten fittings, or guess a replacement part. If a supply stop will not shut off, water is spraying or reaching cabinetry/electrical equipment, the faucet body is cracked, or the drip persists after the model-specific repair, shut off the appropriate water supply and call a licensed plumber.
Before you begin
Safety first
- The homeowner scope is limited to observing the drip, protecting the cabinet, closing a clearly identified supply stop that moves normally, reading the model information, and inspecting visible connections. Do not work on a pressurized line, force a shutoff or handle, remove an internal valve without the exact guide, overtighten fittings, expose electrical equipment to water, or guess a replacement part.
Work through in order
Diagnostic checks
Use only checks that match the exact appliance or system and its official guide.
-
Check 1
Dry the spout, handle, faucet deck, and cabinet area. With the faucet fully off, observe where the first new drop appears and whether it occurs only from the spout, around a handle or base, at the pull-out hose, or at a supply connection below the sink.
Expected result: The spout drips with the faucet off; water appears around a handle or base; or water begins at a hose, shutoff, threaded fitting, or supply line.
Next step: Use the matching branch rather than ordering a generic cartridge. Keep the area dry and record a photograph of the leak location and whether it is hot-side, cold-side, or both.
Stop if: Stop if water is spraying, reaching electrical equipment, the faucet body is cracked, or the leak rate is increasing.
Why this matters
Why: A spout drip points toward an internal shutoff valve, cartridge, seat, or seal. A handle or base leak may involve an O-ring, cartridge seal, or body joint. A below-sink leak is more likely an external connection or hose issue and can damage cabinetry even if the spout is dry.
-
Check 2
Place a towel or container under the leak and identify the accessible hot and cold shutoff valves below the sink. Close only the affected stop if it is clearly labeled and turns normally; if both sides feed the leaking faucet or a stop will not close, use the home's main water shutoff according to local plumbing guidance.
Expected result: The leak stops when one supply is closed, stops only when both are closed, continues despite the faucet stops, or the shutoff itself leaks or will not move.
Next step: Leave the affected supply closed, protect the cabinet, and prepare the exact faucet model information. If the stop leaks, will not close, or the main shutoff is needed, arrange licensed plumbing service before disassembly.
Stop if: Stop for a seized or corroded valve, active spray, flooding, water near electrical equipment, or any need to remove a pressurized fitting.
Why this matters
Why: A one-sided stop isolates a hot- or cold-side valve or supply issue. A spout drip that stops only when both supplies are closed still leaves the faucet's internal valve as a possibility. A failed or seized stop increases the risk of flooding during repair.
-
Check 3
Identify the faucet configuration and model without dismantling it: count handles, note whether it is a single-hole, centerset, or widespread layout, and read the model marking or installation paperwork if available. Compare the manufacturer's model-specific installation guide or repair-parts diagram before touching a handle, retaining nut, cartridge, or seal.
Expected result: The faucet is single-handle or two-handle, the model is confirmed, the model cannot be found, or the available diagram does not match the faucet's handle and body.
Next step: Use the confirmed model's instructions or give the model and photos to a plumber or manufacturer support channel. Do not buy a part based only on the American Standard name, handle style, or a generic cartridge description.
Stop if: Stop if the model cannot be confirmed, a part diagram conflicts with the installed faucet, the handle is seized, or repair would require force or cutting.
Why this matters
Why: Single-handle and two-handle faucets can use different valve assemblies, and even similar-looking collections can have different parts. An unidentified or mismatched diagram makes a guessed cartridge or washer unsafe and likely to create another leak.
-
Check 4
With the water supply isolated and the cabinet protected, inspect only visible fittings, flexible hoses, faucet-base seams, and the aerator for debris or damaged seals. Do not remove a cartridge or valve unless the exact model guide clearly gives that procedure and the supply is fully off.
Expected result: A supply nut, hose, base seam, or visible gasket is wet; the aerator is obstructed but the body is dry; or all external surfaces are dry while the spout continues to drip.
Next step: For a confirmed loose connection, follow the exact manufacturer instruction without overtightening; otherwise keep the water isolated and arrange plumbing service for internal valve, cartridge, or seal work. Reopen a supply slowly only after the repair procedure is complete and the area can be watched.
Stop if: Stop for a cracked body, damaged hose, a fitting that spins or will not seal, active leakage after a normal gentle correction, or any need to force internal parts.
Why this matters
Why: A wet external connection can be the leak source and needs the correct model or fitting procedure, not an internal cartridge by default. An obstructed aerator can affect flow but does not explain a persistent valve drip. Dry external surfaces with a spout drip make the internal shutoff assembly more likely.
-
Check 5
After a model-specific repair or professional visit, reopen the isolated supply slowly while watching the spout, handle, base, hose, and shutoff connections. Operate each handle through its normal range and leave the faucet off long enough to check for a returning drip.
Expected result: The faucet remains dry when off, drips only after movement, leaks immediately at a connection, or the original drip returns after a short period.
Next step: Close the supply again for any returning leak, document the exact location and timing, and arrange licensed plumbing service rather than repeatedly tightening or replacing parts by guesswork.
Stop if: Stop immediately for spraying water, cabinet damage, a cracked faucet body, or a supply stop that cannot isolate the leak.
Why this matters
Why: A dry complete cycle supports that the repair addressed the leak. A drip only during movement suggests a handle or dynamic seal issue; an immediate connection leak suggests assembly or fitting trouble; recurrence suggests a mismatched, damaged, or worn internal part or a faucet-body problem.
Use your observations
Decision map
Find the observation that best matches what you see, then follow the next safe action.
-
PATH 01Safety boundary
What you see
A single drop forms at the spout after both handles or the single lever are fully off, while the faucet base and below-sink connections remain dry.
Do this next
Isolate the hot and cold supplies, confirm the exact model, and use its repair guide to assess the internal valve or cartridge; arrange a plumber if the model-specific procedure is unclear.
Why this path and its safety boundary
Safety stop: Do not force the handle, remove a cartridge under pressure, or install a generic cartridge.
-
PATH 02Safety boundary
What you see
The drip appears around the handle or faucet base rather than from the spout, especially while the handle is moved or the faucet is on.
Do this next
Close the water supplies, inspect only visible seams and seals, and use the exact model diagram or a plumber to distinguish a cartridge seal, O-ring, retaining area, or body leak.
Why this path and its safety boundary
Safety stop: Do not pry trim, force a seized handle, or overtighten a retaining nut to stop a leak.
-
PATH 03Safety boundary
What you see
Water appears below the sink at a supply stop, flexible hose, threaded fitting, or faucet shank while the spout itself is dry.
Do this next
Keep a towel or container in place, close the affected stop if it moves normally, and arrange plumbing service for a hose, gasket, valve, or connection repair.
Why this path and its safety boundary
Safety stop: Stop for a seized stop, active spray, a cracked hose or body, or water approaching electrical equipment; use the main shutoff and obtain urgent help.
-
PATH 04Safety boundary
What you see
Only one handle or one temperature side appears to cause the spout drip, while the other side shuts off normally.
Do this next
Record which side changes the drip, isolate that supply, and have the exact single- or two-handle valve assembly identified before replacing a seal or cartridge.
Why this path and its safety boundary
Safety stop: Do not assume the hot and cold valve parts are interchangeable or continue operating a side that leaks into the cabinet.
-
PATH 05Safety boundary
What you see
The faucet model cannot be confirmed, the available repair diagram does not match, or a replacement part has stopped the drip only briefly.
Do this next
Leave the water isolated as needed and arrange licensed plumbing service with photos, the faucet configuration, model clues, and the drip location and timing.
Why this path and its safety boundary
Safety stop: Do not order or modify a part based solely on brand, appearance, or a generic cartridge listing.
-
PATH 06Safety boundary
What you see
The faucet body is cracked, water cannot be isolated, cabinetry is being damaged, or the leak is spraying or rapidly worsening.
Do this next
Use the main water shutoff if safe, protect the area from further damage, and obtain urgent licensed plumbing help; do not continue troubleshooting under pressure.
Why this path and its safety boundary
Safety stop: Do not operate electrical equipment exposed to water or attempt a pressurized fitting repair.
Helpful context
Understand the symptom
Find where the water is escaping before choosing a part
Dry the spout, handle, deck, and cabinet area, then watch one period with both handles or the single lever fully off. Water from the spout after shutoff is a different problem from water that appears around the handle, at the base, or on a supply connection under the sink. A single-handle and a two-handle American Standard faucet may use different valve assemblies, so do not infer a cartridge from the brand name alone.
Stop the leak safely before opening anything
Place a towel or container below the drip and identify the hot and cold shutoff valves below the sink. Turn the affected supply stop clockwise only if it moves normally and is clearly the water shutoff; if it is seized, corroded, or continues to leak, use the home's main water shutoff and get plumbing help. Do not begin handle or cartridge work while the line is pressurized, and do not rely on a faucet handle as a shutoff.
Match the repair to the exact faucet identity
American Standard sells monoblock, centerset, widespread, and other sink-faucet layouts, with both single-handle and two-handle examples. Product pages provide a model number and may provide an installation guide or repair-parts diagram. Record the model from the faucet, paperwork, or diagram before ordering anything. Ceramic-disc construction does not make cartridges interchangeable across collections or models.
A spout drip is not the same as a surface leak
EPA WaterSense identifies worn faucet washers and gaskets as common causes of faucet leaks and recommends turning off the water line before starting. For a spout drip with dry supply connections, the internal cartridge, valve, seat, or seal is more relevant than an aerator; an aerator can affect the stream but does not normally stop a valve from sealing. For water around the handle or base, inspect only what is visible and leave internal seals or cartridge removal to the model instructions or a plumber.
Only after diagnosis
Potential parts
- American Standard model-specific faucet cartridge or valve assembly
Consider this category only when a spout drip with the faucet off is confirmed and the exact faucet model and compatible repair diagram identify the internal valve or cartridge.
Match the exact model, handle configuration, valve design, retaining method, and revision; American Standard sink faucets are not interchangeable by brand or appearance alone. - model-specific faucet O-ring, washer, or gasket
Consider this category only when the model guide or a plumber identifies a worn or damaged seal at the handle, base, spout, supply connection, or valve assembly.
Use the exact material, dimensions, and placement specified for the model; do not stack washers, substitute an unknown seal, or overtighten a fitting. - sink faucet flexible supply hose or connection seal
Consider this category only when the leak is visibly below the sink at a hose, fitting, or faucet shank and the correct connection type is confirmed.
Confirm connection size, length, thread or compression type, shutoff condition, and faucet model before replacement; isolate water first.
When checks do not resolve it
Need a professional?
Escalate for a recurring spout drip, handle or base leak, wet supply connection, seized shutoff, cracked faucet body, mismatched parts, cabinet damage, or any repair requiring internal valve work or pressurized fitting disassembly.
Safety scope: The homeowner scope is limited to observing the drip, protecting the cabinet, closing a clearly identified supply stop that moves normally, reading the model information, and inspecting visible connections. Do not work on a pressurized line, force a shutoff or handle, remove an internal valve without the exact guide, overtighten fittings, expose electrical equipment to water, or guess a replacement part.
Have this ready
- Provide the faucet model if available, single- or two-handle configuration, sink layout, exact drip location, whether it occurs with the faucet off or during use, which supply stops isolate it, photos of the faucet and underside, any visible part markings, and what was recently repaired.
Common questions
FAQ
Why does my American Standard sink faucet drip when it is turned off?
If the drop forms at the spout while the base and below-sink connections are dry, an internal valve, cartridge, seat, or seal may not be closing fully. Isolate the water, confirm the exact model, and use its repair guide or a plumber; do not assume a generic cartridge will fit.
What if the leak is under the American Standard sink?
Dry the area and identify whether water starts at a supply stop, flexible hose, threaded fitting, or faucet shank. Close the affected stop if it moves normally. A wet below-sink connection needs the correct hose, gasket, or fitting diagnosis rather than an internal spout cartridge by default.
Do American Standard sink faucets all use the same cartridge?
No safe assumption can be made from the brand alone. American Standard offers several sink-faucet layouts and both single- and two-handle models; identify the model and use its parts diagram before selecting a cartridge, valve, washer, or O-ring.
Should I replace the aerator to stop a faucet drip?
An aerator can affect the stream, but it is not normally the part that seals the faucet when it is off. For a persistent spout drip, focus on the model-specific valve, cartridge, seat, or seal after shutting off the water; use the model guide or a plumber if the internal repair is unclear.
When should I call a plumber for an American Standard faucet drip?
Call when a supply stop will not close, water is spraying or reaching the cabinet or electrical equipment, the faucet body is cracked, the model cannot be confirmed, the drip returns after a model-specific repair, or the work involves internal valve removal or a pressurized fitting.
Read the exact guide
Official sources
- Colony Soft 4-Inch Centerset Two-Handle Bathroom FaucetAmerican Standard · American Standard product information for one Colony Soft model; other American Standard faucets can use different parts and procedures.
- Find Parts and Identify Your ProductDelta Faucet · Delta's manufacturer workflow used for general faucet-repair reasoning; American Standard model documentation controls the actual part and procedure.
- Reliant 3 4-Inch Centerset Single-Handle Bathroom FaucetAmerican Standard · American Standard product information for one Reliant 3 model; other American Standard faucets can use different parts and procedures.
- Bathroom Sink Faucets - Innovative and Stylish Sink FaucetsAmerican Standard · American Standard collection-level consumer information; individual model instructions and parts diagrams control repairs.
- Fix a Leak WeekU.S. Environmental Protection Agency WaterSense · General U.S. household leak guidance; local plumbing requirements and the faucet manufacturer's instructions control a specific repair.
Community feedback
Share a repair observation
Share a plain-text repair observation. Accepted observations are published automatically; this page may take a moment to update.