
On this page
Start here
Quick answer
Stop the garbage disposal as soon as water rises at the American Standard sink outlet. With the switch off, keep hands and tools out of the disposer, remove standing water only as needed, and note whether the sink drains normally when the disposer is off and whether a second bowl also rises. A backup that appears when the disposer sends water into the drain usually points to a restricted drain path, discharge connection, or disposer outlet rather than a sink finish problem. After power is off, a correctly sealed double-bowl opening and a gentle plunger attempt may clear a nearby clog; do not use chemical drain opener, reach into the disposer, or keep running it against a full sink. If water remains, the backup returns, the disposer hums or leaks, or the clog is beyond the accessible trap, arrange qualified plumbing service.
Before you begin
Safety first
- This article covers stopping the disposer, safe external observations, controlled opening inspection, one gentle power-off plunger attempt, and service preparation. A professional must handle disposer removal, hidden drain clearing, trap or discharge disassembly with trapped water, electrical work, motor diagnosis, and leak testing.
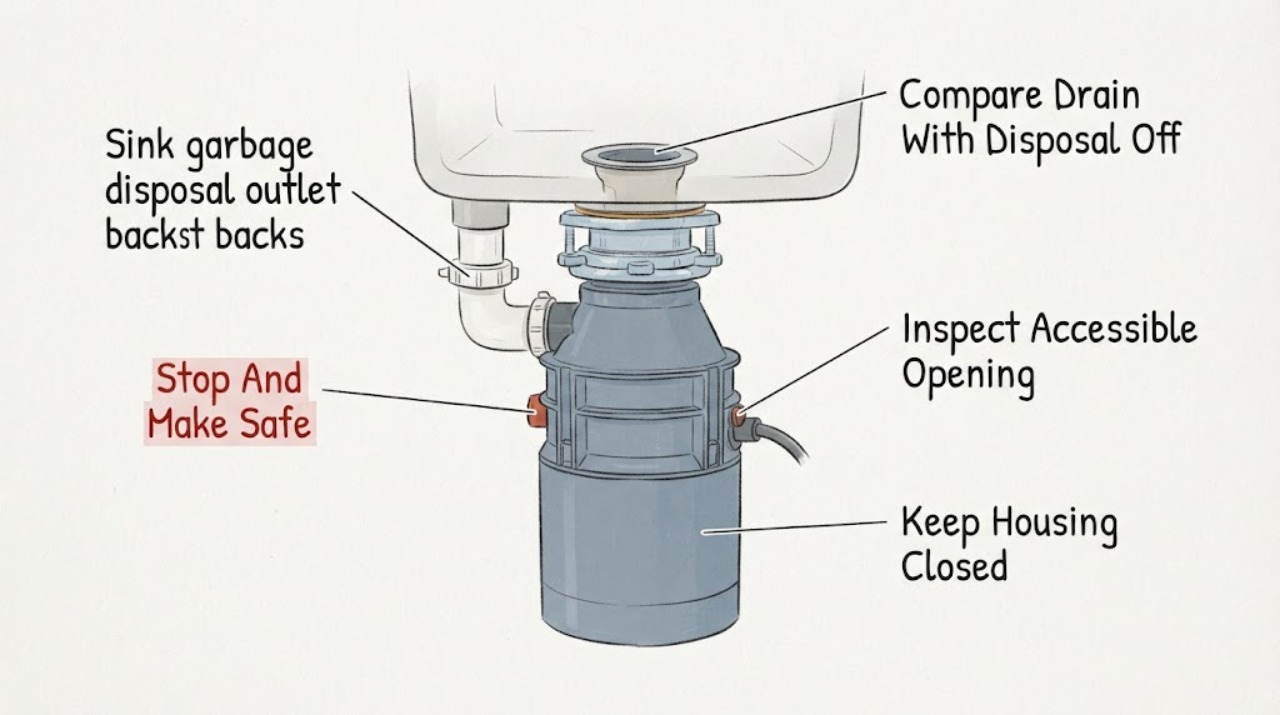
Work through in order
Diagnostic checks
Use only checks that match the exact appliance or system and its official guide.
-
Check 1
Turn the garbage disposal wall switch or air switch off immediately when water rises, then keep the disposer off. If you will remove an object or use a tool, disconnect power according to the disposer manual before putting anything near the opening; keep hands out of the grind chamber.
Expected result: The disposer stops and the water level stays put, the motor continues or only hums, water leaks into the cabinet, or the switch will not stop it.
Next step: For any motor, leak, or switch abnormality, leave power off and arrange service. If the disposer is off and stable, continue with external drainage observations only.
Stop if: Do not reach into the disposer, run it against standing water, or work on wiring or a jam with power connected.
Why this matters
Why: A stopped motor with standing water supports a drain restriction or disposer blockage branch. A humming or uncontrollable motor, cabinet leak, or switch problem adds an electrical, mechanical, or water-damage risk and is not a routine drain-clearing condition.
-
Check 2
With the disposer off, observe whether the sink water level falls on its own and whether the other bowl rises. Do not turn the disposer on to recreate the backup; use the event that already occurred and the current water behavior.
Expected result: The sink drains normally with the disposer off, drains slowly with it off, or water also rises in a second bowl or backs up through another connected fixture.
Next step: Use the pattern to choose the outlet or shared-line branch. If multiple fixtures back up, stop water use in that branch and arrange plumbing service instead of repeatedly running the disposer.
Stop if: Do not add more water, run the disposer, or remove a trap while the cabinet or floor is filling.
Why this matters
Why: Normal drainage with the disposer off but backup during operation suggests a partial restriction at the disposer discharge or shared drain path. Slow drainage with it off supports a downstream clog. A second bowl or fixture rising indicates a shared branch or farther drain restriction rather than only the outlet opening.
-
Check 3
After power is off and the water level is controlled, look from above at the American Standard sink strainer or disposer baffle and the visible outlet opening. Remove only a loose, clearly reachable object with long-handled tongs; do not disassemble the disposer or push debris farther into the drain.
Expected result: A loose object or food buildup is visible at the opening, the opening looks clear, or the disposer is jammed, damaged, or leaking below the opening.
Next step: If the opening is clear or the unit is jammed or leaking, continue to the drain-path check without running the disposer. Arrange service for damage or a jam that cannot be safely cleared under the model manual.
Stop if: Do not put fingers into the disposer, insert a hand tool into the grind chamber, or use a chemical drain product.
Why this matters
Why: A loose obstruction at the opening can restrict discharge, but a clear opening does not rule out a clog deeper in the discharge tube, trap, or shared drain. A jam, damaged housing, or leak is a disposer repair branch rather than a sink-outlet cleaning task.
-
Check 4
If there is no active leak, no electrical abnormality, and the disposer is off, use a sink plunger only as the official disposal guidance allows. On a double-bowl sink, seal the other bowl opening first; use a small amount of water for a controlled seal and press gently rather than using force. Stop if water rises into the other bowl or escapes below the sink.
Expected result: The water level falls and the sink then drains, the plunger moves water into the other bowl, or there is no improvement after a few gentle attempts.
Next step: If drainage improves, rinse with a moderate flow of cold water while the disposer remains off and watch for a return backup. If it does not improve or water escapes below, stop and arrange plumbing service.
Stop if: Do not use force, a drain-cleaning chemical, a hand inside the disposer, or a plunger over an opening while power is on.
Why this matters
Why: Improvement supports a nearby soft blockage, but it does not prove that the full drain line is clear. Water moving to another bowl or no improvement suggests an unsealed setup or a deeper restriction that needs a different tool or a plumber.
-
Check 5
With the disposer still off, place a dry towel or paper under the visible discharge and trap connections without loosening them, then observe for a leak during a small amount of sink drainage that is safe for the cabinet. Note whether the backup or leak is at the disposer outlet, discharge tube, trap, or farther along the wall connection.
Expected result: Water appears at a fitting, the disposer outlet or discharge tube shifts, the trap stays dry but the sink remains backed up, or more than one fixture is affected.
Next step: Keep the disposer off, protect the cabinet, and arrange a qualified plumber for any leak, loose connection, downstream clog, or multi-fixture backup. Do not loosen a fitting while water is trapped or use the disposer to force flow.
Stop if: Do not remove the trap or discharge tube as a first response, pull the disposer down, or work under a cabinet with an energized unit or spreading water.
Why this matters
Why: A fitting leak or shifted discharge connection points to a plumbing connection fault. A dry accessible trap with persistent backup or several affected fixtures makes a downstream shared-line restriction more likely.
-
Check 6
After a safe clearing step, verify that the sink drains without rising, the cabinet remains dry, and the disposer has no unusual hum, leak, or switch behavior. Do not run a long disposal cycle to prove the repair; record the model and whether the backup returned under normal cold-water use.
Expected result: The sink drains and the disposer operates normally without a return backup, or the backup, leak, noise, or slow drainage returns.
Next step: Use only normal disposal practices if the system stays stable. For recurrence or any leak, noise, jam, or electrical symptom, leave the disposer off and arrange qualified plumbing or appliance service.
Stop if: Stop immediately for water near electrical parts, a motor that will not stop, a burning odor, exposed wiring, or flooding.
Why this matters
Why: A stable drain after one gentle clearing supports a nearby obstruction, but recurrence indicates a remaining restriction, poor discharge connection, or disposer fault. Noise, leakage, or a switch issue is not established as a clog alone.
Use your observations
Decision map
Find the observation that best matches what you see, then follow the next safe action.
-
PATH 01Safety boundary
What you see
The sink drains normally with the disposer off but water rises when the disposer sends flow into the garbage-disposal outlet.
Do this next
Keep the disposer off, inspect only the accessible opening, and try one properly sealed gentle plunger attempt if there is no leak or electrical issue. Arrange a plumber if flow does not stay clear.
Why this path and its safety boundary
Why it matters: A partial restriction at the disposer discharge, trap, or shared drain line is more likely than a defect in the American Standard sink bowl or strainer finish.
Safety stop: Do not keep running the disposer to push water through a restriction or use chemical drain opener.
-
PATH 02Safety boundary
What you see
The sink drains slowly or remains full even when the disposer is off, especially if a second bowl or connected fixture also backs up.
Do this next
Stop adding water and arrange qualified plumbing service for the accessible drain path and the line beyond it.
Why this path and its safety boundary
Why it matters: A downstream shared-line, trap, or discharge restriction is more likely than a blockage only at the disposal opening.
Safety stop: Do not disassemble a trapped, full drain or use the disposer as a pump.
-
PATH 03Safety boundary
What you see
The disposer hums, will not stop, leaks below the sink, has a shifted discharge connection, or remains blocked after the opening is clear.
Do this next
Leave power off and arrange qualified appliance or plumbing service. Provide the disposer model and the exact leak or motor symptom.
Why this path and its safety boundary
Why it matters: A disposer jam, discharge fitting, seal, motor, switch, or related appliance fault is more likely than a simple sink outlet clog.
Safety stop: Do not put hands into the unit, pull it down, open wiring, or continue cycling the switch.
-
PATH 04Safety boundary
What you see
A gentle clearing step restores flow briefly, but the outlet backs up again during later disposal use or after food waste enters the system.
Do this next
Keep the disposer off, avoid grease, fat, fibrous loads, and chemical products, and arrange a qualified drain assessment rather than repeating forceful clearing.
Why this path and its safety boundary
Why it matters: A remaining partial blockage, unsuitable waste, discharge layout issue, or disposer-related restriction is more likely than a fully cleared line.
Safety stop: Do not treat temporary drainage as proof of repair or run repeated cycles against a slow line.
Helpful context
Understand the symptom
The outlet is the symptom location, not proof the sink is defective
American Standard identifies its waste fitting as a kitchen sink drain with a strainer. When water backs up as the garbage disposal runs, the key question is where flow stops: inside the disposer, at its discharge connection, in the trap, or farther along the shared drain. The same sink can appear normal with the disposer off while a partial restriction fails when the disposer adds water and ground food waste.
Use the safest branch before trying to clear a clog
A full sink around an electric disposer creates both cut and water-damage hazards. Turn the disposer switch off before any clearing attempt, and use tongs rather than fingers for an object that is plainly reachable from above. On a double sink, the other opening must be sealed during a plunger attempt or pressure can move water into the second bowl instead of through the restriction.
A temporary drain improvement is not the same as a clear line
If a gentle, power-off clearing step lets the sink drain, use only cold water and normal food waste practices afterward. InSinkErator warns against grease or fat and chemical drain openers because they can build up in or damage the drain system. A backup that returns, a leak below the sink, or a disposer that will not run normally needs plumbing or appliance diagnosis rather than more force.
Safety boundary
Stop conditions
- Turn the disposer off and stop water use for flooding, water near electrical parts, a motor that will not stop, burning odor, exposed wiring, or a spreading cabinet leak.
- Do not put fingers or hands into the disposer, use a flame or chemical drain opener, bypass the switch, or work on wiring while power is connected.
- Do not keep running the disposer to force water through a backup, use force with a plunger, or remove a full trap or discharge connection as a first response.
- Do not pull the appliance out to inspect hidden piping; protect the cabinet and arrange a plumber for a downstream, multi-fixture, recurring, or inaccessible restriction.
- If one controlled, power-off clearing attempt does not produce stable drainage, leave the disposer off and arrange qualified plumbing or appliance service.
Only after diagnosis
Potential parts
- sink waste fitting or disposer baffle
Consider this category only if inspection and qualified diagnosis identify a damaged or missing outlet fitting, strainer, or disposer baffle that restricts flow or permits leakage.
Confirm the exact American Standard sink and disposer configuration, opening size, fitting design, and manufacturer fit information before ordering. - garbage-disposal discharge tube or seal
Consider this category only if a qualified inspection finds a cracked tube, failed seal, shifted connection, or related discharge leak rather than a downstream clog.
Confirm the disposer model, discharge geometry, seal type, clamps, and local plumbing requirements before ordering or fitting. - sink drain trap or shared drain fitting
Consider this category only after a qualified drain assessment locates the restriction or leak in the trap or shared drain fitting.
Confirm the installed sink layout, pipe material and size, disposer outlet position, and local code requirements before ordering.
When checks do not resolve it
Need a professional?
Arrange qualified plumbing service when the sink remains slow or backed up with the disposer off, another bowl or fixture is affected, a backup returns after one controlled clearing attempt, a trap or discharge connection leaks, or the restriction is beyond the accessible outlet. Arrange appliance service for a disposer that hums, will not stop, jams, leaks from its body, or has abnormal switching. Electrical work, disposer removal, hidden drain clearing, and any work around a full or leaking line require a qualified professional.
Safety scope: This article covers stopping the disposer, safe external observations, controlled opening inspection, one gentle power-off plunger attempt, and service preparation. A professional must handle disposer removal, hidden drain clearing, trap or discharge disassembly with trapped water, electrical work, motor diagnosis, and leak testing.
Common questions
FAQ
Why does my sink back up when the garbage disposal runs?
The disposal is adding flow to a path that may be partly restricted at the outlet, discharge tube, trap, or shared drain. If the sink drains normally with the disposal off but rises during operation, keep the unit off and follow the safe clog branch.
What should I check first at an American Standard sink disposal outlet?
Turn the disposer off, keep hands out, and observe whether the sink drains with the unit off. Check only for a loose, visible object at the opening and note whether another bowl or fixture also backs up. Do not move the disposer or open a full trap.
Can I plunge a double sink with a garbage disposal?
Only with the disposer switched off and the other sink opening sealed, using a gentle, controlled attempt as the disposer manufacturer's guidance describes. Stop if water moves into the other bowl, leaks below, or the clog does not improve.
Should I pour chemical drain cleaner into the disposal?
No. InSinkErator's manual says not to use chemical drain openers or drain-cleaning products in the disposer. Keep power off and arrange plumbing service when a controlled clearing attempt does not restore stable flow.
When does this sink backup need a plumber?
Arrange service when the sink stays slow with the disposer off, another bowl or fixture backs up, the backup returns, water leaks under the sink, or the restriction is beyond the accessible outlet. A humming, jammed, leaking, or uncontrollable disposer may also need appliance service.
Read the exact guide
Official sources
- Fixing a Clogged Garbage DisposalInSinkErator · Official disposer-manufacturer support guidance used for generic disposal and drain mechanics; the installed disposer model controls its exact procedure.
- Waste FittingAmerican Standard · Direct American Standard US product page; it identifies the sink drain fitting but does not diagnose a garbage-disposal blockage.
- InSinkErator Garbage Disposal Installation, Care, and Use ManualInSinkErator · Official InSinkErator manual; exact safety and maintenance details vary by disposer model.
Community feedback
Share a repair observation
Share a plain-text repair observation. Accepted observations are published automatically; this page may take a moment to update.