
On this page
Start here
Quick answer
A weak flush on an American Standard toilet can mean the tank is not refilling to the model's marked level, the handle or flush valve is not opening fully, the bowl's rim or siphon-jet passages have mineral or debris buildup, or the trapway or drain line is partly blocked. First observe whether the bowl water rises, swirls without siphoning, drains slowly, or simply receives too little water. With the tank lid off, let the tank refill and compare the level with the manufacturer's mark or the overflow tube; do not set a generic level by guesswork. Check that the handle is pressed fully and released, the chain or linkage is not preventing the flush valve from opening, and the water-supply stop is open. If the bowl is rising, stop flushing and use a correctly sized flange plunger; American Standard warns not to keep flushing a clogged toilet. A weak flush that remains after the water level and linkage checks, a recurring clog, a leak into the bowl, a cracked ceramic part, or a problem affecting several fixtures needs qualified plumbing service and an exact model diagnosis.
Before you begin
Safety first
- This article supports observation, model-directed tank and linkage checks, ordinary approved cleaning, and a controlled flange-plunger attempt for a rising or slow-draining bowl. Do not use chemicals, alter flush volume, remove plumbing fixtures, or access pressure-assisted or concealed components without qualified service.
Work through in order
Diagnostic checks
Use only checks that match the exact appliance or system and its official guide.
-
Check 1
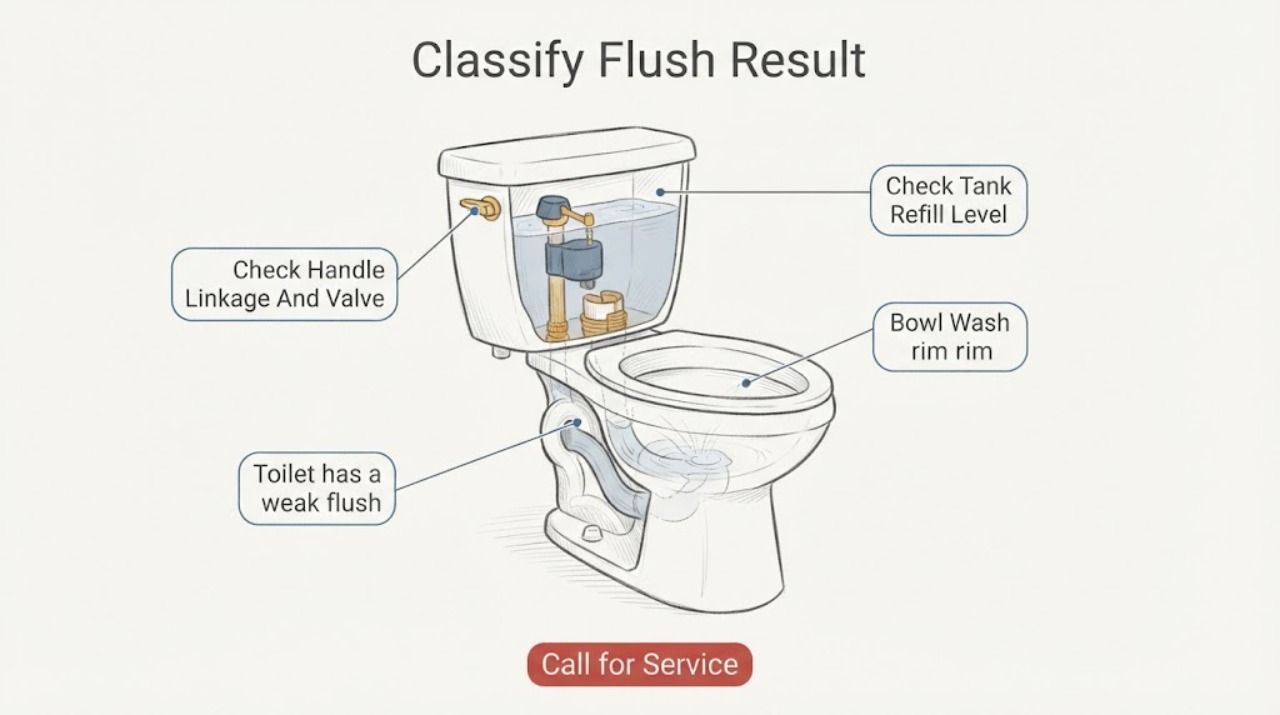
Flush once while watching from the side, without holding the handle down or flushing again immediately. Observe the tank opening, bowl wash and swirl, siphon action, water height, and how quickly the bowl returns to its normal level.
Expected result: Classify the flush as a short or weak tank release, a bowl that swirls without siphoning, a bowl that rises and drains slowly, a flush that leaves residue with normal drainage, or a normal water movement that only feels less forceful than expected.
Next step: Follow the branch that matches the observed pattern and do not repeat the flush if the bowl rises near the rim. Record the model marking and a short video for service if the pattern is unclear.
Stop if: Stop flushing for a rising bowl, overflow risk, water on the floor, cracked porcelain, or any leak at the tank, bowl, or supply connection.
Why this matters
Why: A short tank release points toward water level, handle, chain, or flush-valve travel. Swirling without siphoning can indicate that a compatible VorMax bowl needs priming. Rising or slow drainage points toward a partial trapway or drain restriction. Normal drainage with poor bowl wash points toward rim or siphon-jet passages, mineral buildup, or a component-specific issue rather than the main drain.
-
Check 2
Remove the tank lid carefully and allow the toilet to refill completely after a flush. Compare the final water level with the manufacturer's marked line or the exact model instructions, and check whether the fill valve shuts off without water continuously entering the overflow tube.
Expected result: Record whether the tank stops below the specified level, reaches the specified line, runs into the overflow, refills very slowly, or uses a pressure-assisted or other arrangement without a user-adjustable open tank level.
Next step: Adjust only the model's water-level control as described by American Standard, or arrange service when the valve is damaged, the overflow is involved, or the toilet's design does not expose a safe adjustment.
Stop if: Do not set water above the overflow path, bend a float arm by force, remove a pressure vessel, or work with the supply running when a component is being opened.
Why this matters
Why: A level below the model's specified line can reduce the available flush volume. Water entering the overflow or a fill valve that will not shut off indicates a fill-valve, flapper, or adjustment problem rather than permission to raise the level indefinitely. A tank that reaches its specified level shifts attention to the release, bowl, or drain.
-
Check 3
With the tank lid off and the water supply left on unless the manual says otherwise, observe the handle, trip lever, chain or linkage, and flush valve during one controlled flush. Confirm the handle is pressed fully and released, the linkage is engaged, and the flush valve opens far enough and closes without catching.
Expected result: Record a full valve opening, a partial opening, a chain or hook that is slack or tangled, a handle that must be held down, a valve that closes too soon, or a linkage that is model-specific and cannot be identified safely.
Next step: Use the exact American Standard instructions for the installed flush valve; for a VorMax model, follow its specified linkage and priming procedure rather than adapting another model's setting. Shut off the supply before opening or replacing a valve component.
Stop if: Do not hold the handle down to force a stronger flush, bypass the flush valve, cut the chain, overtighten adjustment screws, or operate with the tank lid or components unstable.
Why this matters
Why: Partial valve travel or a misadjusted linkage can release too little tank water and create a weak flush. A valve that closes or leaks before the cycle is complete may need a model-specific setting or seal, while a normal opening shifts attention away from the handle and toward the bowl or trapway.
-
Check 4
After confirming the tank level and valve travel, inspect the bowl during a flush for an even wash around the rim and a strong movement toward the trapway. Look only at visible openings for mineral scale, debris, or an unusual jet pattern; use the model's care instructions for cleaning and do not push objects into the passages.
Expected result: Observe a complete, even bowl wash, weak or missing flow from part of the rim, a weak siphon-jet pattern, visible mineral or debris buildup, or normal visible flow with residue left in the bowl.
Next step: Clean only with the manufacturer's approved method and ordinary access, then retest once. If passages are hidden, heavily scaled, cracked, or unchanged after permitted care, arrange plumbing or manufacturer service.
Stop if: Do not drill or wire the rim or jet passages, use acid or chemical drain cleaner, remove the bowl, or scrape glazed ceramic aggressively.
Why this matters
Why: Uneven bowl wash or blocked visible passages can reduce the perceived flush even when tank volume is normal. American Standard explains that bowl wash and a siphon jet help move water and waste through the trapway. Normal visible flow with persistent residue can instead indicate a trapway, drain, bowl-design, or component issue that needs model-specific evaluation.
-
Check 5
If the bowl rises or drains slowly, turn the toilet's water supply off or to the closed position, protect the floor, and use a flange plunger whose cup seals the trapway opening. Pump with the bowl containing enough water to cover the cup, then check one controlled flush only after the bowl drains normally.
Expected result: Record whether water level falls and the flush returns to normal, the bowl drains but the flush remains weak, the bowl rises again, or plunging does not change the drainage speed.
Next step: Stop repeated flushing if the bowl rises, and arrange qualified plumbing service for a nonresponsive or recurring clog, several slow fixtures, sewage odor, or suspected drain-line restriction.
Stop if: Do not keep flushing a rising bowl, use chemical drain opener, insert a sharp object, remove the toilet, or use force that can damage the ceramic or wax seal.
Why this matters
Why: Improved drainage and flush after plunging support a localized partial clog. Normal drainage but persistent weak flushing shifts attention back to tank release, bowl passages, or the toilet's model-specific design. A bowl that rises again or does not respond suggests a deeper obstruction and an overflow risk.
-
Check 6
After the safe water-level, linkage, bowl, and drainage checks, perform one normal flush with the handle pressed and released as designed. Compare the result with the exact American Standard model instructions and with the toilet's previous behavior, not with a different toilet or an assumed gallons-per-flush value.
Expected result: Classify the result as restored flush and normal refill, improved but still incomplete bowl clearing, persistent weak flush with normal drainage, repeated clogging, running water, or a leak or crack.
Next step: Document the model, water level, linkage position, bowl movement, plunger result, and any part history; request qualified plumbing or American Standard service when performance remains weak or any leak or crack is present.
Stop if: Do not retrofit a different flush volume, raise water above the specified level, replace a valve or flapper without model compatibility, or continue using a leaking or cracked toilet.
Why this matters
Why: Restored operation supports a corrected adjustment, obstruction, or priming issue. Persistent weak flush with normal tank release and drainage may involve mineral restriction, flush-valve wear, bowl or trapway condition, supply pressure, or a model-specific performance issue. Running water or a leak can waste the water needed for the flush and needs separate repair.
Use your observations
Decision map
Find the observation that best matches what you see, then follow the next safe action.
-
PATH 01Safety boundary
What you see
The tank stops below the model's specified level, or the handle, chain, trip lever, or flush valve opens only partly and the bowl does not rise or drain slowly.
Do this next
Follow the exact American Standard level and linkage procedure, shut off the supply before opening a valve component, and retest once. Request service if the valve will not adjust, leaks, or is a pressure-assisted or unfamiliar design.
Why this path and its safety boundary
Why it matters: Insufficient stored water or incomplete valve travel is more likely than a drain clog. A running fill valve, overflow flow, or leaking flapper can also prevent the toilet from maintaining the intended tank condition.
Safety stop: Do not hold the handle down, raise the water above the overflow path, or swap in a generic flush valve or flapper by appearance alone.
-
PATH 02Safety boundary
What you see
The tank reaches its specified level, the valve opens normally, the bowl does not rise, but the water swirls without siphoning or bowl wash is weak or uneven.
Do this next
If the exact model is a VorMax and the manual permits it, follow its priming sequence with the required interval between flushes; otherwise use only approved bowl-care cleaning and arrange service for hidden or persistent restriction.
Why this path and its safety boundary
Why it matters: A model-specific priming requirement, restricted rim or siphon-jet passage, mineral buildup, or bowl-specific flush issue is more likely than low tank volume. American Standard says an unprimed VorMax bowl can swirl without siphoning.
Safety stop: Do not drill, wire, acid-clean, or scrape the rim or siphon-jet passages, and do not apply a VorMax procedure to an unidentified model.
-
PATH 03Safety boundary
What you see
The bowl rises toward the rim, drains slowly, gurgles, or improves temporarily after plunging; another nearby fixture may also drain slowly.
Do this next
Close the water supply and use a correctly sealed flange plunger once as directed; request qualified plumbing service for recurrence, nonresponse, several affected fixtures, or any sewage backup.
Why this path and its safety boundary
Why it matters: A partial trapway or building-drain restriction is more likely than a weak tank release. Continuing to flush can turn a partial clog into an overflow.
Safety stop: Do not use chemical drain opener, keep flushing, remove the toilet, or force an object through the trapway.
-
PATH 04Safety boundary
What you see
The bowl drains at a normal rate without rising, the tank reaches its specified level, the valve opens fully, but the toilet still leaves residue or clears poorly.
Do this next
Use the model-approved care procedure for visible passages, preserve the original parts and settings, and arrange manufacturer or qualified plumbing diagnosis if the flush remains weak.
Why this path and its safety boundary
Why it matters: The remaining possibilities include mineral or debris restriction in bowl passages, flush-valve wear, a trapway issue that does not slow drainage, supply conditions, or a model-specific performance or installation mismatch.
Safety stop: Do not increase flush volume, remove flow-control components, change the trapway, or replace parts without exact model compatibility.
-
PATH 05Safety boundary
What you see
The toilet runs between flushes, water enters the overflow, dye leaks from tank to bowl, water appears at a connection or base, the handle or valve is damaged, or the porcelain is cracked.
Do this next
Close the supply if water is escaping or the bowl is unsafe, clean up standing water, and arrange qualified plumbing service. Provide the model and photos without removing parts unnecessarily.
Why this path and its safety boundary
Why it matters: The water-loss or structural problem can reduce flush performance and create a leak or flooding risk, but it is not safely resolved by adjusting flush strength. A worn flapper, fill valve, valve seal, connection, or bowl may need model-specific repair.
Safety stop: Do not use a cracked bowl or tank, overtighten porcelain fittings, keep operating with a base leak, or assume a generic flapper or valve is compatible.
Helpful context
Understand the symptom
Weak flush is a symptom, not a part diagnosis
A toilet can feel weak for different reasons. A tank that never refills enough has less stored water to release. A handle, chain, or flush valve that opens only partly can shorten the flush. A bowl that swirls without starting a siphon may be unprimed on some American Standard VorMax models, while a bowl that rises and drains slowly suggests a restriction in the trapway or drain. American Standard also describes the role of bowl wash and a siphon jet in moving water and waste through the trapway. Start by watching the complete flush and deciding whether the failure begins in the tank, at the bowl, or after water enters the drain.
Use the exact American Standard model instructions for settings
American Standard's VorMax instructions show that some models use a marked or specified tank level, a particular flush-valve linkage, and a priming sequence. Those details are not universal across American Standard toilets or across gravity, pressure-assisted, single-flush, and dual-flush designs. The model manual controls the fill line, linkage adjustment, cleaning method, and whether a particular part can be serviced. Do not raise water above the overflow path, hold the handle down, change a flush-volume setting, or install a generic valve simply to make the flush sound stronger.
Know when the weak flush is actually a clog
If the bowl level rises or drains slowly after a flush, treat the toilet as partially clogged even if it eventually empties. American Standard recommends preventing overflow, shutting off water, covering the floor, and using a plunger with the cup covering the trapway opening; repeated flushing can worsen a near-overflow. If plunging does not restore normal drainage, or multiple fixtures drain slowly, the restriction may be farther in the trapway or building drain and needs plumbing service.
Safety boundary
Stop conditions
- Stop flushing when the bowl rises toward the rim, water backs up, sewage appears, or overflow is possible; close the toilet's supply stop and protect the floor.
- Do not use chemical drain opener, boiling water, sharp objects, wire, drills, or acid to clear a trapway, rim passage, or siphon jet.
- Do not set tank water above the specified line or overflow path, hold the handle down, bypass a flush valve, or retrofit a different flush-volume component by guesswork.
- Do not remove the toilet, tank, pressure vessel, flush valve, or bowl from the plumbing without the exact model procedure, water shutoff, and proper support.
- Stop using the toilet for a cracked tank or bowl, base leak, water near electrical equipment, repeated overflow, sewage backup, or a problem affecting several fixtures; arrange qualified plumbing service.
Only after diagnosis
Potential parts
- American Standard fill valve
Consider this category only if the tank cannot reach the exact model's specified level, the valve runs into the overflow, or inspection confirms the fill valve is damaged after approved adjustment and debris checks.
Confirm the exact tank, model, inlet arrangement, and manufacturer's fit information; do not choose a fill valve solely by appearance or raise its setting above the overflow path. - American Standard flush valve or flapper seal
Consider this category only if the exact model's linkage and water level are correct but the valve does not open fully, closes too early, or leaks water from the tank into the bowl.
Confirm the exact American Standard model, flush-valve design, seal shape, chain or linkage, and manufacturer's instructions before ordering or installing. - toilet handle or trip-lever linkage
Consider this category only if the handle, trip lever, hook, chain, or linkage is visibly damaged or cannot produce the model-required full valve travel after adjustment.
Confirm the tank opening, handle orientation, linkage geometry, and exact model compatibility; do not cut or bend a linkage to force a longer flush.
When checks do not resolve it
Need a professional?
Arrange qualified plumbing or American Standard service when the tank cannot reach its model-specified level, the flush valve or linkage will not open correctly, the bowl remains weak after the approved settings or priming procedure, visible passages are inaccessible or heavily scaled, plunging does not restore normal drainage, clogs recur, several fixtures are slow, water runs into the overflow, a base or supply leak appears, or porcelain is cracked. Provide the exact model, flush type, water-level observation, valve and linkage behavior, bowl pattern, plunger result, and photos of any leak or damage.
Safety scope: This article supports observation, model-directed tank and linkage checks, ordinary approved cleaning, and a controlled flange-plunger attempt for a rising or slow-draining bowl. Do not use chemicals, alter flush volume, remove plumbing fixtures, or access pressure-assisted or concealed components without qualified service.
Common questions
FAQ
Why is my American Standard toilet flushing weakly?
Watch whether the tank releases enough water, whether the bowl swirls without siphoning, whether it rises and drains slowly, or whether it drains normally but leaves residue. Those patterns separate tank level or valve travel, VorMax priming, a partial clog, and bowl or trapway passage issues.
What water level should an American Standard toilet tank have?
Use the exact tank mark or owner instructions for that model; there is no safe universal level for every American Standard design. A VorMax instruction may specify a relationship to the overflow tube. Do not raise water above the overflow path or alter a pressure-assisted vessel.
Can a partial clog cause a weak flush even if the toilet eventually drains?
Yes. A partial trapway or drain restriction can make the bowl rise, swirl, or drain slowly and may temporarily improve after plunging. Stop repeated flushing, close the supply if the bowl rises, and use a correctly sealed flange plunger; recurring or nonresponsive clogs need a plumber.
Why does an American Standard VorMax bowl swirl without siphoning?
American Standard says an unprimed VorMax bowl can swirl without siphoning. If the exact toilet is a VorMax, follow its model-specific priming sequence and intervals. Do not apply that sequence to an unidentified toilet or use it to excuse a low tank level, blocked passage, or rising bowl.
Should I replace the flush valve to fix a weak flush?
Not from the symptom alone. First confirm the model water level, handle and linkage travel, bowl wash, and drainage pattern. Consider a flush valve, flapper seal, or fill valve only when the exact diagnostic result and model instructions support it; preserve compatibility and the original flush-volume design.
Read the exact guide
Official sources
- WaterSense Product Search - ToiletsU.S. Environmental Protection Agency · Official EPA WaterSense product information; it does not diagnose a particular American Standard toilet or authorize retrofits.
- Home MaintenanceU.S. Environmental Protection Agency · Official EPA home-maintenance guidance; exact tank settings and replacement parts remain model-specific.
- How To Ensure A High-Quality User Experience From High-Efficiency PlumbingAmerican Standard · Official American Standard technical and product-design discussion; it describes mechanisms and design considerations rather than a universal homeowner repair procedure.
- How to Adjust Your VorMax Toilet Flush Valve SettingsAmerican Standard · Official American Standard VorMax instructions only; linkage and level arrangements differ across toilet families.
- How to Prime a VorMax ToiletAmerican Standard · Official American Standard instructions for VorMax toilets only; do not apply the priming sequence to an unidentified model.
- How To Unclog A ToiletAmerican Standard · Official American Standard consumer guidance for toilet clogs; it does not establish that every model uses identical trapway or flush components.
- How To Clean The Toilet Water Control Valve Of DebrisAmerican Standard · Official American Standard guidance for a water-control valve that continues to leak; it is not a universal procedure for every fill valve.
Community feedback
Share a repair observation
Share a plain-text repair observation. Accepted observations are published automatically; this page may take a moment to update.