
On this page
Start here
Quick answer
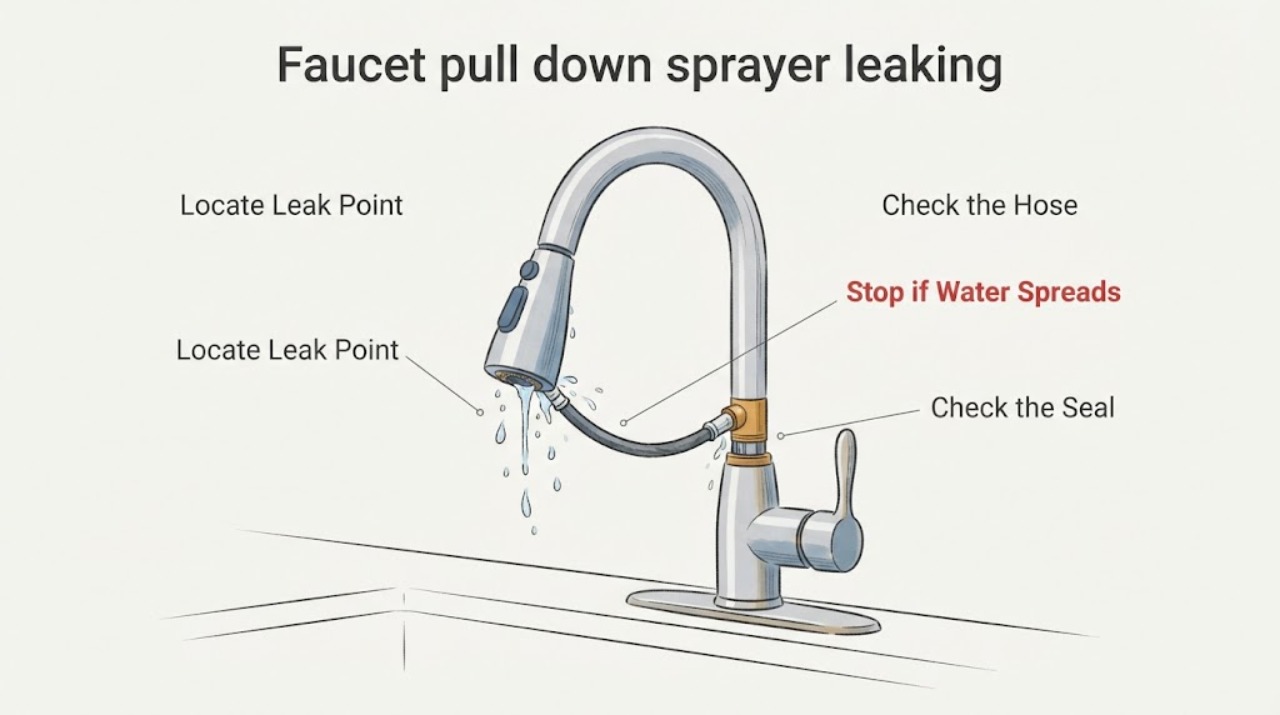
A Delta pull-down sprayer leak must be located before choosing a repair. A few drops from the long hose just after shutoff can be residual water, but water from the spray head while the faucet is on, the wand-to-hose joint, the hose under the sink, or a clip and fitting is a real leak. Dry the area, shut off the faucet and supplies if water is escaping into the cabinet, then inspect only from a safe position for a split hose, loose or incorrect connection, damaged seal, blocked or damaged wand, or a kink that changes the hose path. Delta warns that incorrect hose or clip installation can cause leaks and property damage; use the exact model instructions and parts diagram, and stop rather than forcing a wand, opening a valve body, or improvising a seal.
Before you begin
Safety first
- This article supports leak localization, dry-area observation, loose-obstruction removal, and model-approved wand cleaning only. Isolate water before disconnecting a line, and do not force or improvise seals, clips, hoses, spray assemblies, cartridges, diverters, or pressurized connections.
Work through in order
Diagnostic checks
Use only checks that match the exact appliance or system and its official guide.
-
Check 1
Turn the faucet off, dry the wand and the cabinet area, then observe one normal use from a standing position with the cabinet clear. Do not place hands under a pressurized connection while water is running.
Expected result: Water appears at the spray face or wand shell, at the wand-to-hose joint, along the hose, at the under-sink connection or clip, from the faucet body, or only as a brief post-shutoff drip.
Next step: Write down the exact location and whether the leak occurs only while spraying, with the stream setting, when the wand is pulled, or after shutoff; then isolate water if it reaches the cabinet.
Stop if: Stop immediately for a continuous leak, water near electrical equipment, a split hose, uncontrolled spray, or water that cannot be contained safely.
Why this matters
Why: The location narrows the likely repair: spray assembly or seal, wand connection, hose, connection clip or fitting, faucet or diverter, or normal hose drain-down. A continuing drip or cabinet water is not explained by residual water alone.
-
Check 2
With the faucet off, observe the flexible hose from above and below the sink while the wand is moved only through its normal range; look for kinks, rubbing, cuts, flattened sections, or a hose that catches on stored items.
Expected result: The hose is smooth and clear, a kink or rubbing point appears only when the wand is pulled, or the hose has a split, wet track, or damaged sheath.
Next step: Remove only loose stored items that obstruct the hose path. If the hose is damaged or the leak returns when it moves, leave the supplies off and arrange model-specific hose service.
Stop if: Do not stretch, cut, clamp, tape, lubricate, or pull the hose through a tight opening, and do not continue cycling a hose that leaks.
Why this matters
Why: A travel-related kink can stress the hose and cause water to escape at a weak point or connection. A split or wet track identifies the hose as a likely failed component; a clear hose shifts attention to the wand, seal, connection, or faucet body.
-
Check 3
After water is isolated when the model instructions require it, inspect the wand-to-hose joint for a cross-threaded connection, missing seal, damaged O-ring or gasket, residue, or an unevenly seated hose end. Do not force the joint apart.
Expected result: The joint is dry and evenly seated, water beads at the joint, a seal is visibly damaged or missing, or the joint will not separate with the intended model procedure.
Next step: Use only the seal, clip, and connection arrangement specified for the exact Delta model; reassemble and test over a dry towel. If the joint still leaks, replace the compatible assembly or request qualified service.
Stop if: Do not use thread tape, sealant, pliers on the finish, a generic O-ring, or excessive torque to compensate for an unknown connection.
Why this matters
Why: A leak limited to the joint makes the seal or connection the focused check. A dry joint with water inside the wand body points toward the spray assembly. A stuck joint or unknown seal requires model identification rather than extra torque.
-
Check 4
With the wand clean and the connection dry, observe the spray face and mode control while the faucet runs briefly into the sink. Look for water escaping around the spray holes, button, seam, or wand body rather than only from the intended outlet.
Expected result: The wand body stays dry, water leaks from the face or seam, the spray pattern is distorted by deposits, or the leak is absent with the wand removed from the hose.
Next step: Follow the exact Delta cleaning method for the identified wand, then retest once. If water still escapes from the wand body or the wand cannot be serviced as instructed, stop and arrange a compatible replacement or technician inspection.
Stop if: Do not drill spray holes, pry the wand open, use abrasive tools, or keep using a wand that sprays water into the cabinet or around its controls.
Why this matters
Why: A face or seam leak points to the spray assembly, internal seal, or damage. Deposits may affect operation, but cleaning cannot repair a cracked wand. A leak that disappears without the wand keeps the wand assembly or its joint in focus.
-
Check 5
With the cabinet dry and the supplies isolated if water is escaping, inspect the hose connection, retaining clip, weight area, and nearby faucet or diverter fittings from the side; do not remove a clip or fitting unless the exact model instructions call for it.
Expected result: Water starts at the hose connection, a clip is missing or visibly mis-seated, a seal or fitting is wet, or the connection is dry while the hose or wand is wet.
Next step: Keep the supply stops closed when a connection leaks, photograph the arrangement, and have the exact model and connection inspected before restoring water or ordering parts.
Stop if: Do not substitute a clip, bypass a check valve, tighten a fitting while pressurized, or continue testing when water is reaching the cabinet base or electrical equipment.
Why this matters
Why: A wet connection or missing clip can allow the hose to pull out or leak under pressure. A dry connection with a wet hose points toward a hose defect; water above the hose points toward the faucet or diverter and may require internal service.
-
Check 6
Record the Delta model, exact leak location, whether it occurs with spray or stream, wand position, after shutoff, and under-sink connection state. Photograph the dry and wet paths without including personal information.
Expected result: The leak stops after an approved clean and correctly restored connection, or it persists despite a dry hose path and model-appropriate inspection.
Next step: Keep the water isolated if the leak continues and provide the record to a qualified plumber or Delta-specific technician for compatible parts and a leak test.
Stop if: Do not buy a generic wand, hose, O-ring, clip, or cartridge based only on appearance, and do not reopen the supply until the connection is known to be secure.
Why this matters
Why: A persistent leak can involve the spray assembly, hose, seals, clip, diverter, cartridge, or faucet body. The model and leak location determine whether a wand or hose assembly is replaceable and whether internal faucet service is needed.
Use your observations
Decision map
Find the observation that best matches what you see, then follow the next safe action.
-
PATH 01Safety boundary
What you see
The faucet and cabinet stay dry during use, and only a small amount of water drains from the long flexible hose for a short time after shutoff.
Do this next
Keep the wand docked normally, dry the area, and monitor the next few uses. Escalate if dripping continues, increases, or appears at any joint or under-sink part.
Why this path and its safety boundary
Why it matters: The observation is consistent with water retained in the flexible hose rather than an active leak, provided no water reaches a connection, cabinet, or countertop.
Safety stop: Treat any cabinet water, persistent drip, spray-face leak, or wet connection as an active leak and isolate the supplies.
-
PATH 02Safety boundary
What you see
Water appears under the sink or at the wand-to-hose or hose-to-faucet connection, especially when the wand is pulled or the hose path kinks.
Do this next
Close the supply stops if safe, keep the hose supported without pulling it, and request model-specific hose and connection service; photograph the original arrangement before any parts are removed.
Why this path and its safety boundary
Why it matters: A hose, seal, clip, or connection problem is more likely than a spray-face defect, and continuing to operate can cause cabinet or property damage.
Safety stop: Do not tape, clamp, force, or reconnect a leaking hose, and do not restore water until the correct connection and seal are confirmed.
-
PATH 03Safety boundary
What you see
Water escapes from the spray holes, mode button, seam, or wand shell while the faucet is on, even though the hose and joint remain dry.
Do this next
Use only the identified Delta cleaning method once, then replace the compatible wand assembly or request service if the leak persists or the wand is not intended to be disassembled.
Why this path and its safety boundary
Why it matters: The pull-down spray assembly or an internal wand seal is the leading suspect; deposits may affect the spray pattern, but visible cracking or continued leakage is not repaired by more cleaning.
Safety stop: Do not pry open, drill, glue, or continue using a wand that sends water outside the sink or toward the cabinet.
-
PATH 04Safety boundary
What you see
The wand, hose, and visible connections are dry, but water starts above the hose, at the faucet body, or from a diverter or cartridge area.
Do this next
Leave the supplies off if water can reach the cabinet, identify the exact Delta model, and arrange qualified plumbing or Delta-specific service for the internal leak.
Why this path and its safety boundary
Why it matters: The leak is upstream of the spray assembly and may require cartridge, diverter, valve-body, or faucet-base service rather than a sprayer replacement.
Safety stop: Do not remove a cartridge or diverter without model instructions, do not tighten a pressurized fitting, and stop for corrosion or a connection that may break when moved.
-
PATH 05Safety boundary
What you see
The leak returns after an approved clean and model-correct reassembly, or the source cannot be seen without disassembling the faucet or pressurizing a wet cabinet.
Do this next
Keep the supplies isolated, provide the model and photographs to a qualified technician, and request a controlled leak test and compatible repair recommendation.
Why this path and its safety boundary
Why it matters: The remaining possibilities include a concealed hose or seal failure, a damaged spray assembly, diverter or cartridge, or a connection mismatch that cannot be separated safely by symptom alone.
Safety stop: Do not cycle the faucet repeatedly, improvise seals or clips, or open the faucet body to search for the leak without exact instructions and water isolation.
Helpful context
Understand the symptom
Locate the leak before blaming the spray head
A pull-down assembly has several separate leak points: the spray holes or wand body, the threaded wand-to-hose joint, the hose along its travel under the sink, the hose connection or retaining clip, and the faucet or diverter above the hose. Wipe the area dry and watch one normal use from a safe position. A short drain-down from the long flexible hose after shutoff can be normal, but water that continues, reaches the cabinet, or appears at a connection needs service.
Check the hose path and connection without forcing it
Pull the wand only as far as it normally travels and look underneath for a kink, abrasion, split, rubbing point, or water tracking along the hose. Confirm that the hose is seated in its intended connection and that any retaining clip is present and correctly positioned for the model. Do not pull hard on the hose, tighten a connection by guesswork, or substitute a clip; Delta's installation instructions link incorrect hose or clip installation to leaks and property damage.
The wand itself may be the leaking component
Water around the spray holes, rocker or mode button, or the wand shell while the faucet is on points toward the spray assembly, an internal seal, mineral damage, or a crack. Delta describes mineral deposits as a common sprayer problem and provides model-specific cleaning guidance, but a wand that still leaks after the approved cleaning method may need the complete compatible assembly. Do not drill, pry open, or attempt to rebuild a sealed wand.
Treat cabinet water as a plumbing repair, not a cosmetic drip
If water appears under the sink, close the supply stops if they operate normally and place a dry towel or shallow container to limit damage. Record whether the water comes from the hose, the connection, the faucet body, or a fitting above the hose. A leak that returns with the supply on, a damaged seal, or a connection that cannot be identified from the model instructions should be handled by a qualified plumber or Delta-specific technician.
Safety boundary
Stop conditions
- Close the faucet supplies and stop use for water in the cabinet, a split hose, continuous spray, a leaking connection, or water near electrical equipment.
- Do not force, stretch, cut, clamp, tape, glue, or kink the pull-down hose; do not operate a hose that leaks when it moves.
- Do not use generic O-rings, clips, thread tape, sealant, or replacement wands without confirming the exact Delta model and connection design.
- Do not drill or pry open the spray wand, alter spray holes, open a cartridge or diverter, or tighten a fitting while it is pressurized.
- Stop when the leak source is hidden, the faucet body or valve is corroded, or the correct water-isolation and reassembly procedure is unknown.
Only after diagnosis
Potential parts
- Delta pull-down spray wand assembly
Consider this category only when water escapes from the wand face, button, seam, or shell after the exact model's approved cleaning method, or when Delta identifies the wand as non-serviceable.
Confirm the exact faucet model, finish, hose connection, spray functions, seals, and manufacturer fit information before ordering; wand appearance alone does not establish compatibility. - Delta pull-down hose assembly
Consider this category only when the hose is split, abraded, wet along its length, kink-damaged, or leaking at a model-specific hose connection.
Confirm the faucet model, hose length and ends, weight or guide arrangement, retaining clip, and manufacturer fit information before ordering. - Delta hose connection seal or retaining clip
Consider this category only when inspection confirms a missing, damaged, or incorrectly seated seal or clip at the hose or wand connection and the exact model uses a separately serviceable piece.
Confirm the exact connection design and seal or clip specification with Delta or a qualified plumber; do not substitute a generic part or compensate with tape or sealant. - Delta diverter or cartridge
Consider this category only when the wand and hose stay dry but water originates above the hose or the exact model's diagnosis points to an internal diverter or cartridge leak.
Confirm the exact model, handle and valve design, and repair instructions before ordering; internal faucet service requires water isolation and correct reassembly.
When checks do not resolve it
Need a professional?
Arrange qualified plumbing or Delta-specific service immediately when water reaches the cabinet, the hose or connection is split or leaking, a spray wand leaks through its shell or control, a clip or seal is missing, or the leak persists after an approved clean and model-correct reassembly. Request internal faucet service when the water starts above the hose or the source cannot be located safely.
Safety scope: This article supports leak localization, dry-area observation, loose-obstruction removal, and model-approved wand cleaning only. Isolate water before disconnecting a line, and do not force or improvise seals, clips, hoses, spray assemblies, cartridges, diverters, or pressurized connections.
Common questions
FAQ
Is a small drip from a Delta pull-down sprayer after shutoff normal?
A brief drain-down from the long flexible hose can be normal when the faucet and cabinet remain dry. Water that continues, appears at a joint, reaches the cabinet, or comes from the wand shell is an active leak and should be isolated and inspected.
Why does my Delta pull-down sprayer leak under the sink?
A split or kink-damaged hose, a loose or incorrect connection, a missing retaining clip, or a damaged seal can leak under the sink. Close the supply stops if safe, dry and photograph the area, and do not keep cycling the wand until the exact model connection is checked.
Can I repair a leaking Delta spray wand with glue or thread tape?
No. Glue, thread tape, and generic seals can obstruct the water path or hide an incompatible connection. Identify the exact Delta model and use only the specified wand, hose, seal, or clip, with water isolated before disconnecting a line.
What if the Delta pull-down wand leaks from the spray holes or button?
Mineral deposits may affect the spray, so follow the exact model's approved cleaning method once. If water still escapes from the wand shell, spray face, or control, treat the wand assembly as damaged or failed and arrange a compatible replacement or qualified service rather than opening it.
Read the exact guide
Official sources
- 63235 High-Rise Pull-Down Kitchen and Bar / PrepDelta Faucet · Delta installation and maintenance manual for a high-rise pull-down family, used for leak persistence, short post-shutoff hose drip, spray-screen cleaning, and water-isolation boundaries.
- My kitchen spray attachment is not working. What can I do?Delta Faucet · Manufacturer guidance for mineral deposits, hose kinks, diverter conditions, and model-specific sprayer service.
- 92627 High-Rise Pull-Down Touch Kitchen FaucetsDelta Faucet · Delta pull-down installation manual used for hose and clip seating, approved connection parts, supply flushing, and leak checks after assembly.
Community feedback
Share a repair observation
Share a plain-text repair observation. Accepted observations are published automatically; this page may take a moment to update.