
On this page
Start here
Quick answer
A pull-down faucet can leak at the sprayhead, the hose connection under the sink, the spout or handle seals, or a supply connection; the wet or dry base is a useful location clue, not a diagnosis. Dry the faucet and hose, make a short test while watching the sprayhead and the cabinet, then turn both hot and cold supplies off before disconnecting any hose or connection. A leak only at the wand seam with a dry base points toward the wand screen or seal. A wet hose, weight, or quick connection under the sink points toward the retractable hose or its connection. Water at the base while the faucet runs points toward spout-body seals or water traveling from the handle; water that continues after shutoff makes the cartridge or another valve component more likely. Use the exact model instructions for any seal or hose work, and stop for an active supply leak, hidden cabinet or wall water, damaged parts, or a connection that cannot be identified safely.
Before you begin
Safety first
- This article covers drying, short observation tests, and model-permitted inspection of visible sprayhead and hose connections. It does not authorize pressurized disassembly, supply-line repair, cartridge or valve work, or concealed plumbing access.
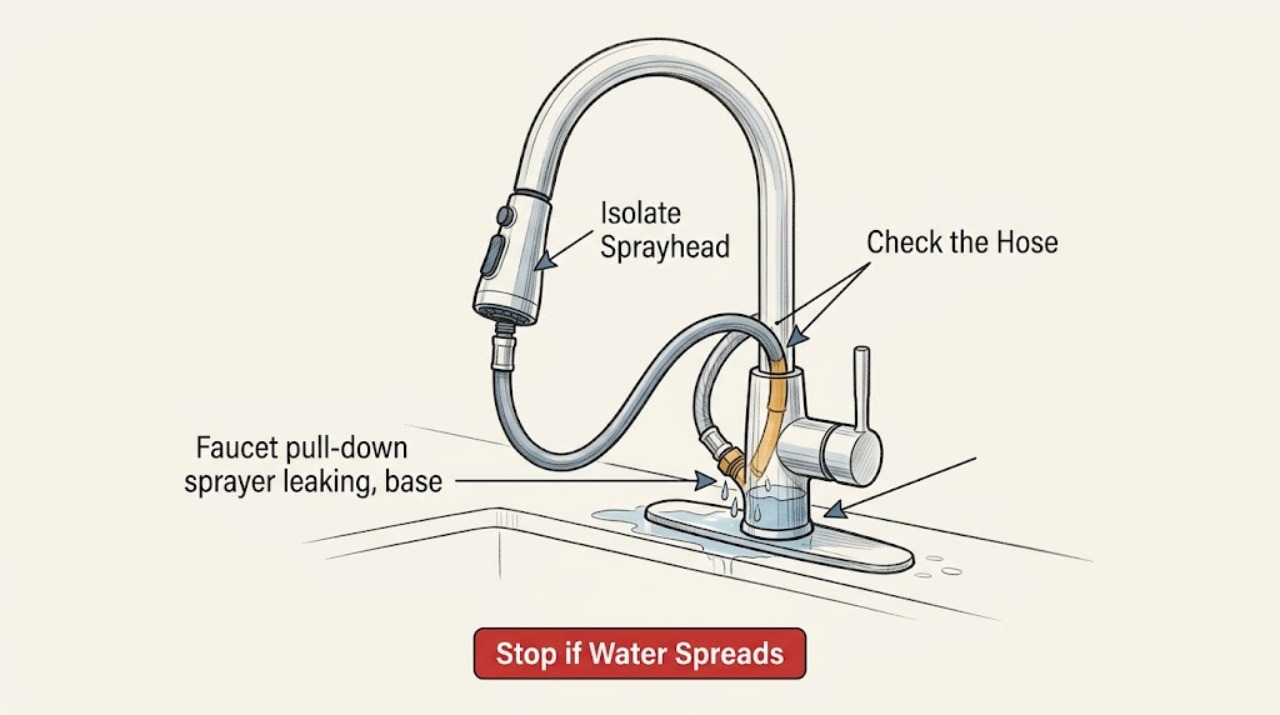
Work through in order
Diagnostic checks
Use only checks that match the exact appliance or system and its official guide.
-
Check 1
Dry the sprayhead, exposed hose, faucet base, handle, and the area beneath the sink with separate towels; place a dry paper towel around the base and under each visible connection, then run the faucet for only a short test while watching from a safe position.
Expected result: Record the first place that becomes wet and whether the leak occurs only while the faucet is running, only when the spray mode is used, or after the handle is turned off. Classify the base as dry, wet while running, or wet after shutoff.
Next step: Use the first-wet location to choose the wand, hose, base, or supply check below; close both under-sink supplies immediately if water is more than a controlled drip or reaches the cabinet floor.
Stop if: Stop the test for a spray, rapidly filling cabinet, water near electrical equipment, an inaccessible leak, or any need to open a wall or pressurized valve.
Why this matters
Why: A wet sprayhead or hose end localizes the check above or below the wand connection. A wet base while running supports a spout-body seal or handle-path check, while water that persists after shutoff raises a valve, cartridge, check-valve, or supply-connection concern. Water that appears only in the cabinet may be traveling from a higher connection.
-
Check 2
With the water off, follow the exact faucet instructions to unscrew or release only the sprayhead from the hose; inspect the visible screen washer, O-ring, threads, and wand housing, then point the hose into the sink for a brief flow test if the instructions permit it.
Expected result: Look for a displaced or damaged seal, debris at the screen, cracked wand housing, cross-threading, or water emerging from the hose end rather than the sprayhead seam. Compare the hose flow with the sprayhead attached only for the short, controlled test.
Next step: Clean or reseat only the model-specified screen or seal, reinstall without force, and repeat the towel test. If the wand is cracked or the connection will not seat, keep the supplies off and identify the exact replacement through the manufacturer or a plumber.
Stop if: Do not force a threaded wand, stretch the hose, operate an unrestrained hose where it can retract, add unapproved sealant, or continue using a cracked or spraying wand.
Why this matters
Why: A leak at the wand seam with a dry base supports the sprayhead seal, screen washer, threads, or wand body. Good hose flow with the sprayhead removed makes an obstructed or damaged sprayhead more likely; water from the bare hose end points below the wand and requires the hose-connection check.
-
Check 3
Turn both hot and cold supply valves off and relieve faucet pressure; use a flashlight to inspect the retractable hose, hose weight, under-deck connection, quick-connect tabs, and nearby supply fittings without pulling the hose farther than the model instructions allow.
Expected result: Note whether the hose is split, kinked, abraded by the weight or cabinet, wet at one end, wet along its length, or dry while a supply fitting is wet. Check whether a quick connection is fully locked only as the instructions describe; do not rely on appearance alone.
Next step: Photograph the connection and model markings, then use the exact model procedure for a compatible hose, O-ring, or connector only when the failed part is confirmed. Leave the supplies off if any fitting remains wet or the connector cannot be positively identified.
Stop if: Do not loosen supply fittings, cut the hose, bypass a connector, use tape to compensate for a missing seal, or pressurize a connection that does not lock or has visible damage.
Why this matters
Why: Water at the spray-hose connection or along the hose supports a hose, O-ring, or connector problem. A wet supply fitting with a dry spray hose points toward the supply hose or stop-valve connection instead. A kinked or taut hose can restrict or stress the assembly, and a damaged hose should not be patched under the sink.
-
Check 4
After the outside is dry and the hose area has been ruled out, wrap a fresh paper towel around the handle and another around the spout-to-escutcheon area; run the faucet briefly in the normal stream and spray modes while observing the towels.
Expected result: Record whether the handle towel wets first, the spout-base towel wets only while the faucet is flowing, or neither towel wets while the cabinet or hose does. Repeat only once if the source is still uncertain.
Next step: Use the result to choose a model-specific handle/body seal procedure or return to the under-sink connection check; do not remove the handle or cartridge until the supplies are off and the model procedure is available.
Stop if: Stop for a damaged handle, corroded fastener, water entering the counter or cabinet, or a repair that requires opening the valve body without exact instructions.
Why this matters
Why: A wet handle towel can make water appear to be a base leak. A wet spout-base towel only while running is consistent with body seals, O-rings, or bearings. If the base stays dry but the cabinet wets, the water is more likely coming from the hose or supply path.
-
Check 5
With the faucet off, watch the previously dry paper towels for a short period, then close the hot and cold supply valves and observe whether new water still appears at the base, hose, or supply connections.
Expected result: Classify the leak as stopping when the faucet is off, continuing until the supplies are closed, or continuing even with the supplies closed; note any cabinet swelling, pooling, or wet shutoff valve.
Next step: Leave the supplies closed for a continuing leak, dry and protect the cabinet, and provide the timing, locations, photos, and model information to a qualified plumber or the faucet manufacturer.
Stop if: Do not disassemble a cartridge, check valve, spacer, stop valve, or supply fitting as a generic next step; stop for continuing water, a failed shutoff, concealed damage, or uncertainty about which valve controls the faucet.
Why this matters
Why: A leak that stops with the handle off is usually tied to the operating flow path. A leak that continues until the supplies are closed makes a cartridge, check valve, spacer, or pressurized supply connection more likely. Water that continues with both supplies closed may be residual water, a different plumbing source, or a stop valve that is not isolating; it is not safe to diagnose by repeated testing.
Use your observations
Decision map
Find the observation that best matches what you see, then follow the next safe action.
-
PATH 01Safety boundary
What you see
The base and cabinet remain dry, but the sprayhead seam wets during spray use; the hose end is dry when the sprayhead is removed.
Do this next
Use the exact model instructions to clean or reseat the visible seal or replace the compatible wand assembly only if the failed part is confirmed, then repeat the towel test.
Why this path and its safety boundary
Why it matters: The leak is more likely at the sprayhead screen washer, O-ring, threads, or wand housing than at the faucet base or cartridge.
Safety stop: Stop if the wand is cracked, threads are damaged, the seal is not identifiable, or the connection sprays after reassembly.
-
PATH 02Safety boundary
What you see
The sprayhead may be dry, but the retractable hose, weight, or under-deck quick connection becomes wet while water is flowing.
Do this next
Keep the supplies off, identify the faucet model and connection style, and use the manufacturer's hose procedure or qualified plumbing service for the confirmed failed assembly.
Why this path and its safety boundary
Why it matters: A hose split, abrasion point, O-ring, or connection lock is more likely than a spout-base seal. A hose that is taut or kinked may also be stressing the connection.
Safety stop: Do not patch, cut, bypass, or pressurize a hose or connector with visible damage or uncertain locking.
-
PATH 03Safety boundary
What you see
The sprayhead and under-sink hose stay dry, while the paper towel at the spout base wets only during faucet operation; the handle towel stays dry.
Do this next
Use the model-specific body-seal procedure only after shutting off both supplies, or arrange qualified service when the handle, spout, or retaining hardware must be removed.
Why this path and its safety boundary
Why it matters: This pattern makes body seals, O-rings, or bearings at the spout more likely than a hose leak. The exact seal arrangement and repair parts are model-specific.
Safety stop: Stop for corrosion, a stuck fastener, damage to the faucet body or countertop, or any need to improvise a seal or force the spout apart.
-
PATH 04Safety boundary
What you see
Water continues after the handle is off and stops only after both supply valves are closed, or a supply fitting is wet while the spray hose is dry.
Do this next
Leave both supplies closed, protect the cabinet from further water, and have a plumber or the faucet manufacturer identify the exact valve, cartridge, check-valve, spacer, or supply repair from the model and observed leak path.
Why this path and its safety boundary
Why it matters: A cartridge, valve, check valve, spacer, or pressurized supply connection is more likely than a sprayhead seal. The leak may also be traveling from a higher connection into the cabinet.
Safety stop: Do not open a pressurized valve or supply fitting, and do not assume that replacing a cartridge will fix a wet supply connection.
-
PATH 05Safety boundary
What you see
The base, hose, and cabinet have intermittent or mixed wetness, the shutoff valves do not isolate the faucet, or the first-wet point cannot be seen safely.
Do this next
Close the accessible supplies, dry the area, document the timing and wet locations, and request qualified plumbing diagnosis. Do not order a part from the symptom label alone.
Why this path and its safety boundary
Why it matters: The leak path is not established; repeated operation could conceal water damage or send water into the counter, cabinet, or wall.
Safety stop: Stop all testing for a rapid leak, failed shutoff, concealed water, cabinet swelling, or water near electrical equipment.
Helpful context
Understand the symptom
Read the base clue without assuming the base is the source
A dry escutcheon or countertop does not rule out a sprayhead or under-sink hose leak, because water may run along the hose or down the back of the faucet. A wet base can also be water that escaped from the handle and collected on the plate. Moen recommends isolating an apparent base leak from a handle leak with a dry paper towel, while Kohler separates a base leak that happens only during operation from one that continues after shutoff. Start by locating the first wet point, not by ordering a cartridge.
Pull-down connections are model-specific
Pull-down faucets use threaded, single quick-connect, double quick-connect, or integrated connection arrangements. The spray wand, screen washer, O-ring, hose, weight, and faucet-body connection are not interchangeable by appearance alone. Shut off the supplies before disconnecting anything, keep the hose from retracting through the faucet, and use the exact model procedure. A connector that looks seated but does not lock or tug-test correctly should not be left pressurized.
Use the leak timing to choose the next safe check
If water appears only while the faucet is running, focus first on the spray wand, hose path, body seals, and handle path. If water continues after both supplies are closed or after the handle is off, a valve or cartridge may be allowing water through, or a supply connection may be leaking independently. Do not open a cartridge or valve body without model-specific instructions; if the leak is active or cabinet materials are getting wet, isolate the water and arrange plumbing service.
Safety boundary
Stop conditions
- Close both hot and cold supplies for an active spray, rapid leak, failed connection, or water reaching the cabinet floor, counter, wall, or electrical equipment.
- Do not loosen supply fittings, open a cartridge or valve, remove a check valve or spacer, or disturb a shutoff valve as a generic troubleshooting step.
- Do not patch, cut, bypass, overtighten, cross-thread, or add unapproved sealant to a pull-down hose, O-ring, quick connection, or sprayhead.
- Stop when a hose or wand is cracked, a connection will not lock, the leak cannot be isolated, or the faucet body, countertop, or fastener is corroded or damaged.
- If the leak continues with the supplies closed, treat it as residual water or another plumbing source until a qualified person identifies it; do not keep testing under pressure.
Only after diagnosis
Potential parts
- sprayhead screen washer or O-ring
Consider this category only when the base and hose remain dry and the leak is confirmed at the sprayhead seam or its visible threaded connection.
Confirm the exact faucet model, seal location, dimensions, and manufacturer procedure; do not compensate for a mismatch by overtightening or adding sealant. - pull-down hose or hose connection seal
Consider this category only when the retractable hose, hose end, weight area, or quick connection is the first wet point and the connection style is identified.
Confirm the exact faucet model and hose-end or connector design before ordering; threaded and quick-connect arrangements are not interchangeable by appearance. - faucet-body seal or O-ring
Consider this category only when the sprayhead and under-sink hose are dry and the spout base wets while the faucet runs.
Confirm the model-specific seal arrangement and whether the spout can be serviced without damaging the body or countertop; use the manufacturer's fit information. - cartridge, check valve, or spacer
Consider this category only when water continues after the handle is off and stops when both supplies are closed, after supply connections have been checked dry.
Confirm the exact model and valve arrangement; these components are not generic substitutes and should not be opened under pressure. - faucet supply hose or shutoff connection
Consider this category only when a supply fitting or shutoff is the first wet point while the spray hose and faucet body remain dry.
Have a qualified person confirm the connection, valve condition, thread or fitting type, and local requirements before replacement.
When checks do not resolve it
Need a professional?
Arrange qualified plumbing or manufacturer service when the source is not visible, the leak continues after shutoff, a supply connection or shutoff valve is wet, the hose or wand is damaged, the faucet body or cartridge needs disassembly, water has entered the cabinet or wall, or the model-specific connection and replacement part cannot be confirmed safely.
Safety scope: This article covers drying, short observation tests, and model-permitted inspection of visible sprayhead and hose connections. It does not authorize pressurized disassembly, supply-line repair, cartridge or valve work, or concealed plumbing access.
Common questions
FAQ
Why is my pull-down faucet sprayer leaking but the faucet base is dry?
A dry base makes a sprayhead seam, screen washer, O-ring, or hose-end connection more likely, especially if water appears only in spray mode. Dry the parts, isolate the first wet point, and inspect only the visible connection allowed by the exact model instructions.
Why is water collecting around the base of the faucet?
Water at the base can come from the handle, spout-body seals, or water traveling from the hose or a higher connection. A paper-towel test distinguishes a handle path from a spout-base leak; a leak only while running and one that continues after shutoff suggest different component groups.
Should I replace the cartridge for a pull-down sprayer leak?
Not from the symptom alone. A cartridge or valve becomes more plausible when water continues after the handle is off and stops when both supplies are closed, after the spray hose and supply fittings have been checked. Use the exact model procedure or qualified service before opening the valve.
Can I use tape or sealant on a leaking pull-down hose connection?
Do not add unapproved sealant or use tape to compensate for a missing washer, O-ring, or locking connection. Pull-down faucets use different threaded and quick-connect arrangements; identify the model and restore the specified seal or assembly instead.
What should I do if the faucet leak continues after I turn the handle off?
Close both hot and cold supply valves, dry the cabinet, and observe whether new water stops. If it stops only with the supplies closed, a cartridge, valve, check valve, spacer, or pressurized supply connection may be involved; if it does not stop, residual water or another plumbing source must be considered and repeated testing should stop.
When should I call a plumber for a leaking pull-down faucet?
Arrange service for an active or hidden leak, a wet supply fitting or shutoff, a failed hose or wand, cabinet or wall water, a connection that will not lock, a cartridge or valve repair, or any source that cannot be isolated safely. Keep the supplies closed until the leak path is controlled.
Read the exact guide
Official sources
- Kitchen Faucet: Leaking Around The BaseMoen Solutions · Manufacturer troubleshooting page; its repair recommendations are model and faucet-style dependent.
- Leaking at Base of Faucet SpoutKohler Assist · Kohler troubleshooting guidance for base-of-spout leaks; replacement parts vary by faucet model.
- How to Install a Pullout or Pulldown HoseMoen Solutions · Moen hose installation guidance; connection type and procedure vary by faucet model and hose style.
- Pull-Down Kitchen FaucetKohler Co. · Kohler installation guide for the identified pull-down kitchen faucet product; other models can differ.
Community feedback
Share a repair observation
Share a plain-text repair observation. Accepted observations are published automatically; this page may take a moment to update.