
On this page
Start here
Quick answer
A toilet that is still running after a plumber visit does not prove that the earlier work failed or that the same part is at fault. First separate a tank that keeps refilling from water silently passing into the bowl, a drain or pump-like sound, and a leak outside the toilet. Note whether the sound is continuous, starts after a flush, or occurs only when another fixture drains. If water is rising in the bowl, backing up elsewhere, leaking onto the floor, or reaching electrical equipment, stop flushing and isolate the water supply if it is safe to reach. For a quiet tank leak, a manufacturer-appropriate dye check can show water crossing the flush seal; for a fill problem, observe whether water reaches the overflow. Give the original plumber the new observations and the prior work description, or arrange a plumbing revisit without assuming what was repaired.
Before you begin
Safety first
- Keep the toilet and affected fixtures out of service for rising water, wastewater, active leaks, water near electrics, or unsafe access. Do not open walls or ceilings, dismantle pressurized plumbing, use chemical drain cleaner, or re-energize wet electrical equipment without qualified inspection.
Work through in order
Diagnostic checks
Use only checks that match the exact appliance or system and its official guide.
-
Check 1
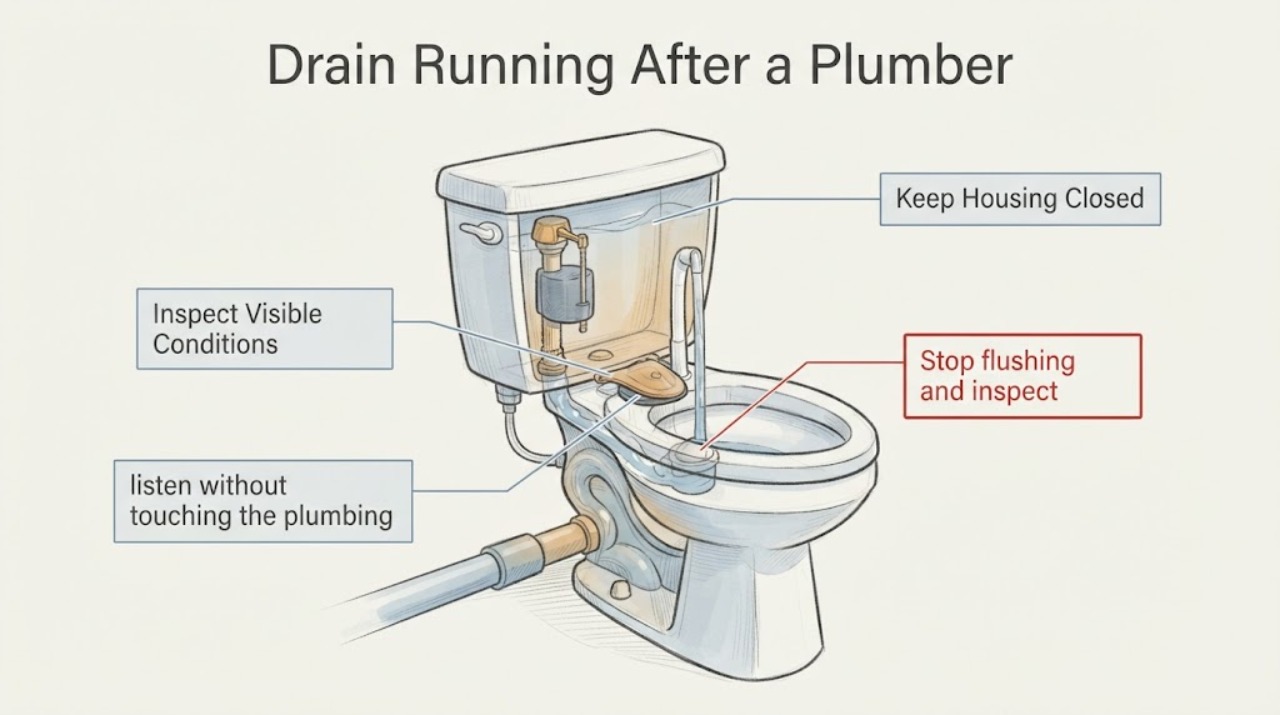
Stop flushing and inspect the toilet from a dry standing position. Note the bowl water level, tank level, floor moisture, water at the supply connection, ceiling or wall marks below, and whether any nearby electrical equipment is wet. If water is actively escaping or the bowl is rising, close the toilet stop valve only if it is clearly identified and safe to reach.
Expected result: The bowl is rising, wastewater is backing up, water is spraying or pooling, a ceiling or wall is wet, or water has reached a light, receptacle, wiring, or other electrical equipment.
Next step: Keep clear, stop using the toilet and connected fixtures, and request prompt plumbing service. If electrical equipment is wet, do not touch it or operate a breaker while wet; isolate power only from a dry safe location and arrange qualified electrical inspection.
Stop if: Stop immediately for wastewater, active flow, unstable ceiling material, water near electrics, or an unsafe route to the shutoff.
Why this matters
Why: This is an active water-damage, sanitation, or electrical hazard, not an ordinary tank-adjustment problem.
-
Check 2
With the bowl level normal and no external leak, listen without touching the plumbing. Classify the symptom as a continuous hiss or refill, water visibly moving from tank to bowl, a brief refill after a flush, a gurgle or drain sound when another fixture runs, or a sound that continues even when the toilet is unused.
Expected result: The tank keeps refilling, the bowl ripples or receives a thin stream, the sound occurs only after a flush, another fixture triggers gurgling, or the toilet is quiet while the apparent drain sound comes from elsewhere.
Next step: Follow the matching tank, drain, or post-service branch. Record the trigger and do not keep flushing to compare sounds.
Why this matters
Why: A persistent refill or bowl flow points toward tank-level, fill-valve, or flush-seal behavior; a fixture-linked gurgle or sound elsewhere points toward a shared drain or another fixture and should not be assumed to be the toilet tank.
-
Check 3
For a tank that appears full but the bowl receives water, place a few drops of food coloring or a dye tablet in the tank without flushing and observe the bowl for the interval specified by EPA WaterSense. Flush afterward only if the bowl and drain are normal and the dye instructions require it; skip the test if there is a backup or active leak.
Expected result: Color appears in the bowl, no color appears but the fill valve still runs, or the tank level rises into the overflow tube.
Next step: Close the stop valve if the toilet is wasting water or the tank cannot stop filling. Send the result and a photo of the tank components to the plumber and request a revisit or model-specific diagnosis; do not order a seal by appearance alone.
Stop if: Do not remove the tank parts or continue testing if the bowl rises, the tank overflows, the floor becomes wet, or the water is contaminated.
Why this matters
Why: Color in the bowl indicates water crossing the flush seal; continued filling or water entering the overflow shifts attention to the fill valve, float, water-line adjustment, or an obstruction. The test does not identify whether the previous plumber replaced or adjusted a part.
-
Check 4
For a continuous tank refill, observe the water level and accessible float or fill-valve behavior without dismantling the tank. Check whether the water reaches the overflow tube, whether the refill tube is visibly displaced, and whether the stop valve or supply connection is wet. Do not adjust a hidden valve or remove a pressurized component unless the exact toilet instructions authorize it.
Expected result: Water reaches the overflow, the fill valve never shuts off, the stop valve is closed but water still enters, the supply connection leaks, or the water line is stable and the refill stops normally.
Next step: Close the stop valve if it is safe and request plumbing follow-up, especially when the valve cannot stop the flow. Give the plumber the water-level result and the prior work description rather than assuming a replacement part.
Why this matters
Why: Overflow or never-ending fill can be a fill-valve, float, water-line, or seal issue; a leaking supply connection is separate from a tank running symptom; a normal tank points back to a bowl, drain, or sound-source diagnosis.
-
Check 5
If the noise occurs during or after another fixture drains, stop using that fixture and observe only from a safe dry position whether the toilet bowl level changes, bubbles, drains slowly, or receives wastewater. Check other nearby drains for slow flow or backup without running large volumes of water.
Expected result: Another fixture triggers gurgling, the toilet bowl rises or bubbles, multiple fixtures drain slowly, wastewater appears, or only the toilet tank makes the sound.
Next step: Stop using affected fixtures and ask the plumber to revisit the post-service drain condition. Do not use chemical drain cleaner, snake through a toilet blindly, or keep flushing against a rising level.
Stop if: Stop for wastewater, a rapidly rising bowl, sewage odor, floor leakage, or a blockage affecting more than one fixture.
Why this matters
Why: A shared drain, vent, or downstream blockage becomes more plausible when several fixtures are involved; an isolated tank sound remains a toilet-component branch. These observations cannot locate a concealed blockage or confirm the previous plumber's work.
-
Check 6
Prepare a precise follow-up record: copy the plumber's invoice or work description, note what symptom existed before and after the visit, record the current trigger and duration, photograph the tank and visible connections, and identify whether any other fixture shares the symptom. Do not state that a particular part was replaced unless the paperwork confirms it.
Expected result: The symptom is unchanged, returned after a short interval, changed to a different sound, or cannot be reproduced without repeated flushing or unsafe access.
Next step: Send the record to the original plumber and ask them to review the completed scope. If they are unavailable or the leak is active, arrange another qualified plumber and keep the toilet isolated until assessed.
Why this matters
Why: A changed symptom may indicate a separate condition or a new leak path; an unchanged or returning symptom supports a service revisit; an unrepeatable symptom needs observations rather than a guessed repair.
Use your observations
Decision map
Find the observation that best matches what you see, then follow the next safe action.
-
PATH 01Next step
What you see
The tank keeps refilling, water reaches the overflow, or a fill valve never shuts off.
Do this next
Close the toilet stop valve if safe, record the tank water level, and request a plumbing revisit. Do not assume the previous plumber worked on the fill valve.
Why this path and its safety boundary
Why it matters: The fill valve, float, water-line setting, obstruction, or related tank seal needs model-appropriate inspection.
-
PATH 02Next step
What you see
The tank is full but color reaches the bowl or a thin stream is visible.
Do this next
Close the stop valve if needed and send the result to the plumber for a seal and flush-valve inspection. Do not repeatedly flush or order a generic seal by appearance.
Why this path and its safety boundary
Why it matters: Water is likely crossing the flush seal or flapper; the dye result does not identify the correct replacement without the toilet's model and valve design.
-
PATH 03Next step
What you see
Gurgling, bubbling, slow drainage, or backup appears when another fixture drains.
Do this next
Stop using the affected fixtures and ask for a plumbing revisit. Do not use chemical drain cleaner or keep flushing against a rising bowl.
Why this path and its safety boundary
Why it matters: The symptom may involve a shared drain, vent, or downstream restriction rather than the toilet tank.
-
PATH 04Next step
What you see
The sound continues while the toilet is unused, the floor or wall is wet, or the leak cannot be seen from a safe position.
Do this next
Close the local or main water valve only if safely accessible, keep the area out of service, and request prompt plumbing inspection. Do not open the wall or ceiling yourself.
Why this path and its safety boundary
Why it matters: A concealed supply, waste, or connection leak is possible and may continue to damage the structure even without a flush.
-
PATH 05Next step
What you see
Water reaches electrical equipment, standing water prevents safe access, wastewater is present, or the ceiling or wall is damaged.
Do this next
Keep clear, do not touch wet equipment or a breaker from a wet position, isolate power only from a dry safe location, and obtain qualified electrical and plumbing help.
Why this path and its safety boundary
Why it matters: Electrical, sanitation, and property hazards take priority over troubleshooting the toilet component.
Helpful context
Understand the symptom
A post-service symptom needs a fresh observation
A plumber may have addressed a blockage, a supply connection, a tank component, or a different fixture. The phrase “still running” can mean a refill hiss, water moving through the bowl, a drain or ejector sound, or a leak that only becomes visible after use. Read the invoice or work note if available, but do not assume the prior repair, the part changed, or the original diagnosis. Describe what is happening now and when it happens.
Stop a water or electrical escalation first
If the bowl is rising, wastewater is backing up, the tank or supply line is spraying, or water is reaching a receptacle, light, wiring, or other electrical equipment, stop flushing and keep people away. Close the toilet's stop valve or the main water valve only from a dry, safe position. Do not reach into standing water, touch wet electrical equipment, or reset a breaker from a wet position.
Do not turn a follow-up into repeated flushing
One controlled observation can be useful when the toilet is stable, the bowl level is normal, and no water is escaping. Repeated flushing can worsen a partial blockage or conceal a supply leak. If the symptom is intermittent, record the time, the fixture in use, the sound, the bowl or tank water level, and any water on the floor instead of repeatedly trying to reproduce it.
Safety boundary
Stop conditions
- Stop flushing immediately for a rising bowl, wastewater, sewage odor, backup in another fixture, active floor leak, or water that cannot be contained safely.
- Do not touch wet electrical equipment, operate a breaker with wet hands or while standing in water, or re-energize equipment that has been wet before qualified inspection.
- Do not assume what the previous plumber repaired, dismantle the tank or supply, remove a concealed fitting, use chemical drain cleaner, or repeatedly flush to reproduce the symptom.
- Stop and request prompt plumbing service for a leak while the toilet is idle, a valve that will not stop water, recurring symptoms after the visit, a concealed source, or damage to the floor, wall, ceiling, or electrical system.
Only after diagnosis
Potential parts
- toilet flapper or flush-valve seal
Consider this only if a dye check or professional inspection confirms that water is escaping from the tank into the bowl through the flush seal.
Seal shape, size, and flush-valve design vary by toilet. Confirm the exact model and diagnosis before selecting a part. - toilet fill valve assembly
Consider this only if the fill valve continues to run, the water level is abnormal, or a qualified diagnosis identifies the fill assembly after the supply is safe.
Fill valves and adjustment procedures differ by toilet design. Confirm the exact model and follow its instructions or have a plumber install it. - toilet supply connection or shutoff component
Consider this only when a visible supply connection or shutoff is confirmed to leak or fail to stop water, not merely because the toilet makes a sound.
Connection dimensions and shutoff installation vary. Have a plumber confirm the source and compatibility before replacement.
When checks do not resolve it
Need a professional?
Call the original plumber for a post-service review when the same symptom remains or returns, or call another qualified plumber when the original scope is unavailable, water is escaping, multiple fixtures are affected, or the leak is concealed.
Safety scope: Keep the toilet and affected fixtures out of service for rising water, wastewater, active leaks, water near electrics, or unsafe access. Do not open walls or ceilings, dismantle pressurized plumbing, use chemical drain cleaner, or re-energize wet electrical equipment without qualified inspection.
Common questions
FAQ
Why is the toilet still running after a plumber repaired it?
“Running” may be a refill, a tank-to-bowl leak, a drain sound, or a separate supply leak. Record the exact sound, water level, trigger, and work description rather than assuming the same part failed. Ask the plumber to review the post-service evidence.
How can I tell whether water is leaking from the toilet tank into the bowl?
When the bowl and drain are normal, an EPA WaterSense dye check can reveal color moving from the tank into the bowl. Skip testing when the bowl is rising, wastewater is present, or there is an active leak, and flush only as the dye instructions require.
Should I keep flushing to see if the drain is still blocked?
No. Repeated flushing can worsen a partial blockage or overflow. Stop for a rising bowl, backup, wastewater, or gurgling from multiple fixtures and request a plumbing revisit.
What if water reaches an outlet or light near the toilet?
Keep clear and do not touch wet electrical equipment or operate a breaker with wet hands or while standing in water. Isolate power only from a dry safe location and arrange qualified electrical inspection as well as plumbing service.
Read the exact guide
Official sources
- TroubleshootingKohler Co. · Kohler toilet troubleshooting document; do not generalize its component locations or adjustment steps to another toilet.
- Home MaintenanceU.S. Environmental Protection Agency WaterSense · General residential toilet leak guidance; use the exact toilet manual for model-specific parts or controls.
- Flood Electrical Safety: High Water, High StakesElectrical Safety Foundation International · General residential electrical-safety guidance; follow local emergency instructions and qualified electrician assessment for the property.
- Fix a Leak WeekU.S. Environmental Protection Agency WaterSense · General residential leak-identification guidance; stop testing when a backup, active leak, or unsafe condition exists.
Community feedback
Share a repair observation
Share a plain-text repair observation. Accepted observations are published automatically; this page may take a moment to update.