
On this page
Start here
Quick answer
Treat this report as two separate observations that may have a common cause: both upstairs shower fixtures have no usable flow, while water is still escaping from an outlet, valve area, wall, ceiling below, or another part of the plumbing. Do not keep turning a stuck handle or remove trim to find the valve. From a dry, safe position, identify exactly where water is visible, check whether other fixtures have water, and look for an accessible fixture or room shutoff. If the local valve will not stop the flow, close the home's main water shutoff slowly if it can be reached without forcing it, then verify the flow has stopped. Call a plumber promptly for a concealed leak, a stuck or damaged valve, water through the ceiling, an inaccessible or failed main shutoff, or no flow at both upstairs fixtures after the leak is isolated.
Before you begin
Safety first
- Keep the affected fixtures isolated for uncontrolled water, concealed leakage, water near electrical equipment, ceiling damage, or a failed shutoff. Do not force valves, remove trim, open walls, loosen pressurized fittings, enter a wet electrical area, or keep running the shower to reproduce the fault.
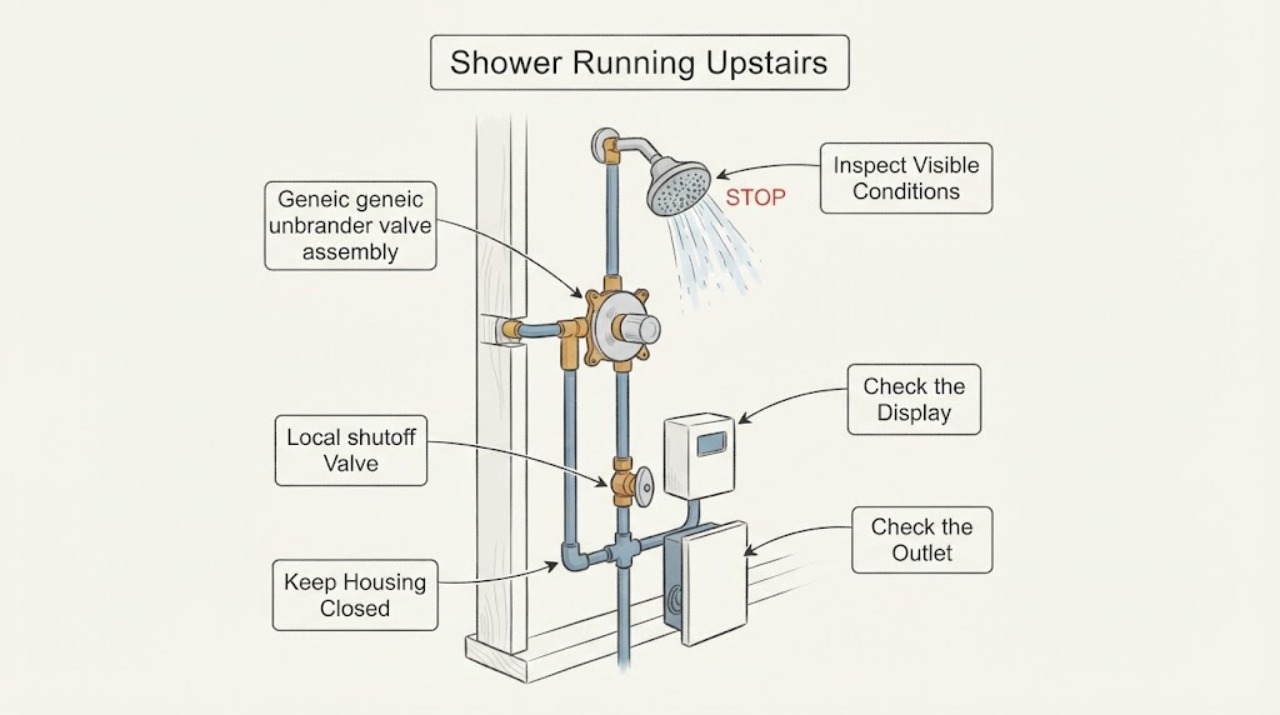
Work through in order
Diagnostic checks
Use only checks that match the exact appliance or system and its official guide.
-
Check 1
Move people away from the wet area, keep electrical items and the floor below the upstairs bathroom dry, and observe from a safe position. Record whether water is coming from the showerhead, tub spout, handle or escutcheon, ceiling or wall, drain area, or an unknown concealed location; note whether it is a drip, spray, stream, or rushing sound.
Expected result: Water is spraying or streaming, a wall or ceiling is wet or bulging, water is near a light or outlet, the floor is becoming slippery, or the source cannot be seen.
Next step: Stop using the upstairs bathroom, isolate water from a dry safe location, keep clear of wet electrical areas, and call a plumber. Use emergency help for imminent ceiling collapse, flooding, or an electrical hazard.
Why this matters
Why: This is an active water-damage or concealed-leak risk, not merely a low-flow showerhead problem.
-
Check 2
Without removing a handle, faceplate, showerhead, or wall covering, check for an accessible shutoff serving the shower, bathroom, or room. Turn it gently toward closed only if it is clearly intended as a user shutoff and moves normally; then watch the outlet and any visible leak for a safe interval.
Expected result: The local shutoff stops the flow, reduces it, does nothing, is missing, or feels stuck or brittle.
Next step: Leave a failed or stuck local valve alone. If water continues or the valve is unavailable, close the home's main shutoff slowly from a dry safe location and verify the result; arrange plumber service for the local valve or supply.
Why this matters
Why: A working local shutoff limits the affected area. A valve that does not change flow or cannot be safely operated leaves the supply pressurized and needs service rather than force.
-
Check 3
After the water is controlled, test the scope using only dry, accessible fixtures: note whether a sink, toilet, or another shower has water, whether both upstairs shower controls are affected, and whether hot and cold behave differently. Do not reopen the failed shower just to prove the symptom.
Expected result: Only the two upstairs fixtures lack flow, the whole home lacks flow, only hot or only cold is absent, or other fixtures work normally.
Next step: Give the plumber the scope and temperature pattern. Keep the affected branch isolated if possible and do not open concealed access or alter a pressure device as a test.
Why this matters
Why: A two-fixture or one-temperature pattern suggests a shared branch, supply stop, valve inlet, or control issue; whole-home loss points to the main supply or house shutoff; normal fixtures elsewhere narrows the issue to the upstairs branch.
-
Check 4
With water still isolated, inspect only visible surfaces around both upstairs fixtures, the tub or shower floor, the room below, and any existing access panel. Use a dry cloth or tissue on exposed joints without loosening anything, and record the first place that becomes wet when safe water is restored by a qualified person or after the emergency is controlled.
Expected result: The first wet point is the showerhead connection, tub spout or diverter, handle or escutcheon, exposed supply joint, drain area, wall, ceiling below, or no visible point.
Next step: Photograph the location and leave the area isolated. Have a plumber diagnose a valve cartridge, diverter, supply connection, drain, or concealed pipe according to the observed first wet point; do not remove trim as a leak test.
Why this matters
Why: A fixture outlet or control leak has a different service path from a drain leak or concealed supply leak. No visible wet point does not rule out water inside the wall or floor.
-
Check 5
If the only remaining symptom is a small amount of water at the tub spout while the shower diverter is engaged, compare it with the stated condition: note whether it is a limited diverter leak or whether water continues after the control is fully off. Do not use a bucket test when the flow is uncontrolled, the floor is unsafe, or water is entering a wall or ceiling.
Expected result: A small outlet leak appears only while the diverter is engaged, or water continues long after the control is off or comes from the handle, wall, or ceiling.
Next step: Keep the fixture off and arrange service for persistent leakage. Provide the outlet, timing, temperature, and whether both upstairs fixtures show the same behavior; do not keep running water to quantify a dangerous leak.
Why this matters
Why: EPA recognizes some diverter leakage during diversion, but persistent post-shutoff dripping or leakage from the control can indicate a valve cartridge or other fault; concealed leakage requires a plumber.
-
Check 6
Identify the shower valve brand and model only from an existing visible label, manual, or safely accessible record. Do not infer the cartridge, internal stop, or control sequence from the handle shape; record whether the fixture is shower-only, tub-and-shower, thermostatic, or digitally controlled if known.
Expected result: The model is known, the valve has accessible stops documented by its manual, or the model and internal arrangement are unknown.
Next step: Use the exact manufacturer instructions only for a documented external check. Otherwise give the model information and the no-flow/ongoing-water pattern to a plumber and leave the valve closed or isolated.
Why this matters
Why: Valve controls, the need for both hot and cold supplies, and service parts vary by design. Unknown identity makes disassembly or a guessed cartridge unsafe and unreliable.
-
Check 7
Prepare the service handoff with the exact condition wording, both affected upstairs fixtures, what was or was not flowing, temperature, outlet or hidden leak location, local and main shutoff behavior, other-fixture results, photos, and any recent plumbing work. Keep the main water isolated if the leak cannot be stopped locally.
Expected result: The plumber can see a controlled outlet leak, a shared upstairs no-flow pattern, an unsuccessful shutoff, or evidence of water behind the wall or below the bathroom.
Next step: Request plumber service and ask for a leak-source diagnosis, safe water isolation, and a check of the shared upstairs supply and both fixture controls before parts are selected.
Why this matters
Why: The combined symptom needs branch-level diagnosis and may involve a valve, diverter, supply, drain, or concealed pipe; a showerhead cleaning alone cannot explain every branch.
Use your observations
Decision map
Find the observation that best matches what you see, then follow the next safe action.
-
PATH 01Next step
What you see
Water is streaming, spraying, entering a wall or ceiling, or cannot be located while the upstairs fixtures have no usable flow.
Do this next
Isolate the home or affected branch from a dry safe location, keep clear of wet electrical areas, and call a plumber. Do not open the wall or keep reopening the shower.
Why this path and its safety boundary
Why it matters: The supply may still be pressurized behind a control or concealed pipe, so the water-damage risk is more urgent than a low-flow diagnosis.
-
PATH 02Next step
What you see
The local shower shutoff stops the ongoing water and other fixtures still work.
Do this next
Leave that branch isolated and arrange plumber service. Provide the exact outlet and whether both hot and cold or both upstairs fixtures are affected.
Why this path and its safety boundary
Why it matters: The affected valve, diverter, control, or nearby branch is more likely than a whole-home supply loss.
-
PATH 03Next step
What you see
The local shutoff cannot be found or does not stop the water.
Do this next
Close the home's main valve slowly only if it is safe and moves normally, then verify water has stopped at a fixture. If it is stuck, damaged, or inaccessible, call a plumber or the local water utility for safe isolation.
Why this path and its safety boundary
Why it matters: The main supply may be the only accessible isolation point, or the local valve may be failed or not a true shutoff.
-
PATH 04Next step
What you see
Both upstairs shower fixtures have no flow, but the rest of the home has water and no active leak is visible.
Do this next
Keep the affected area dry and ask a plumber to check the shared branch and both hot and cold supplies. Do not assume both showerheads failed or remove either valve trim.
Why this path and its safety boundary
Why it matters: A shared upstairs supply, room shutoff, valve inlet, pressure condition, or control arrangement may serve both fixtures.
-
PATH 05Next step
What you see
Water continues from the showerhead, handle, or tub spout after the control is fully off, but there is no wall or ceiling wetness.
Do this next
Keep the control off, isolate the branch if possible, and arrange plumber service. Use the exact valve model for any repair decision; do not guess a cartridge or force the handle.
Why this path and its safety boundary
Why it matters: A valve cartridge, control, or diverter fault is possible. A small diverter leak during diversion is different from water that continues after shutoff.
-
PATH 06Next step
What you see
Only a small amount leaks from the tub spout while the diverter sends water to the showerhead.
Do this next
Do not treat this as proof that the no-flow report is resolved. Confirm whether water stops when the control is off and ask a plumber to assess a persistent or growing leak.
Why this path and its safety boundary
Why it matters: EPA identifies some diverter leakage during diversion, although an older or damaged diverter can waste much more water and may need service.
-
PATH 07Next step
What you see
The main valve does not stop the flow, the valve is stuck or damaged, water reaches electrical equipment, or the ceiling below bulges or sheds water.
Do this next
Keep people clear, avoid wet electrical areas and ceiling surfaces, and obtain emergency plumbing, utility, or emergency help as appropriate. Do not force the valve or enter an unsafe room.
Why this path and its safety boundary
Why it matters: The event is an active property, electrical, or structural emergency beyond ordinary fixture troubleshooting.
Helpful context
Understand the symptom
Keep the contradictory report intact
The phrase “both not running and not stopping water” should not be silently corrected. It may describe two upstairs fixtures that have no usable spray while water continues from a showerhead, tub spout, handle, wall, or ceiling below, or it may combine two observations made at different moments. Write down which outlet is dry, which outlet is still wet, whether the water is hot or cold, and whether the flow is a stream, drip, spray, or hidden rushing sound. That distinction determines whether the first task is water isolation, supply diagnosis, or leak localization.
Why two upstairs fixtures can lose flow together
No water at both fixtures points toward a shared supply, room shutoff, hot-and-cold supply problem, pressure problem, obstruction, or a control arrangement that serves both outlets. It does not prove that the showerhead is blocked. Moen's official troubleshooting guidance notes that both hot and cold supplies may be needed for some shower valves and that the exact valve model changes the control sequence. Do not apply a handle or cartridge instruction from another valve.
A small outlet drip is different from uncontrolled flow
A tub-and-shower diverter can allow some water at the tub spout while water is directed to the showerhead, and EPA describes this as a known source of wasted water. That does not make a continuous stream, a valve that cannot close, water behind the wall, or water through the ceiling safe to ignore. A showerhead that keeps dripping long after the control is off can point to a valve cartridge or related control problem, while a wet wall or ceiling suggests a concealed leak.
Use water isolation before any repair decision
If an accessible local shutoff is present and turns normally, close it only as far as it is designed to close; never force a corroded or brittle valve. If the local valve cannot be found or does not stop flow, use the home's main shutoff only from a dry, safe position and verify the result at a fixture. Water districts describe the main valve as the control that stops water to the home and warn that a stuck valve may need a plumber or utility response. Once the flow is controlled, leave trim, cartridges, and concealed piping to a plumber unless the exact manufacturer instructions and your skill level clearly support a low-risk external repair.
Safety boundary
Stop conditions
- Stop immediately for a stream or spray that will not stop, water entering a wall or ceiling, a bulging ceiling, rapidly spreading floor water, or a source that cannot be safely located. Isolate water from a dry safe position and call a plumber or emergency help.
- Stop for water near a light, outlet, appliance, or other electrical equipment. Keep clear of the wet area and do not operate a wet electrical control; obtain qualified plumbing and electrical help as needed.
- Do not force a stuck shutoff, remove a shower handle or faceplate, open a wall, loosen a pressurized connection, guess a cartridge, or keep reopening the shower to test an uncontrolled leak.
- Stop troubleshooting when both upstairs fixtures remain without flow after an accessible supply check, when the home's main valve fails, or when the leak returns after isolation. Arrange plumber service with the exact two-part condition and the observed water path.
Only after diagnosis
Potential parts
- shower valve cartridge or control seal
Consider this only after a plumber confirms that water continues from the showerhead, handle, or tub spout with the control off and identifies the valve design.
Cartridges and seals vary by valve series and installation. Confirm the exact model and diagnosis before selection. - tub-and-shower diverter
Consider this only when the leak is confirmed at the diverter or the diverter cannot direct flow correctly after the supply and valve are checked.
Diverters differ between tub-spout, transfer-valve, and shower-only arrangements. A plumber should confirm the design and fit. - local shower shutoff or supply valve
Consider this only when a qualified diagnosis finds that the accessible local valve is missing, failed, or unable to isolate the affected upstairs branch.
Location, connection type, and access vary. Do not force or replace a valve while the line is pressurized.
When checks do not resolve it
Need a professional?
Request plumbing service for a failed cartridge or diverter, a local valve that will not stop flow, both upstairs fixtures losing water together, a suspected shared branch restriction, a concealed leak, a drain or supply leak, or a main shutoff that is stuck or ineffective. Escalate immediately for flooding, ceiling damage, or water near electrical equipment.
Safety scope: Keep the affected fixtures isolated for uncontrolled water, concealed leakage, water near electrical equipment, ceiling damage, or a failed shutoff. Do not force valves, remove trim, open walls, loosen pressurized fittings, enter a wet electrical area, or keep running the shower to reproduce the fault.
Common questions
FAQ
How can a shower have no water and still be running?
Keep both observations: the upstairs fixtures may have no usable spray while water continues from a tub spout, showerhead, handle, wall, ceiling, or hidden pipe. Identify the exact wet point and isolate water before deciding whether this is a diverter, valve, shared supply, or concealed leak.
What should I do if the shower handle will not stop the water?
Do not force the handle or remove the trim while the line is pressurized. Use an accessible local shutoff if it moves normally; if it cannot be found or does not stop flow, close the home's main water valve slowly from a dry safe position and call a plumber.
Why do both upstairs shower fixtures have no water?
A shared upstairs branch, room shutoff, valve inlet, hot-or-cold supply, pressure condition, obstruction, or common control may affect both. Check other fixtures without reopening the failed shower and give the plumber the scope and temperature pattern.
Is a little water from the tub spout normal when the shower is on?
Some diverters allow limited leakage while sending water to the showerhead, but a growing flow, water that continues after the control is off, or water from the wall or ceiling is not a routine low-flow issue. Have a plumber assess a persistent leak.
When is this an emergency rather than a shower repair?
Treat uncontrolled flow, water near electrical equipment, a wet or bulging ceiling, rapidly spreading water, an inaccessible or failed main shutoff, or a concealed source as urgent. Keep clear, isolate water only from a safe dry location, and obtain plumber, utility, electrical, or emergency help as appropriate.
Read the exact guide
Official sources
- No Water from tub/shower unitsMoen Solutions · Moen valve guidance; it must not be generalized to an unidentified shower valve.
- WaterSense at Work Sanitary Fixtures and Equipment 3.4 Showerheads and Bath and Shower DivertersUS EPA WaterSense · EPA facility water-efficiency guide used for general diverter behavior, not a model-specific repair procedure.
- Bath and Shower DivertersUS EPA WaterSense · US EPA educational guidance; the allowable leakage figures are not a diagnosis for a particular home's fixture.
- How to Turn Off Your WaterWestern Municipal Water District · Municipal guidance for typical residential shutoffs; valve locations and utility responsibilities vary.
- How to Fix a Leaky Shower HeadDelta Faucet · Delta educational guidance; other manufacturers and valve designs may differ.
- How to fix a faucet leakCity of Portland Water Bureau · Municipal faucet guidance; shower construction and local valves may differ.
Community feedback
Share a repair observation
Share a plain-text repair observation. Accepted observations are published automatically; this page may take a moment to update.