
On this page
Start here
Quick answer
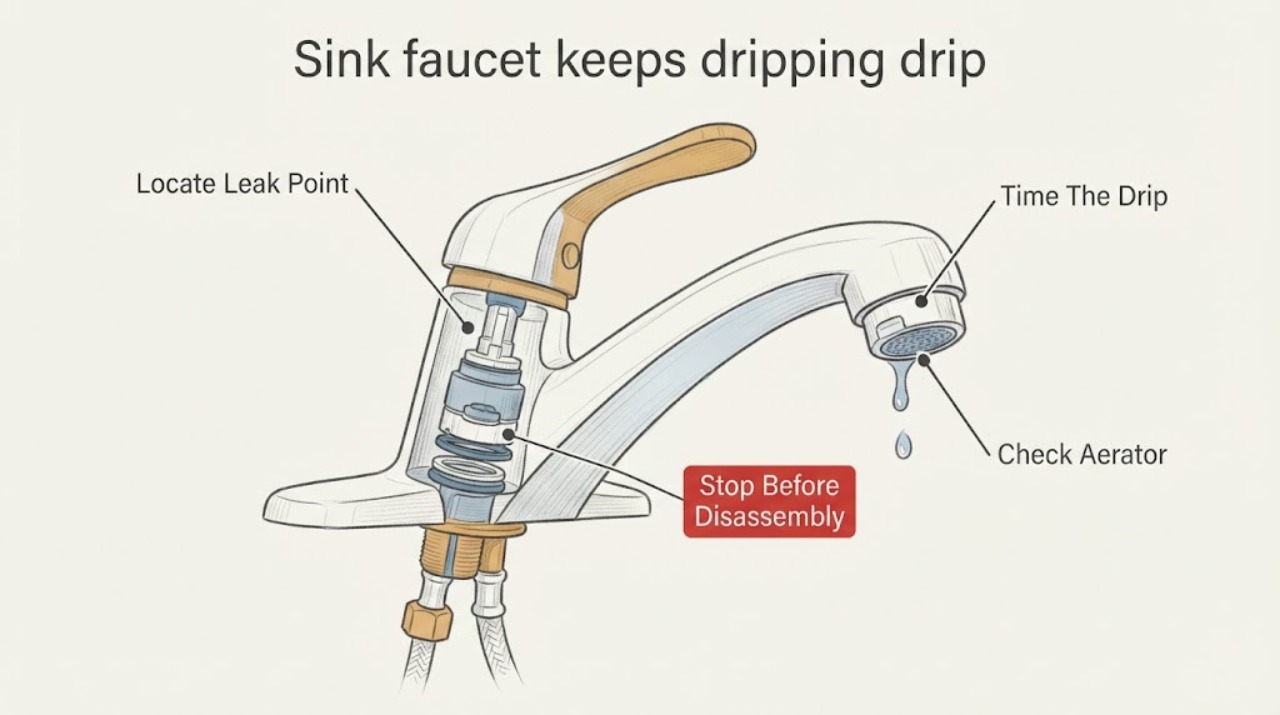
A sink faucet that drips briefly after the handle is closed may only be releasing water held in the spout or have debris at the aerator. A drip that continues steadily for hours or all day usually points to a worn valve or cartridge under the handle; worn washers, O-rings, or a handle mechanism can cause similar symptoms depending on the faucet design. First identify whether water exits the spout, leaks around the handle or base, or appears under the sink. Dry the area, check the aerator and visible connections, and gently close the hot and cold stop valves if you need to contain the leak and they turn normally. Do not force a seized valve, open the faucet body without the model instructions, or guess at a replacement part. Arrange plumbing service for a continuous drip that remains after simple cleaning, a leak under the sink, corroded or seized stops, water near electrical equipment, or any repair requiring the cartridge or valve to be accessed.
Work through in order
Diagnostic checks
Use only checks that match the exact appliance or system and its official guide.
-
Check 1
Dry the spout, handle, faucet base, supply tubes, and cabinet floor, then observe the first place that becomes wet while the handle remains off.
Expected result: Water returns at the spout tip, around the handle or base, at a supply fitting under the sink, or nowhere after the area is dried.
Next step: Follow the branch that matches the highest wet point. If water is near electrical equipment or the leak is spreading, contain it and arrange plumbing service before further testing.
Why this matters
Why: A spout drip points toward the valve, cartridge, washer, or aerator; handle or base moisture suggests a body seal or handle mechanism; under-sink moisture points toward a supply or connection leak rather than the shutoff valve inside the faucet.
-
Check 2
Close the handle fully and watch the spout from a dry position long enough to determine whether the drip stops after a short interval or continues repeatedly; do not hold the handle against its stop.
Expected result: The drip stops after a brief period, or it continues steadily for hours or returns continuously after shutoff.
Next step: For a brief drip, inspect or clean the aerator as the model instructions allow. For a continuous drip, identify the faucet model and handle style and plan a cartridge or valve diagnosis rather than repeatedly cycling the handle.
Why this matters
Why: A brief drip is consistent with residual water or debris at the aerator. Kohler describes a continuous all-day drip after shutoff as characteristic of a worn valve or cartridge.
-
Check 3
Inspect the removable screen at the spout end for visible mineral or debris buildup and clean it only by the faucet manufacturer's instructions; do not force a seized aerator or scratch the finish.
Expected result: The screen is obstructed and the drip is brief, the screen is clear, or cleaning does not change a continuous drip.
Next step: Reinstall the aerator only when its parts are intact and the model instructions permit. If the drip continues all day, move to model identification and service rather than treating the aerator as the root cause.
Why this matters
Why: Aerator debris can hold water and prolong a short post-shutoff drip, but a continuous drip is more consistent with the valve or cartridge under the handle.
-
Check 4
Record whether the sink faucet has one handle or two and locate its model information from an accessible label or the owner's paperwork; do not remove the handle or cartridge just to identify it.
Expected result: The faucet is single-handle, two-handle, or the model cannot be confirmed.
Next step: Use the model-specific parts diagram or give the recorded identity to a plumber. If the model cannot be found and the drip is continuous, arrange diagnosis instead of ordering by appearance.
Why this matters
Why: Single- and two-handle faucets can use different valve or cartridge arrangements, and manufacturers state that replacement parts vary by model. An unconfirmed model makes a guessed cartridge or washer unreliable.
-
Check 5
With a towel below the plumbing, look at the hot and cold supply fittings, flexible tubes, and stop valves without loosening them; do not reach through a puddle or force a corroded valve.
Expected result: The supply connection is wet, a stop valve is corroded or seized, water appears only when the faucet is used, or the connections stay dry while the spout drips.
Next step: If a stop valve turns normally, close it gently to contain a growing leak and arrange service. If it is seized, corroded, or the leak persists at a fitting, stop and call a plumber; do not force or disassemble the connection.
Why this matters
Why: A wet fitting or valve is a surface leak that can be mistaken for a faucet cartridge leak. Dry connections with a continuous spout drip keep the internal valve or cartridge as the leading path.
-
Check 6
After cleaning and visible checks, observe whether the faucet still drips with the handle fully off or whether water is spreading into the cabinet, wall, or electrical area; do not open the faucet body while the water supply is pressurized.
Expected result: The drip stops, the spout continues to drip continuously, water leaks around the handle or base, a supply connection leaks, or water is approaching electrical equipment.
Next step: Contain the water, close accessible stop valves only if they turn safely, and arrange qualified plumbing service. If the area is wet around electrical equipment, keep clear and have the electrical hazard assessed before touching anything.
Why this matters
Why: A persistent drip or body and supply leak requires a model-specific seal, cartridge, valve, or connection repair. Water near electrical equipment adds a property and shock hazard beyond routine faucet maintenance.
Use your observations
Decision map
Find the observation that best matches what you see, then follow the next safe action.
-
PATH 01Next step
What you see
Do this next
Clean the aerator only as the model instructions allow and monitor. If the drip becomes continuous or water appears elsewhere, reassess the leak point and model-specific valve path.
-
PATH 02Next step
What you see
Do this next
Identify the model and obtain the exact service procedure or call a plumber. Do not remove the handle or cartridge without shutting off both supplies and following the model instructions.
-
PATH 03Next step
What you see
Do this next
Dry and observe the exact joint, then arrange model-specific repair if the leak returns. Do not assume a spout cartridge replacement will correct a body or handle leak.
-
PATH 04Next step
What you see
Do this next
Contain the leak and close a normally operating stop valve gently if needed. Have a plumber repair the fitting or valve; do not force a seized stop or disassemble pressurized plumbing.
-
PATH 05Next step
What you see
Do this next
Keep clear of wet electrical areas, contain the water, use a safe accessible stop valve only if it turns normally, and arrange qualified plumbing service. Do not open the faucet body or force hardware.
Helpful context
Understand the symptom
First identify where the water is coming from
A drop from the end of the spout after the handle is off is a valve or aerator question. Water rising around the handle, pooling at the faucet base, or appearing in the cabinet below is a different leak path. Wipe the faucet and cabinet dry, then watch the first place that becomes wet so a cartridge is not replaced for a supply-connection leak.
The timing changes the diagnosis
A short-lived drip can be residual water or aerator debris. A continuous drip all day after shutoff is more consistent with a worn valve or cartridge. The exact repair depends on whether the faucet has one handle or two and on its model, so a visually similar cartridge is not enough evidence of fit.
Contain water before service work
If the drip is growing or water is reaching the cabinet, place a container or towel below it and use the accessible hot and cold stop valves only if they turn normally. Do not force corroded stops or disassemble a pressurized faucet. Cartridge and valve access should follow the exact model instructions or be handled by a plumber.
Only after diagnosis
Potential parts
- faucet valve or cartridge
Consider this only when a continuous spout drip remains after the aerator and external leak paths are cleared and the faucet model and handle style identify the valve or cartridge.
Confirm the exact faucet model and single- or two-handle arrangement; visually similar cartridges are not proof of fit. - faucet washer or O-ring set
Consider these seals only when the model-specific service information or a plumber identifies a worn washer or O-ring as the source of the drip or handle leak.
Match the exact valve design and material requirements; shut off both water supplies before any disassembly. - faucet handle mechanism
Consider a handle mechanism only when water originates around the handle and the model-specific diagnosis finds a broken or misinstalled handle component.
Handle mechanisms are model-specific and can be damaged by incorrect installation; use the manufacturer's parts information or a plumber. - faucet aerator
Consider an aerator only when the screen is damaged or a brief post-shutoff drip is linked to debris at the spout end, not as the default fix for an all-day drip.
Confirm thread, flow, and model fit before ordering; clean or replace it only according to the faucet instructions.
When checks do not resolve it
Need a professional?
Arrange plumbing service for a continuous spout drip after safe aerator and external checks, a handle or base leak, wet supply fittings, a seized or corroded stop valve, an unknown model requiring cartridge access, or water spreading into cabinetry or walls. Keep clear of wet electrical equipment and do not force valves or open a pressurized faucet body.
Common questions
FAQ
Why does my sink faucet keep dripping when the handle is off?
A brief drip may be residual water or aerator debris, but a drip that continues all day usually indicates a worn valve or cartridge. A leak around the handle, base, or under-sink connections follows a different repair path.
How long should a faucet drip after I turn it off?
A short post-shutoff drip can be temporary, especially if debris is at the aerator. Kohler describes a continuous leak that persists all day as a worn valve or cartridge symptom; identify the exact model before choosing a repair.
Could the aerator cause a faucet to drip?
Debris in the aerator can prolong a brief drip from the spout end. It is not the leading explanation for a continuous all-day drip, which points more toward the valve or cartridge under the handle.
Should I replace the faucet cartridge myself?
Only follow the exact model instructions if you can safely shut off both water supplies and are comfortable with the work. The correct part varies by faucet model and handle design. Stop and use a plumber for seized valves, corrosion, concealed leaks, or water near electrical equipment.
How do I know whether the leak is under the sink instead of inside the faucet?
Dry the faucet and supply area, then watch the first place that becomes wet. A wet supply fitting or stop valve is a surface leak; a dry cabinet with a continuous spout drip keeps the internal valve or cartridge in question.
Read the exact guide
Official sources
- Fix a Leak WeekU.S. Environmental Protection Agency WaterSense · General household faucet-leak guidance; it does not replace the faucet manufacturer's model instructions.
- Fixture leaks from the end of the spoutMoen Solutions · Manufacturer guidance for Moen fixture families; exact model identification is required for a replacement part.
- Leaking from End of SpoutKohler Assist · Manufacturer guidance for Kohler bathroom faucet families; use the exact faucet model for parts and repair details.
Community feedback
Share a repair observation
Share a plain-text repair observation. Accepted observations are published automatically; this page may take a moment to update.