
On this page
Start here
Quick answer
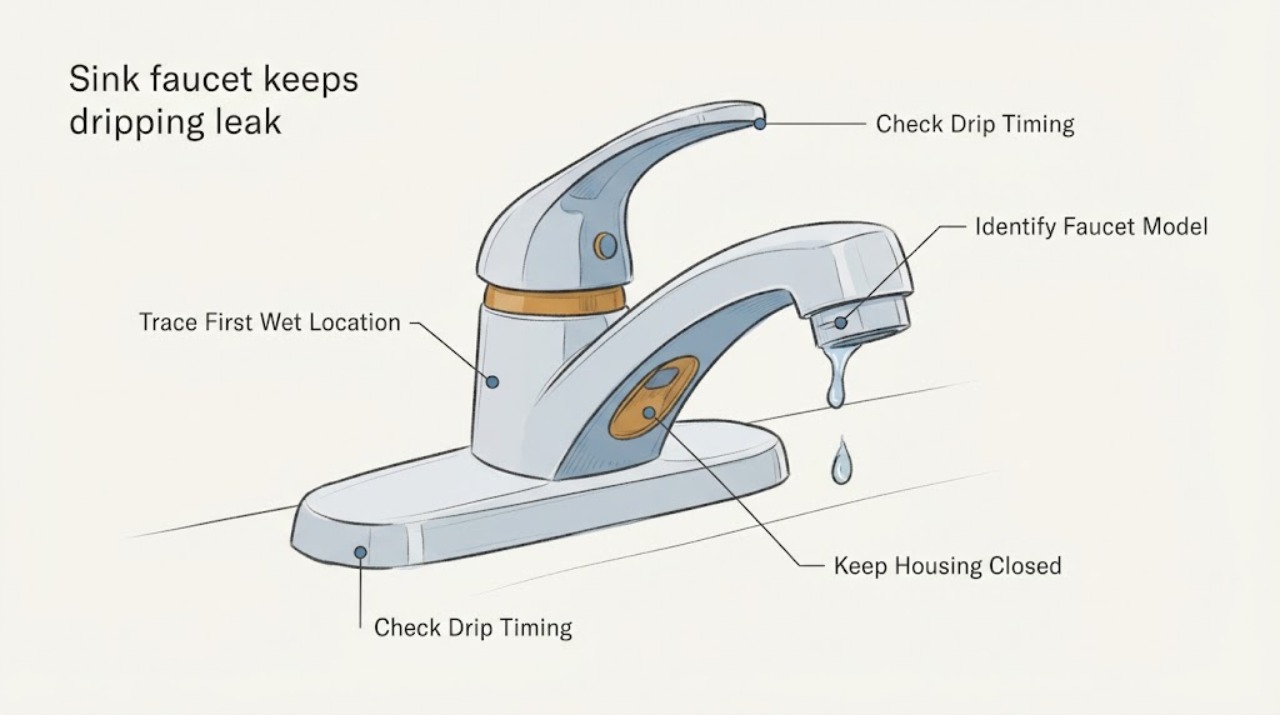
First separate a drip from the end of the spout from water escaping where the spout meets the faucet body or the faucet meets the sink. A drip that continues after the handles are off usually points to the faucet's valve or cartridge not fully closing; a base leak that appears only while water is running is more consistent with spout seals or O-rings, while a base leak that continues after shutoff can involve the valve, cartridge, check valve, or another internal seal. These are manufacturer-described patterns, not a universal part diagnosis. Dry the faucet, observe the first wet location, identify the exact model, and shut off the faucet's water supplies before any model-approved repair. Do not guess at a cartridge, remove a retaining nut under pressure, or continue if the shutoffs do not close, the leak is uncontrolled, the cabinet is flooding, or water is near electrical equipment.
Before you begin
Safety first
- Owner checks are limited to drying and tracing the leak, controlled observation, model identification, safe water containment, and closing accessible supply valves before documented model-specific work. A qualified plumber must handle pressurized disassembly, failed shutoffs, faucet removal, concealed plumbing, cutting, soldering, and any work near electrical equipment.
Work through in order
Diagnostic checks
Use only checks that match the exact appliance or system and its official guide.
-
Check 1
Dry the spout, spout joint, faucet deck, handles, and the area below the sink. Turn the faucet on briefly only if the leak is controlled, then turn both handles fully off and watch with a tissue for the first place that becomes wet.
Expected result: Record whether water exits the spout end after shutoff, appears at the spout-to-body joint while running, appears at the base where the faucet meets the sink, comes from a handle, or drips below the sink.
Next step: Use the observed first wet point to select the matching branch and do not buy a part until the faucet model and water-shutoff condition are known.
Stop if: Stop immediately if water is spraying, the cabinet is flooding, the floor becomes slippery, or water reaches an electrical outlet, disposer connection, or appliance cord.
Why this matters
Why: A post-shutoff spout drip makes the valve or cartridge more likely. A base leak only during flow makes body seals or O-rings more likely; a continuous base leak can involve the valve, cartridge, check valve, spacer, or another internal seal. A leak under the sink may be a supply or mounting connection rather than the spout.
-
Check 2
With the faucet off, wait long enough to distinguish residual water from a continuing drip. If the leak is at the base, repeat the observation once with water running and once immediately after shutoff; do not leave the faucet running unattended.
Expected result: Record a few residual drops that stop, a drip that continues with handles off, a base leak only during running water, or a base leak that continues after shutoff.
Next step: Keep the handles closed and follow the model-identification check. If the drip is continuous or increasing, use the local shutoff before any further inspection.
Stop if: Do not keep cycling the handles to test a worsening leak, and stop if the faucet cannot be shut off at the handle or supply valves.
Why this matters
Why: A leak that stops quickly may be retained water rather than a failed valve. A continuing spout drip indicates incomplete shutoff; Kohler describes a base leak during operation as a different seal pattern from a constant base leak after shutoff.
-
Check 3
Record the faucet brand and model number if it is safely visible, along with one or two handles, pull-down or fixed spout, swivel behavior, and any separate spray or touch controls. Use the manufacturer model or parts guide rather than appearance alone.
Expected result: Record a confirmed model, an uncertain model, no readable model information, or a faucet assembled from mixed or aftermarket components.
Next step: Use the confirmed model's instructions to decide whether an owner repair is appropriate. If identity remains uncertain, request a plumber or manufacturer support diagnosis before disassembly.
Stop if: Do not infer compatibility from brand, color, handle shape, or a part that merely looks similar, and do not remove the handle just to identify a cartridge unless the model instructions support that step.
Why this matters
Why: A confirmed model can map the symptom to the correct valve, cartridge, stem, seal, or spout parts. An uncertain or mixed identity means a visually similar replacement may not fit; Moen and Delta both direct users to model-specific identification for parts.
-
Check 4
Before any model-approved work on a handle, spout, valve, cartridge, or seal, close the faucet's hot and cold supply valves and open the faucet briefly to verify that pressure has dropped. Keep a towel or pan below the connections.
Expected result: Record both supply valves closed and flow stopped, one valve that will not close, continued flow, a seized or corroded valve, or no accessible local shutoff.
Next step: Proceed only with the exact manufacturer's instructions when isolation is confirmed. If either supply cannot be shut off or the faucet remains pressurized, close the main supply only if you know its safe operation and arrange a plumber; otherwise stop and keep clear.
Stop if: Never force a supply valve, loosen a fitting under pressure, or remove a pressurized cartridge, spout, or hose.
Why this matters
Why: No flow and contained residual water indicate the faucet is isolated for the next model-specific step. Continued flow or a failed shutoff leaves the fixture pressurized and makes disassembly unsafe; a local shutoff problem may require plumbing service.
-
Check 5
With water isolated, inspect the outside of the spout joint and faucet base for scale, a visibly displaced seal, looseness, or a wet trail. Do not pry the spout, force a set screw, remove a retaining nut, or scrape inside a valve unless the exact model instructions identify the tool and sequence.
Expected result: Record a base leak only while running, continuous base wetness, a loose or swiveling spout with water at the joint, dry exterior surfaces, or corrosion that prevents safe access.
Next step: Use a model-specific seal or valve procedure only if it is explicitly suitable and the shutoffs remain closed. Otherwise document the result and call a plumber.
Stop if: Stop for corroded or seized hardware, a faucet that moves in the countertop, water under the deck, a hidden leak, or any need to use force or remove the faucet from the sink.
Why this matters
Why: A running-only base leak supports an O-ring, bearing, or body-seal path; a continuous base leak can support a valve, cartridge, check valve, spacer, or other internal seal path. Corrosion or a dry exterior means the visible base may not be the source.
-
Check 6
Compare the spout outlet and the base with a dry tissue after the water is isolated and again after a model-approved repair or service has restored water. Do not use the faucet as a prolonged leak test or leave the cabinet open unattended.
Expected result: Record a dry spout with a wet base, a continuing outlet drip, no leak, or water appearing at a different location such as the handle, hose, or supply connection.
Next step: Close the supply and arrange service if any drip remains, moves under the sink, or returns after a short controlled check. Record the new location for the technician.
Stop if: Stop testing for any spray, rapidly growing puddle, wet cabinet floor, damage to cabinetry, or water near electrical equipment.
Why this matters
Why: A continuing outlet drip points back to the valve or cartridge path; a dry outlet with a wet base points to spout seals or the base connection. A changed leak location can indicate a disturbed seal or a separate supply problem and should not be treated as proof of a successful repair.
-
Check 7
Prepare a service handoff with the faucet model, handle type, first wet location, drip timing, supply-valve behavior, visible corrosion or looseness, whether water appears under the sink, and any previous cartridge or seal work. Do not disassemble further to gather information.
Expected result: Confirm that the record describes observations rather than an assumed failed part and includes photos only of dry, safe, externally visible areas.
Next step: Request qualified plumbing service when the leak persists, the model is unknown, shutoffs fail, or repair requires handle, cartridge, spout, supply, or countertop access beyond the manual's safe scope.
Stop if: Stop all owner troubleshooting when the next step requires pressurized disassembly, force, cutting, soldering, faucet removal, concealed plumbing access, or work near electrical equipment.
Why this matters
Why: The timing and location help a plumber distinguish a valve or cartridge leak from spout O-rings, base seals, mounting or supply connections, and prevent a wrong model-specific part from being installed.
Use your observations
Decision map
Find the observation that best matches what you see, then follow the next safe action.
-
PATH 01Next step
What you see
Only a few drops remain at the spout immediately after use and they stop, with no wetness at the spout joint, base, handle, or under-sink connections.
Do this next
Treat the observation as retained outlet water rather than a confirmed continuous leak, but monitor it. If dripping continues after the wait or begins to wet the base, identify the model and pursue the corresponding valve or seal path.
-
PATH 02Next step
What you see
Water continues from the end of the spout after both handles are fully off, while the spout base and under-sink connections remain dry.
Do this next
Keep the faucet closed, identify the exact model, and use only its approved valve or cartridge procedure. Moen describes a cartridge as a common cause but warns that cartridges vary; call a plumber if the shutoffs or model identity are uncertain.
-
PATH 03Next step
What you see
The spout outlet stops after shutoff, but water appears where the spout meets the faucet body or deck only while water is flowing.
Do this next
This pattern makes spout O-rings, bearings, or body seals more likely than an outlet valve leak. Isolate both supplies and follow the exact model's seal guidance, or arrange service if access is corroded, loose, or not documented.
-
PATH 04Next step
What you see
Water continues at the spout base after the handles are off, or the base leak is accompanied by a wet handle, deck, or under-sink trail.
Do this next
Keep the supply isolated and request a plumber or manufacturer-qualified service. A valve, cartridge, check valve, spacer, internal seal, mounting connection, or supply fitting may be involved; do not choose a part from the symptom alone.
-
PATH 05Next step
What you see
Water first appears under the sink at a hose, shutoff, or connection, the supply valve will not close, the cabinet is flooding, or water is near an electrical outlet or appliance.
Do this next
Stop using the faucet, contain water only from a safe position, and arrange prompt plumbing or electrical help as appropriate. Do not loosen a pressurized fitting or touch wet electrical equipment.
Helpful context
Understand the symptom
The wet location changes the likely repair path
A faucet can leave water at the spout end, around the rotating spout base, around the handle, or below the sink. A few drops at the spout after use may be residual water in the outlet, but a drip that persists after the handles are fully off is a shutoff problem until proven otherwise. Water that appears at the spout base only while the faucet runs can come from seals or O-rings; a continuous base leak can involve a valve, cartridge, check valve, spacer, or another model-specific seal. Trace the first wet point before buying a part.
A cartridge is not a universal diagnosis
Different faucet families use different cartridges, valves, stems, O-rings, or handle mechanisms. Moen notes that cartridges are not interchangeable across its models, and Delta's parts tool groups parts by faucet model and symptom. Record the brand, model number, handle arrangement, and whether the spout swivels before considering a part. If the model cannot be identified, a plumber or manufacturer support channel can prevent a wrong disassembly or fitment decision.
Keep water contained while deciding
Place a towel or shallow container under the faucet or cabinet and avoid leaving the faucet pressurized while inspecting a suspected base leak. Before removing a handle, spout, valve, or seal, close the hot and cold supply valves according to the faucet's instructions and verify that flow has stopped. If a shutoff will not close, a connection is corroded, or water continues to spray or pool, stop and arrange plumbing service rather than forcing the valve.
Safety boundary
Stop conditions
- Close the hot and cold supply valves before any model-approved repair, and never loosen a fitting, cartridge, spout, or hose while water remains pressurized.
- Do not guess a cartridge or seal from appearance, force seized or corroded hardware, remove the faucet from the sink, cut or solder plumbing, or work near wet electrical equipment as an owner check.
- Stop for spraying or rapidly pooling water, a failed shutoff, cabinet flooding, water near an outlet or appliance, an unstable faucet, or any uncertainty about safe isolation; arrange qualified plumbing or electrical service.
Only after diagnosis
Potential parts
- faucet valve or cartridge
Consider this category only when a continuous spout drip or continuous base leak is confirmed and the exact model-specific diagnosis identifies the valve or cartridge as the failed shutoff component.
Confirm the faucet model, handle configuration, cartridge generation, retaining hardware, and manufacturer fit information before sourcing or installing a part; similar cartridges are not automatically interchangeable. - spout O-ring seal or bearing
Consider this category when water appears at the spout base only while the faucet runs and service or model instructions confirm a worn, dirty, or damaged seal path.
Verify the exact faucet model, spout joint design, seal dimensions, lubricant requirements, and approved service instructions before replacement. - faucet check valve or spacer
Consider this category only when the model uses one and qualified diagnosis links a continuous base leak after shutoff to that component rather than to the cartridge or supply connection.
Check the exact faucet model and manufacturer parts diagram; do not infer that a check valve or spacer exists or fits from the leak location alone. - faucet supply hose or shutoff connection
Consider this category only when water is traced below the sink to a damaged hose, fitting, or shutoff connection and service confirms the source.
Verify connection type, hose length, valve arrangement, material, local plumbing requirements, and pressure isolation before replacement.
When checks do not resolve it
Need a professional?
Call a plumber when the drip persists after shutoff, the leak is under the sink, the faucet model is unknown, a supply valve will not close, hardware is corroded or seized, the faucet moves in the countertop, or the repair requires pressurized disassembly, faucet removal, concealed plumbing access, cutting, or soldering. Seek prompt help for an uncontrolled leak, flooding cabinet, damaged shutoff, or water near electrical equipment.
Safety scope: Owner checks are limited to drying and tracing the leak, controlled observation, model identification, safe water containment, and closing accessible supply valves before documented model-specific work. A qualified plumber must handle pressurized disassembly, failed shutoffs, faucet removal, concealed plumbing, cutting, soldering, and any work near electrical equipment.
Have this ready
- Provide faucet brand and model if safely visible, one- or two-handle type, first wet location, drip timing, spout swivel behavior, supply-valve condition, visible corrosion or looseness, under-sink observations, and prior repair history.
Common questions
FAQ
Why does my sink faucet keep dripping from the spout?
A drip that continues after the handles are off commonly involves the faucet valve or cartridge, but the exact component depends on the model. A few drops that stop quickly may be residual water. Identify the model before selecting a cartridge.
Why does the faucet leak at the base only when it is running?
A running-only leak where the spout meets the body can be consistent with dirty, worn, or damaged O-rings, seals, or bearings. It is different from a constant leak after shutoff, which can involve the valve, cartridge, check valve, spacer, or another seal.
What if the faucet base keeps leaking after I turn it off?
Keep the water supplies closed and arrange model-specific diagnosis. A continuous base leak can involve several internal or under-sink paths, so do not assume an O-ring or cartridge without tracing the first wet point.
Do I need to shut off the water before replacing a faucet cartridge or seal?
Yes. Manufacturer repair guidance says to turn off the faucet water supply before beginning work. Verify that flow and pressure have stopped, and do not proceed if a shutoff will not close or a fitting remains pressurized.
Can I use any cartridge that looks like mine?
No. Cartridge and valve designs vary by model and may not be interchangeable. Record the model number and use the manufacturer's parts information or a qualified plumber's identification.
How can I tell whether the leak is from the faucet or the supply line?
Dry the faucet and supply connections, then trace the first wet point during a short controlled observation. Water from the spout or spout joint indicates a faucet path; water below the sink at a hose, fitting, or shutoff indicates a supply path.
What should I do if the under-sink shutoff valve is stuck?
Do not force a seized or corroded valve. Stop using the faucet, contain water from a safe position, and arrange plumbing service to isolate and repair the supply safely.
When is a dripping faucet an urgent plumbing problem?
Seek prompt help for spraying or rapidly pooling water, a cabinet that is flooding, a failed shutoff, an unstable faucet, water near an outlet or appliance, or any uncertainty about safely isolating the faucet.
Read the exact guide
Official sources
- Leaking at Base of Faucet SpoutKohler Assist · Kohler kitchen-faucet guidance used for general symptom distinction; exact faucet model instructions govern.
- Find Parts and Identify Your ProductDelta Faucet · Delta parts guidance used to reinforce model-specific selection; exact faucet product and parts diagram govern.
- Replace Seals on a Single-Control Kitchen FaucetKohler Assist · Kohler single-control faucet repair guide used for the pre-repair water-shutoff principle; exact model procedure governs.
- Kitchen Faucet: Leaking From The SpoutMoen Solutions · Moen manufacturer guidance used for general spout-drip reasoning; exact product model and instructions govern.
Community feedback
Share a repair observation
Share a plain-text repair observation. Accepted observations are published automatically; this page may take a moment to update.