
On this page
Start here
Quick answer
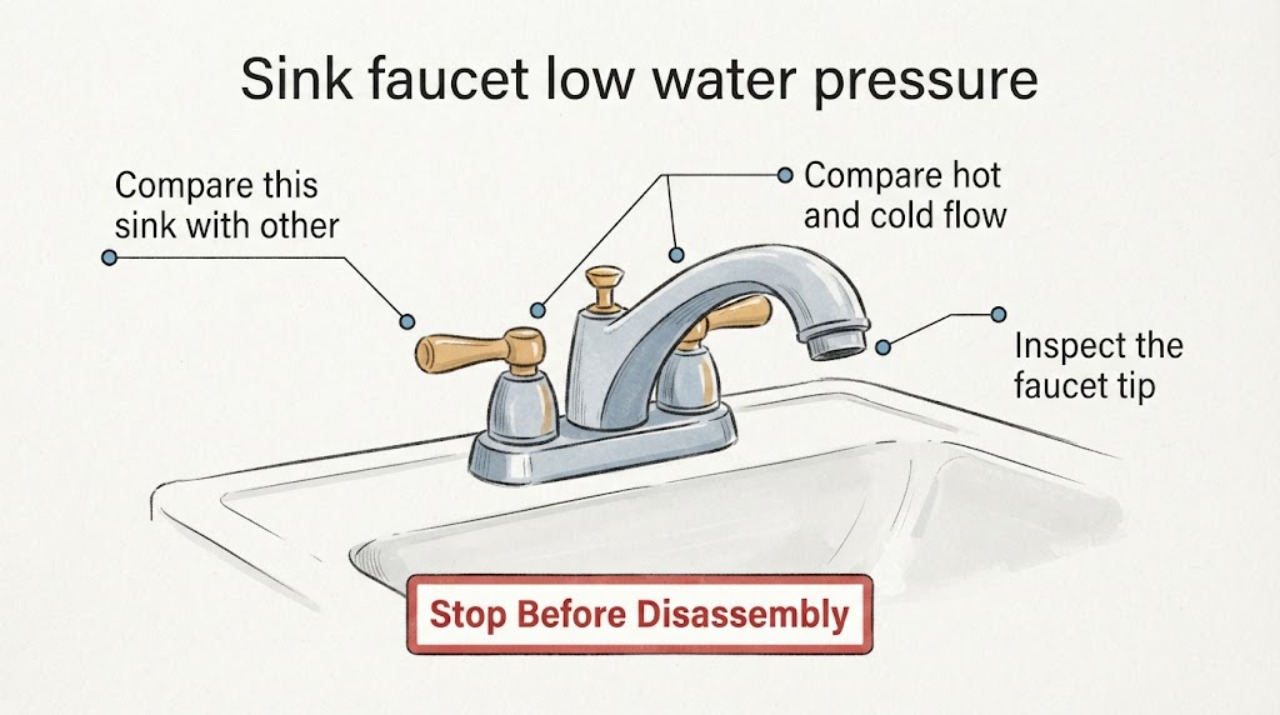
First determine whether the weak flow is limited to this sink or affects other fixtures, then compare hot and cold flow and inspect the faucet tip and visible supply area without taking anything apart. A single-faucet problem can be caused by a restricted aerator, cartridge, or supply path; a whole-home or sudden pressure change points to the building supply or a larger plumbing issue. Do not force a shutoff, disconnect a line, open the faucet body, or keep operating around a leak. Record what you observe and call a plumber when the change is sudden, widespread, leaking, or unsafe.
Before you begin
Safety first
- User checks are observation-only. Do not remove the aerator, cartridge, hose, or faucet body; do not force a shutoff or handle; do not touch wet electrical equipment; and do not continue operating around active leakage.
Work through in order
Diagnostic checks
Use only checks that match the exact appliance or system and its official guide.
-
Compare this sink with other fixtures
Run the sink faucet through its normal range without forcing the handle, then observe one or two other accessible fixtures in the home at their normal controls. Do not manipulate a stiff valve or any control that is leaking.
Expected result: Note whether weak flow is limited to this faucet, affects both hot and cold at this sink, affects another fixture, or affects most fixtures in the home.
Next step: Record the comparison and give it to the plumber. If the change is widespread or sudden, stop troubleshooting individual faucet parts and request plumbing service.
Stop if: Stop if any fixture leaks, a handle or valve resists normal movement, water is near electricity, or checking another fixture would require entering an unsafe area.
Why this matters
Why: A single-faucet symptom keeps attention on the faucet outlet, internal path, or local supply; several fixtures with the same change suggest a supply, building, or pressure issue rather than one faucet part.
-
Compare hot and cold flow
At the affected sink, briefly observe hot-only, cold-only, and mixed flow using normal handle travel. Keep hands away from hot water and do not turn a stiff control or force a stop valve.
Expected result: Write down whether both temperatures are weak, only hot is weak, only cold is weak, or the stream changes as the handle moves.
Next step: Share the temperature pattern and faucet type with the plumber. Do not remove the handle, cartridge, supply lines, or valve components to test the hypothesis.
Stop if: Stop for a leak, scalding risk, abnormal noise, a loose handle, a control that does not stop flow, or any need to force the faucet.
Why this matters
Why: Both hot and cold being weak keeps a common outlet or shared faucet path in focus; one temperature being weak points toward that side’s local supply or valve path; a handle-dependent change may indicate the fixture’s internal control but is not a diagnosis.
-
Inspect the faucet tip and stream pattern
With the water off, look at the visible outlet or aerator from the outside and note scale, staining, a displaced screen, or a damaged thread. Do not unscrew, pry, poke, brush into, or remove the aerator during this observation.
Expected result: The outlet may look clear, visibly restricted, damaged, or normal while the stream remains weak; the water may be a steady narrow stream, split, or spray.
Next step: Photograph the outlet and report the faucet type and stream pattern. A professional can decide whether the aerator may be serviced or replaced without damaging the finish or changing the intended flow control.
Stop if: Stop if the outlet is loose, sharp, corroded, leaking, or would require tools or force to inspect.
Why this matters
Why: Visible buildup or a changed spray makes the outlet a plausible restriction, but a normal-looking outlet does not rule out a cartridge or supply problem. EPA guidance describes aerators as flow-control accessories, and manufacturer guidance identifies debris in an aerator as one possible low-flow cause.
-
Look for visible local leaks and recent changes
From a dry, accessible position, look under and around the sink for puddling, drips, wet cabinet surfaces, staining, or a supply control that appears partly closed. Note recent water shutoffs, plumbing work, filter changes, or a sudden onset; do not move stored items, touch wet connections, or turn a difficult control.
Expected result: Record whether the cabinet and visible connections are dry, whether water appears at a connection or faucet base, and whether the pressure change followed a known water event.
Next step: Keep the area unused if water is escaping and arrange a plumber. Provide photos and the timing of the event; leave supply controls in their current safe position unless they operate normally and are clearly intended for routine use.
Stop if: Stop immediately for active leakage, standing water, a wet electrical device, a failed shutoff, a burst or bulging hose, or any concealed plumbing concern.
Why this matters
Why: A visible leak can reduce usable flow and can cause damage, while a symptom after water service may involve debris or a changed supply condition. A dry cabinet does not rule out a concealed or internal restriction.
-
Check whether the symptom is steady or intermittent
During normal brief use, observe whether flow is consistently weak, pulses, briefly returns, or changes when another fixture is used. Do not run multiple fixtures for an extended test and do not repeatedly cycle a failing faucet.
Expected result: Note the time, duration, whether the stream pulses or recovers, and whether another fixture or a recent water event coincides with the change.
Next step: Stop testing once the pattern is clear and give the timeline to the plumber. Use the faucet only as needed until a leak or unsafe condition is evaluated.
Stop if: Stop for pressure changes accompanied by banging, visible movement, leaking, contamination, loss of shutoff control, or water near electrical equipment.
Why this matters
Why: A steady one-faucet restriction differs from intermittent or home-wide variation, which may need a broader pressure or supply assessment. The pattern is evidence to share, not proof of a failed component.
Use your observations
Decision map
Find the observation that best matches what you see, then follow the next safe action.
-
PATH 01Next step
What you see
Only this faucet is weak, both hot and cold are affected, and the visible outlet has buildup or a changed spray.
Do this next
Have a plumber assess the aerator and faucet outlet first. Do not remove or replace the outlet without confirming the faucet type and safe procedure.
-
PATH 02Next step
What you see
Only hot or only cold is weak, or the symptom changes with one handle position.
Do this next
Report the temperature and handle pattern for assessment of the corresponding local supply or faucet control. Do not open the cartridge or supply path yourself.
-
PATH 03Next step
What you see
Several fixtures are weak, or the change began suddenly across the home.
Do this next
Request plumbing service for a broader supply or pressure check rather than replacing a sink-faucet part based on one observation.
-
PATH 04Next step
What you see
There is visible leakage, a failed shutoff, a wet cabinet, or water near electrical equipment.
Do this next
Stop using the area, keep people away from the water, and arrange prompt plumbing or emergency assistance as appropriate. Do not touch wet electrical equipment or force a valve.
-
PATH 05Next step
What you see
The faucet serves a rental, shared building, or managed property.
Do this next
Report the symptom and observations through the property’s maintenance channel before altering the fixture.
Helpful context
Understand the symptom
Start with scope, not a guessed part
Low flow at one sink is different from low flow throughout the home. The faucet outlet may have visible scale or debris, but the restriction can also be elsewhere in the fixture or supply path. Manufacturer guidance lists several possible causes, so a visual and operational record is more useful than ordering a part before the faucet type and symptom pattern are known.
Stay within a safe observation boundary
Use only normal handle movement and visual checks. Do not remove the aerator, cartridge, supply hose, or faucet components for this first assessment; do not force a stiff handle or angle stop; and do not touch water near electrical equipment. If water is escaping, place people away from the area and arrange plumbing service.
What to report
A plumber can work faster with the fixture location, whether hot and cold are both affected, whether other fixtures changed, when the symptom began, whether the stream is steady or spraying, and any visible leak, scale, or recent water shutoff. Photos should show only accessible, dry surfaces and should not require moving pipes or stored items.
Only after diagnosis
Potential parts
- faucet aerator
Consider only if a professional confirms that the outlet or aerator is restricted or damaged and identifies the correct faucet type and flow specification.
Match thread style, outlet dimensions, faucet model, and intended flow; do not assume a universal fit or remove a flow-control device without guidance. - faucet cartridge
Consider only after the symptom pattern and professional testing point to the faucet control rather than the outlet or supply.
Confirm the faucet brand, model, handle configuration, and cartridge revision before selecting a part; replacement requires a safe shutoff and correct service procedure. - angle stop valve
Consider only when a plumber confirms that the local supply control is restricted, damaged, or not delivering flow and that replacement is safe.
Confirm connection size, outlet configuration, tubing type, and building shutoff requirements; do not force or disconnect a valve as an observation.
When checks do not resolve it
Need a professional?
Call a qualified plumber when low flow persists after the symptom pattern is documented, affects multiple fixtures, began suddenly, or is accompanied by a leak, failed shutoff, damaged hose, or water near electrical equipment.
Safety scope: User checks are observation-only. Do not remove the aerator, cartridge, hose, or faucet body; do not force a shutoff or handle; do not touch wet electrical equipment; and do not continue operating around active leakage.
Have this ready
- Provide the sink location, faucet type and handle count if known, hot-versus-cold result, whether other fixtures are affected, stream pattern, onset and recent water events, visible outlet scale, and dry photos of accessible areas.
Common questions
FAQ
Why is only one sink faucet low pressure?
A single-faucet symptom can be local to the outlet, faucet control, or supply path, while several weak fixtures suggest a broader supply issue. Compare other fixtures and hot versus cold flow before choosing a repair.
Is a clogged faucet aerator the only cause of weak flow?
No. An aerator can be restricted, but a cartridge, local supply control, or wider pressure problem can look similar. Visible outlet buildup is a clue, not confirmation, and the faucet should not be disassembled for a first observation.
When is low faucet pressure an urgent plumbing problem?
Escalate promptly for a sudden or whole-home change, active leakage, a failed shutoff, a damaged supply hose, water near electrical equipment, contaminated water, or any condition that is unsafe to inspect.
Read the exact guide
Official sources
- Low water flow from spout—both hot and cold water on sink faucetsMoen Solutions · Model-dependent manufacturer troubleshooting context; used to distinguish outlet, control, and supply possibilities without instructing user disassembly.
- Home MaintenanceU.S. Environmental Protection Agency WaterSense · General residential faucet maintenance; used here for non-invasive observation and escalation only.
- Why does my faucet have low water pressure?Delta Faucet · General manufacturer troubleshooting context; the article does not reproduce its internal disassembly steps.
Community feedback
Share a repair observation
Share a plain-text repair observation. Accepted observations are published automatically; this page may take a moment to update.