
On this page
Start here
Quick answer
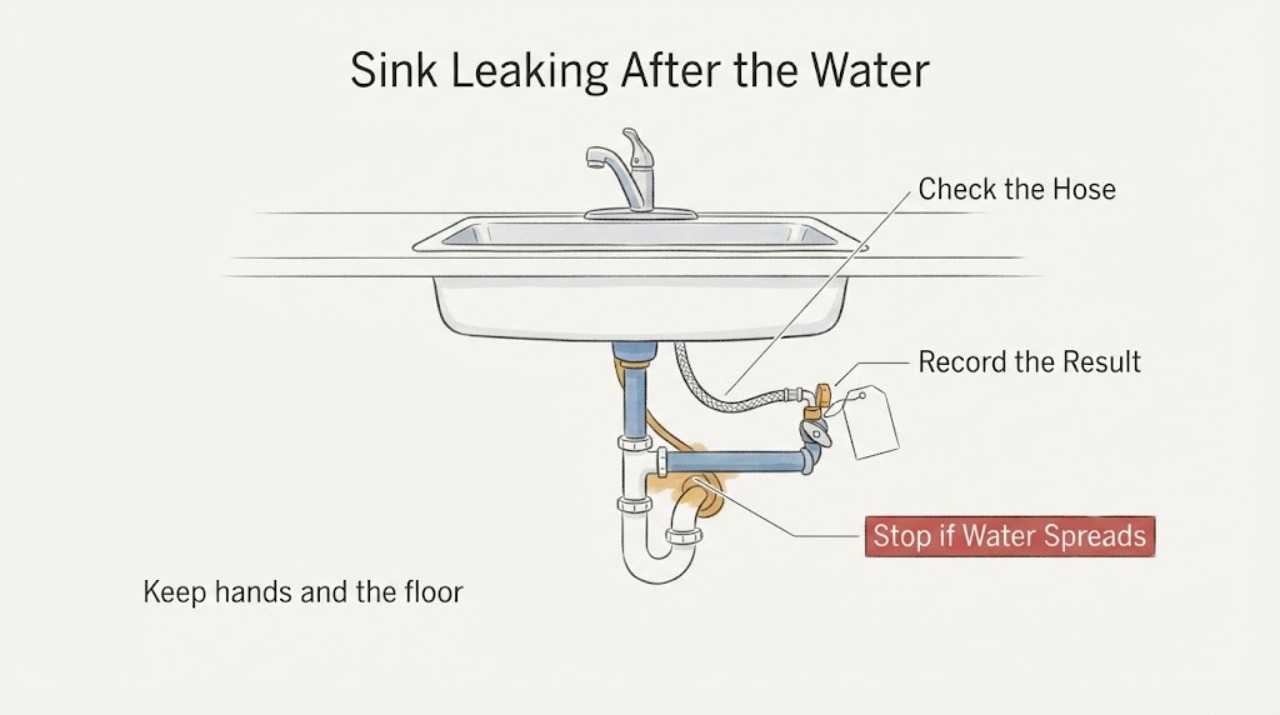
Do not assume a new-house sink leak is normal after the water was shut off. Close the local sink valves, and if the leak continues or the valves do not isolate it, close the home's main water shutoff from a dry, safe location. Dry the cabinet and identify the first wet point at the shutoff valve, supply hose, faucet, drain, or wall connection. A leak that returns when water is restored, persists while the sink is idle, or appears behind a wall should be documented and escalated to the builder and a licensed plumber; do not open the wall or force a new fitting.
Before you begin
Safety first
- Do not work on wet electrical equipment, open walls, force shutoff valves, loosen pressurized fittings, enter contaminated water, or repeatedly restore water to reproduce the leak.
Work through in order
Diagnostic checks
Use only checks that match the exact appliance or system and its official guide.
-
Check 1
Keep hands and the floor dry, move stored items only if they are safe to handle, and close the sink's local hot and cold valves if they are clearly identified and reachable without entering water. If water is spreading or a valve will not stop it, close the home's main water shutoff from a dry location.
Expected result: The leak slows or stops at a local valve, continues despite local valves being closed, or is close to an outlet, disposal wiring, or other electrical equipment.
Next step: Stop the inspection for electrical exposure, uncontrolled flow, smoke, burning odor, or shock. Otherwise keep the isolated valve closed and continue with dry external observation.
Stop if: Do not touch wet electrical equipment, repeatedly operate a stuck valve, or stand in water to reach a shutoff.
Why this matters
Why: A local valve that isolates the leak points toward the sink fixture or its supply; continued flow suggests a valve, upstream connection, trapped water, or concealed line. Water near electricity is an immediate safety problem.
-
Check 2
Blot the cabinet floor and place separate dry towels around each angle stop, hot and cold supply hose, faucet base, faucet outlet, drain strainer, P-trap, and wall-side pipe. Mark which towel becomes wet first and whether the wetness grows while the sink is idle.
Expected result: The first wet point is a shutoff valve or supply hose, faucet or base, drain joint, or the wall-side connection; the leak is idle, faucet-on, or drain-only.
Next step: Follow the matching branch without tightening every fitting or assuming the lowest puddle is the source. Photograph the first wet point before any repair attempt.
Stop if: Stop if locating the first wet point requires removing a panel, opening a wall, moving a fixed appliance, or entering a wet or contaminated area.
Why this matters
Why: An idle leak favors a pressurized supply or valve connection. A leak only while draining favors the strainer, trap, branch, or wall connection. A faucet-on leak favors the faucet body, hose, or outlet path.
-
Check 3
Inspect each new-house shutoff valve and supply hose externally for a wet stem, valve body, compression connection, kink, damaged washer, or hose end. Do not use a wrench on a wet or rotating valve, and do not force a connection that is still pressurized.
Expected result: Moisture begins at the valve stem or body, the hose end, or the connection where the hose meets the faucet or house piping, and the leak changes when that valve is isolated.
Next step: Leave the affected valve closed, retain photos and the installation date, and notify the builder or warranty contact and a licensed plumber. Replace or tighten only when the exact installation instructions authorize it and the area is dry and depressurized.
Stop if: Stop for a valve that spins without isolating water, a cracked hose, a spray, corrosion, or water entering the wall or floor.
Why this matters
Why: The supply-side installation is implicated. A new installation can still have a loose, misaligned, damaged, or defective connection, but the correct repair depends on the actual fitting and local code.
-
Check 4
Check the faucet and basin externally for water at the spout, handle or body, deck gasket, base, and the underside of the faucet connections. Keep the local valves closed while checking; do not remove the faucet or use a tool simply because the home is new.
Expected result: The faucet base or connection is wet while supply is available, the outlet only drips briefly after shutoff, or water appears to run along the counter into the cabinet.
Next step: Keep the valves closed, dry the area, and have the builder or plumber verify the faucet mounting, seals, and hose connections against the exact fixture instructions.
Stop if: Stop if the faucet body is cracked, the water cannot be isolated, or the leak reaches an electrical device or hidden cavity.
Why this matters
Why: A brief residual drip can be water draining from the faucet, but continuing moisture at a base or connection indicates a fixture seal or supply issue. Water tracking from the countertop can mimic a pipe leak.
-
Check 5
If no supply point is wet, make one brief drain observation only when the cabinet and floor are dry and there is no electrical or sewage hazard. Pour a small amount of cold water into the basin, then watch the strainer, tailpiece, P-trap, and wall connection from outside the cabinet.
Expected result: Water appears only while the basin drains, backs up in the sink, or emerges at the wall-side drain; or the drain remains dry while the sink is idle.
Next step: Stop using the sink if it backs up or leaks at the wall, keep the water isolated, and arrange plumbing service. Do not pour chemical drain cleaner into a new-house system or disassemble a line containing chemicals.
Stop if: Stop for dirty backup, sewage odor, ceiling or wall staining, cabinet damage, or water near electrical equipment.
Why this matters
Why: A drain seal, trap, branch, or concealed drain connection is more likely than a supply leak. A wall-side leak may be hidden behind the cabinet or wall and is not a reason to keep testing.
-
Check 6
After the area is dry and the source is documented, restore water only once and only from a safe location if the leak was fully isolated and no hazard is present. Watch the same marked points as pressure returns, then close the local valve again if moisture reappears.
Expected result: The leak returns immediately when water is restored, appears only after the faucet or drain is used, or does not return while the sink and house are idle.
Next step: Do not repeat the cycle. Give the builder and plumber the photos, timing, valve positions, and first wet point; ask them to verify the installation and any warranty response.
Stop if: Stop immediately for spray, rapid pooling, hidden moisture, a stuck shutoff, smoke, burning odor, or any electrical symptom.
Why this matters
Why: Immediate recurrence supports a pressurized supply or fixture connection; use-related recurrence supports the faucet or drain path. No recurrence does not prove the installation is sound if there is trapped water or a concealed leak.
-
Check 7
Record the home's age and occupancy date, when the water was shut off, which valve was used, whether any plumbing work preceded the leak, the first wet point, photos, and whether the leak returned after water was restored. Do not assign fault solely from the phrase new house.
Expected result: The evidence identifies a fixture connection, supply valve or hose, drain, or concealed path; or the source remains uncertain after safe external checks.
Next step: Keep the affected valve or main supply closed as needed and contact the builder's warranty channel and a licensed plumber. Request a written diagnosis and preserve damaged materials and photos.
Stop if: Stop DIY work when the source is concealed, the leak persists, or the repair would require opening walls, changing house piping, or working on a pressurized connection.
Why this matters
Why: A clear location helps separate a builder or fixture installation issue from a drain or house-piping problem, while an uncertain source needs professional tracing rather than guesswork.
Use your observations
Decision map
Find the observation that best matches what you see, then follow the next safe action.
-
PATH 01Next step
What you see
The leak continues after the local sink valves are closed.
Do this next
Close the main water shutoff if safely reachable, stop testing, and call a licensed plumber; notify the builder rather than assuming the cause.
Why this path and its safety boundary
Why it matters: The local valves may not isolate the source, a valve or upstream connection may leak, or water may be trapped or concealed.
-
PATH 02Next step
What you see
The first wet point is a new-house shutoff valve, supply hose, or faucet connection.
Do this next
Keep it isolated, photograph the fitting, and use the builder or plumber to verify the installation and correct part or seal.
Why this path and its safety boundary
Why it matters: A visible supply or fixture connection is implicated.
-
PATH 03Next step
What you see
The leak occurs only while the basin drains or water backs up.
Do this next
Stop using the sink and arrange plumbing service, especially if moisture reaches the wall, ceiling, or electrical equipment.
Why this path and its safety boundary
Why it matters: The strainer, trap, branch, or wall-side drain is more likely than the supply side.
-
PATH 04Next step
What you see
The leak is hidden, the first wet point cannot be found safely, or moisture appears on a wall, ceiling, or floor.
Do this next
Keep water isolated as needed and call a licensed plumber; do not open the wall or continue restoring water for a test.
Why this path and its safety boundary
Why it matters: A concealed pipe or structural path may be involved.
-
PATH 05Next step
What you see
The leak is near electrical equipment, the floor is wet, or water is uncontrolled.
Do this next
Move to a dry location, keep others away, and obtain emergency plumbing or electrical help as appropriate.
Why this path and its safety boundary
Why it matters: Immediate electrical, slip, and property-damage risk outranks diagnosis.
Helpful context
Understand the symptom
Turning off water can change pressure and expose a poor connection, but a leak in a new house is still a defect or installation issue to locate and document. Water already trapped in a faucet, hose, filter, or drain can make a short drip after shutoff; continued wetness, a growing puddle, or moisture that returns when supply is restored points to a connection or concealed leak.
Start with the first wet point rather than the largest puddle. The lower cabinet, floor, or wall may collect water that traveled from a shutoff valve, hot or cold supply hose, faucet base, drain connection, or nearby appliance. Keep the inspection external and photograph the condition before moving or tightening anything.
A new home does not remove the need for a leak check. EPA WaterSense guidance specifically includes new construction, visible sink connections, and checking whether pressure remains constant after the home's shutoff is closed. Do not treat new construction as proof that a connection is sealed or that the builder is automatically responsible; preserve evidence and use the builder's warranty or local plumbing process.
If water is near an outlet, disposal wiring, or other electrical equipment, stop handling the cabinet. Do not stand in water, use a powered tool, open a wall, or keep restoring water to reproduce a leak that is already uncontrolled.
When checks do not resolve it
Need a professional?
Safety scope: Do not work on wet electrical equipment, open walls, force shutoff valves, loosen pressurized fittings, enter contaminated water, or repeatedly restore water to reproduce the leak.
Common questions
FAQ
Can a sink drip briefly after the water is shut off?
A short residual drip can come from water held in the faucet or hose, but continued wetness or a growing puddle needs a first-wet-point check. A leak that persists while the sink is idle or returns when supply is restored should be isolated and professionally assessed.
Does a new house mean the builder must be at fault?
No. EPA WaterSense materials acknowledge that leaks can occur in new construction, but the source may be a fixture, supply valve, drain, appliance connection, or concealed pipe. Document the evidence and notify the builder or warranty provider while arranging appropriate plumbing help.
Why does the leak continue after the sink valves are closed?
The valves may not fully isolate the source, the valve or upstream connection may be leaking, or the visible water may be trapped or coming from a concealed path. Close the main supply only if safe and stop testing rather than opening the wall.
Read the exact guide
Official sources
- Detect and Chase Down Leaks ChecklistU.S. Environmental Protection Agency · Household faucet, under-sink, supply-line, and hidden-moisture leak observations
- WaterSense Labeled Homes Technical Sheet: Free of Water LeaksU.S. Environmental Protection Agency · New-house leak verification, sink faucet and supply connections, and checking pressure after a home shutoff
Community feedback
Share a repair observation
Share a plain-text repair observation. Accepted observations are published automatically; this page may take a moment to update.