
On this page
Start here
Quick answer
Turn off the sink's local water supply if it is safe, dry the area, and identify the first wet point. A leak at a filtered faucet or aerator, an under-sink filter housing or connection, and a drain joint need different repairs. Do not drink from a filter that is loose, cracked, incorrectly fitted, or exposed to contaminated water until the manufacturer's instructions confirm the cartridge and housing are safe; call a plumber if the leak is uncontrolled, hidden, or remains after an approved filter check.
Before you begin
Safety first
- Do not work on wet electrical equipment, open a pressurized filter housing, force fittings, enter contaminated water, or continue a test after a spray, backup, smoke, burning odor, or shock.
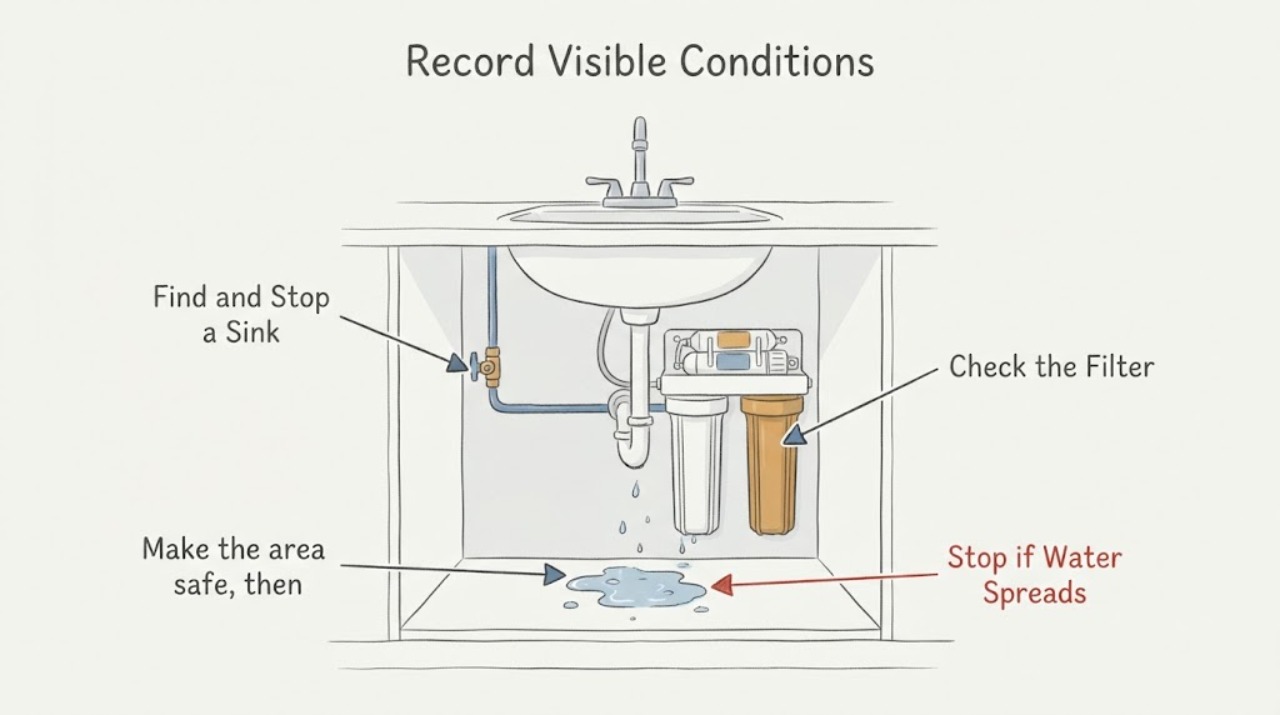
Work through in order
Diagnostic checks
Use only checks that match the exact appliance or system and its official guide.
-
Check 1
Make the area safe, then close the sink's local cold and hot supply valves if they are dry, accessible, and clearly identified. Blot the cabinet, floor, and pipe surfaces with separate dry paper towels.
Expected result: Water is pooling near an outlet, disposal wiring, or another electrical device; the spray is uncontrolled; or the cabinet is becoming wet faster than it can be dried.
Next step: Stop the inspection. From a dry location, isolate power or water only when doing so is safe, keep people away from the area, and arrange a plumber or electrician as appropriate.
Stop if: Stop immediately for standing water near electrical equipment, a hot pressurized leak, smoke, burning odor, or any shock sensation.
Why this matters
Why: This is an immediate water and electrical hazard, not a routine cartridge adjustment.
-
Check 2
With the cabinet dry and the supply valves in a safe state, place a dry towel at the faucet base, filtered outlet, filter housing, tubing joints, drain strainer, and P-trap. Check the towel after the faucet has been idle for several minutes, then after a short cold-water run only if there is no hazard.
Expected result: The first wet towel is at the faucet or filter outlet, below the counter at a filter connection, or at a drain joint; the timing is idle, faucet-on, or drain-only.
Next step: Follow the matching branch below and do not assume the word filter identifies the leaking part.
Stop if: Stop if the first wet point cannot be located without removing a panel, moving a heavy appliance, entering a wet area, or opening a wall.
Why this matters
Why: An idle leak points toward a pressurized supply or filter assembly; a drain-only leak points toward the strainer, trap, or drain connection; a faucet-on outlet leak points toward the faucet filter or aerator path.
-
Check 3
For a leak at the faucet end, record whether it comes from the filtered spout or aerator, the handle or body, or the faucet base. Remove only loose debris that can be reached without tools and compare an intermittent drip with a continuous leak.
Expected result: A brief drip improves after external aerator cleaning, or water continues from the spout or handle while the faucet is closed.
Next step: Use the faucet's exact manual to identify a compatible aerator, cartridge, seal, or filter assembly. If the leak continues or the first wet point is inside the body, have a plumber identify the part.
Stop if: Stop if the outlet will not shut off, the faucet body is cracked, or a fitting requires force or disassembly beyond the product instructions.
Why this matters
Why: A temporary drip can be debris at the aerator, while a continuous faucet leak can indicate a worn valve or cartridge; the correct replacement depends on the faucet model.
-
Check 4
For an under-sink filter leak, photograph the label and connections, then inspect externally for a cracked housing, displaced lid, wet cartridge seal, loose tube, or moisture at the filter head. Do not loosen a pressurized housing or force a tube fitting.
Expected result: Moisture begins at the housing seam or cartridge seal, at a filter-head connection, or at tubing that leads toward the faucet; the leak stops when the filter supply is isolated.
Next step: Keep the filter isolated and follow the exact manufacturer's depressurization, seal, cartridge, and flush instructions. Replace a cracked or unverified component only with a part confirmed for that model; use a plumber if the assembly remains pressurized or inaccessible.
Stop if: Stop if the housing is cracked, the valve will not close, the cartridge is unknown or cross-threaded, or water continues despite isolation.
Why this matters
Why: The filter assembly or its connection is implicated, but the cartridge, O-ring, tubing, and housing are not interchangeable across models.
-
Check 5
If the first wet point is at the drain, run only a small amount of cold water while watching the strainer, tailpiece, P-trap, and wall connection from outside the cabinet. Do not use the filter label to explain a leak that appears only during draining.
Expected result: Water appears at the strainer or trap joint only while draining, backs up into the basin, or comes from the wall-side connection.
Next step: Stop using the sink if water backs up or reaches the cabinet floor, keep the area dry, and call a plumber for a drain or concealed-connection diagnosis. Do not pour mixed chemicals into the drain.
Stop if: Stop the water test for sewage odor, dirty backup, a wall or ceiling stain, cabinet damage, or any water near electrical equipment.
Why this matters
Why: The likely path is a drain seal, trap, branch line, or wall connection rather than the filtered-water supply; an undersink filter can be dry while the sink still leaks.
-
Check 6
Protect drinking-water use after any filter-side leak. Write down the filter brand, model, cartridge marking, installation date if known, and whether the leak reached the clean-water outlet or an unfiltered area; use only cold water from a known-safe source until the product instructions are checked.
Expected result: The cartridge is loose, expired, cracked, installed in an unknown housing, or its clean-water path may have contacted cabinet water, drain water, or an unverified replacement.
Next step: Do not drink, cook with, make ice from, or brush teeth with water from the affected filtered outlet until the exact manufacturer guidance supports safe use, replacement, and any required flush; ask a plumber or water-treatment professional when the path cannot be verified.
Stop if: Stop using the affected filtered outlet for consumption when the cartridge identity, fit, seal, or clean-water path is uncertain.
Why this matters
Why: A leak does not prove that the filtered water is safe. Filtration devices remove different contaminants and have model-specific service lives and instructions.
-
Check 7
Document the first wet point, leak timing, supply-valve position, filter and faucet model information, photos, and any prior cartridge change. After an approved repair, perform one brief cold-water check while watching the same points, then dry the cabinet and recheck for delayed moisture.
Expected result: The leak is gone at the documented source, or moisture returns after the supply is restored or the drain is used.
Next step: Keep the affected water path isolated and give the record to a licensed plumber or the filter/faucet manufacturer when the leak returns, cannot be isolated, or has caused cabinet or wall damage.
Stop if: Stop testing after any recurrence, spray, hidden moisture, or worsening cabinet damage.
Why this matters
Why: A dry first check supports the repair but does not justify repeated cycling if moisture returns; recurrence suggests a seal, connection, housing, drain, or concealed-pipe problem.
Use your observations
Decision map
Find the observation that best matches what you see, then follow the next safe action.
-
PATH 01Next step
What you see
Water is near an outlet, disposal wiring, a power strip, or a wet wall or ceiling.
Do this next
Stop, keep the area clear, and contact an electrician, plumber, or emergency service from a safe location as appropriate.
Why this path and its safety boundary
Why it matters: Water and electrical or structural risk take priority over identifying the filter part.
-
PATH 02Next step
What you see
The first wet point is the filtered faucet outlet, handle, or base.
Do this next
Use the exact faucet instructions and model identity; do not substitute a generic cartridge.
Why this path and its safety boundary
Why it matters: The faucet filter, aerator, valve, cartridge, or base seal is more likely than the under-sink housing.
-
PATH 03Next step
What you see
The first wet point is an under-sink filter housing, head, cartridge seal, or tubing connection and the leak changes when that supply is isolated.
Do this next
Keep it isolated and follow the exact filter instructions or arrange plumbing service.
Why this path and its safety boundary
Why it matters: The filter assembly or its supply connection is implicated.
-
PATH 04Next step
What you see
The leak appears only while the basin drains or backs up.
Do this next
Stop using the sink if water backs up and call a plumber; do not mix drain chemicals.
Why this path and its safety boundary
Why it matters: A drain strainer, trap, branch, or wall connection is more likely than the filter supply.
-
PATH 05Next step
What you see
The filter identity, seal, installation, or clean-water path is uncertain.
Do this next
Use a known-safe alternative and obtain model-specific filter guidance or professional diagnosis before resuming consumption.
Why this path and its safety boundary
Why it matters: The affected filtered outlet cannot be treated as verified drinking water.
Helpful context
Understand the symptom
A sink leak described as a filter leak may start at the faucet outlet, the filter cartridge or housing below the counter, or the drain. Water can run along a tube or cabinet base, so the visibly wet spot is not always the source. The useful first question is where water first appears and whether it appears with the faucet on, with the drain running, or even while the sink is idle.
Keep the inspection external and model-specific. Faucet filter parts and cartridge replacements vary by faucet, and home filtration devices have different replacement intervals and contaminant claims. Use the exact product instructions for a cartridge, O-ring, housing, or dedicated filtered-water faucet rather than forcing a generic part.
If water has reached an outlet, disposal wiring, a power strip, or another electrical device, stop handling the cabinet. If there is standing water, a hidden wall or ceiling stain, a strong spray, hot water, or an odor that suggests contamination, isolate the hazard only from a dry, safe location and arrange professional help.
A small controlled observation can distinguish a drain leak from a pressurized supply leak, but do not keep running water when the leak is worsening or electrical safety is uncertain. Never use a hand inside a disposal opening, open a wall to chase a hidden pipe, or mix drain chemicals in an attempt to solve a filter leak.
When checks do not resolve it
Need a professional?
Safety scope: Do not work on wet electrical equipment, open a pressurized filter housing, force fittings, enter contaminated water, or continue a test after a spray, backup, smoke, burning odor, or shock.
Common questions
FAQ
Why is the cabinet wet if the filter faucet looks dry?
Water can track from a filter housing, tubing joint, supply connection, strainer, trap, or wall connection. Dry each possible source and identify the first towel that becomes wet rather than relying on the lowest puddle.
Can I keep drinking from a leaking filtered faucet?
Not until the cartridge fit, seal, housing, and clean-water path are verified. EPA notes that filter performance and replacement depend on the device, so follow the exact label and manufacturer instructions and use a known-safe alternative while uncertain.
Is a dripping filtered spout always a filter-housing leak?
No. A temporary drip can be aerator debris, while a continuous faucet leak can involve a valve or cartridge; the correct part depends on the faucet model. A leak at the drain while the basin empties is a separate path.
Read the exact guide
Official sources
- Leaking from End of SpoutKohler · Kohler bathroom faucet leak symptoms and model-specific repair guidance
- Water Health Series: Filtration FactsU.S. Environmental Protection Agency · Point-of-use faucet and under-sink filter types, performance limits, certification, and replacement guidance
- Detect and Chase Down Leaks ChecklistU.S. Environmental Protection Agency · Household faucet, kitchen aerator, under-sink pooling, supply-line, and hidden-moisture leak observations
Community feedback
Share a repair observation
Share a plain-text repair observation. Accepted observations are published automatically; this page may take a moment to update.