
On this page
Start here
Quick answer
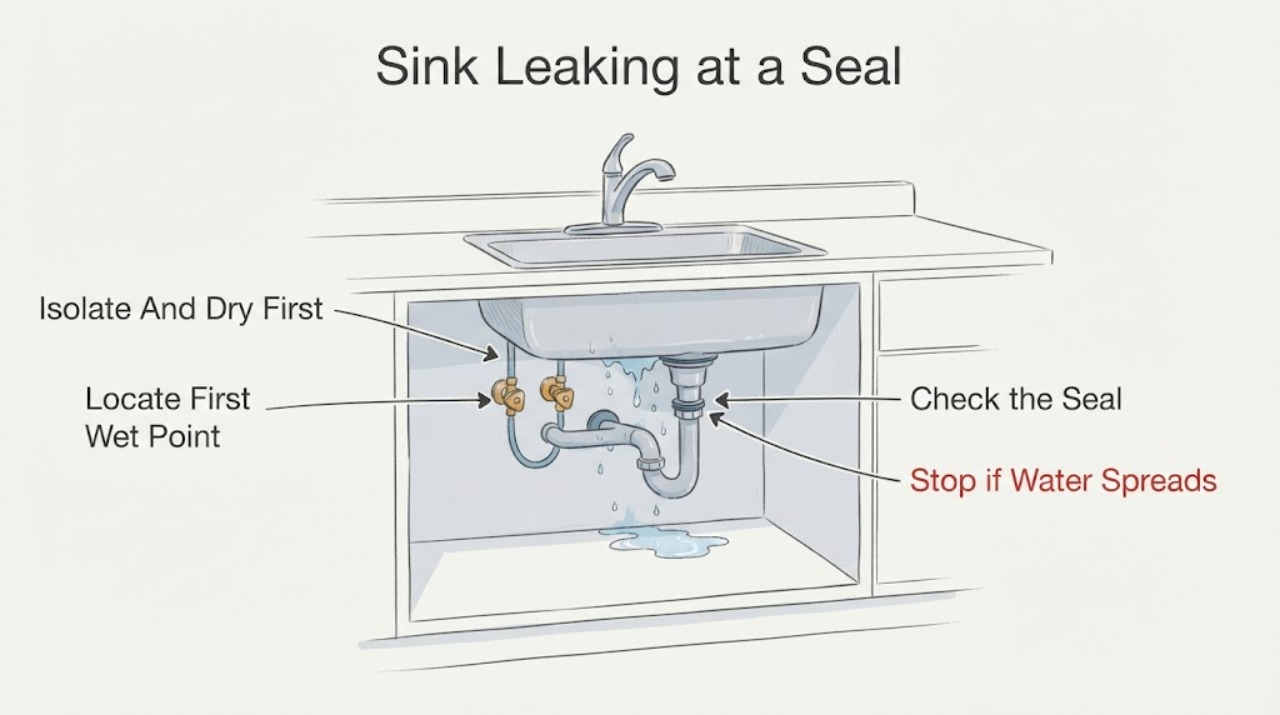
A sink leak that looks like a failed seal may actually start at the faucet, supply connection, drain strainer, trap, disposal flange, dishwasher hose, sink seam, or a higher point that runs downward. Close the affected shutoff valves, keep the cabinet dry, and place a towel or paper beneath the plumbing to locate the first wet point. Test one source at a time with a small amount of water; do not put hands near a disposal and do not energize or touch electrical equipment in a wet cabinet. Water appearing only around the faucet base points toward a faucet seal or an upstream handle leak; water appearing during draining points toward a drain, strainer, trap, or disposal connection; water appearing continuously points toward a supply connection or valve. Replace a gasket only after the exact component, model, and seal orientation are confirmed. Stop for an uncontrolled leak, water near an outlet or disposal wiring, a cracked sink or pipe, sewage, or a valve that will not shut off and call a plumber or emergency service.
Before you begin
Safety first
- This article supports only dry, visible observation, safe shutoff operation without force, and small controlled water tests when no electrical or sewage hazard exists. It does not authorize pressurized disassembly, disposal access, electrical work, concealed plumbing demolition, chemical drain treatment, or work in standing water.
Work through in order
Diagnostic checks
Use only checks that match the exact appliance or system and its official guide.
-
Check 1
Move stored items away, place a container or towel under the cabinet, and close only the affected faucet shutoff valves if they turn normally and are safely reachable. If water is near an outlet, disposal cord, appliance, or other electrical equipment, keep clear and do not touch it.
Expected result: The leak slows or stops when the faucet supply is closed, continues with the faucet unused, cannot be isolated, or has already reached electrical equipment or the cabinet structure.
Next step: Keep the affected fixture unused, dry only from a safe position, and continue with first-wet-point observation only when the area is safe. Call a plumber for an uncontrolled or non-isolating leak and use electrical service for water near wiring or equipment.
Stop if: Do not force a stuck valve, stand in water while touching electrical equipment, use a disposal, or continue for a burst pipe, rapid flow, sewage, smoke, shock, or fire.
Why this matters
Why: A leak that stops at the faucet shutoffs is on the faucet or its supply side; a continuing leak may be a valve, wall, drain, or stored water source. An inaccessible or ineffective shutoff changes this from a seal check to a plumber or emergency response.
-
Check 2
Dry the visible plumbing and put separate strips of paper towel under the faucet supply connections, faucet base, drain strainer, trap joints, disposal flange and discharge, dishwasher hose, and cabinet wall. With the disposal off, run a small amount of water into the sink, then stop and inspect which strip becomes wet first.
Expected result: The first wet strip is at the faucet or supply, sink drain or strainer, trap, disposal connection, dishwasher hose, cabinet wall, or nowhere until water is poured or drained.
Next step: Repeat only the safe test that matches the observed trigger—faucet use, sink fill, or drain flow—and follow the corresponding branch. Do not remove fittings merely because a lower joint is wet.
Stop if: Stop for rapid leakage, a cracked pipe or sink, sewage, water reaching electrical equipment, or any need to dismantle a disposal or concealed plumbing.
Why this matters
Why: The first wet point is more useful than water pooled below it: faucet or supply points to that assembly, drain or trap points to the drainage branch, and a wall or cabinet point may be a hidden supply or structural leak. No wet strip means the test may not have reproduced the event or water may be entering from above.
-
Check 3
If water first appears around the faucet base or handle, dry it and run the faucet briefly while observing the handle, spout base, underside supply connections, and deck. Do not remove the faucet or loosen a retaining nut during this diagnostic check.
Expected result: Water appears only while the handle or spout is used, the handle area wets before the base, the underside supply connection drips continuously, or the faucet base remains dry.
Next step: Record the faucet brand and model and have the correct O-ring, cartridge, supply connection, or mounting seal identified before replacement. Close the faucet shutoffs and call a plumber if the leak continues or the connection is damaged.
Stop if: Do not use a guessed gasket, force the faucet, work with water in the cabinet, or continue for a split hose, corroded fitting, uncontrolled flow, or water near electrical equipment.
Why this matters
Why: Moen notes that a handle leak can run onto the base plate and look like a base-seal failure. A continuous drip at a supply connection points to a hose, valve, or connection rather than a decorative deck seal; a dry faucet shifts attention to the drain or another source.
-
Check 4
If the first wet point appears at the drain opening, strainer, overflow, or trap only while the sink drains, dry the joint and run a small amount of clean water through the sink while watching from the side. Do not put hands into a disposal opening and do not pour chemicals into a leaking or blocked drain.
Expected result: Water starts at the strainer or sink flange, a tapered gasket or overflow-related seal is visibly displaced, water starts at a trap joint, or the leak appears only when the drain is full or restricted.
Next step: Identify the sink and drain configuration and follow its manual or have a plumber replace and seat the correct seal. If the trap is cracked, corroded, blocked, or under strain, stop using the sink and arrange service rather than tightening blindly.
Stop if: Stop for sewage, a cracked or displaced drain, rapid backup, chemical drain cleaner, water near electrical equipment, or any need to dismantle a concealed or loaded drain.
Why this matters
Why: A drain or strainer seal is a different part from a faucet seal; gasket orientation and overflow configuration can matter. A trap or downstream restriction can expose a connection without proving that its gasket is the sole fault.
-
Check 5
If the sink has a disposal and the first wet point is at its sink flange, mounting area, discharge elbow, or tailpipe, keep the disposal switched off and power isolated according to its exact manual before any inspection. Observe only for a cracked gasket, elbow, clamp, or connection; never insert fingers into the discharge opening.
Expected result: Water appears at the disposal mounting flange, at the discharge gasket or elbow, at a dishwasher connection, or at a separate faucet, drain, or cabinet source.
Next step: Leave the disposal off, record the exact model and wet point, and follow the model installation instructions or arrange plumber service. An electrician should address unsafe power or wet electrical components before the disposal is used again.
Stop if: Do not energize a wet disposal, put hands or tools into its opening, loosen mounting hardware while it is supported or wet, or continue for a cracked housing, active flow, smoke, odor, shock, or water near the outlet or cord.
Why this matters
Why: InSinkErator separates mounting and discharge gasket locations and recommends checking gasket damage, discharge hardware, and elbow cracks. A disposal leak does not justify replacing a sink strainer or faucet seal, and a separate source can run onto the disposal.
-
Check 6
With the faucet and drain unused, place dry paper under the shutoff valves, supply hoses, cabinet wall, and floor, then observe whether a drop forms without running water. Do not remove a wall, cabinet back, valve, or pressurized fitting to trace it.
Expected result: A supply hose, shutoff valve, wall, floor, or cabinet seam wets continuously, or the cabinet stays dry until the faucet or drain is used.
Next step: Keep the relevant shutoff closed if safe, protect the cabinet, and call a plumber for a continuous, hidden, corroded, or inaccessible leak. Do not tighten a valve or pressurized joint by force.
Stop if: Stop for an unclosable valve, burst or bulging hose, hidden wall/floor water, sewage, standing water near electrical equipment, or rapidly increasing flow.
Why this matters
Why: Continuous wetness points away from an intermittently used drain seal and toward a supply, valve, concealed, or structural source. Dryness while unused supports a use-triggered faucet or drain branch but does not prove the visible seal is the only issue.
-
Check 7
Prepare a service note with the first wet point, whether the leak is continuous or only during faucet use or draining, sink and faucet/disposal brands and models, shutoff behavior, drain configuration and overflow, hose or fitting condition, and any electrical exposure.
Expected result: The record identifies a faucet seal or handle path, a strainer or trap path, a disposal mounting or discharge path, a supply or valve path, or an unresolved hidden source.
Next step: Keep the affected sink or disposal unused until the source is repaired and the cabinet is dry. Have the plumber verify the complete assembly for a second leak before returning it to normal use.
Stop if: Do not dismantle concealed plumbing, use a disposal in a wet cabinet, apply drain chemicals, force shutoffs, or continue after rapid leakage, sewage, water near electricity, smoke, odor, shock, or fire.
Why this matters
Why: A location-and-trigger record helps the plumber select the correct seal or connection and avoids treating every sink leak as the same gasket problem. An unresolved or hazardous source needs professional access rather than more water testing.
Use your observations
Decision map
Find the observation that best matches what you see, then follow the next safe action.
-
PATH 01Safety boundary
What you see
The first wet point is at the faucet base or handle and appears while the faucet is used.
Do this next
Identify the faucet model and have the correct O-ring, cartridge, supply connection, or mounting seal selected. Close the faucet valves and call a plumber if the leak continues.
Why this path and its safety boundary
Why it matters: Water at the base can be runoff from a handle or spout leak, not necessarily the deck seal; faucet seal types and sizes are model-specific.
Safety stop: Do not force the faucet, use a guessed seal, or work in water near electrical equipment.
-
PATH 02Safety boundary
What you see
The first wet point appears at the drain opening, strainer, overflow, or trap while the sink drains.
Do this next
Identify the drain configuration and model, then follow its instructions or arrange plumber service for the correct seal, trap, or drain repair.
Why this path and its safety boundary
Why it matters: This is a drainage-seal or connection branch; overflow configuration can affect gasket orientation, and a downstream restriction can stress a joint.
Safety stop: Stop for sewage, backup, a cracked fitting, chemical drain cleaner, rapid leakage, or water near electrical equipment.
-
PATH 03Safety boundary
What you see
The sink has a disposal and the first wet point is at its flange, mounting gasket, discharge gasket, elbow, or dishwasher connection.
Do this next
Keep power isolated and record the disposal model and exact wet point. Follow the model manual or call a plumber; have an electrician assess any wet power equipment.
Why this path and its safety boundary
Why it matters: Disposal mounting and discharge seals are distinct, and their fit and installation are model-specific. A wet electrical disposal must not be operated.
Safety stop: Do not put hands in the disposal, loosen supported hardware, energize it while wet, or continue for smoke, odor, shock, active flow, or a cracked housing.
-
PATH 04Safety boundary
What you see
Water appears continuously with the faucet and drain unused, or the first wet point is a supply hose, shutoff valve, wall, floor, or cabinet seam.
Do this next
Close the affected shutoff only if it moves safely, keep clear of wet electrical areas, and call a plumber or emergency service for an uncontrolled, hidden, or inaccessible leak.
Why this path and its safety boundary
Why it matters: A continuous or concealed leak is not explained by a use-triggered faucet or drain seal and can damage cabinetry or reach electrical equipment.
Safety stop: Do not force a valve, remove a pressurized fitting, open a wall, or remain near standing water and energized equipment.
-
PATH 05Safety boundary
What you see
The lower cabinet is wet but no safe test identifies the first source, or water may be coming from the counter, dishwasher, filter, wall, or floor.
Do this next
Keep the sink and nearby appliances unused, dry and monitor only from a safe position, and arrange plumber service to trace the leak.
Why this path and its safety boundary
Why it matters: The visible puddle is downstream evidence and replacing a seal without locating the source can conceal a supply or structural leak.
Safety stop: Stop for rapid flow, sewage, cabinet damage, water near electrical equipment, mold or structural concerns, or any need to dismantle concealed plumbing.
Helpful context
Understand the symptom
Find the first wet point, not the biggest puddle
Water travels along the underside of a sink, cabinet floor, hose, or pipe. Dry the area, place absorbent paper under separate sections, and use a small controlled amount of water to reproduce one symptom at a time. A leak only while the faucet runs is a different branch from a leak while the sink drains or a drip that continues with the fixtures unused.
A seal depends on the component and the model
Faucet O-rings, drain or strainer gaskets, disposal mounting gaskets, and trap or hose seals are not interchangeable. Moen notes that even water around a faucet base can be a handle leak, while InSinkErator distinguishes discharge gaskets and disposal mounting connections. Kohler's guidance shows that a tapered drain gasket can face differently depending on whether a sink has an overflow. Identify the component and model before ordering or fitting any seal.
Keep water and disposal electricity separate
Do not work inside a wet cabinet or near an energized disposal, outlet, cord, or appliance connection. InSinkErator's installation guidance requires electrical power to be turned off before disposal installation and gives model-specific gasket and flange instructions. For an active leak, an inaccessible shutoff, a damaged pipe, or water reaching electrical equipment, stop and use a qualified plumber and, when necessary, an electrician.
Safety boundary
Stop conditions
- Stop immediately for an uncontrolled or rapidly increasing leak, a shutoff that will not close, a burst or cracked pipe, sewage, a cracked sink, or water reaching an outlet, disposal cord, appliance, or other electrical equipment.
- Do not work in standing water, energize a wet disposal, put hands into a disposal opening, remove pressurized fittings, force shutoff valves, open a wall, or use drain chemicals to address a leaking seal.
- Do not order or install a generic gasket before identifying the faucet, drain, strainer, overflow, disposal, or trap model and the correct orientation; do not tighten a connection blindly when the source is elsewhere.
- Arrange qualified plumber service when the first wet point is hidden, continuous, corroded, inaccessible, or still uncertain, or when a seal, drain, disposal flange, supply connection, or structural repair requires disassembly. Use an electrician for wet or damaged electrical equipment and emergency responders for smoke, fire, shock, or immediate danger.
When checks do not resolve it
Need a professional?
Call a qualified plumber when the leak is continuous, cannot be isolated, comes from a concealed or corroded connection, returns after the correct model-specific seal is installed, or the first wet point remains uncertain. Stop immediately for rapid flow, sewage, a cracked sink or pipe, standing water near electrical equipment, smoke, fire, shock, or a wet disposal; use an electrician or emergency response as appropriate.
Safety scope: This article supports only dry, visible observation, safe shutoff operation without force, and small controlled water tests when no electrical or sewage hazard exists. It does not authorize pressurized disassembly, disposal access, electrical work, concealed plumbing demolition, chemical drain treatment, or work in standing water.
Common questions
FAQ
Why is water pooling under the sink if the faucet base looks like the source?
Water can run from a handle or supply connection onto the faucet base and then down into the cabinet. Dry the area and use paper strips while running the faucet briefly to find the first wet point; do not assume the deck seal is the cause.
Can I replace a sink gasket with any rubber seal?
No. Faucet, strainer, overflow, disposal mounting, discharge, and trap seals differ by component, model, and sometimes orientation. Identify the exact configuration and use its manual or a plumber before selecting a replacement.
Is it safe to test a leaking sink with the disposal running?
No. Keep a disposal off while a cabinet is wet or when inspecting a leak, and isolate its power as the exact manual requires before disposal work. Never put hands or tools into the discharge opening; use a plumber and electrician when water reaches electrical equipment.
When should I stop trying to find the sink leak myself?
Stop for rapid or uncontrolled flow, an ineffective shutoff, sewage, a cracked pipe or sink, hidden wall or floor water, standing water near electrical equipment, or a wet disposal. Keep the fixture unused and call a qualified plumber or the appropriate emergency service.
Read the exact guide
Official sources
- Drain Spacer Gasket Kit For Bathroom SinksKohler Assist · Kohler sink documentation used to demonstrate that drain gasket orientation depends on the sink's overflow configuration; exact sink and drain instructions govern fit.
- Bathroom Faucet: Leaking Around the Base of the FaucetMoen Solutions · Moen bathroom faucet support used for the general principle that water at a faucet base can originate at the handle or spout; exact faucet model controls parts and repair steps.
- Garbage Disposal Leaking at the DischargeInSinkErator · InSinkErator disposal support used for disposal-specific gasket and leak-location branches; exact disposal model and installation instructions govern access.
- Installing a New Garbage Disposal - Disposers with EZ ConnectInSinkErator · InSinkErator installation guidance used only for disposal-specific safety and configuration examples; exact model manual controls any repair.
- Kitchen Faucet: Leaking Under The Sink BaseMoen Solutions · Moen kitchen faucet support used for the general distinction between continuous and use-triggered leaks; exact faucet and plumbing configuration controls the repair.
Community feedback
Share a repair observation
Share a plain-text repair observation. Accepted observations are published automatically; this page may take a moment to update.