
On this page
Start here
Quick answer
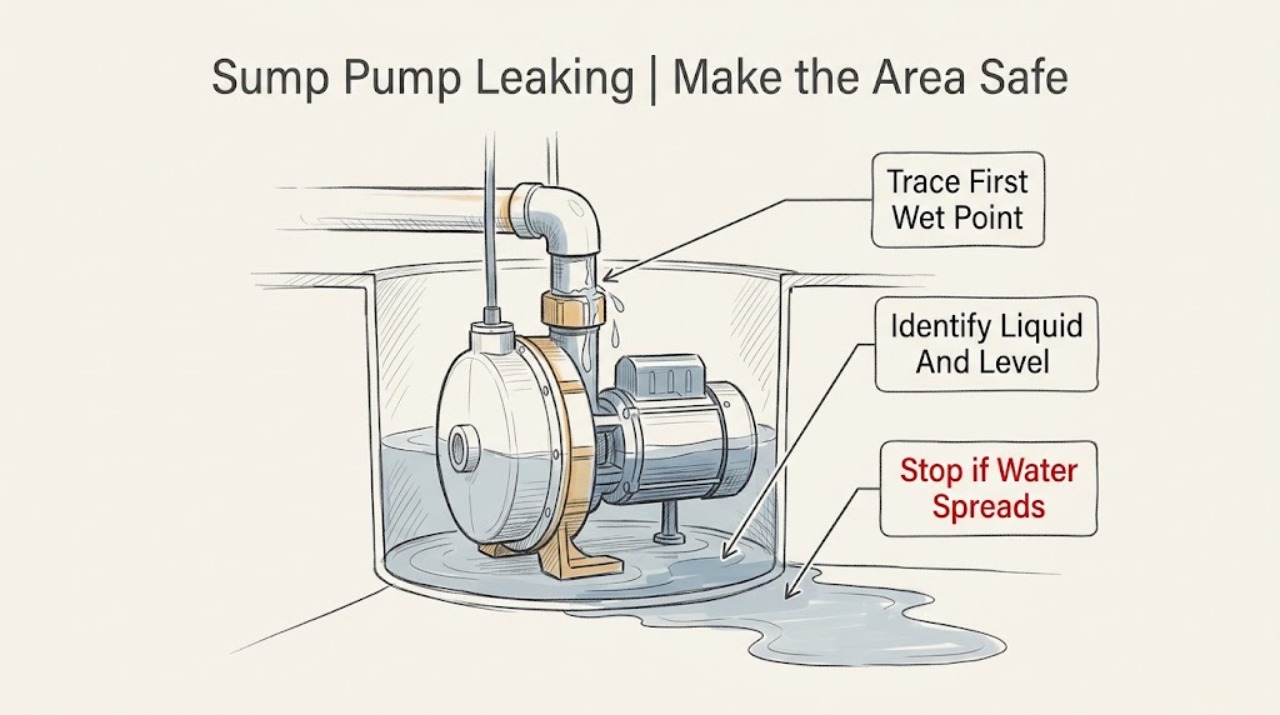
A sump pump leak may come from the tank or lid, the pump discharge connection, a check valve or pipe joint, a failed or overflowing pump, or water entering the basin from another source. Do not reach into a wet pit or handle a pump cord, plug, or junction box while standing in water. From a dry, safe position, note the first wet point, whether the water is clean groundwater or possibly wastewater, the basin level, the pump and float response, and whether water returns through the discharge line. If water is rising, the pump is not removing it, the tank or discharge has split, the leak is near electrical equipment, or the liquid may be sewage or chemicals, keep clear and call a qualified plumber and, when electrical equipment is wet, a qualified electrician or emergency service. Do not lift the pump, open the tank, disconnect piping, or run it dry as a homeowner test.
Work through in order
Diagnostic checks
Use only checks that match the exact appliance or system and its official guide.
-
Check 1
From a dry, stable position, look for standing water, a wet floor around the basin, a wet or damaged cord, a wet outlet or control, smoke, burning odor, arcing, or a rapidly rising water level; do not step into water or touch the pump, plug, outlet, or junction box.
Expected result: The floor and electrical equipment are dry, water is near electrical equipment, the basin is overflowing or rising rapidly, or the liquid may be sewage, effluent, chemicals, or contaminated floodwater.
Next step: Keep people and pets away. If safe from a dry position, use only the normal accessible shutoff; otherwise do not touch power. Call a qualified plumber and a qualified electrician for wet electrical equipment, and use emergency services for fire, shock, toxic fumes, or an immediate flood threat.
Stop if: Stop immediately for standing water at electrical equipment, exposed conductors, smoke, burning odor, arcing, a damaged power cord, sewage or chemical liquid, poisonous odor, or an unsafe floor or basin.
Why this matters
Why: Dry surroundings permit only external observation. Water at electrical equipment creates shock and fire risk, and contaminated liquid creates an exposure and gas hazard. A rapidly rising basin is a flood-control emergency rather than a reason to perform a wet-pit repair.
-
Check 2
Without opening the basin or moving the pump, use a flashlight from a dry position to trace the first wet point around the tank wall, lid, cord entry, pump discharge, union, check-valve area, and nearby plumbing; photograph the path and keep hands out of the pit.
Expected result: Water first appears at the tank or lid, a discharge connection or valve, the cord or control area, the floor beside the system, or from a nearby pipe or wall rather than the sump assembly.
Next step: Keep the system isolated from use if the leak is active or near electricity and give the plumber the location, photos, liquid appearance, and timing. Do not apply sealant, tighten a fitting, lift the pump, or disconnect piping as a test.
Stop if: Do not remove the lid, cut pipe, loosen a union, touch a wet cord, enter the basin, or continue if the source is contaminated liquid, a structural crack, or an active uncontrolled leak.
Why this matters
Why: The first wet point distinguishes a basin or lid seal, discharge plumbing or check-valve leak, electrical-area hazard, building-water intrusion, or another plumbing leak. Water appearing below or away from the pit may be traveling from an upstream source and does not prove the pump tank is leaking.
-
Check 3
From outside the basin, note the liquid color, odor, visible debris, temperature only by observation, water level, recent rain or plumbing use, and whether the level rises when no fixture is running; do not touch or sample the liquid.
Expected result: The liquid looks like clear groundwater, contains sewage or chemical signs, rises after rain, rises when fixtures are used, or rises while the home is not using water.
Next step: Keep contaminated or unidentified liquid untouched and call a qualified plumber. For ordinary water with a rising level, arrange prompt sump service and use only a confirmed backup or emergency flood-control plan; do not pour chemicals or other liquids into the pit.
Stop if: Stop for sewage or effluent, chemical or fuel odor, gas-like odor, skin or eye exposure, a rising level that threatens the floor, or any need to enter the basin.
Why this matters
Why: Groundwater after rain may be ordinary sump inflow. Sewage, effluent, chemicals, or an unexplained rise can indicate an inappropriate connection, a plumbing leak, or a contaminated exposure. The source and level pattern determine whether a plumber, waterproofing professional, or emergency response is needed.
-
Check 4
From a safe dry position and only if the equipment is dry and the exact instructions permit ordinary observation, watch whether the pump starts as the level rises, lowers the water, and stops; observe the float only for visible interference without touching it or forcing a cycle.
Expected result: The pump runs and the level falls, runs but the level does not fall, never starts, runs continuously, cycles again soon after stopping, or the float appears blocked by the basin wall or debris.
Next step: Record the response and keep the system out of service for a failure to lower water, continuous running, repeated cycling, or any leak. Call a qualified plumber or authorized pump service; never run the pump dry or bypass the float as a homeowner test.
Stop if: Do not reach into the basin, lift the float or pump, touch a powered pump, bypass a switch, run without water, or continue near wet electrical equipment.
Why this matters
Why: A running pump with no level reduction points toward discharge restriction, check-valve or airlock behavior, insufficient capacity, or an internal obstruction. No start or continuous running can involve power, float, motor, switch, or control faults. Repeated cycling can follow backflow or float and basin conditions. None of these observations identifies a safe pump repair by itself.
-
Check 5
From outside the basin, follow the discharge pipe to visible joints, the check-valve body, the union, and the outlet point; look for a split, spray, backflow, disconnected fitting, closed valve, or water returning after the pump stops, without loosening or disassembling any connection.
Expected result: The discharge path is dry and intact, a joint or valve leaks while the pump runs, water returns to the basin after stopping, the pipe is split or disconnected, or the outlet is blocked or inaccessible.
Next step: Keep the pump off if the discharge is broken, flooding, or sending water toward the building, and arrange plumbing or pump service. Do not tighten, cut, drill, replace a valve, or run repeated cycles to prove the leak.
Stop if: Stop for an active spray, a split discharge line, water entering a wall or electrical area, an inaccessible or high outlet, sewage, or any need to disconnect piping.
Why this matters
Why: A leaking connection, failed check valve, backflow, or damaged discharge can place water outside the intended path and make the tank appear to leak. A blocked or failed discharge path can also leave the water level high while the pump runs. Pipe sizing, valves, airlock, and repair work are model- and installation-specific.
-
Check 6
Record the pump and tank make and model from a dry exterior label, first wet point, liquid source and appearance, water level trend, float and pump response, discharge and check-valve observations, recent rain or plumbing use, alarm state, and any power or flooding event; do not remove labels or open the system.
Expected result: The record points to a tank or lid leak, discharge or check-valve backflow, pump or float failure, external water intrusion, electrical hazard, contaminated liquid, or an unresolved source.
Next step: Keep the area clear and arrange qualified plumbing service; include electrical service when water reached power equipment and include environmental or emergency help for contaminated water, structural damage, or flooding.
Stop if: Do not continue observation if water is rising, the floor is unsafe, electrical equipment is wet, the liquid is contaminated, or the next step would require opening or entering the tank.
Why this matters
Why: A structured record lets the plumber or authorized pump service distinguish a plumbing leak from a pump failure without exposing the homeowner to a wet-pit or electrical repair. An unresolved or recurring leak should be treated as active until professionally checked.
Use your observations
Decision map
Find the observation that best matches what you see, then follow the next safe action.
-
PATH 01Safety boundary
What you see
Water is at an outlet, plug, cord, control, junction box, or other electrical equipment; the basin is rising rapidly; or there is smoke, arcing, burning odor, shock, or fire.
Do this next
Keep clear and keep others away. From a dry safe location use only an accessible normal disconnect if it can be reached without contact with water; otherwise wait for qualified electrical or emergency personnel. Arrange urgent plumbing or pump service for the rising water.
Why this path and its safety boundary
Why it matters: The immediate hazard is electrical injury, fire, or flooding, not a routine pump leak.
Safety stop: Do not step into water, touch the pump or cord, reset a wet or tripped device, open a panel, or use water on an electrical fire.
-
PATH 02Safety boundary
What you see
The liquid may be sewage, effluent, chemical, fuel, or contaminated floodwater, or it has a strong unexplained odor.
Do this next
Keep people and pets away, do not enter or touch the basin or liquid, and call a qualified plumber or appropriate environmental/emergency service. Tell responders what was observed without attempting to identify the liquid by contact.
Why this path and its safety boundary
Why it matters: Sump and sewage systems can carry illness-causing material and poisonous or flammable gases; ordinary homeowner handling is not appropriate.
Safety stop: Do not run an unsuitable pump, add chemicals, mix cleaners, enter the pit, or work without professional protective procedures.
-
PATH 03Safety boundary
What you see
The first wet point is the tank wall, lid, cord entry, or basin area rather than a visible discharge joint.
Do this next
Keep power and people away from wet areas, photograph the dry exterior if possible, and call a plumber or authorized pump service to assess the tank, cover, pump, and surrounding water path.
Why this path and its safety boundary
Why it matters: The basin, cover, penetration, pump seal, or water entering from surrounding structure may be involved; the observation does not prove which one.
Safety stop: Do not remove the lid, lift the pump, enter the basin, seal over a crack, or touch a wet cord or control.
-
PATH 04Safety boundary
What you see
Water first appears at the discharge pipe, union, check-valve area, or outlet, or returns to the basin after the pump stops.
Do this next
Stop repeated operation if it sends water toward the building or leaves the basin high, and arrange qualified plumbing or pump service for the discharge and check-valve system.
Why this path and its safety boundary
Why it matters: A leaking joint, split pipe, missing or failed check valve, closed or obstructed discharge, or backflow may be allowing water outside the intended route.
Safety stop: Do not disconnect piping, drill or alter an anti-airlock or vent hole, replace a valve, or run repeated cycles to reproduce the leak.
-
PATH 05Safety boundary
What you see
The pump runs but the level does not fall, the pump does not start, runs continuously, or cycles repeatedly.
Do this next
Keep the system out of service for active flooding or abnormal operation and call qualified plumbing or authorized pump service. Use only a professionally confirmed backup or emergency flood-control plan.
Why this path and its safety boundary
Why it matters: Possible causes include discharge restriction, airlock, float interference, power or control trouble, motor or switch failure, insufficient capacity, or a pump obstruction; the leak source still needs separate tracing.
Safety stop: Do not bypass the float, touch the impeller, lift the pump, run it dry, disconnect cords or piping, or reset protection repeatedly.
-
PATH 06Safety boundary
What you see
The sump hardware is dry but water appears nearby, or the level changes with rain, fixtures, a water heater, or another plumbing source.
Do this next
Keep water away from electrical equipment, stop the upstream fixture only if safe and appropriate, document the timing, and call a qualified plumber; use a waterproofing professional for persistent structural groundwater intrusion.
Why this path and its safety boundary
Why it matters: The apparent sump leak may be groundwater intrusion, a separate plumbing leak, or water traveling from an upstream source rather than a leaking tank.
Safety stop: Do not open walls or floors, enter a crawlspace or pit, or continue if the source is active, contaminated, structural, or near electrical equipment.
Helpful context
Understand the symptom
A sump-pump leak is not always a failed pump seal
Water around a sump system can originate at the basin or lid, a discharge joint, a check valve, a broken or overflowing pipe, meltwater or groundwater entering the pit, or a separate plumbing leak. A pump may be running normally while a discharge connection leaks, or the pump may stop while the basin continues to fill. Follow the water to its first wet point before deciding which component is involved.
Keep electrical decisions separate from water decisions
A sump pit combines water with a powered motor, float switch, cord, outlet, and sometimes an alarm or battery system. If the floor, plug, outlet, junction box, or control is wet, do not touch it or stand in the water. If the area is dry and the normal disconnect is safely reachable without approaching the hazard, a qualified person can isolate power before service; flooded electrical areas require an electrician or emergency response.
The liquid itself changes the service boundary
Ordinary groundwater is different from sewage, effluent, chemicals, fuel, or contaminated floodwater. Sump and sewage equipment can expose a person to illness-causing material or poisonous gases, and manufacturers warn against using pumps for chemicals or hazardous liquids. Do not enter the basin, handle contaminated water, or clean a pump without the correct training and protective equipment.
A check valve can make a normal pump look like it is leaking
When a pump stops, water in the discharge pipe should not return to the pit when a correctly installed check valve is present. A missing, stuck, backward, or leaking check valve can cause backflow, repeat cycling, and a rising basin level. Confirming the valve condition or changing piping is a service task unless the exact manual gives a safe, model-specific procedure for a qualified person.
Safety boundary
Stop conditions
- Do not enter or reach into the sump pit, stand in water, or touch a pump, cord, outlet, control, or junction box when the area is wet.
- Stop for smoke, burning odor, arcing, shock, exposed wiring, a damaged cord, water at electrical equipment, rapidly rising water, or an unsafe floor; use qualified electrical or emergency help.
- Do not handle sewage, effluent, chemicals, fuel, contaminated floodwater, or unexplained strong odors; keep people and pets away and call qualified service.
- Do not lift or disassemble the pump, disconnect piping, bypass a float, run the pump dry, alter a check valve or vent, apply chemicals, or repeatedly cycle a leaking system.
- Keep the system out of service and call a qualified plumber or authorized pump service for active leaks, rising water, tank or discharge damage, recurring backflow, or an unresolved wet point.
Only after diagnosis
Potential parts
- sump pump check valve
Only consider a check valve after a qualified diagnosis confirms discharge backflow, a leaking or missing valve, or repeated cycling attributable to the valve.
Confirm the exact pump, discharge size, installation direction, temperature and fluid limits, and local plumbing requirements before selecting or installing any valve. - sump pump float switch
Only consider a float switch after service confirms that the pump does not start, does not stop, or cycles because of a defective or model-specific switch rather than obstruction, power, piping, or motor trouble.
Confirm the exact pump model and switch arrangement; do not bypass or adjust a float in a wet pit. - sump basin or cover
Only consider a basin or cover after a plumber confirms a crack, failed penetration, unsafe cover, or installation defect is the source of the leak.
Confirm basin dimensions, pump and float clearance, venting, code requirements, and the complete discharge design with a qualified professional.
When checks do not resolve it
Need a professional?
Call a qualified plumber or authorized pump service for any active sump leak, rising water, pump that does not remove water, recurring backflow, discharge or tank damage, unknown wet point, or contaminated liquid. Include a qualified electrician when water reached an outlet, cord, control, junction box, or other electrical equipment; use emergency response for fire, shock, toxic fumes, or an immediate flood threat.
Have this ready
- Provide the pump and tank make and model from a dry exterior label, first wet point, liquid appearance and source clues, basin level trend, pump and float response, discharge and check-valve observations, photos from a safe position, recent rain or plumbing use, alarm state, and any power or flooding event.
Common questions
FAQ
Can I unplug a leaking sump pump?
Only a qualified person should isolate a pump when water, the plug, cord, outlet, or control may be wet. Never stand in water or touch electrical equipment to unplug it. From a dry, safe position, use only a normal accessible disconnect if it can be reached without approaching the hazard, then call plumbing service and electrical service when needed.
Why does water come back into the sump after the pump stops?
A missing, stuck, incorrectly installed, or leaking check valve can allow water in the discharge pipe to flow back into the basin. A damaged or obstructed discharge can also leave the level high. Observe from a dry position and have a qualified professional inspect the discharge; do not remove or alter the valve as a test.
Is water around the sump tank always a tank leak?
No. Water may be coming from a lid or penetration, discharge joint, check valve, pump or pipe, groundwater, or another plumbing source and then traveling across the floor. Trace the first wet point from a dry position without opening the basin, and call a plumber for an active or recurring leak.
Can I reach into the sump pit to clear the leak?
No. Do not enter or reach into a sump pit, especially when the pump is powered, the area is wet, or the liquid may be sewage or chemicals. Manufacturers require power isolation and qualified service for pump handling, and contaminated basins can expose you to illness-causing material or poisonous gases.
Read the exact guide
Official sources
- Product Support | Frequently Asked QuestionsZoeller Pump Company · Zoeller sump pump support for check valves, backflow, short cycling, airlock, float behavior, and service observations
- HT450-Series High Temperature Submersible Sump Pumps, Installation ManualLiberty Pumps · Liberty Pumps submersible sump pump installation, discharge, check-valve, float, electrical, contaminated-liquid, maintenance, and troubleshooting guidance
- EASY DO’S & DON'T’S FOR INSTALLING A SUMP PUMPZoeller Pump Company · Zoeller sump pump electrical precautions, water and pump handling, service boundaries, float and discharge observations, and sump safety
- Submersible Sewage Pumps LE and LEH, Installation ManualLiberty Pumps · Liberty Pumps submersible pump discharge, check-valve, water-return, contamination, and authorized-service guidance
Community feedback
Share a repair observation
Share a plain-text repair observation. Accepted observations are published automatically; this page may take a moment to update.