
On this page
Start here
Quick answer
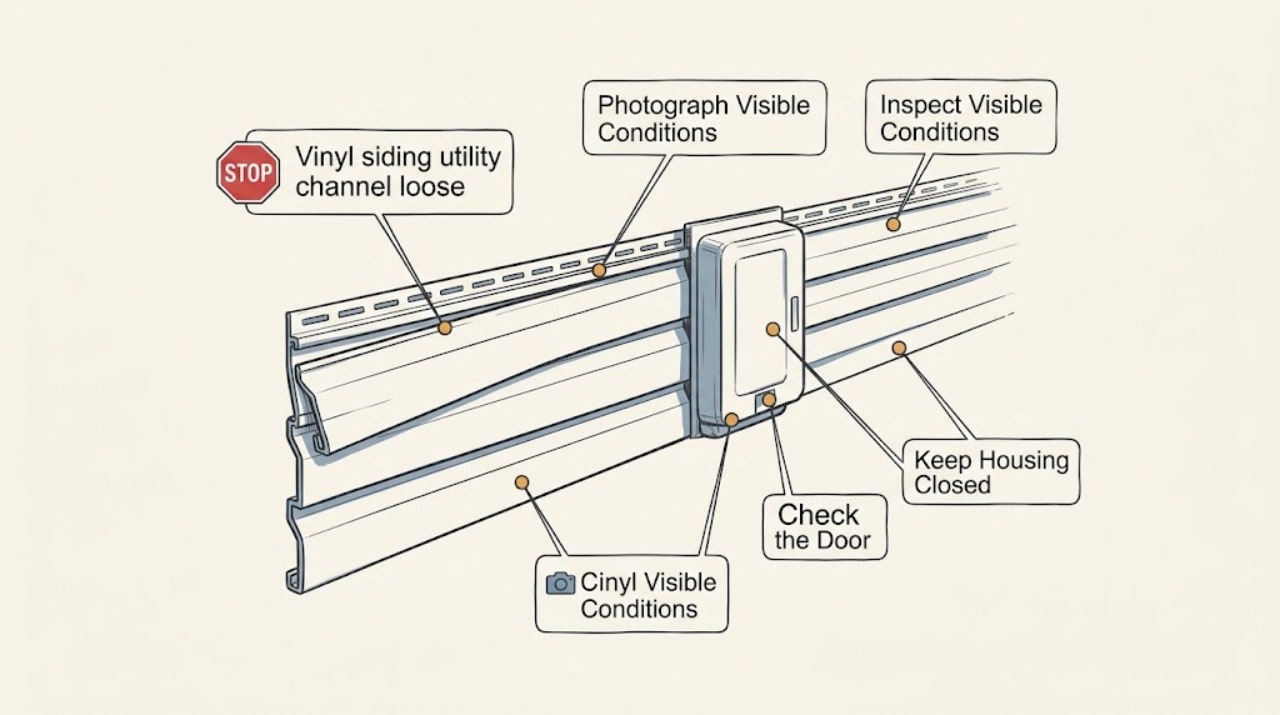
Treat a loose vinyl siding utility channel as a siding-system and water-management issue, not as a reason to drive a fastener tight or force the channel back into place. From stable ground or a safely accessible window, document whether the channel is separating, bowing, cracked, open at a joint, or allowing the cut siding edge to move, and compare it with adjacent trim. Do not climb, use a ladder, pull on the trim, pry the siding, face-nail the channel, drill, cut, or seal over an unknown defect. A channel that is high, storm-damaged, broadly detached, or exposing the wall needs prompt professional siding assessment; a visible gap with water entry, loose material, or exposed sheathing should be escalated urgently.
Before you begin
Safety first
- This guide is limited to safe ground-level and normal finished-interior observation. Do not climb, use a ladder, pull or pry the channel, unlock or remove panels, face-nail, drill, cut, force the siding, seal over an unknown defect, or follow a complete siding installation procedure as a user diagnostic.
Work through in order
Diagnostic checks
Use only checks that match the exact appliance or system and its official guide.
-
Check 1
From stable ground or a safely accessible window, photograph the loose utility channel, the siding edge it receives, nearby J-channel or corner trim, and the wall below without climbing, reaching, touching, or using a ladder.
Expected result: Record the wall elevation and look for a visible gap, bow, open joint, cracked pocket, detached-looking fastener, displaced siding edge, missing trim, or exposed sheathing.
Next step: Keep the clearest photos and mark the exact trim location for a siding professional; do not push the channel flat or cover the opening.
Stop if: Stop if the trim or siding could fall, weather or ground conditions are unsafe, utilities obstruct the view, or a better view would require a ladder, roof access, or contact with the wall.
Why this matters
Why: A localized gap may involve one trim or panel connection, while bowing, repeated separation, or exposed wall layers suggests a broader siding or water-resistive-envelope concern; a ground view cannot confirm attachment or concealed damage.
-
Check 2
Compare the loose channel visually with adjacent utility channels, J-channels, corners, windows, doors, or other terminations from the same safe position without prying, pulling, drilling, or cutting.
Expected result: Note whether the channel is the only abnormal section, whether the siding edge remains seated, whether the problem follows a joint or opening, and whether nearby panels are buckled, rippled, or out of alignment.
Next step: Send comparison photos and the pattern to the service provider and request assessment of the channel, panel edge, fastening, and receiving surface as one system.
Stop if: Stop before touching, unhooking, unlocking, removing panels, or trying to make the channel move.
Why this matters
Why: A difference at one termination can point to a local trim or panel interface, while repeated movement or buckling can indicate installation, substrate, or movement-related problems rather than one loose fastener.
-
Check 3
After ordinary rain or wind has passed, observe the channel and the wall below it from the ground without spraying a hose or applying sealant.
Expected result: Record water streaks, active drips, damp-looking wall finish, staining, an opening behind the trim, or movement that appeared after the weather; do not direct water into the joint.
Next step: Provide the weather timing and images to a siding or building-envelope professional and ask that the water path be addressed before cosmetic sealing or trim replacement.
Stop if: Stop for active water, wind, lightning, slippery ground, falling material, water near electrical equipment, or any need to climb or handle the trim.
Why this matters
Why: A repeatable weather-related pattern raises concern about drainage, flashing, a receiving-channel detail, or the wall layer behind the siding. No visible water during one check does not rule out intermittent entry.
-
Check 4
From finished interior areas at normal floor level, look for staining, dampness, peeling finish, drafts, or musty odor on the wall nearest the loose channel without opening the wall or removing interior trim.
Expected result: Record the room, location, timing, and whether the sign follows rain or wind; keep clear of sagging surfaces and do not touch suspected damp or mold-like material.
Next step: Photograph the interior symptom and tell the siding professional whether it coincides with exterior movement; request coordinated moisture or wall-envelope evaluation if advised.
Stop if: Stop and keep occupants clear for a sagging or bulging wall or ceiling, active water, falling material, extensive mold-like growth, or moisture near electrical fixtures.
Why this matters
Why: Interior symptoms can indicate water or air leakage behind the siding, but they cannot identify whether the utility channel, flashing, panel, or concealed wall layer is responsible.
-
Check 5
Review safe records and photos for the affected wall, including the last siding or window work, storms, painting, caulking, and any earlier movement, without disturbing the channel or panel.
Expected result: Note whether the issue began after an impact, storm, window or door change, exterior repair, or repeated seasonal movement, and distinguish one section from a whole elevation.
Next step: Provide the timeline, affected-wall map, and photos when requesting service; leave the channel and siding in their observed position until evaluated.
Stop if: Stop if collecting information would require entering an unsafe height, opening the wall, removing trim, or approaching unstable material or overhead utilities.
Why this matters
Why: Timing and scope help a professional prioritize trim, panel, flashing, substrate, and water-entry checks, but they do not prove that one recent event caused all of the damage.
Use your observations
Decision map
Find the observation that best matches what you see, then follow the next safe action.
-
PATH 01Safety boundary
What you see
The utility channel is visibly loose or separated but there is no active water, falling material, exposed sheathing, or apparent instability.
Do this next
Arrange a professional siding assessment to distinguish a trim attachment, panel-edge, substrate, or movement problem; document it and leave it undisturbed in the meantime.
Why this path and its safety boundary
Safety stop: Do not drive a fastener tight, face-nail the channel, pull the panel, pry the receiver, or seal the joint as a first test.
-
PATH 02Safety boundary
What you see
Water streaks, damp wall finish, active dripping, storm-related movement, or an opening behind the channel is visible.
Do this next
Request prompt siding or building-envelope service to trace and control the water path before selecting trim, sealant, or panel repair.
Why this path and its safety boundary
Safety stop: Do not spray a hose, caulk over the evidence, remove panels, or continue inspection in unsafe weather.
-
PATH 03Safety boundary
What you see
The channel or siding is high, broadly detached, hanging, cracked, displaced across several courses, or inaccessible from a safe ground view.
Do this next
Keep people clear and arrange professional siding repair using appropriate access and fall protection; provide ground-level photos and storm timing.
Why this path and its safety boundary
Safety stop: Do not use a ladder, climb, reach from a window, pull the trim, or attempt a complete installation or replacement procedure.
-
PATH 04Safety boundary
What you see
The channel appears stable but the adjacent panel is buckled, the receiving pocket is distorted, the wall is uneven, or interior dampness is present.
Do this next
Treat the condition as a siding-and-wall-envelope assessment rather than a single loose-channel fix and request professional evaluation of the panel, substrate, flashing, and moisture path.
Why this path and its safety boundary
Safety stop: Do not force the panel into the channel, block movement, open the wall, or choose a generic trim based on appearance alone.
Helpful context
Understand the symptom
Utility trim or a utility channel acts as a receiver for a cut edge of vinyl siding, often where the panel's top lock has been removed or where siding terminates at an opening. A loose-looking channel may reflect a detached fastener, movement at a joint, a damaged receiving pocket, an uneven or deteriorated substrate, restricted panel movement, or water damage behind the trim. The face of the channel alone cannot identify which condition is present.
Vinyl siding and its trim must accommodate normal movement while still directing water away from the wall. A tight fastener or improvised seal can restrict movement, distort the panel, block drainage, or hide an opening. The Vinyl Siding Institute describes utility trim as a receiver for the cut siding edge and emphasizes product-specific installation details; a professional should determine whether the trim, panel edge, fasteners, flashing, or wall behind it needs attention.
Keep this inspection visual and ground-based. OSHA identifies exterior finishing, including siding and gutters, as work that can expose workers to fall hazards. If the utility channel cannot be assessed without height, panel removal, or contact with a loose section, stop with the evidence available and arrange siding or building-envelope service.
Only after diagnosis
Potential parts
- vinyl-siding-repair-kit
Consider this category only after a siding professional confirms that the channel or receiving trim is the failed component and that a compatible repair is appropriate for the documented panel profile.
Confirm the siding profile, cut-edge geometry, color, trim type, and manufacturer guidance; a generic kit may not engage the existing panel or channel. - exterior-caulk
Consider sealant only when a professional identifies a specific exterior joint where it is appropriate; it is not a substitute for detached trim, an open receiving pocket, restricted movement, or concealed water damage.
Confirm the sealant and joint with the siding or building-envelope professional and the applicable product guidance; do not seal drainage paths or moving interfaces indiscriminately.
When checks do not resolve it
Need a professional?
Arrange prompt siding or building-envelope service for a loose vinyl utility channel, especially when the channel is high, storm-related, broadly detached, cracked, or accompanied by panel buckling or interior dampness. Escalate urgently for active water, exposed sheathing, hanging material, unstable siding, a sagging wall or ceiling, or moisture near electrical equipment.
Safety scope: This guide is limited to safe ground-level and normal finished-interior observation. Do not climb, use a ladder, pull or pry the channel, unlock or remove panels, face-nail, drill, cut, force the siding, seal over an unknown defect, or follow a complete siding installation procedure as a user diagnostic.
Common questions
FAQ
What does a vinyl siding utility channel do?
It acts as a receiving trim for a cut siding edge, including locations where the panel's top lock has been removed. The exact profile and attachment depend on the siding system, so a loose-looking channel should be assessed with the panel and wall behind it.
Should I nail the loose utility channel tight?
No. Driving a fastener tight or face-nailing can restrict vinyl movement, distort the panel, or hide a damaged receiving pocket or wall layer. Photograph the condition from a safe position and arrange professional assessment.
Can I caulk around the loose channel?
Do not caulk it as a first test. Sealant may hide the water path or interfere with drainage and movement; a siding professional should identify the correct joint and repair scope first.
When is a loose utility channel urgent?
Escalate promptly when the channel is high, storm-damaged, broadly detached, cracked, or accompanied by buckling, active water, exposed sheathing, hanging material, interior dampness, or an unstable wall. Keep people clear and do not climb or handle it.
Read the exact guide
Official sources
- Vinyl Siding Installation ManualPacific Northwest National Laboratory, Building America Solution Center · The U.S. Department of Energy-supported Building America Solution Center identifies the Vinyl Siding Institute manual as the relevant installation publication while cautioning that it is educational and not formal training or certification.
- Vinyl Siding Installation ManualVinyl Siding Institute · The Vinyl Siding Institute describes utility trim as a receiver for cut siding edges, notes that utility trim is used when the top lock is removed, and emphasizes manufacturer-specific details and movement clearances.
- Fall Protection in Residential ConstructionOccupational Safety and Health Administration · OSHA identifies exterior finishing activities such as siding and gutters as work that can pose fall hazards and describes the need for appropriate protection for elevated residential construction work.
Community feedback
Share a repair observation
Share a plain-text repair observation. Accepted observations are published automatically; this page may take a moment to update.