
On this page
Start here
Quick answer
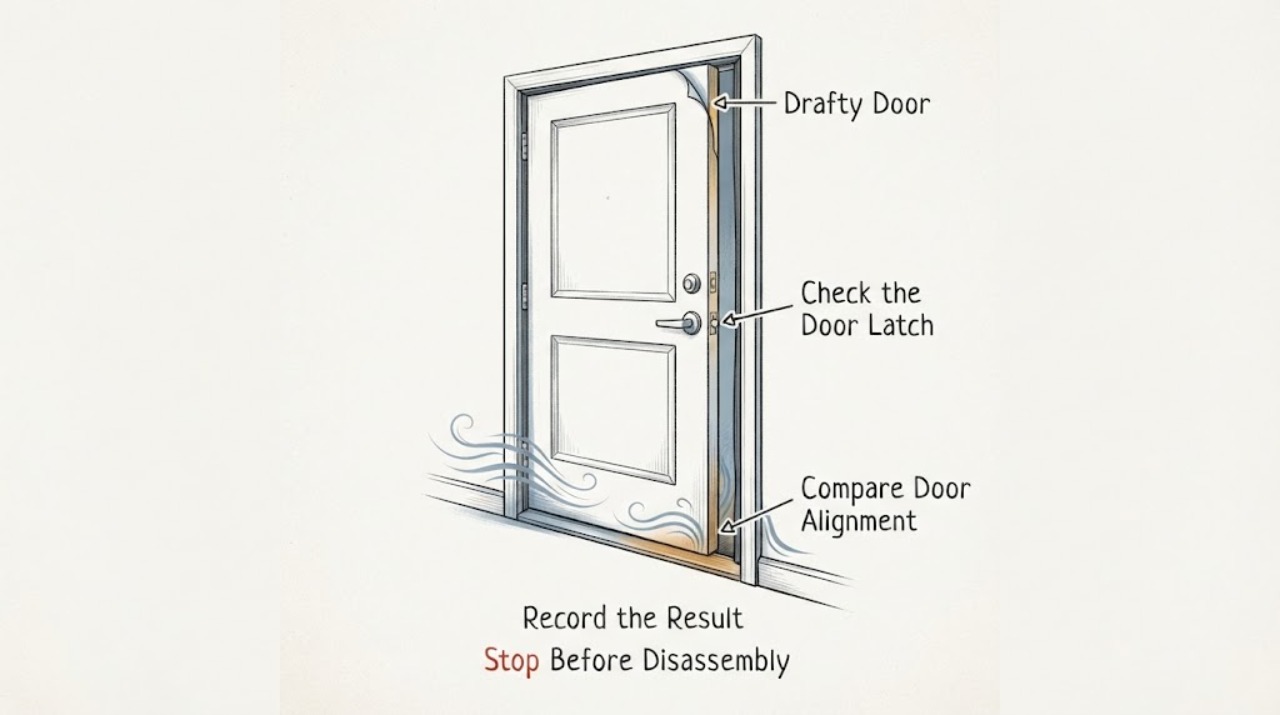
Close and latch the door, then locate whether the draft crosses the perimeter seal, the bottom sweep or threshold, or the gap behind the frame. Weatherstripping is for the moving door-to-jamb joint; caulk or backer rod is for stationary gaps around the frame. Correct loose hinges or alignment before fitting a new seal, measure each side and the top, and make sure the finished door still closes without excessive force. Stop and use a qualified professional for complex trim, suspected lead paint, structural movement, or a leak that remains after the visible seal is corrected.
Work through in order
Diagnostic checks
Use only checks that match the exact appliance or system and its official guide.
-
Check 1
Close and latch the door on a calm day, then inspect the full perimeter for visible daylight, a loose seal, cracked sealant, dust tracks, or a place where the door does not meet its stops.
Expected result: The gap is at the hinge or latch side, along the top, at the bottom, or behind the trim rather than at the moving edge.
Next step: Mark the leaking section and continue with the matching seal or alignment check instead of replacing every component at once.
Why this matters
Why: The leak location identifies whether to correct door fit, replace weatherstripping, address the sweep, or air-seal a stationary frame gap.
-
Check 2
Check the door's accessible hinges, knob, strike area, and stops for looseness or misalignment. Tighten only loose visible fasteners if the door remains safely supported, and confirm the door closes smoothly before changing the seal.
Expected result: The door now sits snugly against its stops, or it still rubs, binds, sits out of square, or needs excessive force to latch.
Next step: If the door remains out of square or the frame moves, stop and arrange a qualified door or building professional. If fit is sound, measure and replace the worn weatherstrip.
Why this matters
Why: DOE's exterior-door job aid places door adjustments before weatherstripping; a seal cannot reliably correct a structurally misfitted door.
-
Check 3
Inspect the perimeter weatherstripping at the hinge side, latch side, and head of the door. Compare the seal's compression with the jamb and look for missing, torn, flattened, buckled, or incorrectly fitted sections.
Expected result: The seal is visibly damaged or leaves an even gap when the door is closed, or it contacts the jamb continuously.
Next step: Measure each side and the top, select a compatible replacement profile for the door, and install it so the door still operates normally.
Why this matters
Why: A damaged or poorly fitted moving seal is the direct weatherstripping branch; an intact continuous seal shifts attention to the threshold or frame.
-
Check 4
Check the bottom edge, sweep, and threshold for daylight, a worn flexible seal, a threshold that no longer meets the door, or an obstruction that prevents the door from closing fully.
Expected result: The draft is concentrated at the floor and the sweep is missing, damaged, or not contacting the threshold, or the bottom is already sealed.
Next step: Replace or adjust only the bottom sweep or threshold component specified for the door, then verify smooth closure and a continuous contact line.
Why this matters
Why: A door sweep addresses the moving bottom edge; a threshold or floor gap may require a different adjustment or stationary seal.
-
Check 5
If the leak appears between the jamb and the wall or behind removable trim, identify it as a stationary rough-opening gap. For an accessible, uncomplicated area, use a sealant approach intended for doors and windows; do not force backer rod or foam against the frame.
Expected result: The gap is wider or hidden behind trim, the frame bends when material is inserted, or the home has complex trim or old painted surfaces.
Next step: Use a qualified professional for difficult trim, moving frames, suspected lead paint, or any gap that cannot be sealed without disturbing the door's operation.
Why this matters
Why: Stationary framing gaps need caulk, backer rod, or suitable low-expansion foam rather than perimeter weatherstripping; force or complex trim can damage the fit.
-
Check 6
After fitting a new weatherstrip or sweep, close and latch the door several times, checking for continuous contact, a working latch, and smooth operation without excessive force.
Expected result: The draft is gone and the door operates normally, or the seal buckles, leaves a gap, prevents latching, or creates a new binding point.
Next step: Adjust or refit the seal according to its manufacturer's instructions. If proper contact and normal operation cannot coexist, stop and arrange professional adjustment.
Why this matters
Why: DOE's desired outcome is reduced air infiltration while maintaining or improving door operation; a seal that impedes movement is not correctly fitted.
-
Check 7
Recheck the marked leak points on a windy day or with a suitable non-flame smoke check, and consider a professional blower-door assessment if the draft remains difficult to locate.
Expected result: Air still moves around the door after the visible seal is corrected, or multiple doors and windows show similar leakage.
Next step: Arrange a qualified home-energy or door professional to locate and prioritize the remaining leaks; do not keep adding layers of weatherstrip that make the door bind.
Why this matters
Why: The remaining leak may be behind the trim or part of a larger building-envelope problem rather than one replaceable strip.
Use your observations
Decision map
Find the observation that best matches what you see, then follow the next safe action.
-
PATH 01Next step
What you see
The draft follows a visible gap where the closed door meets the jamb.
Do this next
Correct loose hardware or alignment first, then replace the perimeter weatherstripping if it remains worn or discontinuous.
Why this path and its safety boundary
Why it matters: The moving door joint is the correct location for weatherstripping.
-
PATH 02Next step
What you see
The draft is concentrated beneath the door.
Do this next
Inspect the sweep and threshold and fit a compatible bottom seal without preventing the door from closing.
Why this path and its safety boundary
Why it matters: The bottom edge has a different contact geometry from the side and head weatherstrip.
-
PATH 03Next step
What you see
The leak is between the jamb and wall framing or behind the trim.
Do this next
Use a suitable stationary-gap sealing method or hire a professional for hidden, large, or complex openings.
Why this path and its safety boundary
Why it matters: Caulk, backer rod, or low-expansion foam is used for stationary framing gaps; weatherstrip alone will not close the rough opening.
-
PATH 04Next step
What you see
The new seal blocks the latch, causes binding, or requires excessive closing force.
Do this next
Stop and refit or adjust the door; do not leave a seal installed that prevents normal operation.
Why this path and its safety boundary
Why it matters: A tight air seal must not compromise safe egress, latching, or door movement.
-
PATH 05Next step
What you see
A draft remains after visible seals are corrected or affects many openings.
Do this next
Arrange a home-energy assessment or qualified door professional to locate hidden or whole-house leakage.
Why this path and its safety boundary
Why it matters: The remaining problem may be a rough-opening or broader envelope issue, not a single weatherstrip.
Helpful context
Understand the symptom
Find the path before buying a seal
A draft at a closed door can enter through worn perimeter weatherstripping, a bottom sweep or threshold, a door that no longer sits squarely in its stops, or a stationary gap between the jamb and wall framing. The fix depends on that location. Weatherstripping cannot compensate for a door that is misaligned, and caulk should not be used where the door needs to move.
The useful dividing line
If daylight or moving air is visible at the door-to-jamb contact, inspect the weatherstrip and door fit. If the draft is concentrated along the floor, inspect the sweep and threshold. If the trim or wall-side joint is the source, the repair becomes air sealing around a stationary rough opening and may be better handled by a home-performance professional.
Keep the door operable
Any new seal must compress enough to block air without preventing the latch or forcing the door. Do not pack foam tightly enough to bow the frame, cover drainage paths, or disturb painted trim without checking for lead-paint risk. Use a professional when the frame is damaged, the door binds, or the leak suggests movement in the wall.
Safety boundary
Stop conditions
- Stop if the door cannot latch, binds, will not open normally, or needs excessive force after a seal is installed.
- Stop and use a qualified professional when disturbing painted trim may create lead-paint dust, the frame is structurally moving or damaged, or the gap is hidden and extensive.
- Do not use expanding material that can bow the jamb, cover drainage paths, or interfere with door operation.
Only after diagnosis
Potential parts
- perimeter door weatherstripping
Consider this category only when the draft is at the moving door-to-jamb joint and the existing seal is missing, torn, flattened, or discontinuous.
Measure the door and jamb and match the profile and attachment method; confirm the replacement will preserve normal closing and latching. - door bottom sweep
Consider this category only when the draft is concentrated beneath the door and the sweep no longer contacts the threshold.
Confirm door thickness, threshold geometry, and clearance before ordering; do not use a sweep that drags or blocks the door. - door and window caulk or backer rod
Consider this category only for a stationary gap between the jamb and framing after the leak is located; it is not a substitute for a moving-joint weatherstrip.
Use a product intended for doors and windows and follow local safety and paint guidance; professional installation may be preferable for hidden or complex gaps.
When checks do not resolve it
Need a professional?
Use a qualified door or home-performance professional when the door is out of square, the frame moves, a draft remains behind complex trim, painted surfaces may contain lead, several openings leak, or sealing cannot be completed without affecting normal operation.
Have this ready
- Door location, draft location, visible daylight or smoke result, door and frame condition, seal type and dimensions, and whether the door still latches normally.
Common questions
FAQ
Where should weatherstripping go on a drafty door?
It belongs at the moving door-to-jamb joint, along the sides and head where the closed door meets the stops. A draft beneath the door usually needs a sweep or threshold check instead.
Should I use caulk or weatherstripping around a door?
Use weatherstripping where the door moves and caulk, backer rod, or suitable low-expansion foam for stationary gaps between the jamb and framing. Do not use a moving-joint seal to fill a hidden rough-opening gap.
How do I know whether the new door seal is too tight?
Close and latch the door repeatedly. The seal should block the draft while the door still closes, latches, and opens normally without excessive force. If it binds, refit it or call a professional.
Read the exact guide
Official sources
- Install Weatherstripping on an Exterior DoorU.S. Department of Energy · Exterior-door weatherstripping and sweep installation, measurement, fit, and operation guidance
- Sealing Behind Window & Door Trim ProjectENERGY STAR · Door and window draft signs, leak checks, trim air sealing, materials, and professional boundary guidance
- Energy-Efficient Home Improvement Credit Insulation and Air-Sealing EssentialsU.S. Department of Energy · Air sealing distinction between caulk, weatherstripping, and door or window framing gaps
- Glossary of Common TermsENERGY STAR · Weatherstripping definition and blower-door diagnostic context
- Guide to Air SealingU.S. Department of Energy · Door-frame air-leak locations, professional assessment, ventilation, and accessible sealing guidance
Community feedback
Share a repair observation
Share a plain-text repair observation. Accepted observations are published automatically; this page may take a moment to update.