
On this page
Start here
Quick answer
Do not force a door that will not close. From a safe standing position, close it only until the first contact and note whether the top, bottom, hinge side, latch side, frame, or weatherstrip is stopping it. Check the accessible seal for a fold, displaced section, paint, debris, or damage, then compare the reveal between the panel and frame. A localized seal obstruction may be a model-approved low-risk correction; a door that hits at one end, has an uneven gap, rubs the frame, or has a visibly twisted or moving frame needs the exact manufacturer instructions or qualified door service. Once the panel meets the frame evenly, check the latch or strike without forcing the handle. Stop for cracked glass, an unstable frame, a door that can fall or swing unexpectedly, damaged hinges, or any repair that requires removing the panel or changing structural fixings.
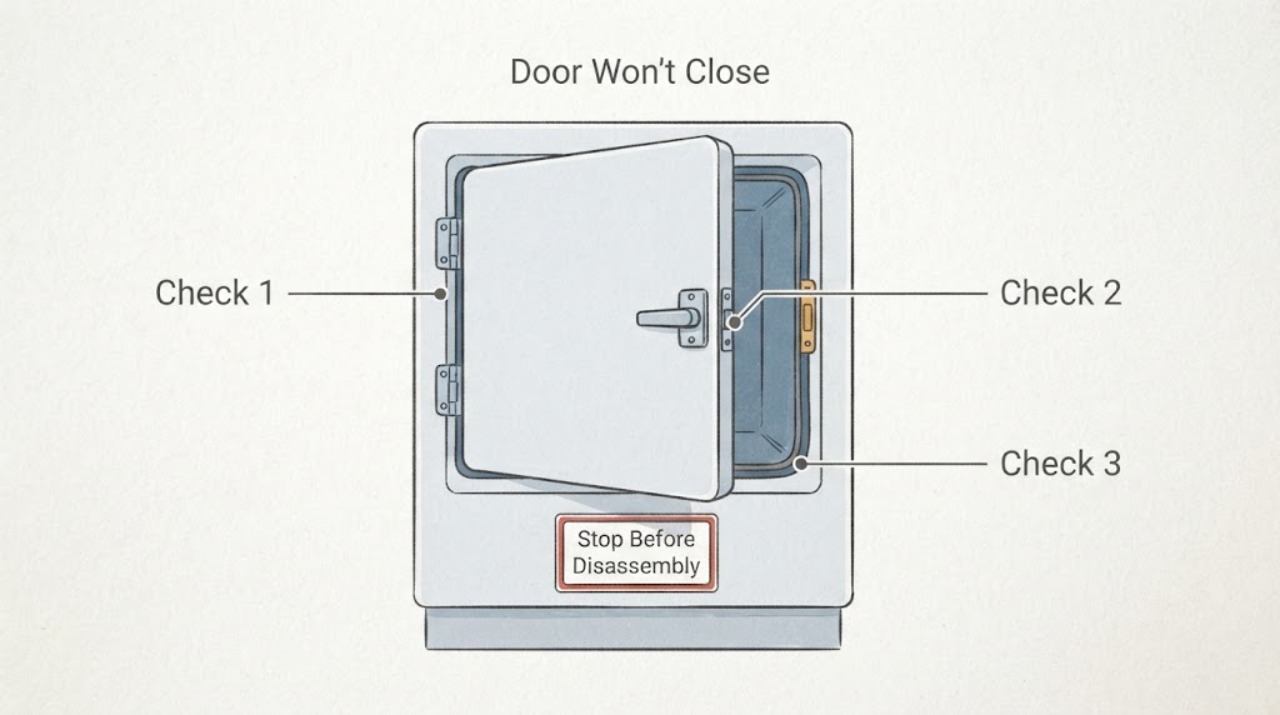
Work through in order
Diagnostic checks
Use only checks that match the exact appliance or system and its official guide.
-
Check 1
Identify the door type and reproduce the symptom only from a safe standing position: move the door slowly toward closed until the first resistance, keeping hands clear of the closing edge and without leaning on or forcing the panel.
Expected result: Record whether the door stops at the top, bottom, hinge side, latch side, sill, or seal; whether it reaches the frame but does not latch; and whether it is hinged, sliding, storm, patio, or another design.
Next step: Photograph or note the contact point and exact door details, then continue to the accessible frame-and-seal inspection. Do not proceed if the panel is unstable, unusually heavy, or moves unexpectedly.
Stop if: Stop immediately for instability, a falling or uncontrolled panel, cracked glass, exposed sharp material, or a need to hold the panel in an unsafe position.
Why this matters
Why: A first contact at one edge points toward clearance or alignment, while a door that meets the frame but misses the latch follows a hardware path. The door type determines which adjustments are safe and which manual applies.
-
Check 2
Inspect only the accessible frame edge, sill, weatherstrip, and seal surfaces with the door supported normally; look for a folded or displaced seal, paint, dirt, a loose section, a protruding fastener, or visible frame damage.
Expected result: The seal is clear and even; the weatherstrip is folded, painted, torn, missing, or out of its channel; an object or fastener projects into the closing path; or the frame/sill is cracked, bowed, twisted, or moving.
Next step: Remove only loose surface debris that can be lifted without tools and without disturbing the seal. For displaced or damaged sealing, record the profile and model and follow the exact replacement guidance; do not cut, glue, drill, or force the seal into place.
Stop if: Stop for cracked or unstable framing, exposed fasteners, damaged glass, water intrusion into concealed areas, or any seal/frame work that requires removing the panel.
Why this matters
Why: A direct obstruction can prevent closure without a hinge or latch fault. Damage, a missing seal, or a distorted frame is not proof that a generic seal or shim will fit and may require the exact manual or qualified repair.
-
Check 3
With the door open and then nearly closed, compare the visible gap or reveal between the panel and frame from top to bottom without removing trim or changing screws.
Expected result: The gap is broadly even; the top or bottom gap changes sharply; the panel rubs one jamb or the sill; the door is visibly sagging; or a sliding panel is not sitting evenly in its track.
Next step: If the exact manual provides a homeowner adjustment for this door, follow only that procedure and make one small documented change. Otherwise leave the geometry unchanged and arrange qualified door service; do not add random shims or overtighten frame fasteners.
Stop if: Stop if the frame is twisted, the sill is uneven or moving, hinges are bent, the panel must be lifted, or the adjustment would alter structural attachment.
Why this matters
Why: An uneven reveal supports an alignment, hinge, roller, sill, jamb, or frame-square issue rather than a seal-only issue. Manufacturer guidance describes realignment or reshim work for uneven contact, but the safe procedure is product-specific.
-
Check 4
For a hinged door, observe whether the hinges or their visible leaves move normally; for a sliding patio door, check only the manufacturer-provided roller-adjustment access and track area from a safe position. Do not remove the panel or hinge pins.
Expected result: A hinge appears loose, bent, or binding; a sliding panel sits low or rubs the frame; the track contains visible debris; or no hinge/roller symptom is visible.
Next step: Use only the exact model's documented adjustment, if it is explicitly intended for the homeowner, and recheck the reveal after one change. If the hardware is damaged, inaccessible, or the panel must be removed, stop and call a professional.
Stop if: Do not pull hinge pins, remove rollers, lift the panel, or continue with damaged or spring-loaded hardware.
Why this matters
Why: Hinge sag, binding, or roller height can change the frame reveal. Andersen describes model-specific horizontal/vertical hinge adjustment and one-notch roller adjustment for certain patio doors, while other doors use different hardware.
-
Check 5
After the panel meets the frame evenly, close it gently and observe the latch, strike, receiver, or locking edge without forcing the handle or key.
Expected result: The latch aligns and engages smoothly; the latch misses high or low; the panel reaches the frame but the strike or receiver is offset; or the lock requires force.
Next step: If the exact manual identifies a safe strike adjustment, follow it once and retest gently. If the latch still misses, the lock requires force, or the door cannot be secured, leave it out of service and arrange qualified repair.
Stop if: Stop for a lock that will not secure, a broken latch, forced movement, a door that can swing freely, or any need to dismantle the locking hardware.
Why this matters
Why: A latch-only problem can be separate from the frame and seal. An offset adjustable strike or receiver may need model-specific alignment, but forcing a lock can damage the hardware or leave the door unsecured.
-
Check 6
If one exact-manual, low-risk correction was permitted, cycle the door gently a few times and recheck the seal contact, frame reveal, and latch with the same safe method.
Expected result: The door closes and latches evenly with no rubbing or seal bunching; it improves briefly and then binds again; or it remains unable to close.
Next step: Use the door only if it closes, latches, and seals normally and the manual permits continued use. For recurrence, visible damage, leakage, or any unresolved closure problem, provide the professional with the contact point, photos, model details, and the single change attempted.
Stop if: Stop use and arrange qualified service if the problem returns, the door cannot be secured, the seal remains damaged, or any hazard appears.
Why this matters
Why: A repeatable normal cycle after a documented correction supports a temporary resolution, but recurrence indicates unresolved movement, fit, frame, seal, or hardware trouble. It does not justify repeated adjustment or force.
Use your observations
Decision map
Find the observation that best matches what you see, then follow the next safe action.
-
PATH 01Safety boundary
What you see
The door stops on a loose, folded, displaced, painted, or visibly damaged weatherstrip or seal, while the frame and panel remain stable.
Do this next
Remove only loose surface debris, then follow the exact manual for reseating or replacement. If it cannot be restored without cutting, gluing, removing the panel, or changing the frame, call a professional.
Why this path and its safety boundary
Why it matters: The seal may be interfering directly with closure, but the correct profile and attachment are model-specific.
Safety stop: Do not force, trim, permanently bond, or substitute an unverified seal.
-
PATH 02Safety boundary
What you see
The panel hits the top or bottom first, has an uneven reveal, rubs the jamb, or meets the weatherstrip unevenly.
Do this next
Use only a documented model-specific adjustment if it is explicitly homeowner-safe; otherwise arrange qualified alignment or frame service.
Why this path and its safety boundary
Why it matters: This supports a hinge, roller, jamb, sill, or frame-alignment path rather than a simple latch adjustment.
Safety stop: Do not shim, drill, remove the panel, or alter structural frame attachment as a generic fix.
-
PATH 03Safety boundary
What you see
The door reaches the frame evenly but the latch or strike misses or requires force.
Do this next
Follow the exact hardware instructions for one safe strike adjustment if available. If the lock still requires force or cannot secure the door, call a professional.
Why this path and its safety boundary
Why it matters: The closure path is mostly clear and the remaining fault is likely at the strike, receiver, latch, or lock alignment.
Safety stop: Do not force the handle, key, or locking edge or dismantle the lock.
-
PATH 04Safety boundary
What you see
The frame is visibly bowed, twisted, cracked, moving, or out of square, or the sill is uneven or unstable.
Do this next
Leave the door in the safest position that does not obstruct an exit and arrange qualified door or building service. Document the frame and contact points without altering them.
Why this path and its safety boundary
Why it matters: The problem exceeds a simple seal inspection and may affect the opening, attachment, weather resistance, or door stability.
Safety stop: Stop all adjustment and do not drill, cut, pry, or add structural shims without a qualified assessment.
-
PATH 05Safety boundary
What you see
The door closes after one documented manual-approved correction but the symptom returns during normal use.
Do this next
Stop repeating adjustments and call a professional with the model details, photos, contact point, and the correction attempted.
Why this path and its safety boundary
Why it matters: The change did not establish a durable repair; movement, fit, seal compression, or hardware condition remains unresolved.
Safety stop: Do not keep forcing or resetting the same hardware.
-
PATH 06Safety boundary
What you see
The panel is unstable, unexpectedly moves, has damaged glass or sharp material, or cannot be safely supported.
Do this next
Keep people clear, avoid operating the door, and seek qualified urgent help appropriate to the hazard.
Why this path and its safety boundary
Why it matters: Safe user troubleshooting has ended and continued operation could cause injury or property damage.
Safety stop: Stop immediately; do not remove the panel or attempt a hardware repair.
Helpful context
Understand the symptom
What the contact point tells you
A door that stops at one corner, rubs the jamb, or meets the seal unevenly has a different decision path from a door that reaches the frame but will not latch. Manufacturer troubleshooting guidance lists uneven weatherstrip contact, an out-of-square frame, an adjustable strike, hinge position, and damaged weatherstrip as separate possibilities. Record the contact point before changing anything.
Keep the first checks low risk
Work from the accessible side with the door supported by its normal hinges or track. Keep fingers clear of the closing edge and do not force a panel, lift a heavy door, remove a door panel, drill the frame, or alter concealed fixings. Exact hinge, roller, weatherstrip, and frame procedures vary by door type and model.
A temporary improvement is not proof of a repair
After one model-approved adjustment, test the door gently through a small number of normal open-and-close cycles. If the frame, seal, hinge, roller, or latch symptom returns, stop repeating adjustments and arrange qualified diagnosis. A damaged weatherstrip or seal may be replaceable, but the exact profile and fit must be confirmed for the door.
Safety boundary
Stop conditions
- Stop for an unstable or uncontrolled panel, cracked glass, sharp damage, a moving or cracked frame, or a door that cannot be safely supported.
- Do not force the panel, handle, key, latch, or lock; do not pull hinge pins, remove rollers or panels, drill, pry, cut, glue, or change structural frame fixings as a generic repair.
- Stop using the door if it cannot close and secure, if the weather seal is badly damaged, or if the problem returns after one documented correction.
Only after diagnosis
Potential parts
- door weatherstrip
Consider only if the exact manual or qualified diagnosis identifies a folded, torn, missing, or permanently damaged weatherstrip as the reason for uneven closure or sealing.
Confirm the exact door model, frame channel, profile, length, handing, and manufacturer fit information before selection. - door seal pad
Consider only when the product instructions identify a missing or damaged corner seal pad and the frame itself is sound.
Confirm the exact door system and seal-pad position; do not substitute a generic pad for a structural or frame repair.
When checks do not resolve it
Need a professional?
Call when the cause is not a simple accessible obstruction, when alignment or hardware is damaged, when the frame is distorted, or when the door remains unresolved after one documented model-approved correction.
Have this ready
- Door type, brand/model or site details if visible
- Where the panel first contacts the frame or seal
- Photos of the reveal, weatherstrip, frame, sill, hinge/roller area, and latch
- Whether the symptom is constant and any recent installation, weather, or impact event
- The one low-risk check or manual-approved correction attempted
Common questions
FAQ
Why does my door hit the frame at the top or bottom?
An uneven reveal or contact at only one end can indicate a sagging panel, hinge or roller position, a twisted jamb, an uneven sill, or an out-of-square frame. Record the contact point and follow the exact door instructions; do not add random shims or force the panel.
Can a weatherstrip stop a door from closing?
Yes. A folded, displaced, painted, torn, or incorrectly fitted weatherstrip can interfere with closure or create uneven contact. Inspect it only from an accessible, safe position and confirm the exact replacement or reseating method for the door.
What if the door reaches the frame but will not latch?
Treat that as a latch, strike, receiver, or alignment check rather than forcing the handle. If the exact manual gives a safe strike adjustment, make one documented adjustment; if the lock still needs force or cannot secure the door, call a professional.
Should I remove the door to fix a frame or seal problem?
No. Removing a panel, pulling hinge pins, lifting a heavy patio panel, or changing structural frame attachment can create an instability or alignment hazard. Arrange qualified help when the seal or frame cannot be corrected through the exact documented low-risk procedure.
When should I stop troubleshooting a door that will not close?
Stop for an unstable panel, cracked glass, a moving or cracked frame, damaged hinges or rollers, a lock that cannot secure the opening, or any need to force, dismantle, drill, cut, or remove the panel. A recurring problem after one documented correction also needs qualified diagnosis.
Read the exact guide
Official sources
- Trouble Shooting GuidePella Corporation · Manufacturer-specific storm-door examples; do not apply hardware steps to another door without its instructions.
- Troubleshooting GuideTherma-Tru · Manufacturer examples for Therma-Tru doors; use the exact product manual for other door systems.
- Patio Door AdjustmentsAndersen Windows & Doors · Use only when the door design and model match the documented Andersen adjustment path.
Community feedback
Share a repair observation
Share a plain-text repair observation. Accepted observations are published automatically; this page may take a moment to update.