
On this page
Start here
Quick answer
When a door will not close, first find where the panel contacts the frame, sill, weatherstrip, or hardware. A dropped or warped frame, loose or binding hinge, displaced closer, bottom sweep, or latch-side mounting frame can stop closure. Open and close the door gently, inspect the gap and friction point, and check whether it closes when the latch or strike is not involved. Make only the external adjustment described for the exact door model. Do not force a heavy panel, remove the frame, cut the door, or alter a structural opening; arrange qualified door service if the frame is twisted, the hinges are damaged, the glass is loose, or the door cannot be secured.
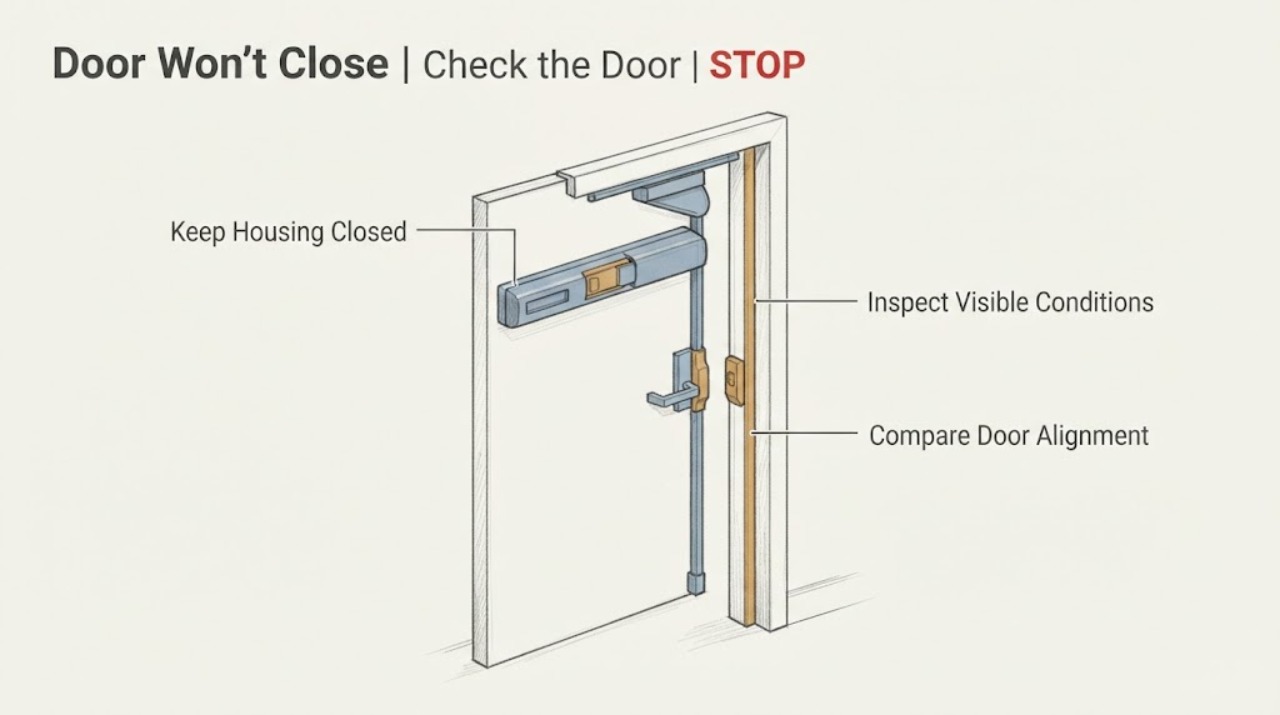
Work through in order
Diagnostic checks
Use only checks that match the exact appliance or system and its official guide.
-
Check 1
Open and close the door gently several times while watching the panel-to-frame gap and noting the first place the panel rubs, catches, or stops.
Expected result: The panel rubs the hinge side, latch side, top, or sill; the gap is uneven; or the panel moves freely until it reaches the latch or closer.
Next step: Do not force the panel past the contact point. Photograph the location and continue with the frame and hinge checks that match the observed side.
Why this matters
Why: A rubbing point or uneven gap indicates a frame, hinge, panel, or installation alignment problem. Free movement until the latch or closer is reached shifts the next check to that hardware rather than the whole frame.
-
Check 2
Check the frame visually for plumb, level, and square: compare the gap around the panel and look for a twisted, bowed, or shifted jamb without removing trim or shims.
Expected result: The gap changes from top to bottom or the frame is visibly out of square, plumb, or twisted; alternatively, the frame and gap appear even.
Next step: Leave structural correction to a qualified installer. If the frame looks sound, continue to the hinge and hardware checks; do not hammer the frame or cut the panel to make it fit.
Why this matters
Why: A distorted or out-of-square frame can prevent the door from closing even when the hinges and latch are intact. An even frame makes a local hinge, closer, sweep, or latch obstruction more likely.
-
Check 3
Inspect the visible hinge side and fasteners for looseness, binding, bent mounting parts, or a panel that has dropped; support the panel and keep fingers away from hinge pinch points.
Expected result: A hinge or fastener is loose or bent, the panel has dropped toward the sill, or the hinges move without visible damage.
Next step: Tighten only an obviously loose accessible fastener if the exact manual permits it, then retest gently. Use model-specific hinge adjustment instructions for adjustable hardware; arrange service for bent hinges, a dropped heavy panel, or continued rubbing.
Why this matters
Why: A loose, bent, or binding hinge can shift the panel into the frame. A sound-looking hinge with a dropped panel can still need model-specific adjustment, while a damaged mounting part should not be forced back into position.
-
Check 4
With the panel moving freely, check the closer, bottom sweep or expander, and top or latch-side weatherstrip for displacement or overlap that physically blocks the panel from reaching the frame.
Expected result: A closer is out of position, the sweep sits too low or catches the sill, or weatherstrip overlaps or is folded; alternatively, those parts clear the opening.
Next step: Follow the exact product manual for a permitted external repositioning and retest without force. Do not cut the door panel or permanently remove a weather seal; escalate if the part is damaged or the obstruction returns.
Why this matters
Why: These parts can stop a door before the latch engages even when the frame is square. A clear, correctly positioned seal and closer move the diagnosis toward latch or strike contact.
-
Check 5
Close the door slowly with the lock and latch retracted, then compare the latch or strike position and any trim plate contact with the door fully closed.
Expected result: The panel closes with the latch retracted but the latch hits the strike or trim plate; or the panel still will not close before the latch reaches it.
Next step: If the manual permits a small strike or receiver adjustment, make only that model-specific adjustment and retest. If the latch or strike is damaged, misaligned by a warped frame, or still fails, arrange qualified door service.
Why this matters
Why: A latch that misses the strike indicates local hardware alignment. Failure before the latch is involved confirms that the frame, hinge, sweep, closer, or weatherstrip remains the active obstruction.
-
Check 6
After one permitted external adjustment, test the door from both sides for smooth closing, full latch engagement, and a consistent panel-to-frame reveal without pushing or lifting the panel.
Expected result: The door closes and latches normally; it closes only when pushed or lifted; or it remains open, binds, or cannot be secured.
Next step: Stop after the single controlled retest if the fault remains. Keep the door secured by another safe method and arrange qualified service for frame correction, hinge replacement, closer work, or latch repair.
Why this matters
Why: Normal closure confirms that the adjustment addressed the contact point. A need to push or lift the panel suggests continuing alignment or hinge settlement, while an unsecured or binding door requires service rather than repeated adjustment.
Use your observations
Decision map
Find the observation that best matches what you see, then follow the next safe action.
-
PATH 01Next step
What you see
The panel rubs or the gap is uneven before the latch is reached
Do this next
Treat the frame, hinge, panel position, or closer as the active branch; use only model-specific external adjustment and escalate structural or heavy-panel work.
-
PATH 02Next step
What you see
The door reaches the frame but the latch misses the strike
Do this next
Check the visible strike or receiver alignment and make only a permitted small adjustment; arrange service if the frame or hardware is damaged.
-
PATH 03Next step
What you see
A sweep, expander, closer, or weatherstrip blocks the panel
Do this next
Reposition only as described by the exact manual; do not cut the panel or remove the weather barrier as a workaround.
-
PATH 04Next step
What you see
The frame is warped, the glass is loose, the panel is heavy or falling, or the door cannot be secured
Do this next
Stop using the door and arrange qualified door, glazing, or building-envelope service.
Helpful context
Understand the symptom
Locate the first contact point
Do not start by trimming the door or moving the strike. Close the panel slowly and identify whether it rubs at the hinge side, latch side, top, sill, sweep, or closer. A consistent gap and free swing with the latch disengaged suggests a hardware or strike issue; a crooked gap or rubbing frame suggests that the door or opening has shifted. The first contact point determines the next check.
When to stop
Keep hands clear of hinge gaps and the panel edge. Stop if the glass is cracked or loose, the frame is visibly bowed, the panel is heavy or falling, or the door cannot be secured. Frame replacement, rough-opening correction, glass removal, and major hinge work are professional jobs.
Safety boundary
Stop conditions
- Stop if the frame is twisted or bowed, the glass is cracked or loose, the panel is heavy or falling, or fingers could enter a hinge pinch point.
- Do not force, lift, trim, drill, or cut the door panel or rough opening to make it close.
- Arrange qualified service if the door cannot be secured, needs repeated adjustment, or remains out of alignment after one permitted external check.
Only after diagnosis
Potential parts
- door hinge or adjustment hardware
Consider hinge hardware only when the panel rubs, has dropped, or a qualified diagnosis finds a damaged or worn hinge after frame alignment is checked.
Confirm the exact door type, handing, hinge design, and manufacturer fit information before selecting hardware. - door closer or bottom expander
Consider this only when the closer or expander visibly prevents closure and the exact product instructions identify it as adjustable or failed.
Closer and expander parts vary by door system; verify the exact model and diagnosed component before replacement. - strike plate or latch receiver
Consider this only when the panel closes freely but the latch consistently misses or cannot enter the strike or receiver.
Confirm lock geometry, handing, frame type, and manufacturer fitment before selecting a strike or receiver.
When checks do not resolve it
Need a professional?
Arrange qualified door service when the frame is warped or out of square, hinges are bent or binding, the panel has dropped, the door cannot latch or be secured, or a permitted external adjustment does not restore smooth closure.
Common questions
FAQ
Why does my door rub the frame and fail to close?
The frame may be out of square, a hinge may have shifted or bound, or the panel may have dropped. Find the first contact point and check alignment before adjusting the latch.
Can I trim the door if it will not close?
Do not trim the panel as a first response. Check the frame, hinges, sweep, closer, and latch path, and arrange qualified service for structural or heavy-panel correction.
When does a door that will not close need a professional?
Arrange service when the frame is warped, the glass or hinges are damaged, the panel has dropped, the door cannot be secured, or one permitted external adjustment does not restore smooth closure.
Read the exact guide
Official sources
- How to Install a Front DoorPella · Manufacturer installation guidance for plumb, square, consistent gaps, smooth opening and closing, and weatherstrip contact
- TROUBLE SHOOTING GUIDEPella · Manufacturer troubleshooting for a door that does not open or close properly and a handle that does not latch
- Operation and Adjustment GuideAndersen Windows · Manufacturer operation guide used for frame alignment decision paths; its detailed hardware applies to the named product family
- Adjust Hinges on 400 Series Frenchwood® Hinged Patio Doors, 1989 to 1991Andersen Windows · Manufacturer guidance for checking rubbing, panel position, hinge adjustment, and square alignment; exact instructions vary by door model
- Adjust Tabs on Andersen® Hinged Inswing and Outswing Patio DoorsAndersen Windows · Manufacturer guidance for visible receiver tabs that affect the door panel’s fit and lock engagement
Community feedback
Share a repair observation
Share a plain-text repair observation. Accepted observations are published automatically; this page may take a moment to update.