
On this page
Start here
Quick answer
A door that will not close is usually being stopped by rubbing or a shifted frame, compressed or displaced weatherstripping, hinge sag, an obstruction at the sill, or a latch that no longer lines up with its receiver. Close it slowly without forcing the handle or lock and note the first contact point: top, bottom, hinge side, lock side, weatherstrip, threshold, or latch. Check only ordinary-access conditions and the exact door manufacturer's instructions. Do not plane, drill, bend, remove hinge-fixing screws, defeat a closer or safety latch, or force a deadbolt. If the door is an exterior, fire-rated, security, multi-point, patio, or storm assembly, the frame is warped, the hinges are loose or damaged, the glass or panel is cracked, the lock will not release, or alignment cannot be restored by the documented adjustment, stop using it as a primary closure and arrange qualified door or window service.
Before you begin
Safety first
- This article supports slow ordinary-access observation and loose-debris clearing only. Do not force the door, remove hinge-fixing screws, detach the panel, defeat lock or safety hardware, or improvise a structural, glass, spring, closer, or frame repair.
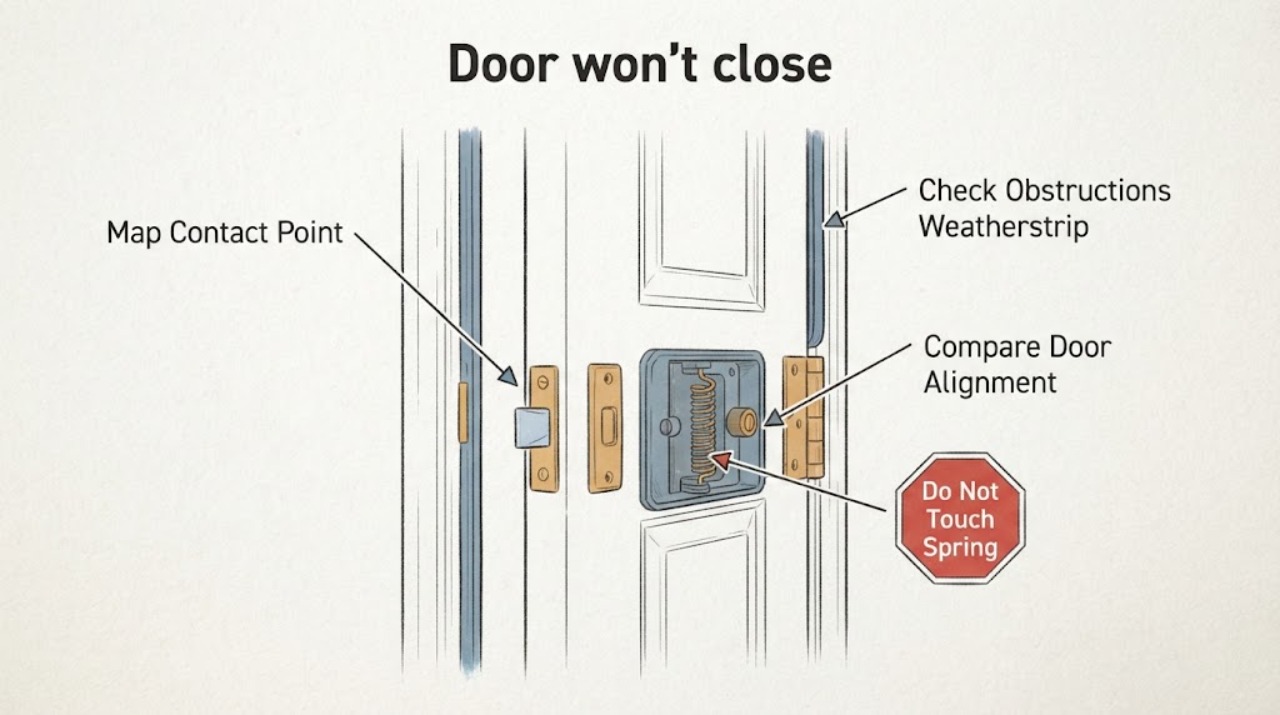
Work through in order
Diagnostic checks
Use only checks that match the exact appliance or system and its official guide.
-
Check 1
With the door area clear, operate the handle normally and move the door slowly toward the frame without slamming or forcing the lock; if the door has a closer, let it move only through its normal range.
Expected result: Record the first place that stops the panel: top, bottom, hinge side, lock side, weatherstrip, threshold, or latch/receiver. Also record whether the handle retracts the latch, whether the door is square in the opening, and whether there is a crack, broken glass, loose hardware, or a new scraping sound.
Next step: Photograph the contact point and identify the door type and model before selecting any adjustment. Continue only with an ordinary-access obstruction or documented manufacturer procedure; otherwise arrange qualified service.
Stop if: Do not slam, shoulder, lift, pry, or deadbolt the door closed, and stop if glass, frame, lock, closer, or hinge damage is visible.
Why this matters
Why: A repeatable rub point suggests panel, hinge, jamb, sill, or frame alignment. Even contact with the weatherstrip but no latch engagement points toward strike or latch alignment. A latch that will not retract or a damaged panel is a hardware or safety boundary, not a reason to force the door.
-
Check 2
Inspect the sill, threshold, frame, latch opening, and weatherstrip from ordinary access for dirt, a displaced seal, loose trim, paint buildup, a fallen object, or a closer or screen component that is visibly out of position; remove only loose debris that can be cleared without tools or force.
Expected result: Record whether the panel meets the weatherstrip evenly from top to bottom, hits the sill or threshold first, or stops on a discrete obstruction; note whether the obstruction returns or the weatherstrip is torn, swollen, detached, or compressed.
Next step: Clear the ordinary-access debris and retest gently. If the seal, sill, closer, screen, or frame needs removal, cutting, bending, shimming, or an unlisted adjustment, stop and provide the photos and exact door identity to a qualified technician or manufacturer.
Stop if: Do not cut, plane, sand, drill, bend, or glue the panel, weatherstrip, sill, frame, or closer to make the door close.
Why this matters
Why: Uneven weatherstrip contact can prevent the door from reaching the latch, while a sill obstruction or displaced component can create a localized stop. A warped, swollen, or damaged seal/frame is not established as a simple cleaning issue and may need replacement or frame work.
-
Check 3
With the door supported by its normal hinges and opened only as far as safe, inspect visible hinge leaves, fasteners, reveals, and the frame for looseness, sag, or an uneven gap; do not remove a hinge or a fixing screw to test it.
Expected result: Record whether the lock-side gap narrows toward the top or bottom, the panel rubs the frame, a hinge leaf moves, a fastener is missing, or the jamb/sill appears out of square or shifted.
Next step: Use a manufacturer-specified tightening or hinge-adjustment procedure only when the exact door documentation identifies the hardware and safe support method. Otherwise stop and request service with the gap pattern and photos.
Stop if: Never remove hinge position-fixing screws, detach multiple hinges, work under an unsupported panel, or adjust a spring-loaded or heavy door without the exact instructions and appropriate support.
Why this matters
Why: An uneven head gap or panel rub can be consistent with hinge sag or a frame that is out of square. A loose or damaged hinge can let the panel fall, while an apparently sound hinge with a twisted or settled jamb may require frame correction rather than more hinge tension.
-
Check 4
With the door open and hands clear of pinch points, operate the handle, latch, deadbolt, and any visible receiver or strike through their normal travel; compare the latch position with the receiver without forcing the door closed or turning a lock against resistance.
Expected result: Record whether the latch retracts and springs back, whether it lines up vertically and horizontally with the strike or receiver, whether the handle binds, and whether a latch or shipping component is visibly wedged in the mechanism.
Next step: Follow only the exact manufacturer's latch or strike procedure for the identified door. If the receiver, lockcase, multi-point mechanism, or closer needs repositioning, replacement, or disassembly, arrange qualified service.
Stop if: Do not force a key or deadbolt, pry the latch, defeat a safety latch, remove unidentified components, or substitute a strike, lockcase, or closer by appearance.
Why this matters
Why: A freely moving latch that misses its receiver supports an alignment issue. A latch that is stuck, does not spring back, or binds in the lockcase points to model-specific hardware service. A shipping component can be relevant on a newly installed specialized patio door, but its presence and removal procedure cannot be inferred for another door.
-
Check 5
Identify the door manufacturer, model or series, swing direction, and hardware type from labels, documentation, or photographs, then compare the observed contact pattern with that product's installation and adjustment guidance.
Expected result: Record whether the door is an interior, entry, patio, storm, screen, fire-rated, multi-point, or other specialized assembly; whether it is under warranty or recently installed; and whether the documented adjustment matches the visible hardware.
Next step: Send the model identity, contact-point photos, latch/receiver result, hinge-gap pattern, and installation history to the manufacturer, installer, or qualified door/window technician. Secure the opening without forcing the door until the cause is confirmed.
Stop if: Stop all adjustment when the model cannot be identified, the door is heavy or unsupported, the frame or glass is damaged, the opening is security- or fire-critical, or the documented procedure requires removal, drilling, cutting, or structural work.
Why this matters
Why: Door adjustment procedures and safe fasteners vary by model, and a procedure for one brand or series does not prove fit or safety for another. A recently installed unit may have an installation or shipping issue; an older unit may have settlement, wear, or damaged hardware.
Use your observations
Decision map
Find the observation that best matches what you see, then follow the next safe action.
-
PATH 01Safety boundary
What you see
The door hits the top or bottom of the frame, or the reveal is visibly uneven before the latch reaches the receiver.
Do this next
Document the gap pattern and use only the exact manufacturer adjustment or installation guidance; arrange service if the frame or hinge needs support, shimming, removal, or structural correction.
Why this path and its safety boundary
Why it matters: Hinge sag, an out-of-square frame, an uneven sill, or a shifted jamb is more plausible than a bad latch alone.
Safety stop: Do not plane, cut, lift, pry, remove hinge-fixing screws, or work under an unsupported panel.
-
PATH 02Safety boundary
What you see
The panel meets the weatherstrip or threshold unevenly, or a visible seal, closer, screen, or sill obstruction stops closure.
Do this next
Clear only loose ordinary-access debris, then retest gently; request manufacturer or qualified service for seal replacement, closer adjustment, frame work, or any cut/bend/shim decision.
Why this path and its safety boundary
Why it matters: A seal, sill, or accessory alignment issue may be preventing the panel from reaching the latch position.
Safety stop: Do not cut or permanently deform weatherstripping, the sill, the frame, or a closer to gain clearance.
-
PATH 03Safety boundary
What you see
The latch retracts and springs back normally, but it reaches above, below, or beside the strike or receiver when the door is gently closed.
Do this next
Use only the documented adjustment for the exact latch/receiver and door series, or have a technician align it; do not force the lock to pull the door into position.
Why this path and its safety boundary
Why it matters: The panel or receiver alignment is wrong even though the latch mechanism itself may be operating.
Safety stop: Do not drill new holes, substitute a strike, bend the receiver, or remove hardware without exact product instructions and a safe support plan.
-
PATH 04Safety boundary
What you see
The latch does not retract or spring back, the handle binds, or an unidentified component is wedged in the lock mechanism.
Do this next
Stop and identify the door and lock hardware, then use the manufacturer procedure or arrange qualified lock/door service.
Why this path and its safety boundary
Why it matters: This is a model-specific lock or latch fault; forcing the panel can damage the mechanism or leave the opening unsecured.
Safety stop: Do not pry the latch, force a key or deadbolt, defeat a safety feature, or remove an unidentified shipping or lock component.
-
PATH 05Safety boundary
What you see
The frame is twisted or swollen, the panel or glass is cracked, a hinge is damaged, or the door must be lifted, slammed, or held to close.
Do this next
Stop using the opening as a primary closure, protect people from broken glass or falling parts, use a safe temporary security measure, and arrange qualified door/window service.
Why this path and its safety boundary
Why it matters: The closure and security function may be compromised, and ordinary alignment checks are no longer sufficient.
Safety stop: Do not continue operation, remove the panel, or attempt structural, glass, spring, or heavy-door repair without qualified equipment and support.
Helpful context
Understand the symptom
Find the first contact point before adjusting anything
Close the door slowly with the latch retracted only as the hardware normally permits. Note whether the panel rubs at the top, bottom, hinge side, or lock side; hits the weatherstrip or sill; or reaches the frame but the latch misses its receiver. That observation changes the next check. Therma-Tru's troubleshooting guide treats uneven weatherstrip contact, a misaligned adjustable strike, hinge sag, and an out-of-square frame as different conditions, not one universal screw adjustment.
Keep ordinary checks separate from model-specific adjustments
Look for a loose hinge leaf, shifted strike or receiver, debris at the sill, a displaced weatherstrip, or a lock latch that does not retract and spring back normally. Photograph the hardware and record the door manufacturer, series, handing, and model if available. A patio, storm, entry, fire-rated, multi-point, or other specialized door may use different hardware and adjustment limits; do not copy a procedure from another door.
When a door still will not close, protect the opening and call for service
If the door has to be shoved, lifted, slammed, or locked with force, the frame is visibly twisted or swollen, the panel or glass is damaged, or the latch remains stuck, stop. Manufacturer guidance warns that removing certain hinge position-fixing screws can let a door drop, and a stuck latch may require a model-specific release or lock-mechanism decision. Keep the opening secured by a safe temporary method that does not damage the door, then arrange qualified service.
Safety boundary
Stop conditions
- Do not slam, shoulder, pry, lift, or deadbolt a door that is rubbing or misaligned, and do not hold a door or closer in position by improvised means.
- Do not plane, cut, drill, bend, sand, or glue the panel, frame, sill, weatherstrip, strike, receiver, closer, or latch to make the door close.
- Do not remove hinge position-fixing screws, detach multiple hinges, or work under an unsupported heavy panel; a door can drop and cause injury or property damage.
- Do not force a key or deadbolt, pry a stuck latch, defeat a safety latch, or remove unidentified shipping or lock components.
- Stop and arrange qualified service for cracked glass, a warped frame, damaged or loose hinges, a fire-rated or security-critical opening, a multi-point or spring-loaded mechanism, or any need for structural or model-specific adjustment.
Only after diagnosis
Potential parts
- door weatherstrip or seal
Consider this category only when the exact assembly's seal is torn, displaced, compressed, or confirmed by the manufacturer as the closure obstruction.
Confirm the exact door series, seal profile, location, compression requirement, and installation method; do not cut or substitute a seal by appearance. - door hinge or hinge fastener set
Consider this category only after inspection or diagnosis confirms a damaged hinge or missing/failed fastener and the panel can be safely supported.
Confirm the exact door type, weight, handing, hinge position, fastener specification, and safe replacement procedure; do not remove multiple hinges or fixing screws as a test. - door latch, strike, or receiver assembly
Consider this category only when the latch or receiver is damaged, stuck, or unrepairable after the exact manufacturer's alignment procedure.
Confirm the exact lockcase, handing, multi-point or single-point design, strike geometry, security requirements, and manufacturer fit information before ordering.
When checks do not resolve it
Need a professional?
Arrange qualified door or window service when the first contact point cannot be corrected by clearing ordinary debris, the door rubs because of sag or a shifted frame, the weatherstrip or sill is damaged, the latch or receiver is misaligned or stuck, the handle or closer binds, the frame or glass is damaged, or the door needs force to close or secure. Provide the manufacturer, model or series, swing direction, photos of the contact and hardware, recent installation or movement history, and any exact instructions already checked.
Safety scope: This article supports slow ordinary-access observation and loose-debris clearing only. Do not force the door, remove hinge-fixing screws, detach the panel, defeat lock or safety hardware, or improvise a structural, glass, spring, closer, or frame repair.
Common questions
FAQ
Why does my door hit the frame and not close?
Note the first contact point. A top or bottom rub can indicate hinge sag, a shifted jamb, an uneven sill, or a frame out of square; a weatherstrip or threshold stop is a different branch. Do not plane or force the door—use the exact manufacturer's adjustment guidance or call service.
What if the door closes but the latch misses the strike?
With the door open, check that the latch retracts and springs back normally, then compare its position with the strike or receiver without forcing a lock. If the latch works but misses, alignment is plausible; use only the model-specific adjustment or arrange qualified service.
Can I remove a hinge screw to raise a sagging door?
Do not remove hinge position-fixing screws or detach a hinge as a guess. Manufacturer guidance warns that some fixing screws help support the panel and their removal can let the door drop. Identify the exact door and use its documented, safely supported procedure or call a technician.
Why will a new patio or storm door not latch?
An installation-specific latch rail, shipping component, closer, or strike alignment may be involved. Keep all parts, identify the model, and follow its installation guide; do not drill new holes or remove an unidentified component based on another door's instructions.
When should I stop trying to close a door?
Stop when it needs force, has cracked glass or a warped frame, the hinges or lock are damaged, it cannot secure the opening, or an adjustment requires cutting, drilling, lifting, spring/closer work, or removing fixed hardware. Use a safe temporary security measure and arrange qualified door or window service.
Read the exact guide
Official sources
- Hinge Replacement and Hinge and Hardware Adjustment GuideAndersen Corporation · Official guide for the named older Andersen Frenchwood hinged patio doors; it is evidence for adjustment hazards, not a fit claim for an unidentified door.
- 2017 Site Manual, Site 4: Door Will Not Open or Close ProperlyTherma-Tru Doors · Official Therma-Tru technical manual for its installation systems; it does not establish procedures for an unidentified door.
- Andersen Storm Door Installation Guide 901726Andersen Corporation · Official guide for a named Andersen storm-door installation; its drilling and fastener steps are not generic instructions for an unidentified door.
- Lock Latch Stuck on Andersen Hinged Patio DoorsAndersen Corporation · Official Andersen guidance for named hinged patio-door families; it is not a universal procedure for other doors or locks.
- Troubleshooting GuideTherma-Tru Doors · Official Therma-Tru guidance for its door systems; other door brands and assemblies require their own instructions.
Community feedback
Share a repair observation
Share a plain-text repair observation. Accepted observations are published automatically; this page may take a moment to update.