
On this page
Start here
Quick answer
A door that will not close because of its gasket usually has a damaged, displaced, painted, folded, or overly compressed weatherstrip, but the door may also be approaching the gasket out of alignment. Inspect the gasket from hinge side to latch side, look for an uneven contact pattern, and check whether the panel is sagging or the strike is misaligned. Clean only according to the door manufacturer's instructions and replace a visibly failed gasket with the exact system part. If the frame is out of square, the glass or panel is loose, or the door needs hinge, jamb, or structural work, stop forcing it and arrange qualified door service.
Before you begin
Safety first
- User checks are limited to controlled movement, visual gasket and reveal inspection, approved surface cleaning, and a small model-specific adjustment when the manufacturer explicitly provides one. A qualified technician must remove heavy panels, repair or replace glazing, reset a frame, alter structural hinges or jambs, or diagnose damaged hardware.
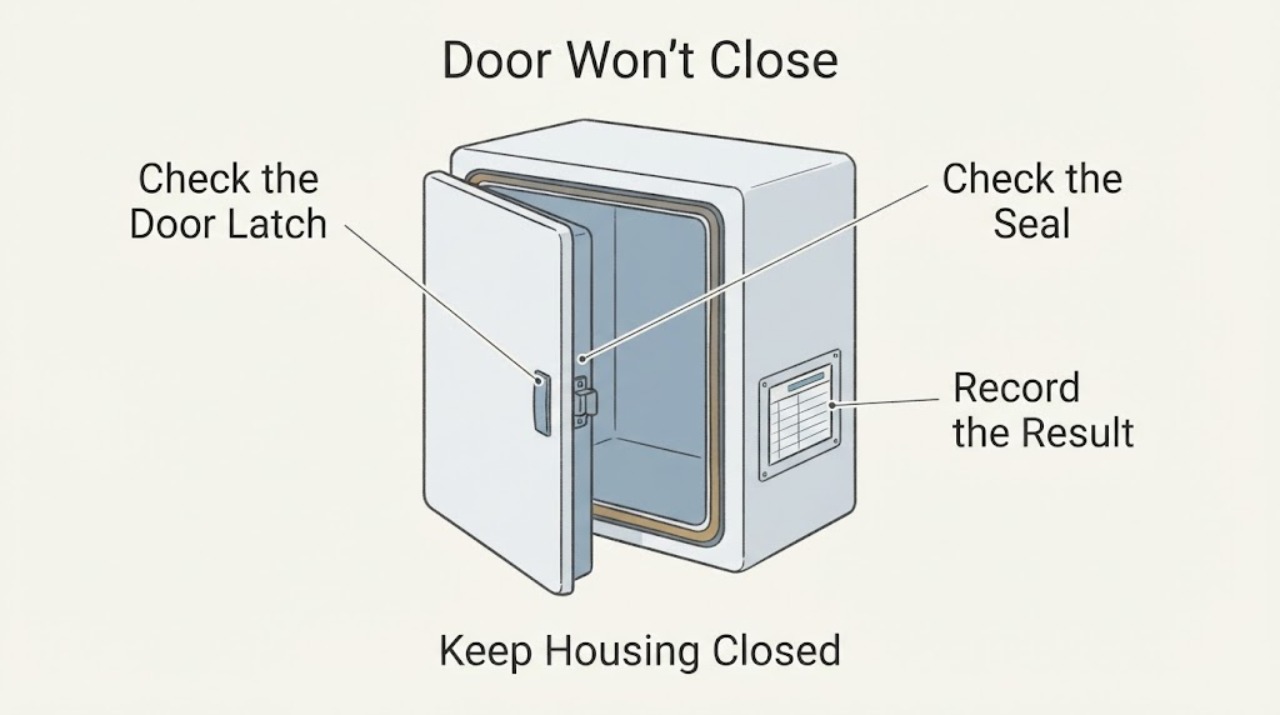
Work through in order
Diagnostic checks
Use only checks that match the exact appliance or system and its official guide.
-
Find where the door stops before it latches
Close the door slowly with the handle, using only light, controlled pressure. Note whether it stops at the gasket on the hinge side, head, sill, or latch side, whether it rebounds, and whether the latch reaches the strike at all. Do not push harder once the panel begins to bow, twist, or scrape.
Expected result: The panel contacts the gasket high or low first, the full gasket resists evenly, or the latch misses while the gasket contact appears even.
Next step: Use the gasket inspection for local interference, the reveal and frame check for uneven contact, or the latch branch when the seal is even but the strike does not align.
Why this matters
Why: A high or low first contact suggests alignment or a sagging panel; even resistance around the opening points more toward gasket size, displacement, or compression. A latch-only problem can be separate from the gasket.
-
Inspect the gasket or weatherstrip without removing it
With the door open and stable, inspect the gasket or weatherstrip continuously from top to bottom. Look for a missing section, paint or sealant on the sealing surface, a crack, tear, fold, wrinkle, pulled-out end, bunching at a corner, or a section that sits proud of its normal channel. Do not pull a seated gasket out to test it.
Expected result: The gasket is visibly damaged, displaced, painted, or bunched, or it looks continuous and correctly seated.
Next step: If the defect is visible, photograph it and identify the exact door system before ordering a replacement. If the gasket looks sound, continue to the contact-pattern and alignment checks instead of trimming it.
Why this matters
Why: A failed or displaced seal can physically prevent closure or change the compression needed for the panel to latch. An intact, seated gasket makes a frame, hinge, strike, or panel alignment issue more likely.
-
Check whether the panel meets the gasket evenly
From the safe side of the opening, inspect the gap or reveal between the door panel and frame while the door is nearly closed. Compare the top, bottom, hinge side, and latch side without forcing the door into the frame.
Expected result: The panel meets the gasket evenly from top to bottom, or one end contacts first and the opposite end has a visibly different gap.
Next step: If the reveal is uneven, use only the exact door's approved panel or hinge adjustment instructions, or arrange service. If the reveal is even, inspect latch alignment and gasket compression rather than changing the frame.
Why this matters
Why: Therma-Tru identifies a door that hits the weatherstrip at the top or bottom first as an alignment condition. Andersen likewise uses an even reveal and plumb, level, and square checks to distinguish panel adjustment from a full-unit problem.
-
Check the latch and strike without forcing them
With the door open, operate the handle and latch normally and look for a bent, loose, or obstructed strike or latch. Then bring the door toward the closed position and observe whether the latch meets the strike only after the gasket is compressed. Do not enlarge the strike opening or bend hardware as a test.
Expected result: The latch is straight and reaches the strike with the gasket evenly contacted, or it misses, catches, or requires pressure from the panel.
Next step: If the gasket contact and reveal are even but the strike is wrong, follow the model-specific hardware guide or request door service. If the latch is under load because the panel is sagging, correct alignment before changing the strike.
Why this matters
Why: An adjustable strike that is out of alignment can stop a door from closing even when the gasket is intact. Pressure from a misaligned panel can also make a correctly positioned latch appear faulty.
-
Clean or reseat only what the manufacturer allows
If the gasket has only a light, removable surface contaminant and no tear or displacement, clean it with the door manufacturer's approved method and let it dry. If a small section has pulled from its designed channel, consult the exact installation or care guide before pressing it back; do not glue, stretch, shave, or heat the gasket as a workaround.
Expected result: The door closes normally after an approved cleaning or documented reseating, or the gasket still prevents closure or immediately pulls out again.
Next step: If the symptom persists, stop modifying the gasket and identify the exact replacement or service path. Do not substitute a generic seal based only on appearance or thickness.
Why this matters
Why: A surface contaminant or loose seating can change gasket contact, but a torn, permanently deformed, incorrectly sized, or repeatedly displaced seal needs replacement or professional assessment.
-
Decide when alignment, glazing, or structural service is needed
Stop the user-level checks and document the door, gasket, reveal, sill, hinges, strike, and frame whenever the panel is sagging, the frame is twisted or out of square, the glass or lite is loose, the sill is damaged, the gasket cannot stay seated, or the door must be lifted or removed.
Expected result: The door closes after a safe approved cleaning or minor documented adjustment, or it remains unable to close and shows a structural, glazing, or hardware clue.
Next step: Arrange qualified door, glazing, or installation service and provide the exact door identity, contact pattern, photos, and checks already completed.
Why this matters
Why: A local gasket issue may be a replacement part, while an out-of-square opening, loose panel, damaged glass, hinge, jamb, or sill changes the repair scope and can make further force unsafe.
Use your observations
Decision map
Find the observation that best matches what you see, then follow the next safe action.
-
PATH 01Next step
What you see
The gasket is missing, cracked, torn, painted, folded, or visibly displaced.
Do this next
Keep the door from being forced, identify the exact door system, and use its approved replacement or service instructions. Do not trim or glue a substitute gasket as a trial.
-
PATH 02Next step
What you see
The panel reaches the gasket at the top or bottom first and the reveal is uneven.
Do this next
Treat this as an alignment or sagging clue. Use only model-specific adjustment instructions or arrange qualified service; do not increase gasket compression to hide the misalignment.
-
PATH 03Next step
What you see
The gasket and reveal are even, but the latch misses or binds at the strike.
Do this next
Follow the exact hardware guide for a safe strike adjustment or request door service. Do not bend, file, or enlarge the latch or strike opening.
-
PATH 04Next step
What you see
The frame is twisted or out of square, the sill is damaged, the panel is loose, or glass is cracked or loose.
Do this next
Stop moving the door and arrange qualified installation, door, or glazing service. Keep people away from unstable or damaged glass and do not remove the panel alone.
-
PATH 05Next step
What you see
The door closes after approved cleaning or a documented minor adjustment and remains stable.
Do this next
Monitor the next several normal closures and keep the gasket clean and seated according to the manufacturer's care guidance. If the problem returns, stop forcing it and reassess alignment and seal condition.
Helpful context
Understand the symptom
The gasket or weatherstrip is meant to compress enough to seal while still allowing the panel to reach the latch. A door can therefore fail to close because the seal itself is damaged or displaced, or because the panel reaches the seal high or low first. The first useful distinction is a local gasket obstruction versus a door, jamb, hinge, sill, or strike that is no longer aligned.
Keep the checks visual and controlled. Do not slam the door, cut or sand the gasket, pry the panel, remove a heavy door alone, drill the jamb, or adjust structural hinges or a strike without the exact manufacturer instructions. Stop immediately for cracked glass, an unstable panel, exposed sharp material, or an opening that cannot be secured safely.
Safety boundary
Stop conditions
- Do not slam, pry, twist, cut, sand, heat, glue, or stretch a gasket, and do not force a door whose panel or glass is flexing.
- Stop for cracked or loose glass, a loose panel, sharp fragments, a bowed or shifting frame, damaged sill, exposed fasteners, or a door that cannot be controlled or secured safely.
- Do not lift or remove a heavy panel alone, drill or reshape the jamb, enlarge a strike opening, alter structural hinges, or use power tools as a first troubleshooting step.
- Do not continue adjusting when a small manufacturer-approved change does not improve the reveal, gasket contact, or latch alignment.
Only after diagnosis
Potential parts
- door gasket or weatherstrip
Consider this category only when the existing gasket is missing, torn, painted, permanently deformed, or repeatedly displaced and the exact door system is identified.
Confirm the door manufacturer, series, profile, length, and installation method before ordering; appearance alone does not establish fit. - latch or adjustable strike hardware
Consider this category only when the gasket contact and panel alignment are even but the latch still misses or binds and a technician confirms hardware failure.
Match the complete lock and frame configuration and preserve the door's security function; do not enlarge the opening as a workaround. - hinge or panel alignment component
Consider this category only when a sagging panel or uneven reveal remains after safe inspection and a qualified technician confirms a worn or damaged alignment component.
Structural hardware and adjustment depend on the exact door system and frame; confirm the manufacturer's part information before purchase. - replacement safety glass or doorlite
Consider this category only when the glass or doorlite is cracked, loose, or damaged and a glazing professional confirms the replacement scope.
Verify glass type, dimensions, safety requirements, and frame system with the glazing professional; do not remove the panel as a user test.
When checks do not resolve it
Need a professional?
Arrange qualified door service for a gasket that is torn, repeatedly displaced, or not available as an exact system replacement; an uneven reveal that persists; a misaligned strike, sagging panel, damaged sill, twisted frame, loose panel, or cracked glass; or any work requiring panel removal, structural hinge or jamb adjustment, glazing, or unsafe access.
Safety scope: User checks are limited to controlled movement, visual gasket and reveal inspection, approved surface cleaning, and a small model-specific adjustment when the manufacturer explicitly provides one. A qualified technician must remove heavy panels, repair or replace glazing, reset a frame, alter structural hinges or jambs, or diagnose damaged hardware.
Common questions
FAQ
Can a damaged gasket stop a door from closing?
Yes. A missing, torn, painted, folded, bunched, or displaced gasket can block closure or change how the panel meets the frame. Identify the exact door system before replacing it, and do not trim or glue the seal as a trial.
Why does the door hit the gasket at the top or bottom first?
That contact pattern usually points to panel sag or frame alignment rather than a gasket-only problem. Check the reveal without forcing the door and use only model-specific adjustment instructions or qualified service.
Should I adjust the strike if the door will not close?
Only after the gasket contact and panel alignment are even, and only with the exact hardware instructions. A strike under load can be a symptom of a sagging or out-of-square door, so do not file or enlarge the opening as a workaround.
When should I stop trying to close a door with a gasket problem?
Stop for cracked or loose glass, a shifting frame, a loose panel, sharp fragments, severe scraping, or any need to lift or remove a heavy panel. Keep the opening controlled and arrange qualified door or glazing service.
Read the exact guide
Official sources
- Troubleshooting GuideTherma-Tru Doors · Therma-Tru door weatherstrip, gasket, frame, hinge, strike, glass, and close-operation troubleshooting
- Checking Window or Patio Door Unit InstallationAndersen Windows and Doors · Andersen door and patio-door reveal, plumb, level, square, panel alignment, and service guidance
- Patio Door AdjustmentsAndersen Windows and Doors · Andersen hinged and gliding patio-door gasket contact, panel rub, hardware adjustment, and latch guidance
Community feedback
Share a repair observation
Share a plain-text repair observation. Accepted observations are published automatically; this page may take a moment to update.