
On this page
Start here
Quick answer
A glass door that will not close is usually being stopped by an obstruction, a panel that has shifted out of alignment, a roller or hinge problem, a closer or latch that is out of position, or damaged glass or hardware. First identify whether it is a sliding patio door, hinged glass door, or storm/screen door, then keep fingers clear and inspect the sill, track, frame, latch area, and glass edges without forcing the panel. For a sliding door, a manufacturer-approved roller adjustment may restore an even gap; for a hinged or storm door, the closer, frame, strike, or bottom expander is model-specific. Do not force, lift, drill, or disassemble a heavy glass panel. If the glass is cracked, chipped, loose, binding hard, or the hinges, rollers, closer, or frame are damaged, secure the opening and arrange qualified window-and-door service.
Work through in order
Diagnostic checks
Use only checks that match the exact appliance or system and its official guide.
-
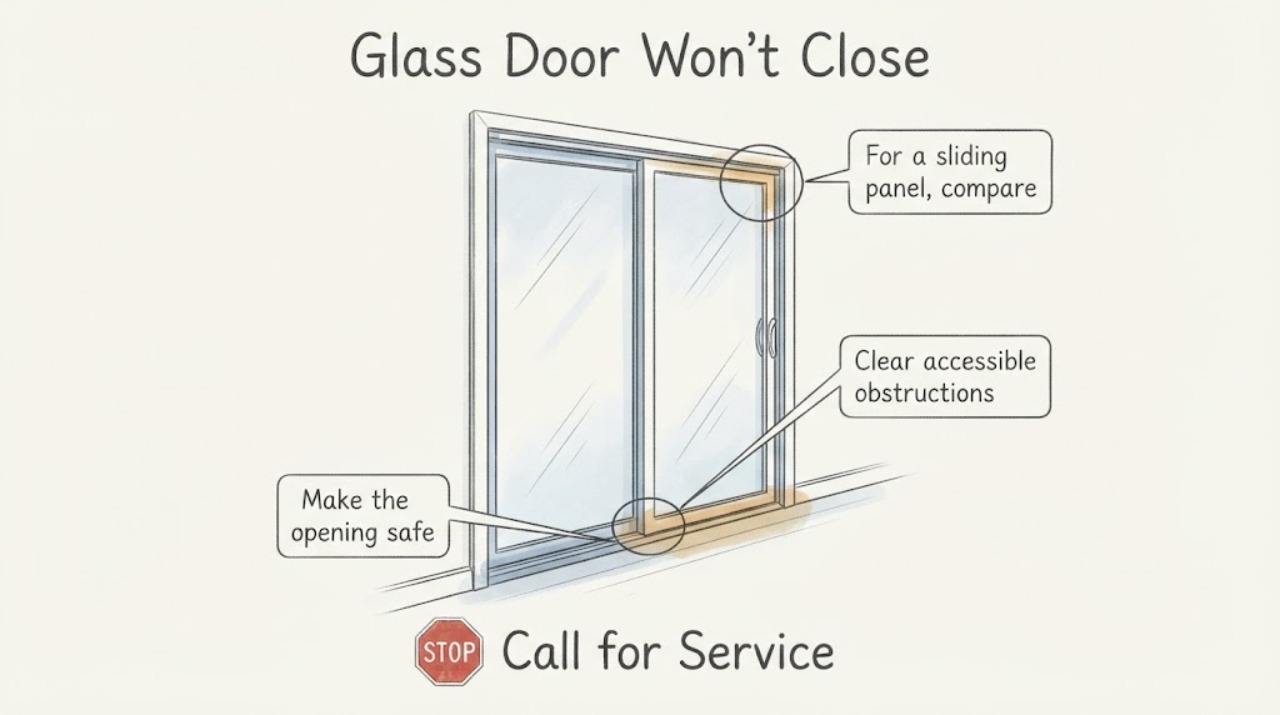
Make the opening safe and identify the closing failure
Keep the door supported in its current safe position and keep people clear. Without forcing the glass, determine whether it is a sliding panel, a hinged door, or a storm/screen door with a glass insert. Note whether it stops before the frame, rubs at the sill or jamb, reaches the frame but will not latch, or moves loosely at a hinge, roller, or fitting.
Expected result: The panel is stable and intact, or the glass is cracked/chipped, the fitting is loose, the panel is sagging, the frame is visibly twisted, or the door could fall or swing unexpectedly.
Next step: If there is damaged glass, a loose or displaced fitting, or an unstable panel, do not operate or force the door; secure the area and arrange qualified service. Otherwise continue to inspect the sill, track, frame, and latch area.
Why this matters
Why: A stable, intact panel allows limited external checks; damaged glass, loose fittings, a sagging panel, or a distorted frame is a structural or injury risk and is not a user alignment exercise. The door type determines which manufacturer guidance can apply.
-
Clear accessible obstructions from the closing path
With fingers kept away from pinch points, inspect the sill, track, threshold, weatherstrip, latch receiver, and the gap at the frame for stones, dirt, screws, toys, curtains, or displaced seals. For a sliding panel, look at the visible lower track without lifting the glass. For a hinged or storm door, check whether the sweep, bottom expander, screen, or closer arm is contacting the frame. Remove only a loose, harmless obstruction that is safely reachable.
Expected result: A foreign object or shifted seal is blocking the path, the track is visibly damaged, the bottom sweep/expander binds, or the path is clear but the panel still rubs or stops.
Next step: After removing a safe obstruction, move the door slowly once. If it still binds, do not add force or use the glass to lever it; continue to the door-type-specific alignment check or service boundary.
Why this matters
Why: A simple obstruction can prevent both closing and latching; a damaged track, binding sweep, or persistent rub indicates alignment or hardware work. A clear path rules out the easiest external cause but does not prove the glass, rollers, hinges, or frame are sound.
-
For a sliding panel, compare the reveal before a model-specific roller adjustment
If the door is an intact sliding patio panel and the track is clear, open it slightly and view the gap between the operating panel and the side jamb from top to bottom. Confirm the panel is not leaning or scraping. Only if the complete manufacturer and model instructions identify the roller adjustment, use the specified access point and turn one notch at a time, checking movement after each change; do not remove the panel.
Expected result: The top-to-bottom gap is even, the gap is tapered, the panel still scrapes after a small approved adjustment, or the adjustment point and product identity cannot be confirmed.
Next step: If the approved adjustment restores smooth movement, close the panel slowly and check the latch without slamming. If the reveal remains uneven, the panel scrapes, or the model instructions are unavailable, stop and arrange qualified service.
Why this matters
Why: Andersen treats an unequal reveal as evidence that a gliding panel needs adjustment and directs small incremental roller changes. An even reveal with continued binding points toward a track, roller, frame, or panel fault; an unknown product should not be adjusted by analogy.
-
For a hinged or storm door, separate closer, hinge, and latch symptoms
If the door is hinged or a storm door with a glass insert, observe whether it swings freely until the last part of travel, whether the closer arm or pin is in the correct door position, whether the bottom expander or sweep catches, and whether the latch meets the strike. Do not remove the door, loosen hinge screws, alter a closer valve, or shim a heavy glass assembly unless the exact product instructions explicitly cover that operation.
Expected result: The door binds through the swing, closes but misses the strike, stops because the closer or expander is misplaced, or has a twisted/bent frame or hinge.
Next step: Use only a clearly identified manufacturer procedure for a minor external adjustment. If the door is heavy, the hinge/frame is distorted, the closer is leaking or damaged, or the latch still misses, leave it secured and arrange qualified service.
Why this matters
Why: Pella lists closer position, bottom expander, mounting-frame alignment, binding hinges, and strike position as separate causes. A frame or hinge that is bent or twisted is not corrected by repeatedly moving the strike, and a glass door's closer hardware is model-specific.
-
Perform one controlled close and stop at the service boundary
After a safe obstruction removal or confirmed model-specific adjustment, make one slow closing attempt with hands clear of the edges. Confirm the panel reaches the frame without scraping, the latch engages without slamming, and the glass remains stable. Do not keep cycling a door that binds, bounces open, or cannot be secured.
Expected result: The door closes and latches smoothly, it closes but will not latch, it still stops or scrapes, or the glass/fitting moves, cracks, or makes a sharp impact.
Next step: If it fails, keep the opening secured and arrange qualified window-and-door service with photos only from a safe distance, the full product identity, door type, failure point, and checks completed. Never force the lock or continue testing damaged glass.
Why this matters
Why: A smooth close confirms only that the immediate external condition changed; it does not authorize unrelated hardware replacement. Failure after one controlled attempt indicates a persistent alignment, track, hinge, closer, latch, or structural issue.
Use your observations
Decision map
Find the observation that best matches what you see, then follow the next safe action.
-
PATH 01Safety boundary
What you see
The glass is cracked, chipped at an edge, loose in its fitting, displaced, or the panel or frame is unstable.
Do this next
Keep people away, do not operate or force the door, and arrange qualified glass/window-and-door service. Do not attempt to remove or re-seat a heavy glass panel yourself.
Why this path and its safety boundary
Safety stop: True
-
PATH 02Next step
What you see
A loose, harmless object or shifted seal is visibly blocking the sill, track, frame, or latch area.
Do this next
Remove only the safely reachable obstruction with the door supported, then make one slow close attempt. If it still binds or the obstruction is trapped, stop and arrange service.
-
PATH 03Next step
What you see
An intact sliding panel has a tapered top-to-bottom reveal and the exact product instructions identify a roller adjustment.
Do this next
Follow the manufacturer's procedure in small increments, checking movement after each change. If the panel scrapes or remains uneven, stop rather than removing the panel or forcing it.
-
PATH 04Next step
What you see
A hinged or storm door reaches the frame but misses the latch, or its closer, expander, strike, or mounting frame is visibly out of position.
Do this next
Use only the exact manufacturer's adjustment instructions. If the hinge/frame is bent, the closer is damaged, or the latch still misses, secure the door and arrange qualified service.
-
PATH 05Safety boundary
What you see
The closing path is clear but the door still rubs, binds, will not latch, swings unpredictably, or cannot be safely secured after one controlled attempt.
Do this next
Stop troubleshooting and arrange qualified window-and-door service. Provide the door type, full manufacturer/model identity if known, failure location, glass condition, and the external checks completed.
Why this path and its safety boundary
Safety stop: True
Helpful context
Understand the symptom
Identify the door type before adjusting anything
A sliding panel closes by rolling along a track, while a hinged or storm door closes through hinges, a closer, a latch, and a strike. Their adjustment points are not interchangeable. Andersen's patio guidance is for identified Andersen gliding and hinged patio-door families, and Pella's troubleshooting steps are for its door assemblies. With no model number, use those sources to recognize the decision path, not to guess an adjustment screw or replacement part.
Treat the glass and its fittings as a safety boundary
Keep children and pets away from an opening that cannot be secured. Do not force a panel against a hard stop, use the glass as a lever, loosen clamps, remove hinges, or carry a large pane alone. Stop if an edge is chipped, a crack is spreading, the panel is sagging, a fitting is loose, or the frame is twisted. The safe repair path is qualified window-and-door service with the complete product identity.
An even reveal is a useful sliding-door clue
For a gliding patio panel, look at the gap between the panel and side jamb from top to bottom. Andersen uses an equal reveal as the indication that the panel is aligned; a tapered gap points toward a roller or panel adjustment. Make only the exact model's approved adjustment and move in small increments, checking movement as you go.
Closing is different from latching
A panel can reach the frame but still fail to latch, or it can stop before the frame because of rubbing, a sill obstruction, a closer, or a warped opening. Pella's troubleshooting guide separates those conditions and lists different model-specific corrections. Record which state you have before ordering hardware or changing the strike.
Only after diagnosis
Potential parts
- sliding-door roller or track hardware
Consider roller or track hardware only after the opening is clear, the glass is intact, the reveal is uneven or movement remains rough, and qualified diagnosis identifies the hardware as the cause.
Confirm the complete door manufacturer and model and its approved fit information; do not remove a heavy glass panel to test a part. - door closer, hinge, or pivot hardware
Consider this hardware only when a qualified inspection confirms that a closer, hinge, or pivot is out of position or damaged after the frame and closing path are checked.
Glass-door fittings are model- and weight-specific; verify the manufacturer's service information and use qualified installation. - latch, strike, or receiver hardware
Consider latch or strike hardware only when the panel reaches the frame with a correct alignment but the latch still misses or will not engage, and the exact hardware is identified.
Confirm the full door identity and approved hardware compatibility; do not alter a structural glass fitting to make an unknown latch fit.
When checks do not resolve it
Need a professional?
Call qualified window-and-door service for damaged glass, loose fittings, a bent frame or hinge, a failed roller or track, a closer that is damaged or leaking, persistent rubbing, or a latch that will not engage after the safe external checks.
Common questions
FAQ
Why won't my glass sliding door close all the way?
Check the sill and track for an obstruction, then look at the panel's top-to-bottom reveal. A tapered gap can indicate that the panel or rollers need a manufacturer-approved adjustment; an even gap with continued scraping points toward a track, roller, frame, or panel fault.
Can I adjust the rollers on a glass door myself?
Only when the complete door identity and manufacturer's instructions clearly identify the adjustment. Make small approved changes and check movement after each one. Do not remove a heavy glass panel or adjust unknown fittings by analogy.
What if the glass door reaches the frame but will not latch?
That is a latch-and-strike or closer/alignment symptom rather than proof that the glass itself is faulty. Check the visible latch path and use the exact product instructions; a bent frame, damaged closer, or persistent missed strike needs qualified service.
When should I stop trying to close a glass door?
Stop for cracked or chipped glass, loose fittings, a sagging or unstable panel, hard binding, a damaged track or hinge, or a door that cannot be secured after one safe external check and approved adjustment. Keep people clear and arrange qualified window-and-door service.
Read the exact guide
Official sources
- Patio Door AdjustmentsAndersen Windows & Doors · Manufacturer maintenance and adjustment guidance for hinged and gliding patio door panels, rollers, reveals, and latch receivers.
- TROUBLE SHOOTING GUIDEPella Corporation · Pella troubleshooting table for doors that do not open or close properly, latch issues, closers, expanders, frames, hinges, and strike alignment.
- Gliding Patio Door Hardware Adjustment and Replacement GuideAndersen Windows & Doors · Manufacturer guidance for identifying an unequal panel reveal, adjusting gliding-door hardware, and recognizing that panel removal is required for roller replacement.
- Tempered Glass Safety AlertU.S. Consumer Product Safety Commission · CPSC safety alert identifying tempered-glass safety considerations and linking the agency's glass-door safety material.
Community feedback
Share a repair observation
Share a plain-text repair observation. Accepted observations are published automatically; this page may take a moment to update.