
On this page
Start here
Quick answer
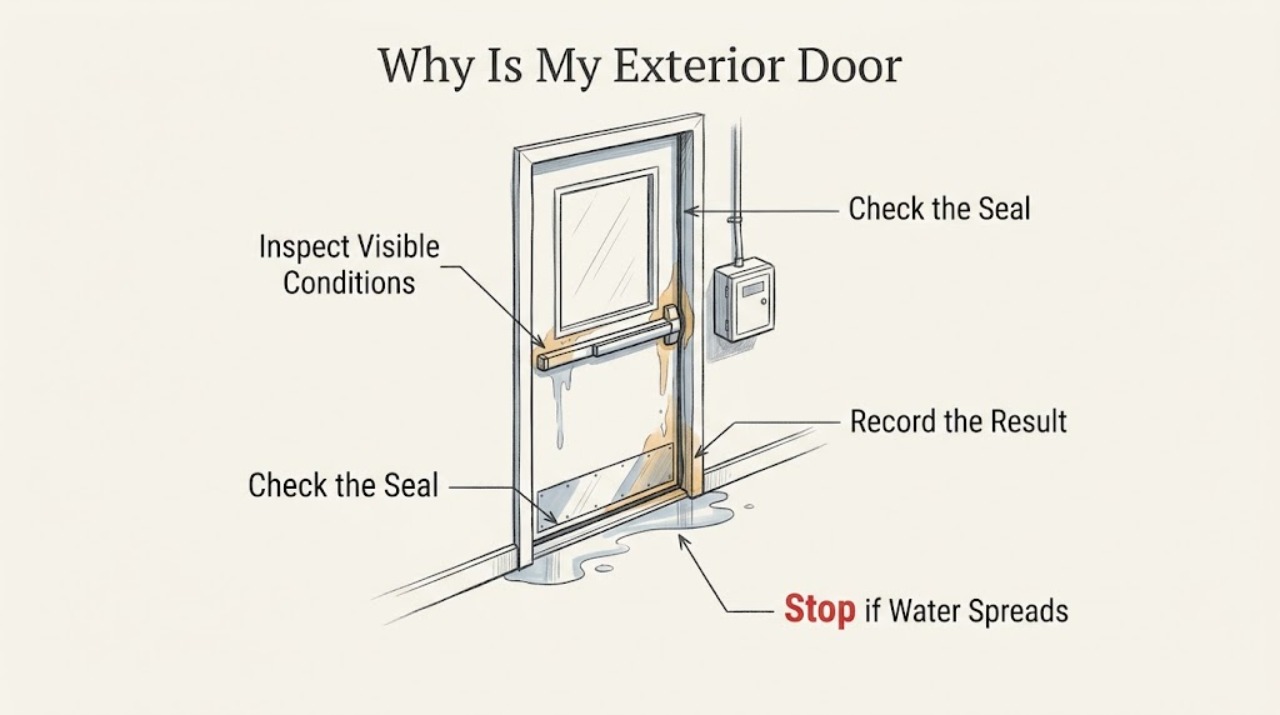
First locate where water crosses the door: under the threshold, around the jambs or head, or from the wall above the opening. A worn sweep or weatherstrip can leave a gap, but water that enters around the frame or appears inside the wall points to the sill pan, lapped flashing, rough-opening seal, or surrounding drainage plane. Document the leak from a safe position, keep the door operating freely, and have a qualified door or building-envelope professional inspect concealed flashing before sealing over anything.
Work through in order
Diagnostic checks
Use only checks that match the exact appliance or system and its official guide.
-
Check 1
During or immediately after rain, observe from inside without removing trim and mark the first place water appears: under the threshold, at a jamb corner, across the head, or on the wall beside the frame.
Expected result: Water begins at the bottom edge, at one frame joint, above the door, or on the adjacent wall rather than at the door itself.
Next step: Photograph the first wet point and the area above it, then use that location to guide a professional inspection instead of sealing only the visible drip.
Why this matters
Why: A bottom-edge entry makes the threshold, sweep, sill pan, or sill drainage path more likely; a jamb, head, or adjacent-wall entry makes the opening flashing, rough-opening seal, cladding, or an upstream wall detail more likely.
-
Check 2
With the door closed and latched normally, inspect the perimeter from the interior and exterior for daylight, a loose-fitting edge, a crushed or split weatherstrip, a damaged sweep, or a threshold gap; do not force the door against a seal.
Expected result: The closed door has a visible perimeter gap or the weatherstrip and sweep do not contact evenly, or the seal contacts evenly with no visible gap.
Next step: If the door binds or cannot latch smoothly, stop adjustment and call a qualified installer; otherwise document the gap and ask whether the weatherstrip or sweep is the correct repair before applying sealant.
Why this matters
Why: An uneven contact pattern can allow air and wind-driven water through the door perimeter and may call for weatherstrip, sweep, hinge, strike, or fit adjustment; an even perimeter does not rule out a concealed sill or wall-flashing leak.
-
Check 3
From the ground, inspect the exterior threshold, frame corners, trim, siding joints, and any overhang or porch above the door for open joints, damaged trim, water marks, or a path that could carry water toward the opening.
Expected result: The exterior surface has an open joint, damaged trim, water staining above or beside the frame, or no visible exterior defect.
Next step: Do not cover an open drainage path with an unverified bead of caulk; photograph the detail and have a qualified professional trace the water-management layers.
Why this matters
Why: An upstream wall or trim defect can feed water to the opening even when the door seal looks sound; no visible defect means the sill pan, rough opening, or another concealed layer remains possible.
-
Check 4
Ask a qualified door installer or building-envelope professional to inspect the sill pan, back dam, jamb and head flashing, rough-opening seal, and the wall below the opening if moisture has reached trim or framing.
Expected result: The inspection finds a worn perimeter seal only, or finds missing or damaged sill flashing, reverse-lapped layers, an unsealed rough-opening gap, trapped moisture, or deteriorated framing.
Next step: Request a written scope that identifies the failed layer and preserves outward drainage; do not order a generic sill pan or foam solely from the visible symptom.
Why this matters
Why: A perimeter-seal-only result may support a weatherstrip or sweep repair; a flashing, drainage, or framing defect requires opening-specific repair so water is directed outside rather than into the wall.
Use your observations
Decision map
Find the observation that best matches what you see, then follow the next safe action.
-
PATH 01Next step
What you see
The only finding is an uneven perimeter gap and the door is otherwise square, dry inside the wall, and operating normally.
Do this next
Have the weatherstrip or sweep measured and fitted according to the door manufacturer's guidance, then verify that the door still closes, latches, and operates freely; monitor during wind-driven rain.
-
PATH 02Next step
What you see
Water appears under the threshold or at the sill even though the perimeter weatherstrip contacts evenly.
Do this next
Treat the problem as a sill, threshold, pan-flashing, or drainage-path issue and have the opening inspected; replacing the perimeter strip alone is unlikely to restore concealed drainage.
-
PATH 03Next step
What you see
Water appears at a jamb, head, adjacent wall, or interior trim, or the leak persists after a surface seal is renewed.
Do this next
Request an opening and wall-drainage investigation for lapped flashing, rough-opening gaps, cladding joints, and hidden moisture rather than adding more surface sealant.
-
PATH 04Next step
What you see
The door binds, will not latch, the trim or floor is swollen, mold is visible, or water is near electrical equipment.
Do this next
Stop forcing or dismantling the door, keep people away from the affected area, avoid wet electrical equipment, and arrange prompt qualified help to stabilize the opening and assess moisture damage.
Helpful context
Understand the symptom
Where a leaking door usually needs attention
A door can leak at the bottom edge, through the jamb or head joints, or from the wall above and beside the frame. The visible drip is not always the entry point: water can travel inside the wall if the opening's flashing is not integrated with the wall drainage plane. The sill is especially vulnerable because it must collect incidental water and direct it back outside.
Weatherstrip versus water-management failure
A daylight gap or loose-fitting door can indicate an air leak and may point to a worn weatherstrip, sweep, hinge, or strike adjustment. That is different from a failed sill pan or flashing detail. Replacing a strip may reduce wind-driven entry through a gap, but it cannot repair water that is bypassing the frame and entering the wall cavity.
Why caulk alone can make the problem harder to find
The rough opening and sill are layered water-management details, not just a surface joint. A professional may need to inspect the sill pan, back dam, jamb and head flashing, and the seal between the unit and rough opening. Do not close a suspected drainage outlet or fill a concealed cavity before the water path is understood.
Keep the evidence
Photograph the door from inside and outside, including the threshold, frame corners, nearby siding or trim, and any stain or damaged flooring. Record whether the leak needs wind-driven rain, ordinary rain, a door being opened, or water collecting at the threshold. This helps the professional choose between a simple weatherstrip adjustment and an opening-flashing investigation.
Only after diagnosis
Potential parts
- exterior-door weatherstrip or sweep
Consider this only when the closed door has an uneven perimeter gap or the existing strip or sweep is damaged, and the sill and wall-flashing path are not the source of water.
Match the door profile, frame, threshold, opening direction, and manufacturer's fit instructions; the replacement must seal without preventing normal operation. - door sill pan flashing
Consider this only when a qualified professional confirms missing, damaged, or improperly drained sill flashing; it is not a substitute for diagnosing a perimeter weatherstrip gap.
Confirm the door system, rough-opening dimensions, wall drainage plane, exterior cladding, and installation details before selecting a pan-flashing material.
When checks do not resolve it
Need a professional?
Call when the leak continues, starts at the sill or frame, has reached the wall or floor, or cannot be traced safely from visible surfaces.
Have this ready
- Provide photographs of the first wet point, threshold and frame corners, the exterior trim and wall above the door, the door's operating condition, and the rain or wind conditions when the leak occurred.
Common questions
FAQ
Will replacing the door weatherstrip stop the leak?
Only if the water is entering through a real perimeter gap and the sill and wall drainage layers are sound. Water under the threshold or inside the wall points to a sill pan, flashing, rough-opening, or drainage problem that a new strip cannot repair.
Should I caulk around the bottom of the door?
Do not seal over a suspected drainage outlet before the water path is understood. A professional should verify the sill pan, back dam, and lapped flashing so incidental water is directed outside rather than trapped in the wall or threshold.
How can I tell whether the leak is from the door or the wall?
Observe the first wet point during rain: under the threshold suggests a sill or threshold path, a jamb or head suggests opening flashing, and staining above or beside the frame suggests an upstream wall or trim path. Photograph both sides before any repair.
Read the exact guide
Official sources
- Rough Opening Flashing: Air SealingU.S. Department of Energy Building Science Education · Exterior door and window rough-opening joints
- Job Aid 11-1: Install Weatherstripping on an Exterior DoorU.S. Department of Energy Weatherization Assistance Program · Exterior doors with daylight, loose fit, or weatherstrip and sweep gaps
- Window FlashingU.S. Department of Energy Building Science Education · Exterior door and window openings in residential wall assemblies
- Fully Flashed Window and Door Openings: Sill FlashingU.S. Department of Energy Building Science Education · Exterior door and window sill openings
Community feedback
Share a repair observation
Share a plain-text repair observation. Accepted observations are published automatically; this page may take a moment to update.