
On this page
Start here
Quick answer
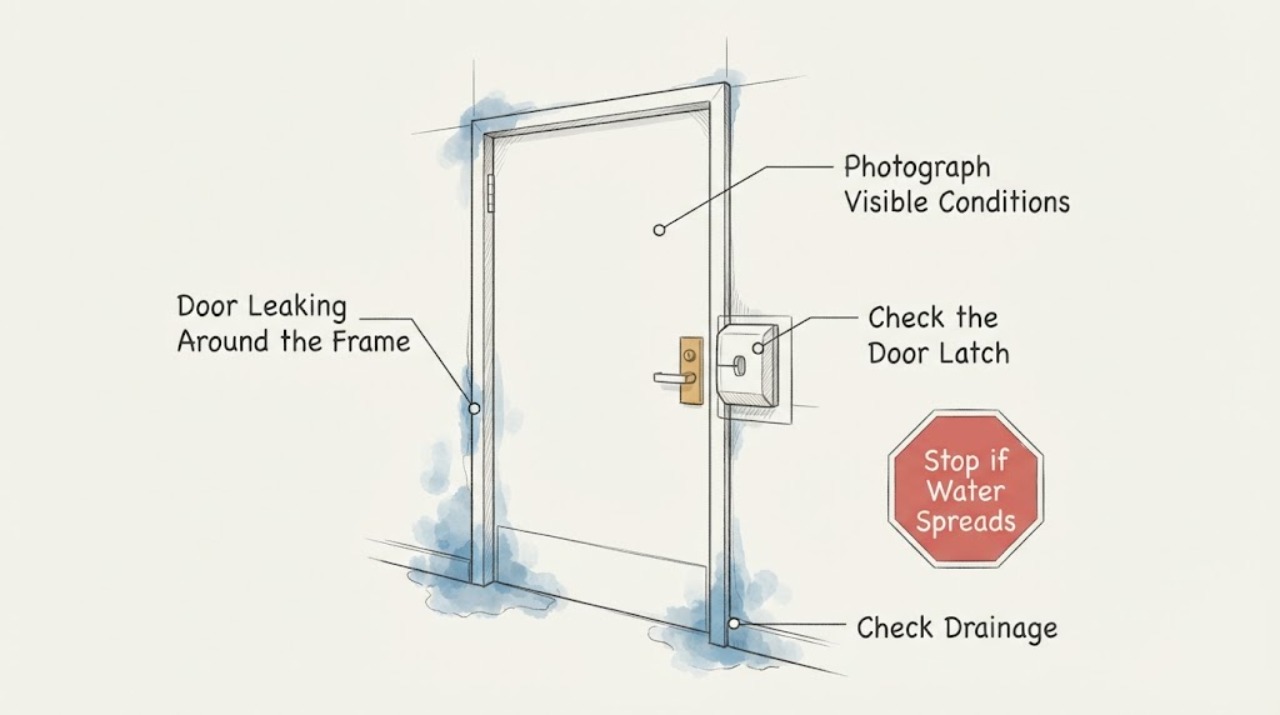
If water is leaking around a door frame, first determine whether it appears only during wind-driven rain, at the bottom threshold, or even in dry weather. Dry the area, photograph the stain or drip path, and inspect the exterior frame joints, head flashing, sill, threshold, and nearby roof or siding for an upper leak that is running down. A damaged perimeter seal may admit rain, but water at the jamb or sill can also indicate failed flashing or drainage behind the frame. Do not seal over the bottom drainage path or pressure-wash the opening. If water reaches the wall cavity, the frame is loose, the sill is soft, or the leak persists after a small exterior seal repair, stop and arrange qualified door or building-envelope service.
Work through in order
Diagnostic checks
Use only checks that match the exact appliance or system and its official guide.
-
Check 1
Dry the interior and photograph the stain, drip, or damp trim. Note whether it occurs only during rain, only with wind from one direction, after snow melt, or even in dry weather. Trace the damp edge upward and outward without removing trim.
Expected result: The water begins at the threshold/jamb, appears above the door and runs down, or remains damp without a weather event.
Next step: Inspect the corresponding exterior section and nearby roof, gutter, siding, and trim before applying any sealant.
Why this matters
Why: A threshold or jamb origin points to the door opening; a higher origin can be roof, siding, or head-flashing runoff; dampness in dry weather may be condensation or a plumbing leak rather than rain entry.
-
Check 2
With the door closed, inspect the perimeter gasket, corners, frame-to-trim joint, threshold, and bottom sweep for cracks, missing sections, open caulk joints, soft wood, daylight, or a frame that moves when the door is latched. Use a thin card only to locate a loose contact point; do not force the door.
Expected result: The water entry lines up with a visibly open perimeter joint, or the seal looks intact while water appears below or behind the frame.
Next step: Repair only a clearly identified accessible joint with compatible exterior material; escalate a soft, moving, or concealed frame condition.
Why this matters
Why: A visible perimeter gap may be a limited seal repair if the frame is sound. Water below or behind an intact seal raises concern about sill, pan flashing, or rough-opening drainage and should not be hidden with surface caulk.
-
Check 3
Inspect the exterior head and side flashing, sill or threshold slope, end joints, drainage gaps, and the condition of the surrounding siding or masonry. Clear leaves or debris from an existing drainage path without removing flashing or sealing over a path intended to drain outward.
Expected result: The sill slopes outward and remains sound, or it is flat, blocked, cracked, soft, reverse-lapped, or visibly directing water toward the room.
Next step: Arrange qualified door or building-envelope service for a damaged sill, flashing, soft frame, or concealed drainage defect.
Why this matters
Why: A sound outward-draining sill supports a perimeter-seal diagnosis. A blocked or inward-draining sill can keep admitting water until the flashing or threshold is corrected; surface caulk alone will not restore the water-management path.
-
Check 4
Only if the frame is sound and the suspected exterior joint is accessible, perform a gentle, localized hose test with a helper watching inside. Start below the suspected joint and work upward in short sections; do not use a pressure washer or direct water into the opening.
Expected result: Water appears inside only when a particular exterior section is wetted, or no water appears during the controlled test.
Next step: Dry the area, document the exact section, and repair or refer that section based on whether it is a simple joint or a flashing/frame defect.
Why this matters
Why: A repeatable response at one section helps identify the entry path; no response does not rule out wind-driven rain, intermittent drainage, or a concealed leak. A test that wets the wall or floor is a stop signal.
Use your observations
Decision map
Find the observation that best matches what you see, then follow the next safe action.
-
PATH 01Safety boundary
What you see
A visible, localized exterior joint or perimeter seal is open, the frame is hard and sound, and water does not appear behind the wall.
Do this next
Remove loose failed sealant, prepare the joint, and apply a compatible exterior sealant according to its instructions; keep drainage paths open and allow it to cure before retesting.
Why this path and its safety boundary
Safety stop: Stop if the joint is structural, the frame moves, the substrate is soft, or the repair would seal a sill opening that is meant to drain.
-
PATH 02Safety boundary
What you see
Water begins at the threshold or sill, the frame is soft or stained, or exterior flashing appears blocked or sloped inward.
Do this next
Arrange a qualified door or building-envelope assessment for the sill pan, flashing laps, threshold, and surrounding wall before further caulking.
Why this path and its safety boundary
Safety stop: Do not cover the sill with a continuous bead that traps water, pry out the frame, or cut into the wall without a plan for structural and drainage protection.
-
PATH 03Safety boundary
What you see
The interior drip appears above the door or follows the trim from a roof, gutter, siding, or masonry joint.
Do this next
Correct or refer the upper water source first, then dry and inspect the door frame and wall for concealed damage.
Why this path and its safety boundary
Safety stop: Do not reseal only the visible lower drip while water is still entering from above.
-
PATH 04Safety boundary
What you see
Dampness persists in dry weather, the wall smells musty, paint is bubbling, or the frame/trim is soft or loose.
Do this next
Stop DIY sealing and arrange qualified building-envelope or water-damage assessment to identify the source and extent of moisture.
Why this path and its safety boundary
Safety stop: Do not close a wet cavity behind trim or paint over active moisture damage.
Helpful context
Understand the symptom
Water at the frame is a path problem
Do not assume the visible drip is the entry point. Water can run behind siding or trim from above, enter at a head or jamb joint, or reach the sill and travel inward. Dry the interior first, then trace upward and inspect outside before applying sealant.
Separate a failed seal from failed flashing
A cracked gasket or open corner at the moving door can often be repaired at the perimeter. Water that appears in the wall, at the underside of the frame, or only during wind-driven rain may require a flashing and drainage repair. Blocking a sill with caulk can trap water rather than solve it.
Protect the wall while testing
Use towels and a shallow tray to protect flooring, and stop any test as soon as water appears inside. Do not spray pressurized water into joints, drill into the frame, or remove trim if the wall may contain wiring, plumbing, or hazardous paint.
Safety boundary
Stop conditions
- Stop if water reaches electrical equipment, flooring cannot be protected, the wall or frame is soft, or the leak is active and spreading.
- Do not pressure-wash the door opening, seal over a drainage path, drill into the frame, or use expanding foam that can distort the frame.
- Stop before removing trim if the wall may contain wiring or plumbing, the home may contain lead paint, or the work could compromise a required exit or structural support.
Only after diagnosis
Potential parts
- exterior door sealant
Only consider this for a confirmed accessible joint where the frame is sound and the joint is not part of a required drainage path.
Match the sealant to the existing substrate and follow the product instructions; compatibility and movement capability vary by material. - door sill pan or flashing
Only consider this when inspection identifies failed sill drainage, damaged flashing, or water entering below the frame; this is usually a professional repair.
The pan, end dams, back dam, slope, and wall drainage layer must be designed as one system for the specific opening. - door threshold or sweep
Only consider this when water enters at the bottom and the existing sill and frame are sound and correctly aligned.
Confirm width, height, slope, and clearance so the replacement sheds water without binding or blocking the door.
When checks do not resolve it
Need a professional?
Arrange qualified door or building-envelope service when the frame or sill is soft or loose, water appears behind trim or in the wall, flashing is damaged or incorrectly drained, the source is above the door, the leak persists after a localized seal repair, or the repair affects egress or structure.
Common questions
FAQ
Why does water appear around the door frame but not on the door itself?
Water may be entering at a frame joint, sill, flashing, or the wall above and then traveling behind the trim. Trace the path from the first interior damp point outward before sealing the visible drip.
Should I caulk the bottom of a leaking door frame?
Not automatically. A sill or pan may need to drain outward, and a continuous bead in the wrong place can trap water. Inspect the drainage design or use a qualified professional first.
Can a weatherstrip fix a leaking door?
It can help when water enters through a clearly damaged perimeter seal and the frame and sill are sound. It will not correct failed flashing, an inward-sloping sill, a soft frame, or runoff from above.
Is a hose test safe for finding a door leak?
Use only a gentle, localized test with a helper inside, starting below the suspected joint and stopping at the first interior moisture. Never use a pressure washer or direct pressurized water into the opening.
Read the exact guide
Official sources
- Water Management ResidentialU.S. Department of Energy Building America Program · Government residential water-management principles for openings and flashing
- BSC Information Sheet 302 - Pan Flashing for Exterior Wall OpeningsU.S. Department of Energy Building America Program · Government building-science guidance on water management at door and window openings
- What to Look For: DIY Checks and InspectionsENERGY STAR · Government-backed door and window air-leak inspection methods
- Seal and Insulate with ENERGY STARENERGY STAR · Government-backed air-sealing materials and professional-help guidance
- Sealing Behind Window & Door Trim ProjectENERGY STAR · Government-backed guidance on window and door frame air sealing and safety
Community feedback
Share a repair observation
Share a plain-text repair observation. Accepted observations are published automatically; this page may take a moment to update.