
On this page
Start here
Quick answer
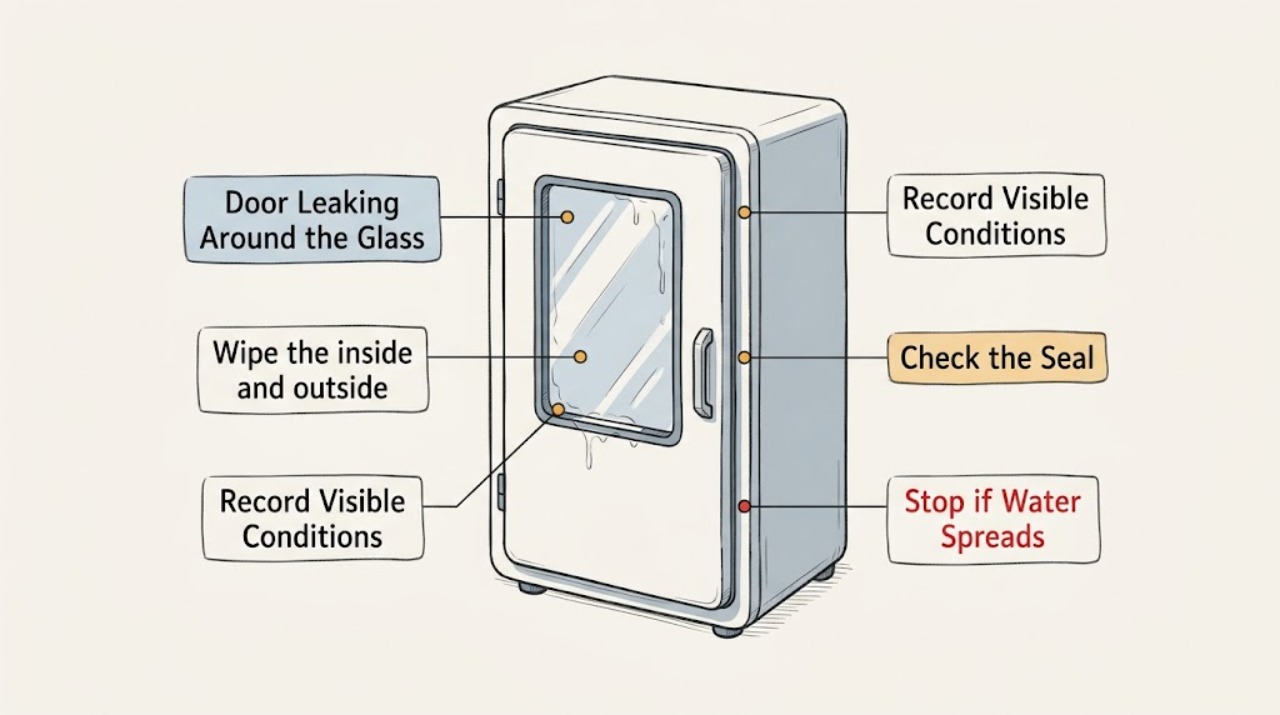
First determine whether the moisture is condensation on the glass, moisture between panes, or rain entering around the glass, frame, sill, or wall opening. Wipe the surface dry, observe where moisture returns during a controlled weather event, and inspect the interior edge, weatherstrip, drainage openings, and nearby trim without removing the glass or door frame. Surface condensation may be humidity-related, while water between panes, repeated rain entry, stains, soft trim, or rot needs a qualified window-and-door assessment. Do not seal over drainage openings or dismantle a glass panel as a first response.
Work through in order
Diagnostic checks
Use only checks that match the exact appliance or system and its official guide.
-
Check 1
Wipe the inside and outside glass surfaces dry, then inspect the same pane from both sides for droplets, a uniform haze, or moisture confined between the panes.
Expected result: Moisture returns on only one exposed surface; haze or liquid remains between panes; or water appears at the perimeter, sill, or interior trim.
Next step: For surface moisture, continue with the humidity and weather check. For moisture between panes or water at the frame, document the location and continue with the relevant perimeter check without disassembling the door.
Why this matters
Why: A single exposed surface suggests condensation or surface wetting. Moisture trapped between panes suggests the insulating glass seal may have failed. Perimeter or sill wetting points toward the frame, drainage, flashing, weather seal, or wall opening rather than the glass surface itself.
-
Check 2
Record when the moisture appears: after a cool night or high humidity, only during wind-driven rain, after washing the exterior, or continuously regardless of weather.
Expected result: The droplets appear on the exterior glass in changing weather and later evaporate; or water returns at the interior edge during rain or exterior washing.
Next step: Do not call surface condensation a frame failure solely from its appearance. If rain entry is repeatable, protect the interior, photograph the water path, and continue with the weatherstrip and sill observations.
Why this matters
Why: Weather-dependent surface droplets can be condensation rather than a door leak. A repeatable interior entry point during rain or washing is evidence that water is getting past a seal, drainage path, sill, or opening and needs a water-management diagnosis.
-
Check 3
With the door closed, inspect the visible weatherstrip and gasket around the glass and panel for gaps, compression loss, displacement, dirt, or damage; clean only loose surface dirt with a suitable soft cloth.
Expected result: The seal is visibly out of position or has a gap at the wet corner; or the seal contacts evenly while water still enters.
Next step: Refit only a visibly displaced, user-accessible seal if the exact product instructions describe that adjustment. Do not stretch, cut, glue, or replace a seal by guesswork; if the seal is damaged or the leak persists, arrange a model-specific assessment.
Why this matters
Why: A displaced or damaged weather seal can explain a localized draft or splash path. An intact-looking seal does not rule out water behind the frame, a blocked drain path, or a failed installation detail.
-
Check 4
Inspect the sill and lower frame from the exterior and interior for open drainage or weep openings, trapped debris, water marks, and a path that leads into the room; do not plug an opening merely because it looks like a gap.
Expected result: A drainage opening is covered by debris or water collects at the sill; or the openings are clear but water still appears inside.
Next step: Remove only loose, reachable debris without probing or enlarging the opening, then perform one controlled weather observation. If water persists, stop applying exterior sealant and have the installation and drainage system assessed.
Why this matters
Why: Door assemblies use drainage paths to manage small amounts of water, so blocking a designed outlet can redirect water indoors. Clear evidence of water past a clear sill path suggests a deeper seal, flashing, frame, or wall-opening issue.
-
Check 5
Trace the wet edge beyond the glass to the adjacent trim, wall, floor, or sill and compare the location with the windward side and any roof, flashing, or cladding joint above the door.
Expected result: Staining or dampness extends into trim, flooring, or the wall; or the moisture ends at the glass perimeter with no surrounding damage.
Next step: Dry and protect the area, record the first wet point and the direction of travel, and arrange qualified service for any structural or concealed moisture. Do not remove trim or cut into the wall to chase the leak yourself.
Why this matters
Why: Extended staining, soft wood, or rot means moisture may be accumulating where it cannot be seen and is not a simple glass-cleaning issue. A clean, localized perimeter mark is more consistent with a seal or glazing diagnosis, but it still requires the door design and installation details to be checked.
-
Check 6
Check whether the glass is cracked, loose, visibly shifted, or fogged between panes, and whether the door opens, closes, and latches without forcing the panel.
Expected result: Glass or frame damage, movement, or trapped moisture is present; or the assembly operates normally but continues to leak after the external observations.
Next step: Stop using the door if glass is cracked or loose and keep people away from the area; arrange qualified glazing or door service. For intact glass with recurring leakage, provide the photographs and weather conditions to a qualified technician instead of dismantling the panel.
Why this matters
Why: Damaged or loose glazing is a safety and weather-sealing issue that can worsen with movement. Normal operation does not exclude a failed insulated-glass seal or a concealed water-management defect.
Use your observations
Decision map
Find the observation that best matches what you see, then follow the next safe action.
-
PATH 01Next step
What you see
Moisture is only on an exposed glass surface and appears with humidity or temperature changes
Do this next
Treat condensation as the first explanation, monitor whether it evaporates, and improve room humidity control if needed; call service if water is actually entering the frame or wall.
-
PATH 02Next step
What you see
Moisture is trapped between panes
Do this next
Treat the insulating glass seal as a conditional service or glazing issue and confirm the exact door system before considering replacement glass.
-
PATH 03Next step
What you see
Water enters at the perimeter, sill, or adjacent trim during rain
Do this next
Keep drainage openings clear, avoid sealing over designed outlets, document the wet path, and have the weather seal, flashing, sill, and wall opening assessed.
-
PATH 04Next step
What you see
The glass is cracked or loose, the frame is distorted, or trim is soft or rotting
Do this next
Stop using the door and arrange qualified glazing or building-envelope service; do not remove the glass or open the wall as a first response.
Helpful context
Understand the symptom
Identify the kind of leak before applying sealant
A wet glass surface is not automatically a failed seal. Exterior condensation can form when humid air meets cooler glass and may evaporate later, while haze or liquid trapped between insulating panes points to a sealed-glass-unit problem. Rain entering at the interior edge, sill, or adjacent trim is a water-management problem. The first useful evidence is the exact location and timing of the moisture, not the brand of caulk used on the last repair.
Keep the inspection low risk
Use a dry cloth, flashlight, and photographs. Do not remove glass beads, lift a heavy door panel, cut into the wall, or cover a drainage opening. Stop if the glass is cracked or loose, the frame is visibly distorted, water is reaching electrical equipment, or the surrounding structure is soft or deteriorating.
Safety boundary
Stop conditions
- Stop immediately if the glass is cracked, loose, or shifting, or if the frame is visibly distorted.
- Stop and arrange qualified service if water reaches electrical equipment, the trim or wall is soft, or mold or rot is visible.
- Do not seal over weep or drainage openings, lift a heavy glass panel, remove glazing components, or cut into the wall during a basic leak check.
Only after diagnosis
Potential parts
- weatherstrip or glazing gasket
Consider this only if the leak is localized at a visibly displaced or damaged seal and the exact door system confirms that seal as the failed boundary.
Confirm the exact door system, glazing method, and manufacturer fit information before ordering or replacing a seal. - insulating glass unit
Consider this only when moisture is confirmed between panes or a qualified glazier confirms a failed sealed glass unit.
Glass dimensions, thickness, safety glazing, spacer, and frame requirements must be confirmed by a qualified glazier for the exact door. - sill or drainage component
Consider this only when a qualified assessment finds a damaged sill, blocked or failed drainage component, or installation defect after the visible path is documented.
Do not select a sill or drainage part from the symptom alone; verify the complete door assembly and installation details.
When checks do not resolve it
Need a professional?
Arrange qualified window, door, glazing, or building-envelope service for water entering during rain, moisture between panes, damaged or loose glass, recurring leakage after the visible drainage and weatherstrip checks, or any staining, soft trim, rot, or concealed-wall moisture.
Common questions
FAQ
Is water on door glass always a leak?
No. Moisture on one exposed glass surface can be condensation caused by humidity and temperature. Water between panes or water appearing at the frame, sill, or interior trim needs a different diagnosis.
Should I caulk around a leaking glass door?
Do not cover drainage or weep openings and do not caulk over an unknown water path. Document where water enters first; a qualified technician should determine whether the cause is a weather seal, glazing seal, sill, flashing, or wall opening.
When does a leaking door need professional service?
Arrange service for cracked or loose glass, moisture between panes, repeat rain entry, water stains, soft or rotting trim, water near electrical equipment, or a leak that remains after a safe visible inspection.
Read the exact guide
Official sources
- Condensation on the Exterior of Window or Patio Door GlassAndersen Windows · Manufacturer explanation of exterior moisture on window or patio-door glass
- How to Install a Front DoorPella · Manufacturer installation guidance used for visible door sealing and water-management boundaries; follow the exact product manual
- Replacement Windows and DoorsMarvin · Manufacturer guidance on water between panes, leaks, water stains, wood rot, and concealed moisture
- Sealing the Door to the Exterior Wall CladdingPella · Pella professional installation document for door sealing and drainage details
Community feedback
Share a repair observation
Share a plain-text repair observation. Accepted observations are published automatically; this page may take a moment to update.